
Related Manuals for Solwave 180MW1000D


Summary of Contents for Solwave 180MW1000D
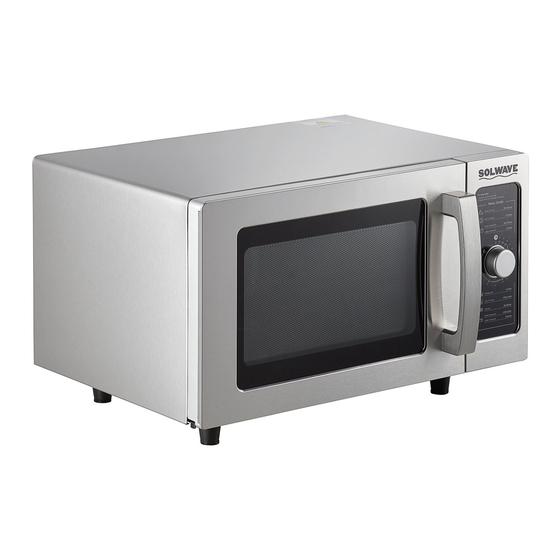
- Page 1 User Manual User Manual 1000W Commercial Microwave Model: 180MW1000D 05/2017 Please read and keep these instructions. Indoor use only.
- Page 2 User Manual IMPORTANT SAFETY INSTRUCTIONS When using electrical equipment, basic safety precautions should be followed to reduce the risk of burns, electrical shock, fire, or injury to persons. READ all of the instructions before using this equipment. 1. This equipment MUST BE GROUNDED. Connect only 9.
- Page 3 User Manual To avoid risk of electrical shock or death, this oven must be earthed. To avoid risk of electrical shock or death, do not alter the plug. OPENING YOUR NEW OVEN GROUNDING INSTRUCTIONS Inspect oven for any damage such as cracks or dents in door or Oven MUST be grounded.
- Page 4 • Work performed by unauthorized personnel or unauthorized service agencies voids this Warranty • This warranty does not apply to, and Solwave is not responsible for any warranty claims on products sold or used outside of the contiguous United States.
- Page 5 02/2020 USER MANUAL Adjustable Speed Conveyor Toaster 184T3300B 208V - 3300W (10" Wide Belt) 184T3300D 208V - 3300W (10" Wide Belt) 184T3600B 208V - 3600W (14½" Wide Belt) 184T3600D 208V - 3600W (14½" Wide Belt) 184T140 120V - 1750W (10" Wide Belt)
-
Page 6: Table Of Contents
INDEX Important Safety Information . . . . . . . . . . . . . 2 Circuit Diagram . . . . . . . . . . . . . . . . . . . . . . . . . . . . 3 Discharge Assembly . - Page 7 SAFETY When using electrical appliances, basic safety precautions should always be followed, including the following: Read all instructions carefully and completely . For commercial use only . DO NOT touch hot surfaces . Protect against electrical shock by keeping all cords, plugs, and other electrical components away from water or other liquids .
-
Page 8: Circuit Diagram
CIRCUIT DIAGRAM WIRING DIAGRAM LEGEND DESCRIPTION 25A/300V MODEL: CONVEYOR TOASTER 120V 184T140 16A/250V 1.75kW/120VAC/50-60Hz EH1, EH2 710W, 1040W/120V 12x12/120V ∞ 120V/60Hz 30W/150 θS 90°C 16A/250V IN5408/4A θS... -
Page 9: Discharge Assembly
DISCHARGE ASSEMBLY As detailed in the diagrams below, the unit can either be assembled with front or rear discharge depending on installation position and preference. FRONT DISCHARGE REAR DISCHARGE 1 . Pull metal plate up to the closed position 1 . Push the metal plate down to the open and latch . -
Page 10: Before Using Your Conveyor Toaster
BEFORE USING YOUR TOASTER Before cooking anything in your oven for the first time, please follow these simple instructions: This conveyor toaster has been designed to continuously produce toasted bread or buns . The desired toasted color of the product can be adjusted by changing the belt speed of the conveyor . -
Page 11: Cleaning & Maintenance
CLEANING & MAINTENANCE CAUTION: THIS APPLIANCE SHOULD NOT BE IMMERSED IN WATER. USE ONLY A DAMP CLOTH OR SPONGE DIPPED IN SOAPY WATER. DO NOT USE STEEL WOOL AS IT WILL DAMAGE THE BRIGHT STAINLESS STEEL FINISH. EXTERIOR & CRUMB TRAY Unplug the power cord from the wall outlet . - Page 12 DIMENSIONS MODEL 184T3300B / 184T3300D 14 .5" 16 .5" 17" 184T3600B / 184T3600D 18 .5" 16 .5" 18" 184T140 14 .5" 16 .5" 30"...
-
Page 13: Limited Warranty
EQUIPMENT LIMITED WARRANTY Avatoast warrants its equipment to be free from defects in material and workmanship for a period of 1 year . This is the sole and exclusive warranty made by Avatoast covering your Avatoast brand equipment . A claim under this warranty must be made within 1 year from the date of purchase of the equipment . - Page 14 User Manual Commercial Refrigerator User’s Manual 10/2020 Refrigerated Pizza Prep Units 178SSPPT1, 178SSPPT2, 178SSPPT260, 178SSPPT3 Refrigerated Sandwich Prep Units 178SSPT27HC, 178SSPT36HC, 178SSPT48HC, 178SSPT60HC, 178SSPT71HC, 178SSPT27MHC, 178SSPT36MHC, 178SSPT48MHC, 178SSPT60MHC, 178SSPT71MHC Please read the manual thoroughly prior to equipment set-up, operation and maintenance. - 1 -...
- Page 15 User Manual BASE UNIT LEFT MIDDLE RIGHT OPTIONAL MODELS 178SSPPT1 DRAWER 178SSPPT1A 178SSPPT260 SLIM DOOR DRAWER 178SSPPT260B 178SSPPT260 SLIM DRAWER DRAWER 178SSPPT260C 178SSPPT260 SLIM DRAWER DOOR 178SSPPT260D 178SSPPT2 DOOR DRAWER 178SSPPT2B 178SSPPT2 DRAWER DRAWER 178SSPPT2C 178SSPPT2 DRAWER DOOR 178SSPPT2D 178SSPPT3 DOOR DOOR DRAWER...
- Page 16 User Manual CAUTION – RISK OF FIRE OR EXPLOSION DUE TO FLAMMABLE REFRIGERANT USED. FOLLOW HANDLING INSTRUCTIONS CAREFULLY IN COMPLIANCE WITH LOCAL GOVERNMENT REGULATIONS. ATENCIÓN – RIESGO DE INCENDIO O EXPLOSIÓN DEBIDO A REFRIGERANTE INFLAMABLE UTILIZADO. SIGA LAS INSTRUCCIONES DE MANIPULACIÓN CON CUIDADO CONFORME A LAS REGLAS DE LA MUNICIPALIDAD. ATTENTION –...
- Page 17 User Manual Electrical • Please ensure that the required voltage of the compressor is being supplied at all times. Low or high voltage can detrimentally affect the refrigeration unit. • All units should be plugged into a grounded and properly-sized electrical outlet with appropriate overcurrent protection.
- Page 18 User Manual Refrigerator Control Loading Product Before loading shelves, please be sure that all shelf clips are completely fastened in their correct locations. It is important that all shelves rest completely level before stocking your cabinet with product. In order to maintain correct air flow inside the unit, please be sure to leave two to four (2 to 4) inches of space between the back wall and stored product.
- Page 19 User Manual Safety / Warning Please pay close attention to the safety notices in this section. Disregarding these notices may lead to serious injury and/or damage to the unit. Attention • To minimize shock and fire hazards, be sure not to overload outlet. Please designate one outlet for your unit.
- Page 20 User Manual Regular Maintenance WARNING: DISCONNECT POWER CORD BEFORE CLEANING ANY PARTS OF THE UNIT. Cleaning The Condenser Coil • For efficient operation, it is important that the condenser surface be kept free of dust, dirt, and lint. • We recommend cleaning the condenser coil and fins at least once per month. •...
- Page 21 User Manual Food Pan Layouts: SSPT 178SSPT27 178SSPT36 (6) 1/6 Size, (2) 1/9 Size (10) 1/6 Size 33” 24.25” 6.5” 6.5” 6.5” 4.33” 6.5” 6.5” 6.5” 6.5” 6.5” 178SSPT48 (12) 1/6 Size, (6) 1/3 Size 42.5” 7” 7” 7” 7” 7”...
- Page 22 User Manual Food Pan Layouts: SSPT-M 178SSPT27M 178SSPT36M (9) 1/6 Size, (3) 1/9 Size (15) 1/6 Size 24.25” 33” 6.5” 6.5” 6.5” 4.33” 6.5” 6.5” 6.5” 6.5” 6.5” 178SSPT48M (18) 1/6 Size 42.25” 6.5” 6.5” 6.5” 6.5” 6.5” 6.5” 2.5” 178SSPT60M (24) 1/6 Size 56.25”...
- Page 23 User Manual Food Pan Layouts: SSPPT ELEVATION (6) 1/3 Size 42.3” 7.15” 7” 7” 7” 7” 7.15” 6” 6” 6” 1726 (6) 1/3 Size (6) 1/3 Size 178SSPPT260 42.3” (7) 1/3 size 7.15” 7” 7” 7” 7” 7.15” 42.3” 6” 6”...
- Page 24 User Manual Drawer Pan Layouts: SSPPT SECTI ON VI EW ELEVATI ON SECTION VIE W 178SSPPT1 178SSPPT260 SLIM DRAWER 178SSPPT2 SECTI ON VI EW PLAN SECTI ON VI EW 178SSPPT3 - 11 -...
- Page 25 User Manual Food Pan Divider Bars: SS-PT ITEM # SIZE SS-PT-27 SS-PT-36 SS-PT-48 SS-PT-60 SS-PT-71 178SCLB15354 178SCLB15327 178SCLB25354 178SCLB25327 178SCLB90354 Food Pan Divider Bars: SS-PT-M ITEM # SIZE SS-PT-27M SS-PT-36M SS-PT-48M SS-PT-60M SS-PT-71M 178SCLB15532 178SCLB25532 178SCLB90532 178SCLB10853 Food Pan Divider Bars: PICL ITEM # SIZE SSPPT1...
- Page 26 User Manual Troubleshooting Compressor Not Running Fuse blown or circuit breaker tripped. Replace fuse or reset circuit breaker. Power cord unplugged. Plug in power cord. Thermostat set too high. Set thermostat to lower temperature. Cabinet in defrost cycle. Wait for defrost cycle to finish. Condensing Units Run For Long Periods of Time.
- Page 27 User Manual Warranty Information - 10/2020 Limited Service Warranty - Valid only in the United States 3 Year Parts and Labor Warranty Unless otherwise stated, Avantco Refrigeration warrants to the original purchaser of new Avantco Refrigera- tion units, that such equipment will be free from defects in material and workmanship for a period of 3 years from the original date of delivery.
- Page 28 User Manual Warranty Information - 10/2020 Limited Service Warranty - Valid only in the United States Limited Service WarrantyValid only in the Contiguous United States | Rev. 10/2020 Additionally, no claims can be made against this warranty for spoilage of products, loss of sales or profits, or any other consequential damages.
- Page 29 RECOMMENDED SETTINGS CHART BAKED GOODS TEMPERATURE SETTING VENT VENT CONTROL SETTING Rolls, Hard 160–185°F Open Rolls, Soft 150–175°F Moist Open-Half Pies, Desserts 160–185°F Open Tacos, Tortillas 150–160°F Moist Open-Half MEAT TEMPERATURE SETTING VENT VENT CONTROL SETTING Beef - Rare 130–135°F Moist Open-Half Beef - Med/Well Done...
- Page 30 USER MANUAL Drawer Warmers / Holding Drawer RETAIN THIS MANUAL FOR FUTURE REFERENCE. UNIT MUST BE KEPT CLEAR OF COMBUSTIBLES AT ALL TIMES. Models: 423WDNBI, 423WDNFS, 423WDSBI, 423WDSFS 01/2020...
- Page 31 USER MANUAL Table of Contents Owner's Information ..........................3 Safety Warnings ............................. 4 Specifications ............................6 Operating Instructions ..........................7 Recommended Settings Chart ........................ 9 General Cleaning ............................. 9 Troubleshooting ............................ 11 Drawer Warmer Wiring Diagram ......................12 Standard Drawer Warmer Exploded View..................... 13 Standard Drawer Warmer Parts List .....................
-
Page 32: Owner's Information
USER MANUAL Owner's Information Please complete this information and retain this manual for the life of the equipment. For warranty purposes, please fill out and retain this information. An example of the serial plate(s) for these units are included below for reference. -
Page 33: Safety Warnings
USER MANUAL ServIt Drawer Warmers are designed to keep foods at optimum serving temperatures without affecting quality. They are built for tough kitchen duty with rugged stainless steel construction, heavy-duty hardware, stainless steel slides, and positive closing drawers. Drawer Warmers keep everything from meat to vegetables to rolls hot and flavor-fresh until served, with ultimate control over dry-moist environments and temperature for your delicious foods. - Page 34 USER MANUAL ELECTRIC SHOCK HAZARD: • Plug unit into a properly grounded electrical receptacle of the correct voltage, size, and plug configuration. If plug and receptacle do not match, contact a qualified electrician to determine and install proper voltage and size electrical receptacle.
-
Page 35: Specifications
USER MANUAL SPECIFICATIONS • Cordset Configuration: 120V: NEMA5-15P plug, 3 wire grounded cord. • If the supply cord is damaged, the manufacturer or an authorized service agent or a similarly qualified person must replace it to avoid a hazard or voiding the warranty. Item # # Drawers Voltage... -
Page 36: Operating Instructions
USER MANUAL OPERATING INSTRUCTIONS General Information: • Always clean equipment thoroughly before first use. (See general cleaning instructions). • Check rating label for your model designation and electrical rating. • For best results, use stainless steel countertops. WARNING: ELECTRICAL SHOCK HAZARD. FAILURE TO FOLLOW THE INSTRUCTIONS IN THIS MANUAL COULD RESULT IN SERIOUS INJURY OR DEATH. - Page 37 USER MANUAL Installation and First Use Instructions Continued: 9. CAUTION: Initial heating of unit may generate smoke or fumes and must be done in a well ventilated area. This is standard and may last up to 60 minutes during initial startup. Operate unit without food until smoke and fumes have dissipated.
-
Page 38: Recommended Settings Chart
USER MANUAL If putting casters on a pre-existing unit: 1. Turn off the unit and let it cool down completely before handling. 2. Remove all food, pans, and water from the drawers and place aside. 3. Place the unit on the floor legs down. 4. - Page 39 USER MANUAL GENERAL CLEANING CONTINUED Instructions: 1. Follow General Cleaning instructions (above). 2. Remove any inset pans and drawer pans. Wash thoroughly in the sink or dishwasher. 3. Remove drawers: Remove pans and pan inserts. Extend drawer and lift up on the front to clear the drawer stop. Lower drawer and pull straight out.
-
Page 40: Troubleshooting
USER MANUAL TROUBLESHOOTING Issue Potential Cause Solution Temperature control is set too high Change the temperature to a lower setting Unit is too hot Unit is connected to incorrect power supply Contact an authorized electrician Defective internal thermostat Contact an authorized electrician Allow unit 30 minutes to reach operating Unit has not had enough time to preheat temperature. -
Page 41: Drawer Warmer Wiring Diagram
USER MANUAL DRAWER WARMER WIRING DIAGRAM... -
Page 42: Standard Drawer Warmer Exploded View
USER MANUAL STANDARD DRAWER WARMER EXPLODED VIEW... -
Page 43: Standard Drawer Warmer Parts List
USER MANUAL STANDARD DRAWER WARMER PARTS LIST Item Item# Part # Description DW1-010001 Body Assembly DW2-010001 Body Assembly DW3-010001 Body Assembly DW-010321 Element Bracket 423WDSP3 DWFRG-120 Heating Element DW-030001 DW-020301 Center Pan Support Assembly DW-020201 Drawer Face Assembly 423WDSP7 DW-020401 Drawer Handle 423WDP8 Drawer Vent Knob... -
Page 44: Narrow Drawer Warmer Exploded View
USER MANUAL NARROW DRAWER WARMER EXPLODED VIEW... -
Page 45: Narrow Drawer Warmer Parts List
USER MANUAL NARROW DRAWER WARMER PARTS LIST Item Item# Part # Description DWS1-010001 Body Assembly DWS2-010001 Body Assembly DWS3-010001 Body Assembly DWS-010321 Element Bracket 423WDNP3 DWFRGS-120 Heating Element DW-030001 DWS-020301 Center Pan Support Assembly DWS-020201 Drawer Face Assembly 423WDNP7 DWS-020401 Drawer Handle 423WDP8 Drawer Vent Knob... -
Page 46: Warranty
USER MANUAL Equipment Limited Warranty ServIt warrants its equipment to be free from defects in material and workmanship for a period of 1 year. This is the sole and exclusive warranty made by ServIt covering your ServIt brand equipment. A claim under this warranty must be made within 1 year from the date of purchase of the equipment.
Need help?
Do you have a question about the 180MW1000D and is the answer not in the manual?
Questions and answers