
Subscribe to Our Youtube Channel
Related Manuals for Fogo Montanha E601


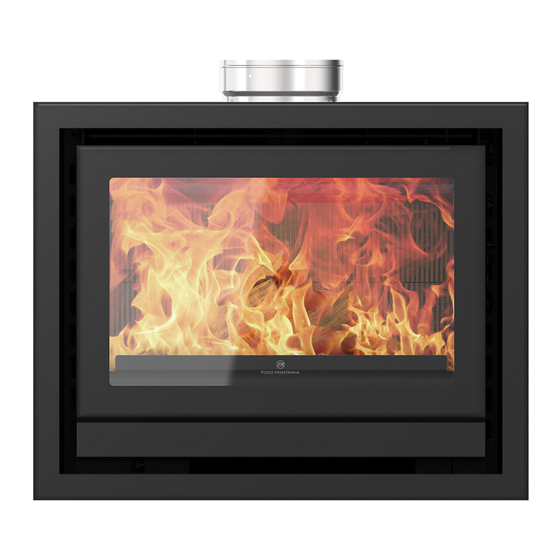
Summary of Contents for Fogo Montanha E601
- Page 1 INSTRUCTION MANUAL English INSERT TYPE WOOD BURNING STOVES E601 | E701 | E801 | E901 E609 | E609H | E709 | E809 | E909 Mod.1030_A...
- Page 2 * All local regulations, including but not limited to national and European standards, must be observed when installing, operat- ing and servicing the unit; * Technical support is normally provided by FOGO MONTANHA, except in special cases to be determined by the installer or support technician;...
-
Page 3: Table Of Contents
Index 1. Introduction ..................................4 2. Technical Characteristics ..............................5 3. Wood ....................................6 4. Installation ................................... 7 4.1. Your flue and chimney ..............................7 4.2. Chimney installation ..............................8 4.3. Your fireplace ................................8 4.4. Auxiliary table installation (PA1090G051 or PA1090G049) ..................9 5. -
Page 4: Introduction
1. Introduction Thank you for buying a FOGO MONTANHA stove. To get the best ecological performance and highest output from this appliance please follow these installation and operating instructions. The guarantee will cease to apply if the stove is damaged as a result of a failure to follow the installation and operating instructions. -
Page 5: Technical Characteristics
2. Technical Characteristics Models E601 E701 E801 E901 Efficiency nominal Nominal consumption of firewood Kg/h Maximum heated volume Nominal heat output 10,6 11,9 0,070 CO emission (13% O 0,077 0,063 0,056 Vol.% emission 10,0 Vol.% Particle’s emissions (13% O 13,9... -
Page 6: Wood
3. Wood The stove burns only wood. The best results are obtained using dry wood. Logs cut to size, stored and ventilated undercover for at least one year and preferably two, are best as they: Produce considerably more heat than wet or green wood. ... -
Page 7: Installation
4. Installation 4.1. Your flue and chimney For your stove to work properly the chimney must also work properly. Check out the following points whilst bearing in mind that this is for informational purposes only and is not binding for us in any manner whatsoever. It is an unfortunate fact that there are numerous factors that can play decisive roles in the correct functioning of a chimney. -
Page 8: Chimney Installation
The chimney should not be close to tall trees, walls or buildings as these could cause downdraughts. The chimney must be well insulated. The internal face of the flue must be free from cracks and fissures and lined with fire cement or other, suitable, refractory material. If not, then a suitable liner must be installed throughout its entire length. -
Page 9: Auxiliary Table Installation (Pa1090G051 Or Pa1090G049)
A larger table (item PA1090G051) for fitting sizes E901/E801/E909/E809 and a smaller table (item PA1090G049) for fitting sizes E701/E601/E709/E609/E609H. The table is adjustable in height and has 2 components to regulate the depth in order to fix it to the back wall, it also has holes in the bottom of the legs to facilitate the fixation to the floor, Figure 1. - Page 10 The components that make up the table are as follows: Component drawing Quantity Description Screw DIN 912 M8x20mm Washers DIN 9021 M8 Screw DIN 933 5.6 M8x16 Leg Extension Table leg Long locking Short lock Table for equipment Models: E901/E801/E909/E809 Equipment table Models: E701/E601/E709/E609/E609H Fixing brackets...
- Page 11 Protect the surface on which you are going to work. Join the four legs of the table with four DIN 912 M8x20mm screws as shown in Figure 2. Figure 2 - Auxiliary table assembly Place one of the short interlocks from the inside of one of the leg extensions and insert between the two leg extensions on one side, as can be seen in the picture below.
- Page 12 The process should be repeated for the other three legs, Figure 4. Figure 4 - Auxiliary table assembly Place the two squares through the opening in the table and place a screw and washer in each. Do not tighten the screws completely, just enough to allow the squares to move, Figure 5. Figure 5 - Auxiliary table assembly Place the auxiliary table in its final position, remember that the table must face the front wall, as shown in Figure 6.
- Page 13 After fixing the table to the floor and wall, you should drill the holes for FIP bushing M8x60 Ø10mm Chemical, for the upper supports "PA1090G053", according to the indicated measures, see Figure 8. A (mm) B (mm) C (mm) Equipment E901 E801 E701 E601 E909 E809 E709 E609 Figure 8 - Mounting the upper brackets...
- Page 14 To apply the upper supports, before attaching them to the wall, you should attach them outside according to the measure shown in Figure 9. The measure “Y” is the distance that the support will have to the wall fixing, this measure should be taken at the place to be installed in order to later tighten the fixing set. Figure 9 - Mounting the upper brackets - PA1090G053 You should note that when you put the equipment in place you should remove the door by lifting it upwards in order to remove the door from the supports, Figure 10.
- Page 15 10. You can then insert the equipment into place, as shown in Figure 12. Figure 12 - Placing the equipment on site 11. After placing the unit in place, it should have a distance of 40 mm from the face of the plasterboard or masonry to the front face of the unit, so that when you install the frame, it will be well installed, see Figure 13.
- Page 16 - (b) From the inside of the equipment, but from the inside you will have to remove the following compo- nents (ash tray + ash drawer + vermiculite + false bottom + box) to gain access to the area where you will screw the equipment to the table.
- Page 17 14. Finally, you can place the door and frame on the unit, the frame should have a clearance of at least 2 mm in relation to the plasterboard or masonry, see Figure 16. Figure 16 - Minimum distance between frame and face of plasterboard or masonry 15.
-
Page 18: Combustion Air
5. Combustion Air Contrary to a normal fireplace the stove uses very little combustion air. In most houses entry of fresh air through gaps in doors and windows is sufficient to provide this air. However, in houses that are well insulated this may not be sufficient. -
Page 19: Opening And Closing The Door
8. Opening and closing the door Whenever you have to open the door of the equipment you should proceed as follows: 1. Open the “Primary Air” combustion air control (C). 2. Open the “Fume hood” hot air outlet knob (G). 3. -
Page 20: Combustion Principle
9. Combustion principle The stove is designed so that full of wood, with a slow flame, it will burn at maximum efficiency for several hours. stove can be made to burn overnight, very slowly, with little or no flame. This is not advisable because this incomplete combustion creates extra smoke, which, upon condensation, deposits tar on the stove, chimney and glass panel. -
Page 21: Controls
10. Controls 10.1. Combustion air inlet (A) The cold air intake is made under the unit, so the unit will get cold air from the room where it is installed, see Figure 20. Figure 20 - Cold air intake underneath the equipment The equipment also comes with a covered cold air intake on the back, if you want to install it to the outside air, you will have to break the micro-junctions of the covers and make the connection to one of the air intakes options, from the back or the bottom, if you choose the back, you will have to change the cover, passing it to the bottom,... -
Page 22: Hot Air Outlet (B)
If you want to make an outdoor installation, you must purchase the Outdoor air intake kit. - For air inlet kit Ø80mm - PA1090G035 (For E601 and E609 models only). - For air inlet kit Ø100mm - PA1090G057. To make this connection, you must use a flexible hose from the air intake kit of the unit to the outside of the house. -
Page 23: Combustion Air Control "Primary Air" (C)
NOTE: If you intend to use the fan convection hot air regulator, before installing the unit, you must tighten the locking screw, to allow the flap operation to be unlocked, see Figure 24. Figure 24 - Fan convection hot air flap locking screw 10.3. -
Page 24: Door Catch (D)
10.4. Door catch (D) The door closing is automatic, that is, with the key inserted in the right place, the door is pushed so that it closes when it reaches the bearing, as shown in the following image, see Figure 26. Over time, due to the number of times the door has been opened and closed, the door sealing cord will lose its elastic recovery properties and the door bearing and hinges will need to be adjusted, see Figure 27. -
Page 25: Fan Flap (E)
10.5. Fan flap (E) The main function of the flap is access to the fan switch. But if you leave the flap raised at a 45° angle, the airflow through the stove intensifies, see Figure 28. If you want to remove the fan casing, you have to take off this tab and remove the air gap that is screwed to the combustion chamber, see Figure 29. -
Page 26: Installing Or Removing The Ventilation Kit
10.7. Installing or removing the ventilation kit a) In the following models of equipment’s “E601, E701, E801 and E901” the ventilation kit is installed in the equipment in the factory, to remove the ventilation kit we must remove the ash tray, the ash tray, the vermiculite... - Page 27 Figure 30 – Ventilation kit models E601 / E701 / E 801 / E901 b) On the following models "E609, E609 H, E709, E809 e E909" the ventilation kit is not installed in the equipment but must be purchased separately.
- Page 28 Figure 33 – Location of microswitch and fan button Once you have placed the microswitch and the baton in the unit, you should fine tune the actuating tab that is located on the door, Figure 34. Figure 34 – Location of microswitch and fan button The fan power cable comes out of the side of the kit, as shown in Figure 35.
-
Page 29: Secondary Hot Air Outlet Handle "Smoke Flap" (G)
10.8. Secondary hot air outlet handle “Smoke flap” (G) It controls the passage/exit of smoke when opening the door, that is, when the appliance is in operation and you want to refill it with more firewood, before opening the door, pull the handle towards you. This will allow a greater and easier passage of smoke through the chimney neck, avoiding the return of smoke from the unit into the surrounding room, see Figure 36 and Figure 37. -
Page 30: Lighting
11. Lighting 1. Fully open the door of the unit; 2. Place pine cones (preferably) or firelighters on the ash rack at the base of the combustion chamber; 3. Place firewood of small dimension, stacked horizontally; 4. Open the primary combustion air intake control, leave the door ajar to make lighting quicker and open the smoke flap, see Figure 36;... - Page 31 Model Distance X E901 3 mm E801 8 mm E701 7 mm E601 3 mm E909 5 mm E809 8 mm E709 7 mm E609 5 mm Table 1 - Distance from the optimum firing point In hot and to add more wood: Fully open the combustion air control, “Primary air”.
-
Page 32: Controlling The Unit
12. Controlling the unit There are three possible regulations: A. Very high radiant and convection heating - Very high wood consumption. Open the "Primary-Air" combustion air control fully until it burns well. This position should only be used to light the stove. Once the stove is warm, choose another position, B or C. -
Page 33: Cleaning
13. Cleaning Cleaning is best performed when the stove is cool. 13.1. Glass The preheated air glass cleaning system is operated by the regulator on the top of the door, see Figure 41, the vermiculite insulation will help keep the glass clean during most operating conditions. However, if the glass becomes dirty: 1. - Page 34 Figure 40 – Removing the ash drawer Note: Leave 1-2 cm of ash on the vermiculite base. The ash insulates the hot embers and protects the vermiculite. Place firelighters on top of the ash and not directly on top of the vermiculite. Painted surfaces Wipe off ash deposits on the paint by using a soft haired brush, cotton cloth, or the suction brush attachment of a vacuum cleaner.
-
Page 35: Maintenance
14. Maintenance 14.1. Painted surfaces Repaint the stove using only heat resistant paint. Only repaint the stove when it is completely cold. Before spraying be sure to cover all parts of the stove that do not need to be sprayed (window and fireplace for example), and to de-grease any parts to be re-sprayed. - Page 36 2. Remove the smoke channel (B) by pushing it towards the top of the stove (1). Then move the smoke channel forward (2), it is loose and remove it by moving it downwards (3), Figure 43. Figure 43 – Removing the smoke circuit 3.
- Page 37 Figure 45 – Removing the ash deflector 2. Remove the 3 pieces of vermiculite from the bottom by moving upwards and removing from the equip- ment, Figure 46. Figure 46 – Removing the vermiculite bottom 3. Remove the 2 pieces from the sides, moving towards the centre of the equipment and back towards the outside of the equipment, Figure 47.
-
Page 38: Broken Glass
Figure 48 – Removing the vermiculite back parts from the equipment NOTE: If a piece of equipment has 20 mm thick vermiculite "insulating material", it is not an anomaly. In case you want to replace these 20 mm thick vermiculite (back, sides and deflector) you should request it normally and you will be sent compatible 25 mm thick vermiculite. -
Page 39: Electrical Schema
15. Electrical schema Power cable 3 position button Plug Resistance Thermostat Microswitch Figure 49 – Electrical schema 16. Troubleshooting Apparent malfunctions are often caused by incorrect operation. If you think something has gone wrong with your stove, check out the points below. If the trouble is not remedied after checking these points, then contact your installer. -
Page 40: Warranty
3750-362 Belazaima do Chão Águeda - Portugal This document does not substantiate the provision by Fogo Montanha of a voluntary warranty on its produced and marketed products (from now on mentioned as "Product (s)"), but rather a guide, intended to be enlightening for the effective activation of the legal warranty that benefits consumers (from now on mentioned as "Warranty"). - Page 41 In order to exercise its rights, and provided that the term indicated in 3.1 is not exceeded, the Buyer must report in writing to Fogo Montanha, the lack of conformity of the Product within a maximum period of: 3.5.1 60 (sixty) days after the date on which it has detected it in the case of domestic use of the product;...
- Page 42 3.10 In equipment belonging to the pellet family, in addition to the daily and weekly maintenance contained in the instruction manual, it is also obligatory to carry out the cleaning inside and in the respective chimney for the evacuation of fumes. These tasks should be carried out every 600-800 kg of pellets consumed, in the case of stoves (air and water) and compact boilers, and every 2000-3000 kg of pellets consumed in the case of automatic boilers.
- Page 43 3.17 The Warranty is valid for the Products and equipment sold by Fogo Montanha solely and exclusively within the geographical and territorial zone of the country where the Product was sold by Fogo Montanha. 4. Circumstances that exclude the application of the Warranty Excluded from the Warranty, being the total cost of the repair borne by the Buyer, the following cases: 4.1.
- Page 44 4.16. The installation of the equipment supplied by Fogo Montanha should contemplate the possibility of their easy removal, as well as points of access to the mechanical, hydraulic and electronic components of the equipment...
- Page 45 Fogo Montanha have a 6-month guarantee. Warranty Spare Parts provided by Fogo Montanha Parts supplied by Fogo Montanha in the context of the commercial sale of spare parts, i.e., not incorporated in the equipment, do not have a warranty.
- Page 46 10. Replaced Parts under the of Scope Technical Service From the moment they are removed from the equipment, the Parts used are considered as waste. Fogo Montanha as a producer of waste in the scope of its activity is obliged by the legislation in force to deliver them to a licensed entity that performs the proper waste management operations under the law and therefore is prevented from giving them another destination, whatever.
-
Page 47: Statement Of Performance
1. Código de identificação único do produto-tipo | Código de identificación único del tipo de producto | Unique identification code of the product type | Le code d'identification unique du type de produit | Codice unico di identificazione del tipo di prodotto E601 C – EAN 05600990458796... - Page 48 De acordo com o Anexo ZA.1 (EN13229) | De Libertação de substâncias perigosas | Emisión OK. De acordo com relatório de ensaio | De acuerdo acuerdo con lo Anexo ZA.1 (EN13229) | According sustâncias peligrosas Release com informe de la prueba | According to the test to the Annex ZA.1 (EN13229) | Selons le Annexe dangerous substances | Dégagement de report | Selons le rapport d’essai | Secondo i...
- Page 49 ECLARAÇÃO DE ESEMPENHO ECLARACIÓN RESTACIONES ECLARATION OF ERFORMANCE ÉCLARATION DE ERFORMANCE ICHIARAZIONE DELLE PRESTAZIONI DD-044 º 1. Código de identificação único do produto-tipo | Código de identificación único del tipo de producto | Unique identification code of the product type | Le code d'identification unique du type de produit | Codice unico di identificazione del tipo di prodotto E701 C –...
- Page 50 De acordo com o Anexo ZA.1 (EN13229) | De Libertação de substâncias perigosas | Emisión OK. De acordo com relatório de ensaio | De acuerdo acuerdo con lo Anexo ZA.1 (EN13229) | According sustâncias peligrosas Release com informe de la prueba | According to the test to the Annex ZA.1 (EN13229) | Selons le Annexe dangerous substances | Dégagement de report | Selons le rapport d’essai | Secondo i...
- Page 51 ECLARAÇÃO DE ESEMPENHO ECLARACIÓN RESTACIONES ECLARATION OF ERFORMANCE ÉCLARATION DE ERFORMANCE ICHIARAZIONE DELLE PRESTAZIONI DD-045 º 1. Código de identificação único do produto-tipo | Código de identificación único del tipo de producto | Unique identification code of the product type | Le code d'identification unique du type de produit | Codice unico di identificazione del tipo di prodotto E801 C –...
- Page 52 Temperatura de superfície | Temperatura de OK. De acordo com relatório de ensaio | De acuerdo De acordo com os requisitos | De acuerdo con los la superfície | Surface temperature | La com informe de la prueba | According to the test requisitos | According to the requirements | Selons température surface...
- Page 53 ECLARAÇÃO DE ESEMPENHO ECLARACIÓN RESTACIONES ECLARATION OF ERFORMANCE ÉCLARATION DE ERFORMANCE ICHIARAZIONE DELLE PRESTAZIONI DD-046 º 1. Código de identificação único do produto-tipo | Código de identificación único del tipo de producto | Unique identification code of the product type | Le code d'identification unique du type de produit | Codice unico di identificazione del tipo di prodotto E901 C –...
- Page 54 De acordo com o Anexo ZA.1 (EN13229) | De Libertação de substâncias perigosas | Emisión OK. De acordo com relatório de ensaio | De acuerdo acuerdo con lo Anexo ZA.1 (EN13229) | According sustâncias peligrosas Release com informe de la prueba | According to the test to the Annex ZA.1 (EN13229) | Selons le Annexe dangerous substances | Dégagement de report | Selons le rapport d’essai | Secondo i...
- Page 55 ECLARAÇÃO DE ESEMPENHO ECLARACIÓN RESTACIONES ECLARATION OF ERFORMANCE ÉCLARATION DE ERFORMANCE ICHIARAZIONE DELLE PRESTAZIONI DD-048 º 1. Código de identificação único do produto-tipo | Código de identificación único del tipo de producto | Unique identification code of the product type | Le code d'identification unique du type de produit | Codice unico di identificazione del tipo di prodotto E609 P –...
- Page 56 Temperatura de superfície | Temperatura de OK. De acordo com relatório de ensaio | De acuerdo De acordo com os requisitos | De acuerdo con los la superfície | Surface temperature | La com informe de la prueba | According to the test requisitos | According to the requirements | Selons température surface...
- Page 57 ECLARAÇÃO DE ESEMPENHO ECLARACIÓN RESTACIONES ECLARATION OF ERFORMANCE ÉCLARATION DE ERFORMANCE ICHIARAZIONE DELLE PRESTAZIONI DD-049 º 1. Código de identificação único do produto-tipo | Código de identificación único del tipo de producto | Unique identification code of the product type | Le code d'identification unique du type de produit | Codice unico di identificazione del tipo di prodotto E609H P –...
- Page 58 De acordo com o Anexo ZA.1 (EN13229) | De Libertação de substâncias perigosas | Emisión OK. De acordo com relatório de ensaio | De acuerdo acuerdo con lo Anexo ZA.1 (EN13229) | According sustâncias peligrosas Release com informe de la prueba | According to the test to the Annex ZA.1 (EN13229) | Selons le Annexe dangerous substances | Dégagement de report | Selons le rapport d’essai | Secondo i...
- Page 59 ECLARAÇÃO DE ESEMPENHO ECLARACIÓN RESTACIONES ECLARATION OF ERFORMANCE ÉCLARATION DE ERFORMANCE ICHIARAZIONE DELLE PRESTAZIONI DD-050 º 1. Código de identificação único do produto-tipo | Código de identificación único del tipo de producto | Unique identification code of the product type | Le code d'identification unique du type de produit | Codice unico di identificazione del tipo di prodotto E709 P –...
- Page 60 De acordo com o Anexo ZA.1 (EN13229) | De Libertação de substâncias perigosas | Emisión OK. De acordo com relatório de ensaio | De acuerdo acuerdo con lo Anexo ZA.1 (EN13229) | According sustâncias peligrosas Release com informe de la prueba | According to the test to the Annex ZA.1 (EN13229) | Selons le Annexe dangerous substances | Dégagement de report | Selons le rapport d’essai | Secondo i...
- Page 61 ECLARAÇÃO DE ESEMPENHO ECLARACIÓN RESTACIONES ECLARATION OF ERFORMANCE ÉCLARATION DE ERFORMANCE ICHIARAZIONE DELLE PRESTAZIONI DD-051 º 1. Código de identificação único do produto-tipo | Código de identificación único del tipo de producto | Unique identification code of the product type | Le code d'identification unique du type de produit | Codice unico di identificazione del tipo di prodotto E809 P –...
- Page 62 Temperatura de superfície | Temperatura de OK. De acordo com relatório de ensaio | De acuerdo De acordo com os requisitos | De acuerdo con los la superfície | Surface temperature | La com informe de la prueba | According to the test requisitos | According to the requirements | Selons température surface...
- Page 63 ECLARAÇÃO DE ESEMPENHO ECLARACIÓN RESTACIONES ECLARATION OF ERFORMANCE ÉCLARATION DE ERFORMANCE ICHIARAZIONE DELLE PRESTAZIONI DD-052 º 1. Código de identificação único do produto-tipo | Código de identificación único del tipo de producto | Unique identification code of the product type | Le code d'identification unique du type de produit | Codice unico di identificazione del tipo di prodotto E909 P –...
- Page 64 Temperatura de superfície | Temperatura de OK. De acordo com relatório de ensaio | De acuerdo De acordo com os requisitos | De acuerdo con los la superfície | Surface temperature | La com informe de la prueba | According to the test requisitos | According to the requirements | Selons température surface...
Need help?
Do you have a question about the E601 and is the answer not in the manual?
Questions and answers