eta SH 20P Installation Manual

eta SH 20P Installation Manual

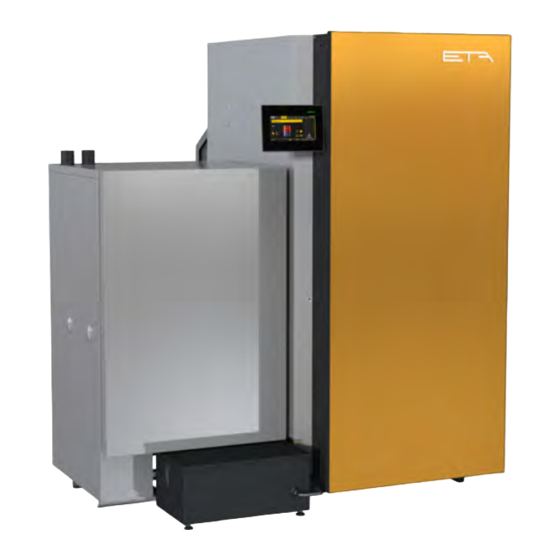
Twin pellet burner 40-50 kw

Advertisement

Quick Links

2020-07-21
EN
0000000371
V.012
2503
939023-004
TWIN pellet burner
40-50 kW
Installation

Advertisement

Table of Contents
loading

Summary of Contents for eta SH 20P

  • Page 1 2020-07-21 0000000371 V.012 2503 939023-004 TWIN pellet burner 40-50 kW Installation...
  • Page 2 ETA Heiztechnik Gewerbepark 1 A-4716 Hofkirchen an der Trattnach Tel: +43 (0) 7734 / 22 88 -0 Fax: +43 (0) 7734 / 22 88 -22 info@eta.co.at www.eta.co.at...
  • Page 3: Table Of Contents

    Contents General ................4 Preface.
  • Page 4: General

    ETAtouch control system of your ETA boiler. A LAN cable is required for the connection Types of safety instruction from the ETAtouch control system to the internet modem.
  • Page 5: Warranty, Guarantee And Liability

    General Warranty, guarantee and liability Warranty, guarantee and liability Minimum return temperature 60°C Ensure a minimum return temperature of 60°C to the boiler. Requirements We can only accept liability for the function of our Install safety valve and thermal relief valve products if they are correctly installed and operated.
  • Page 6: Dismantling, Disposal

    Repair of defects For repairs of defects carried out by the customer or by a third party, ETA shall only bear the costs or remain obligated by warranty if this work was approved in writing in advance by the customer service of ETA Heiztechnik GmbH.
  • Page 7 General Dismantling, disposal...
  • Page 8: Technical Data

    The pellet burner can be delivered for installation on the right or left side. The illustration shows a log boiler (40- 60 kW) with the pellet burner on the left side. Safety heat exchanger R1/2" external threads Discharge with R1/2" coupling Return with coupling R5/4“ Flow with R5/4" coupling Pellet suction hose DN50 Pellet return air DN50 www.eta.co.at...
  • Page 9 Technical data The flue gas connection on the boiler does not yet give any indication of the required chimney diameter. Information on the required chimney diameter can be found in the installation instructions for the boiler in the Chimney chapter. TWIN pellet burner Unit Rated capacity TWIN pellet burner...
  • Page 10: Energy Labelling

    The required buffer volume for the boiler can be found in the assembly instructions. All boilers already have the temperature controller integrated, so every product is a "package-system" (boiler with temperature controller). Wood chip boiler SH with pellet burner TWIN Model identification SH 20P SH 30P SH 32P SH 40P...
  • Page 11 Technical data Energy Labelling Wood chip boiler SH with pellet burner TWIN Model identification SH 20P SH 30P SH 32P SH 40P SH 50P Unit TWIN20 TWIN26 TWIN40 TWIN40 TWIN50 mg/m³ Seasonal space heating emissions - OGC <30 <30 <30 <30...
  • Page 12: Ce-Conformity

    Heating boilers, Part 1 and 4 We hereby declare that the product in its standard design as stated here corresponds to the above provisions. The technical documentation for this product is administered by ETA Heiztechnik GmbH. Hofkirchen, 31/10/2018 Ing. Johann Eibelhuber...
  • Page 13: Installation

    Installation Adjusting the log boiler Installation Remove the insulation over the heat exchanger cover. Assembly and installation only by qualified specialist personnel The assembly and installation may be performed by specialist personnel with the corresponding qualifications only. Technical illustrations The technical illustrations in this documentation show a log boiler with the pellet burner on the left side.
  • Page 14 Fig. 4-4: Heat exchanger cover Remove the cleaning lever. To do so, remove the bolt Fig. 4-6: Cover and pull out the lever. Lift up and remove the cover over the boiler circuit boards. Fig. 4-7: Cover Fig. 4-5: Cleaning lever www.eta.co.at...
  • Page 15 Installation Adjusting the log boiler 1. Remove the lower bracket from the side on which Detaching the side panel the pellet burner will be installed later. This bracket Remove the side panels of the log boiler on which the is no longer needed. pellet burner will be installed later on.
  • Page 16 Fig. 4-12: Nuts, discs, self-tapping screws 4. Mount both twist guards on the opposite side in the brackets. Fig. 4-15: Remove insulation Fig. 4-13: Twist guards Milling opening for flame pipe Remove the flange plate and the 3 threaded rods. Fig. 4-16: Flange plate www.eta.co.at...
  • Page 17: Mounting The Heat Exchanger Cleaner

    Installation Mounting the heat exchanger cleaner Mounting the heat exchanger Mill out the flame pipe of the pellet burner and the insulating plate with a drill and a 10 mm drill bit. Start cleaner at the bottom of the opening and slowly mill out the hole clockwise.
  • Page 18 Fasten the connecting rod with a nut to the bracket and secure to the pins with discs and cotter pin. Fig. 4-21: Drive Thread the connecting rod onto the bracket and both pins. Fig. 4-24: Fasten the connecting rod Fig. 4-22: Installation on the left side of the boiler www.eta.co.at...
  • Page 19 Installation Mounting the heat exchanger cleaner Lubricate the cam with heat-resistant grease or a copper paste. Fig. 4-27: Sensor position (mounting on the right side of the Fig. 4-25: Lubricate the cam boiler) Check the gap between the sensor and the connecting Mount the sensor rod.
  • Page 20 Closing the heat exchanger cover Re-attach the heat exchanger cover. Turn the ball knob up to the stop to suspend the heat exchanger cover. Then tighten the knurled nuts alternately and evenly by turning clockwise. Fig. 4-32: Cover Fig. 4-30: Heat exchanger cover www.eta.co.at...
  • Page 21: Installing The Actuators

    Installation Installing the actuators Installing the actuators Push actuators onto the air valve shafts. Secure the upper actuator with the nut. For the lower actuator, ad- ditionally push-on the spring removed from the Reinstalling the actuators opposite side as well as the supplied bushing and On the opposite side of the pellet burner, turn both air secure with the nut.
  • Page 22 Fix the clamping lever for the ash box on the pellet burner. Fig. 4-36: Pellet burner Manually attach the pellet burner on both sides with an M8 long nut each. Fig. 4-39: Clamping lever Fig. 4-37: Long nut www.eta.co.at...
  • Page 23 Installation Mount pellet burner Mount the fastening bracket for the outside of the pellet Mounting the fastening bracket burner. Mount the fastening bracket to the side panel of the log boiler. Fig. 4-40: Fastening bracket Fig. 4-43: Fastening bracket Mount the cover for the bottom of the pellet burner. Mount the pellet burner panel Mount the side panel to the fastening bracket.
  • Page 24 Fig. 4-47: Adjusting the height Put the insulating cover on the combustion chamber. Fig. 4-45: Rear panel Mount the panel for the pellet nozzles with the same distance to the pellet nozzles. Fig. 4-48: Insulating cover Fig. 4-46: Panel www.eta.co.at...
  • Page 25: Attaching Pellet Hoses

    Installation Attaching pellet hoses Attaching pellet hoses Fasten the control circuit board with round-headed screws. Note instructions about laying pellet hoses When laying the pellet hoses, take note of the comments; see 6.7 "Information about pellet hoses". Mounting fire protection sleeves (if required) If the pellet hoses from the storeroom are routed over a fire section (for example a room in- between) to the boiler room, fire protection sleeves...
  • Page 26: Network Connection

    Boiler network connection The network cable has already been installed at the factory and is located next to the boiler circuit board. Fig. 4-54: Connections for pellet hoses An on-site network extension (1x plug / 1x socket) is required. www.eta.co.at...
  • Page 27 Installation Network connection...
  • Page 28: Electrical Connections

     Before beginning any work, isolate the system completely from all power sources, ensure that it cannot be switched back on, and verify that it is Fig. 5-2: Digital switch safely isolated from supply. www.eta.co.at...
  • Page 29 Electrical connections Requirements Fig. 5-3: Speed-controlled pump Fig. 5-4: Special function - pump (with supply extension 230 Fig. 5-5: Special function - changeover valve with three-point controlling Fig. 5-6: Special function - burner...
  • Page 30: Circuit Board Pe-C4 Twin

    24 V input 3x 0.75 mm² nal [S10]) switching unit: position switch (terminal S521 24 V input 3x 0.75 mm² [S11]) S531 CAN Bus from circuit board [SH-C]: terminal [S581B] S532 CAN Bus 2 x 2 x 0.6 mm www.eta.co.at...
  • Page 31 Electrical connections Circuit board PE-C4 Twin These terminals have already been pre-wired at the factory: Terminal Function Standard assignment CAN node CAN-Bus node switch Fuse 230 V, T 6,3 A (electronics) Fuse 230 V, T 8 A (vacuum turbine / ignition) Fuse 230 V, MT 5 A (conveying system) T 500 mA fuse (CAN-Bus) Fuse T 500 mA (24 V supply)
  • Page 32: Connection Between Sh And Twin

    Electrical connections Connection between SH and TWIN Fig. 5-7: Connection between SH and TWIN Concluding activities Mount panel over the door frame. Installing the panels Reattach the panels over the boiler circuit boards. Fig. 5-8: Panel Fig. 5-9: Panel www.eta.co.at...
  • Page 33 Electrical connections Concluding activities Mount the panel on the top. Fig. 5-10: Panel on the top Mount the cover over the automatic heat exchanger cleaning. Fig. 5-11: Cover Removing protective film Remove protective film from all covers. After longer periods of operation of the boiler, the film can no longer be removed without damaging the paint.
  • Page 34: Pellet Store

    Placement of the storeroom is crucial for satisfactory all ETA pellet boilers with a rotary valve so that even operation. For this reason, do not place the pellet store during operation there is no open connection between underneath or in the immediate vicinity of bedrooms.
  • Page 35: Requirements For Pellet Store

    Pellet store Requirements for pellet store Requirements for pellet store boards must be mounted on the inner wall (30 mm thick with tongue and groove) so the pellets cannot push against the door, or so that it can be opened. Structural requirements The pellet store's walls must withstand the load caused by the weight of the pellets (bulk weight 650 kg/m³).
  • Page 36: Calculating Pellet Supply And Store Size

    The following table is used to determine the usable determine the necessary room dimensions and the cross-section of a storeroom in m² with the conditions length of the conveying system. in the illustration above: • 40° inclined form • Free space above 400 mm www.eta.co.at...
  • Page 37: Filling Nozzles

    Pellet store Filling nozzles Filling nozzles • Free space for the conveying system 80 mm Usable cross section in m² Total height of the storeroom (m) Installing the filling nozzles in the narrow side of the pellet store Width Two nozzles are preferably installed in the narrower outer wall of the pellet store.
  • Page 38 Each half of the room needs its own nozzle with an impact protection mat on the opposite side. The disad- ETA filling nozzles with 100 mm diameter fit exactly in vantage is that halfway through the filling process, the the cut-outs made for fitting a sewer pipe with 110 mm hoses must be exchanged.
  • Page 39: No Cables/Pipes In The Pellet Store

    For filling nozzles and sealing caps available from system. Do not use plastic piping (danger due to ETA, the interior of the sealing caps contain a cover for electrostatic charge build-up). sealing. If this cover is removed, air enters the pellet store via the sealing cover.
  • Page 40: Tilted Floor

    The slanted floor should be flush with the enclosing walls so that no pellets can fall into the empty space beneath it. However, the support frame Fig. 6-9: Tilted floor design for suction probes Formwork panel Filling nozzle Back air nozzle Support span www.eta.co.at...
  • Page 41 Pellet store Tilted floor The slanted floor must withstand the weight of the pneumatic conveyor. To avoid this, always mount the pellets (bulk weight 650 kg/m³). Assuming the usual suction probes on a wooden board (25 or 27 mm thick) commercially available formwork panels with a width of and fasten it to the floor.
  • Page 42: Information About Pellet Hoses

    Earthing The pellet hoses must be earthed as they acquire an electrostatic charge during pellet transport. A copper litz wire is moulded into the pellet hoses for earthing. Fig. 6-14: Note bending radius www.eta.co.at...
  • Page 43: Fire Safety Regulations

    Pellet store Fire safety regulations On the ends of the pellet hoses, free around 5 cm of In the event of a fire, the internal material of the fire copper litz wire from the hose and bend it inwards into protection sleeve expands and thus closes the pellet the hose.
  • Page 44 1 m or sheet metal heat deflector. This alarm thermostat is not required for an ETA • No other use.
  • Page 45: Ventilation

    Pellet store Ventilation Ventilation • If the minimum diameter of the filling lines is 90 mm. • If the filling lines or ventilation lines up to a length Requirements for ventilating the pellet store of 2 m the free ventilation cross-section is at least Pellet stores must have ventilation to prevent 40 cm².
  • Page 46 Operation of the boiler with external air supply (as long as this is supported) is then not possible. Fig. 6-19: Filling nozzle inside building Sealed, unventilated sealing cover Fig. 6-21: Bag in boiler room Ventilation opening outside Ventilating the room Filling nozzle www.eta.co.at...
  • Page 48 DOWNLOAD www.eta.co.at...

Table of Contents