Table of Contents
Advertisement
Quick Links
Advertisement
Table of Contents

Subscribe to Our Youtube Channel
Related Manuals for Robe ANOLIS Subdrive 4


Summary of Contents for Robe ANOLIS Subdrive 4
- Page 1 Version 1.4...
-
Page 2: Table Of Contents
SubDrive 4 Table of contents 1. Introduction ........................3 2. Safety information ......................3 3. Fixture exterior view ...................... 4 4. Mounting ......................... 5 5. SubDrive 4 menu ......................8 5.1 Fixture Address ("A001") ................... 8 5.2 Fixture information ("InFo") ..................8 5.3 Personality ("PErS") .................... -
Page 3: Introduction
1. Introduction The SubDrive 4 serves for power and control up to four ArcSource Submersible II LED modules. 2. Safety information FOR YOUR OWN SAFETY, PLEASE READ THIS USER MANUAL CAREFULLY BEFORE POWERING OR INSTALLING YOUR SUBDRIVE 4 ! Save it for future reference. DANGEROUS VOLTAGE CONSTITUTING A RISK OF ELECTRIC SHOCK IS PRESENT WITHIN THIS UNIT! The fixture was designed for outdoor use and it is intended for professional application only. -
Page 4: Fixture Exterior View
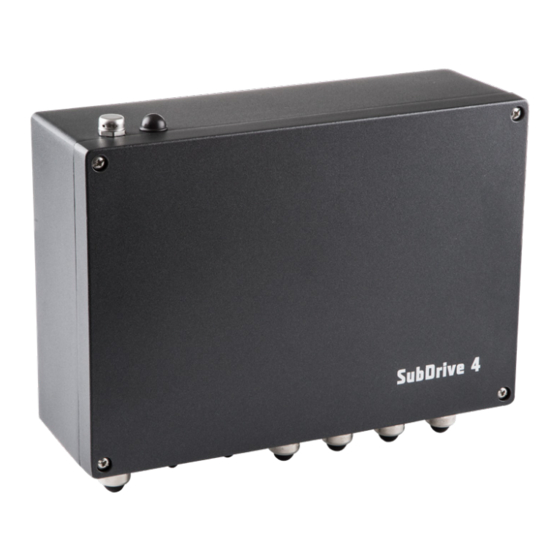
3. Fixture exterior view 1-Top cover 6- DMX In 2-Fastening screws 7- DMX Out 3- Antenna cover 8- LED Output 1 4-Gore valve 9- LED Output 2 5- Power In 10- LED Output 3 11- LED Output 4... -
Page 5: Mounting
4. Mounting Fixture must be installed by a qualified electrician in accordance with all national and local electrical and construction codes and regulations. Maximum cable length between between the SubDrive 4 and the ArcSource Submersible II depends on the operating mode: Minimum mode: 100 m Medium mode: 50 m Maximum mode: 25 m... - Page 6 Power connection Braun Blue Green/yellow Black White Green DMX connection Data + Data - Data ground (shielding) ArcSource Submersible II connection DATA +24V Communication Ground (red wire) (orange wire (blue wire) 6. Connect the fixture to mains. 7. Set desired parameters in the fixture menu ( DMX address, operating mode, etc) by means of display and four control buttons.
- Page 7 RB 3091...
-
Page 8: Subdrive 4 Menu
5. SubDrive 4 menu The 4-digit display with four buttons serves for setting the fixture to desired operating mode ,setting DMX address and mode, manual control etc. Note: If DMX signal has been disconnected, DMX address blinks. The four control buttons on the front have the following functions: ESCAPE button - leaves menu without saving changes. -
Page 9: Personality ("Pers")
In order to reset some counter to 0 you have to press and hold the UP and DOWN buttons and at the same time press the ENTER button. "dM In" ---DMX input values. Select this function to read DMX values of each channel received by the fixture. "tEMP"... -
Page 10: Manual Mode ("Man.c.")
"tEM.U" --- Temperature Unit. Use this menu item in order to display the ArcSource Submersible II temper- ature in desired units: °C or °F. "LoAd" --- Load. Use this menu to set a desired power to the connected ArcSource Submersible IIs. You can set different power to each LED output (LEd1, LEd2,LEd3, LEd4). -
Page 11: Special Functions ("Spec")
- Flash cable RS232/DMX, P/N13050624 (if you want to use a serial port of PC) - Robe Universal Interface or Robe Universal interface WTX (if you want to use an USB port of PC) After the software update the fixture will be set to default values. - Page 12 If you use the Robe Universal Interface, connect a USB port of your computer with the Robe Universal Interface by means of the USB cable and DMX input of the fixture with the DMX output of the Robe Universal Interface via a DMX cable.
- Page 13 Another way, how to update software in the fixtures (especially large installation of fixtures) is to use the ROBE Uploader. It is a software for automatized software update of Robe fixtures. It takes advantage of RDM support).
-
Page 14: Technical Specifications
RGBW/RGBA: 7 (2,3,4,9,12,16,3 channels) SW: 4 (2,2,6,8 channels) SC: 3 (1,3,4 channels) Editable Programs: 3 (up to 42 steps each) Settings/Addressing: Via RDM communicator or Robe Universal Interface (RUNIT) PHYSICAL Weight 7.5 kg | 16.53 lbs Number of LED Output zones: 4 Max. - Page 15 DiMENSIONS mm [inch] September 10, 2021 Copyright © 2021 Robe Lighting - All rights reserved All Specifications subject to change without notice Made in CZECH REPUBLIC by ROBE LIGHTING s.r.o. Palackeho 416/20 CZ 75701 Valasske Mezirici...
- Page 16 SubDrive 4 (RGBW, RGBA) - DMX chart, version 1.0 Mode/Channel Type of Value Function control Red - all zones 0-255 Red LEDs saturation control (0-100%) (255=default) proportional Green - all zones 0-255 Green LEDs saturation control (0-100%) (255=default) proportional Blue - all zones 0-255 Blue LEDs saturation control (0-100%) (255=default) proportional...
- Page 17 Dimmer intensity from 0% to 100% (0=default) proportional Dimmer fine -all zones 0-255 Dimmer intensity from min.—>max. (0=default) proportional *Halogen lamp effect during dimming Copyright © 2021 Robe Lighting s.r.o. - All rights reserved All Specifications subject to change without notice...
- Page 18 SubDrive 4 (SW) - DMX chart, version 1.0 Mode/Channel Type of Value Function control Warm white - all zones 0-255 Warm white LEDs saturation control (0-100%) (255=default) proportional Cool white - all zones 0-255 Cool white LEDs saturation control (0-100%) (255=default) proportional Warm white - zone 1 0-255...
- Page 19 Dimmer coarse - all zones 0-255 Dimmer intensity from 0% to 100% (0=default) proportional Dimmer fine - all zones 0-255 Dimmer intensity from min.—>max. (0=default) proportional Copyright © 2021 Robe Lighting s.r.o. - All rights reserved All Specifications subject to change without notice...
- Page 20 Dimmer coarse - all zones 0-255 Dimmer intensity from 0% to 100% (0=default) proportional Dimmer fine - all zones 0-255 Dimmer intensity from min.—>max. (0=default) proportional Copyright © 2021 Robe Lighting s.r.o. - All rights reserved All Specifications subject to change without notice...
Need help?
Do you have a question about the ANOLIS Subdrive 4 and is the answer not in the manual?
Questions and answers