Table of Contents
Advertisement
Quick Links
Advertisement
Table of Contents

Subscribe to Our Youtube Channel
Related Manuals for Robe AT Series


Summary of Contents for Robe AT Series
- Page 1 Version 2.8...
-
Page 2: Table Of Contents
User manual DMX CONTROL 480 Table of contents 1. Safety instructions ......................4 2. Operating determinations ..................... 4 3.Before operation ......................5 3.1.Powering up ....................... 5 3.2.Sound-control ......................5 3.3.Building the DMX-line ....................5 3.4.Connecting PC ......................6 3.5.Projector addressing ....................6 4.Control elements of the controller ................ - Page 3 11.3.Editing/creating a chaser ..................21 11.4.Copying a chaser ....................22 11.5.Running a chaser ....................22 11.6.Presetting a macro ....................23 11.7.Running a macro ....................23 12.Programming mode ....................24 12.1.Creating a scene ....................24 12.2.Deleting a scene ....................26 12.3.Copying a scene ....................26 12.4.Creating a program ....................
-
Page 4: Safety Instructions
Keep this device away from rain and moisture! Unplug mains lead before opening the housing! FOR YOUR OWN SAFETY, PLEASE READ THIS USER MANUAL CAREFULLY BEFORE YOU INITIAL START - UP! 1. Safety instructions Every person involved with installation and maintenance of this device have to: - be qualilfied - follow the instructions of this manual CAUTION! -
Page 5: Before Operation
Please use the original packaging if the device is to be transported. Never put any liquids on the device or close to it. Should any liquid enter the device nevertheless, disconnect from mains immediately. Please let the device be checked by a qualified service technician before you operate it again. -
Page 6: Connecting Pc
Ω Caution: At the last projector, the DMX cable has to be terminated with a 120 resistor. Solder the resistance into a 3 pin XLR-connector and plug it in the DMX-output of the last projector. 3.4.Connecting PC The 9-pin female connector on the rear panel of the unit is reserved for connection the controller to the PC via RS- 232 interface. -
Page 7: Control Elements Of The Controller
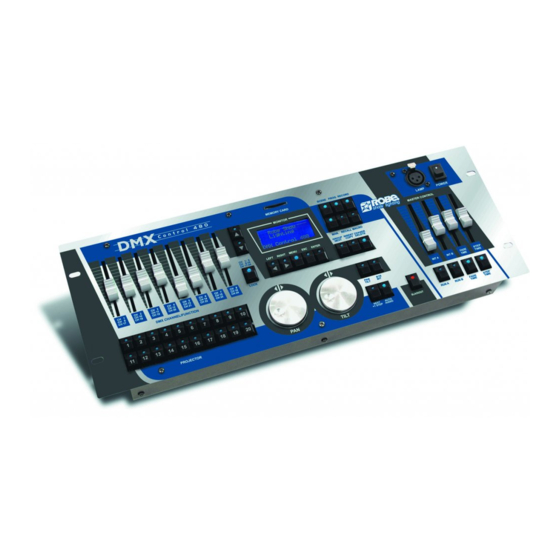
4.Control elements of the controller Top panel: 1 - DMX CHANNEL/FUNCTION sliders Every slider represents a DMX-channel of the respective projector and can be individually assigned. Please take the DMX channel-occupation from the user manual of the respective projector. 2 - CHANNEL RANGE/LOCK button The button determines the channel range for DMX CHANNEL/FUNCTION sliders or locks the controller. - Page 8 pin 2=12 V AC pin 3= 0 V AC 20 - INT B slider A slider for adjustment the light intensity of program(scene,record) running B. 21 - FADE TIME slider The slider adjusts the fade time. 22 - POWER switch 24 - PROJECTOR SELECT buttons For selecting the desired projector(s) 23 - STEP TIME slider...
-
Page 9: Operation
DMX 512 signal output. Connect built DMX serial link to the controller's output(s).Connect the controller to the mains and switch it on,the initial screen appears: Robe Lighting DMX Control 480 Now by pressing the MENU button you access the main "MENU" where you can scroll to the desired submenu. -
Page 10: Assigning The Projectors To The Projector Buttons
5.3.Assigning the projectors to the projector buttons The first operation which needs to be perfomed on the DMX CONTROL 480 is projector selection.To do this,you can use the inbuilt library of projectors or create your new projectors. 1.Press <ESC> several times until the display shows the initial screen. 2.Press <MENU>... -
Page 11: Projector Library
(you can use special functions as described in sections "Remote control of the projectors" and "Uploading programs to the projectors". All ROBE XT series projectors included in the library are defined for one DMX- channels setting (Mode 1). Example:... - Page 12 The list of created abbreviations (non editable) for describing projector effects : PAN=coarse pan PRIS.RO.= prism rotation MACRO=macros TILT= coarse tilt EFFE.RO.= effect rotation COLO.SPD=colour speed PANFINE= fine pan COLO.RO.= colour rotation FUNCTI.1 GOBO.SPD=gobo speed TILTFINE= fine tilt EFFECT= effects FUNCTI.2 EFFE.SPD=effect speed DIMMER = dimmer...
-
Page 13: Copying The Projectors Within The Projector Library
176 - 191 Pulse-effect in sequences with decreasing speed 192 - 223 Random strobe effect with increasing speed 224 - 255 Shutter open You have to set: Dimmer range: Min.:000 Max.:63 Blackout:000 The blackout value may be from the range of 140-159 as well The dimmer intensity range is important for correct function of the sliders INT A and INT B.The DMX value for blackout is needed for correct function of the BLACKOUT button. -
Page 14: Creating/Editing The Effect Names
D e l e t e u n i t ? ESC/ENT 5.Press <ENTER> to confirm the projector deleting or <ESC> to leave this menu without changes.After pressing <ENTER> the following screen appears: CONFIG UNIT Device num: 052 NO DEVICE 6.4.Creating/editing the effect names There are 255 positions for effect names,127 of these are factory assigned and the rest ones are free (editable) 1.Press <ESC>... -
Page 15: User Setting
7.2.User setting There are 3 items which determine the controller's behaviour:Start Val ;S.Blackout ;S.Lock. Item "Start Val."-determines the slider position at which starts program/record its running. Value limits:0- bottom position of the slider track 255-upper position of the slider track Adjusted value is accepted for both sliders INT A and INT B. - Page 16 4.Enter the new password (combination of any of 4 PROJECTOR SELECT buttons) by pressing the corresponding buttons and the screen appears: SET PASSWORD Please verify new password 5.Enter the new password again and confirming screen appears: SAVE CHANGES ? ESC/ENT 6.Press <ENTER>...
-
Page 17: Remote Adjusting The Projectors
<UP>,<DOWN>,<ESC>,<ENTER> you can set desired projector's functions. The projectors have to be only from ROBE XT-series or AT-series and have master/slave operation. The projectors should be operated in controller mode (no master/slave mode) to ensure a proper running of this function. -
Page 18: Operating The Memory Card
A001---->SPEC--->Code.The projectors have to be from XT-series or AT-series and include master/slave operation.If you use a copy of ROBE projector,be sure that you did not change the names of the channels (e.g. channel name GOBO you change to R.GOBO). -
Page 19: Loading Data From The Memory Card
MM Card Menu Load data Save data 3.Use <UP> , <DOWN> to select "Save data" and press <ENTER>.The bank selection screen appears: MMC Save Data Select bank:10 No. of bank (0-60 for 32 MB MM Card) to which the data will be saved 4.Use <UP>,<DOWN>... -
Page 20: Manual Control Of The Projectors
active scene/program/record <RECALL> - the button for returning all manually controlled effects(channels) to the control of the currently active scene/program/record <PAN/TILT> - the button activates the PAN/TILT wheels <8/16BIT> - the button activates 16-bit movement resolution <AUTO/AUDIO> - the button switches between AUTO mode and AUDIO mode. <MACRO>... -
Page 21: Editing/Creating A Chaser
For fine pan/tilt movement press <8/16BIT> (its LED starts flashing). To deactivate the control of the pan/tilt movement with PAN and TILT wheels ,press <PAN/TILT>(its LED stops flashing). Important: If you adjusted the pan/tilt position of fixtures with DMX CHANNEL/FUNCTION sliders or <UP>,<Down> buttons, all controlled fixtures have the same pan/tilt coordinates as shown on the screen. -
Page 22: Copying A Chaser
or "ADJUST" by pressing <UP>,<DOWN> or by rotating the TILT wheel. Active projectors you determine by pressing matching PROJECTOR SELECT buttons (their LEDs shine). By pressing <NEXT/GROUP> the current chaser's step is copied to the next step. Note: The abbreviation CONCT (constantly) means that the lasting of the chaser step can´t be changed during chaser running. -
Page 23: Presetting A Macro
Adjust time:+001..All steps with mark "ADJUST" will be increased by 40 milliseconds Adjust time:+127..All steps with mark "ADJUST" will be increased by 5.08 seconds (127x40 mS) Adjust time:-001..All steps with mark "ADJUST" will be decreased by 40 milliseconds Adjust time:-128..All steps with mark "ADJUST" will be decreased by 5.12 seconds (128x40 mS) 4.To stop the chaser running ,press <DEL./CHASER>... -
Page 24: Programming Mode
12.Programming mode 12.1.Creating a scene Scene consists of various effect created by the lights (colours,figures and positions) You can create up to 750 scenes. 1.Press <ESC> several times until the display shows the initial screen. 2.Press <MENU> and use <UP>,<DOWN> to scroll to the "Make Scene" menu and press <ENTER>.The following message appears: Scene: 001 Scene number (1-750) - Page 25 The channel setting for SPOT 150 XT (Mode 1): Channel DMX Values Functions 0 - 63 Light intensity from 0 to 100% 64 - 95 Shutter open 96 - 127 Strobe-effect from slow to fast (max 8 flashes/s) 128 - 139 Reset 140 - 159 Shutter closed...
-
Page 26: Deleting A Scene
12.2.Deleting a scene 1.Press <ESC> until the display shows the initial screen. 2.Press <MENU> and use <UP>,<DOWN> to scroll to the "Make Scene" menu and press <ENTER>.The following message appears: Scene: 001 USED 3.Use <UP>,<DOWN> or TILT wheel to select the scene you want to delete (e.g.010 ) and press <DEL>.The safety question appears: Delete scene ? ESC/ENT... - Page 27 3.Use <UP>,<DOWN> or Pan wheel to select desired free program.All LEDs of the PROJECTOR SELECTbuttons,which have been assigned to the projectors, shine. Now you have to determine the projectors, which will be used in the program - the mask.Press the PROJECTOR SELECT buttons matched to the projectors ,which you don´t want to use in the program(their LEDs become off).
- Page 28 Examples: You wish to repeat steps from No.20 to No.25 three times: Step: 25 Sce: 124 Step: 26 Sce: Loop LStp: -- NLop: --- LStp: 20 NLop: 003 Prg.time: 320.0s Prg.time: 425.0s Fati: 10 StTi: 20 Fati: -- StTi: -- You wish to repeat step No.25 ten times: Step: 26 Sce: Loop LStp: 25 NLop: 010...
-
Page 29: Deleting A Program
2.Press <INSERT/COPY>.The safety question appears: Insert step ? ESC/ENT 3.Press <ENTER> to insert the new program step or press <ESC> if you do not want to insert this step. Example:You want to insert the step prior to the step No.4 Step: 02 Sce: 011 Step: 03 Sce: 012 Step: 04 Sce: 013... -
Page 30: Creating A Record
SAVE CHANGES ? ESC/ENT 5.Press <ENTER> to confirm the copying. 12.7.Creating a record The record consists of conected programs You can create up to 100 records with a maximum of 50 programs each. Creating a record is simply a matter of assigning each step a previously recorded program number. 1.Press <ESC>... - Page 31 The maximum viewable range of total record time "Rec. tim" is 99999.9s (1667 minutes) but in fact the total record time can be longer. 6.In many cases,you may not wish to use all 50 steps. To end the record,choose the End in the field "Prog".The number of steps in your record will be determined by the position in which you place the End.
-
Page 32: Deleting A Record
3.Press <ENTER> to insert the new record step or press <ESC> if you do not want to insert this step. Example:You want to insert the step prior to the step No.4. Step: 02 Prg.: 011 Step: 03 Prg.: 012 Step: 04 Prg.: 013 Step: 05 Prg.: 014 Start step: 01 Start step: 01... -
Page 33: Runnig Mode
16.Runnig mode The following instructions needed to recall and run previously created scanes, programs and records.You can run 2 scenes,programs or records at the same time (RUN A,RUN B buttons).The combinations scene-program,scene- record or program-record are possible. 15.1.Running scenes 1.Press <ESC> several times until the display shows the initial screen. 2.press <SCENE>.The following screeen appears: RUN SCENE Select Scene... - Page 34 4.Press <LEFT> and use <UP>,<DOWN> to select the starting step of the program. 5.Check the program running mask (= projectors which will be used in the program running) and press the PROJECTOR SELECT buttons matched to the projectors ,which you don´t want to use in the program running (their LEDs become off).
-
Page 35: Running Records
Example: assigned projectors No. active projectors in program running Program running A 1,2,5,10,15 5,10 Program running B 1,2,15,16, 1,2,15,16 After starting the program running B,projectors No.1 and No.2 go to the program step No.2 by reason of synchronization with the projectors No.15 and No.16 which were prepared at step No.1 for the program running B. The adjusted fade time and step time multiplier are used for both program running A and program running B. - Page 36 The screen shows: INTENSITY A Rec.: 001 Step:01 Prog.:001 Step:01 Fati:20 StTi:30 Fati=Record fade time multiplier (2) , StTi=Record step time multiplier (3) Note:01 means 0.1 ; 99 means 9.9 Example 2 (record with 1 step only): FADE TIME button is not active Original record 1 STEP TIME button is not active Running record 1...
-
Page 37: Factory Default Setting
17. Updating the fixture library The following are required in order to update the DMX CONTROL 480 library: - the flashdev.exe file (for Windows 95 or higher) or flashdev (for Linux) ,available for download from ROBE web site (http:// www.robe.cz) -
Page 38: Technical Specifications
18.Technical specifications Number of control channels: Maximum number of programs: 255 with up to 50 steps each Maximum number of records: 100 with up to 50 steps each Maximum number of scenes: Maximum number of scenes within a program:50 Maximum number of programs within a record:50 Memory: 512 kB Memory Card:... -
Page 39: Cleaning And Maintenance
19.Cleaning and maintenance DANGER ! Disconnect the device from the mains before starting any maintenance work There are no user-serviceable parts inside the device. Maintenance and servicing should be carried out by authorized personnel only. When cleaning the controller do not use cleaning solutions or aggressive detergents which may damage the surface! Rather use a soft and damp cloth. -
Page 40: Appendix - Projector Library
Appendix - Projector library Manufacturer Name Name in the controller Mode Channels ROBE show lighting SPOT 150XT Mode 1 Spot 150 XT/ClubSpot 150CT ROBE show lighting SPOT160XT Mode 1 Spot 160 XT/ClubSpot 160CT ROBE show lighting SPOT250XT Mode 1 Spot 250 XT/ClubSpot 300 CT...
Need help?
Do you have a question about the AT Series and is the answer not in the manual?
Questions and answers