Table of Contents
Advertisement
Quick Links
Advertisement
Table of Contents

Related Manuals for Vixen SXD2


Summary of Contents for Vixen SXD2
- Page 1 Instruction Manual for Equatorial Mount SXD2...
-
Page 2: Preface
Thank you for your purchase the Vixen SXD2 equatorial mount. The SXD2 equatorial mount is a high precision sturdy mount ideal for astrophotography. The cutting-edge STAR BOOK TEN Hand Controller features a high definition large color LCD screen with intuitive controls to help you enjoy your astronomical observation. -
Page 3: Table Of Contents
- - - - - - - - - P 86 Locating the SXD2 Mount - - - - - - - - - - - - - - - - - - - - - - - - - - - - - - - P25... -
Page 4: Before Use
Do not rotate the mount manually without loosening the clamp levers. The SXD2 mount has clamps which allow you to rotate the Right Ascension (R.A) and Declination (DEC.) axes freely for quick set up for home position and compact storage of the mount. Remember to tighten the clamp levers when you use the mount. The clamp levers should be loosened to protect the inner gear train for storage and when you transport the mount. -
Page 5: Sxd2 Mount Components
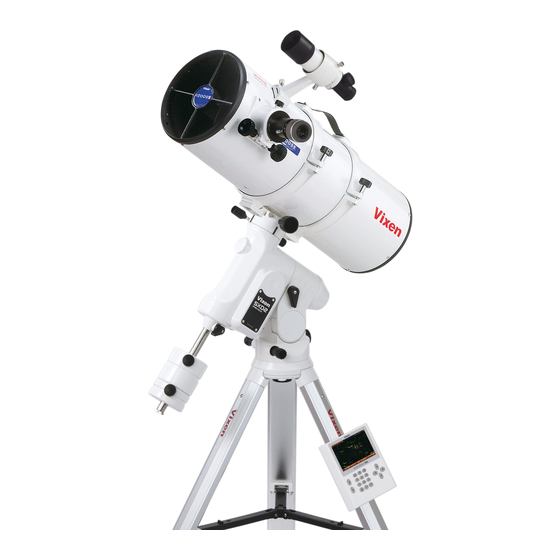
(For Polar Alignment) Counterweight 1.9kg (4.2 lb) Counterweight Power Switch Safety Thumbscrew DC12V Power [ SXD2 Mount series telescope package with optical tube and tripod ] Connecting Port Safety Screw Carry Handle Lock Screw Dew Shield Finder Scope Controller Connecting Port... - Page 6 BEFORE USE The specifications are subject to change without notice. SXD2 Mount Specifications Mount SXD2 Equatorial Mount R.A Slow Motion Wheel 180-tooth full circle micro-movement gear, 72mm in diameter, Brass wheel DEC. Slow Motion Wheel 180-tooth full circle micro-movement gear, 72mm in diameter, Brass wheel...
-
Page 7: Star Book Ten Components
BEFORE USE STAR BOOK TEN Components ① ③ ② ④ ⑤ ⑥ ⑦ ⑧ ⑨ STAR BOOK TEN Bottom View ⑤ ① Color LCD Screen Numerical / Command Keys Displays star charts and information about celestial object and the status Allows you to enter a number or a command indicated on the keys. -
Page 8: Screen Menus And Instructions
BEFORE USE Screen Menus and Instructions ① ② ③ ④ ⑤ ⑥ ⑦ ⑧ ⑨ ⑩ ⑪ ⑫ ⑬ ⑭ ⑮ ⑯ ⑰ ⑱ ⑲ Item Description Display Mode ① : The telescope is linked with the star chart. The telescope follows in the same direction as the star SCOPE MODE chart is scrolled. -
Page 9: Flow Of Operation
BEFORE USE Flow of Operation Take the following steps to set up and use the SXD2 equatorial mount correctly. P10~18 Preparation ① Set up the tripod on level ground. ● Balancing the mount. ● Initial Setting ② P19~22 Set the Language (The first time only) ●... -
Page 10: About The Internal Battery Of Star Book Ten
The STAR BOOK TEN controller has a built-in clock, which runs on a CR2032 battery. As the battery is not inserted in the STAR BOOK TEN at Vixen's factory before shipment insert it when you use the STAR BOOK TEN for the first time. The provided battery is for factory inspection and not designed for long term use. -
Page 11: Assembling The Mount
Attach the metal post on the tripod head. Thread the metal post into 4-1 4-1 4-2 4-2 the hole marked as SXD2 and tighten it with a screwdriver. Screwdriver Screwdriver Tighten the metal post until the end of the thread securely; otherwise... -
Page 12: At Taching The Equatorial Mount
Chapter 1 PREPARATION . Attaching the Equatorial Mount Ⅱ CAUTION: Be sure to handle the equatorial mount carefully as it is a very heavy item. Package without the SXG Half Pillar Loosen the azimuth adjustment screws in advance by turning the Azimuth Adjustment Knob Azimuth Adjustment Knob azimuth adjustment knobs on the mount. -
Page 13: .Attaching The Counterweight
Because of this feature, placing the SXD2 mount so that its declination axis comes directly over one of the tripod legs can make it most stable when you use the SXD2 mount for a north (or south) latitude of 50 degrees and lower. However, the balance of the SXD2 mount may vary if it is used in latitude higher than 50 degrees. -
Page 14: At Taching The Optical Tube
Chapter 1 PREPARATION . Attaching the Optical Tube Ⅳ Make sure that the slide bar or dovetail tube plate is flat against the saddle plate. Tightening the lock screws with a gap between these parts may cause the telescope to fall. Attaching to the Saddle Plate Loosen the two lock knobs on the saddle plate before you attach the optical tube. -
Page 15: Balancing The Equatorial Mount
Why Balance the Mount? The Vixen SXD2 mount is a German equatorial mount, in which the rotating RA axis and rotating DEC axis cross each other at right angle. The axes are rotated by using movements of gears on the each axis to get maximum stability and limit the stress on the gears. If the equatorial mount is in an unbalanced state, it will increase stress to the gears and this could result in damage or erratic operation. - Page 16 Chapter 1 PREPARATION Telescope Tube with Tube Rings Loosen the R.A. clamp while holding the counterweight bar (1-1) and turn the telescope tube until the DEC. axis comes to horizontal (1-2). Tighten the R.A. clamp and loosen the DEC. clamp. Be sure to hold the optical tube or counterweight in hand while loosening the clamps.
- Page 17 Chapter 1 PREPARATION Tips on Proper Balancing The balance arrangements below illustrate various possible settings, depending on the length and weight of your optical tube. The center of gravity of the telescope is given as 25cm from the intersection of the RA and DEC axes. No counterweight: One 3.7kg (8.1 lbs) and one 1.9kg (4.1 lbs): from 1.3kg (2.8 lbs.) up to 1.8kg (3.9 lbs.)
-
Page 18: Conne Cting The Star Book Cable
Chapter 1 PREPARATION Ⅵ . Connecting the STAR BOOK Cable Connecting to the Mount Plug one end of the STAR BOOK cable, where no ferrite core is attached, into the connecting port on the mount for the controller Controller Connecting Port Controller Connecting Port cable. -
Page 19: Turning On The Power
The power switch is located on the bottom of the declination body of the mount. To turn on the power press the side marked I on the switch and to turn off the power, press the O marked side on the switch. Turning on the power switch displays the Vixen logo on the screen of the STAR BOOK TEN. ... -
Page 20: Se T Ting Local Time
Chapter 2 INITIAL SETTING . Setting Local Time Ⅲ This setting is required the first time you use the STAR BOOK TEN or when the internal battery has been changed. You can enter date and local time of your area using 24 hours a clock, i.e. 3pm is 1500. It does not offset daylight saving time. (The last entered date and time information will be stored and displayed.) Choose "Local Time Setting"... -
Page 21: Se T Ting Location
Chapter 2 INITIAL SETTING . Setting Location Ⅳ This setting is required the first time you use the STAR BOOK TEN or when you change the internal battery or when you travel to a distant observing location. Enter the name, longitude (east or west), latitude (north or south) and time zone (plus or minus) of your main observing location. Up to 10 different locations can be entered. - Page 22 Chapter 2 INITIAL SETTING Setting, Changing or Deleting the Location Information To use your observing location, move the cursor to "Location" in the "Initial Configuration" menu with the key and press the ) key to access the location entry dialog box. Choose the observing location you want to use from the location information with the key and press the key.
-
Page 23: Moving The Telescope
Chapter 3 BASIC OPERATION Moving the Telescope Make sure that the R.A and DEC clamps on the SXD2 mount are locked tightly. Advance the “Initial Configuration” screen in the following procedure to display the telescope's home position setting screen. Choose OK with the key in “Initial Configuration”... -
Page 24: Startup Procedure
Chapter 4 AUTOMATIC GOTO SLEWING Automatic Go-To Slewing The moon and bright planets are found readily in the night sky as you can locate their positions with ease. However, less bright planets, nebulae and star clusters are dim and mostly invisible with the unaided eye. Even if you know where these dim and blurred objects are in the night sky, it often takes time and effort to look for them. -
Page 25: Home Position
Ⅰ After setting up the telescope, locate the SXD2 mount so that its R.A. axis points toward the north celestial pole if you use the telescope in the Northern hemisphere. If your intention is not to take lengthy astrophotography, you don't need to align the R.A. axis to the celestial pole precisely. -
Page 26: Alignment
(The target circles indicate due east in the southern hemisphere.) The SXD2 mount starts tracking at the celestial rate from that point and now the Go-To slewing will accurately bring a target object in the finder scope's field of view. You need to proceed to star alignment to set the pointing accuracy of your telescope. - Page 27 Chapter 4 AUTOMATIC GOTO SLEWING Select a star from an alignment stars list in the object database. Be sure to select alignment stars for which you recognize locations in the night sky. Aldebaran in Taurus, the Bull is shown here as an example of the first alignment star. , press the command key (or the command key to access “Star”...
- Page 28 Chapter 4 AUTOMATIC GOTO SLEWING Your first Go-To slewing may not bring the alignment star in the main telescope's field of view but should appear in the finder scope. Here, center Aldebaran in the telescope's field of view as an example with the following procedure.
- Page 29 Chapter 4 AUTOMATIC GOTO SLEWING Slewing the Telescope to an Object near the Sun or to the Sun If you try slewing to an object near the Sun or to the Sun, the STAR BOOK TEN will alert you with a dialog box: “Warning! Target is close to the Sun.” In the dialog box, choose OK with the key and press the key to advance.
- Page 30 Chapter 4 AUTOMATIC GOTO SLEWING Tips on Star Alignment ● It is advisable to use fixed stars for the alignments. As the distant stars are a fixed point of light and they have no area, you can pinpoint a location for an alignment point. Alignments with the moon, planets, nebulae and star cluster are not as accurate as star alignment with fixed stars.
-
Page 31: Slewing To An Obje Ct In Scope Mode
Chapter 4 AUTOMATIC GOTO SLEWING . Slewing to an Object in SCOPE MODE Ⅳ Once the star alignment is completed in Section III, choose a celestial object to which you want to slew. You can look for objects like nebulae and star clusters on the star charts of the STAR BOOK TEN to choose what you want to observe. -
Page 32: Slewing To An Obje Ct In Chart Mode
Chapter 4 AUTOMATIC GOTO SLEWING . Slewing to an Object in CHART MODE Ⅴ The Go-To slewing in CHART MODE works in the same way as you did in SCOPE MODE Additionally, scrolling the star chart allows you to select any object as a target and automatically slew your telescope to it. - Page 33 Chapter 4 AUTOMATIC GOTO SLEWING The Go-To slewing finishes with ringing the chimes. Pressing the key will start slewing the telescope to the target. When you call up M42 from “Object Menu” in CHART MODE , the interactive dialog appears on the screen.
- Page 34 Chapter 4 AUTOMATIC GOTO SLEWING . Slewing to an Object with Command Keys Ⅵ The STAR BOOK TEN has command keys to allow direct access to each list of celestial objects in the database. This choice displays a list of planets in the solar system (Mercury, Venus, Mars, Jupiter, Saturn, Uranus, Neptune and a dwarf- planet Pluto) as well as the sun and moon.
-
Page 35: Moon Map
Chapter 4 AUTOMATIC GOTO SLEWING Moon Map The “Moon Map“ dialog box appears on the screen if you press the key a little longer. The telescope can be pointed at the major "seas" and geographical formations on the surface of the moon. Note: •... -
Page 36: Using The Moon Map
Chapter 4 AUTOMATIC GOTO SLEWING Choose "Moon" with the direction key and press the (or the ) key. The "Moon Map" dialog box appears and choose "Moon Map" with the direction keys and press the (or the ) key. If you are in key to start the automatic Go-To slewing. - Page 37 Chapter 4 AUTOMATIC GOTO SLEWING Descriptions of Moon Map Screens Screen 1: Changing the Size and Orientation of the Moon Map Item Description Mirror-reversed left and right ① Mirror-revered upside-down ② ① Rotate upside-down (180 degrees) ③ ② Rotate counterclockwise ④...
- Page 38 You can scroll the list of the terrain names one by one with the up and down direction keys if the frame mode is not selected. In this option, the STAR BOOK TEN screen is not linked with the SXD2 mount and scrolls can be done smoothly and quickly. The zoom keys, reverse and rotation of the moon map are inoperative in this mode.
- Page 39 Chapter 4 AUTOMATIC GOTO SLEWING Inverted (180-degree rotated) Moon Map The moon map can be switched from/to the inverted image to/from the ordinary image orientation with press of the key. The inverted image symbol on the bar information of the moon map is highlighted in green if you choose this option. It functions along with the mirror-reversed image and rotating functions.
- Page 40 Chapter 4 AUTOMATIC GOTO SLEWING , select a place you want to view on the moon map by scrolling and zooming CHART MODE with the direction keys and zoom keys. Copernicus crater is a target here by way of example. The list of location names on the moon map tracks the terrain as you move the moon map.
- Page 41 Chapter 4 AUTOMATIC GOTO SLEWING INDEX Craters Seas, Ocean, Bays, Lakes and Marsh Albategnius Geminus Posidonius Mare Australe (Southern Sea) Alphonsus Goclenius Ptolemaeus Mare Crisium (Sea of Crises) Archimedes Goldschmidt Purbach Mare Fecunditatis (Sea of Fertility) Aristarchus Grimaldi Pythagoras Mare Frigoris (Sea of Cold) Aristillus Guericke Rabbi Levi...
- Page 42 Chapter 4 AUTOMATIC GOTO SLEWING The following is an example on how to slew to NGC224 (M31, the Andromeda galaxy) with the command key. Press the key to access the lists of objects in the NGC or IC catalog. Pressing the ...
-
Page 43: Obje Ct Menu
Chapter 4 AUTOMATIC GOTO SLEWING This displays all of the celestial objects in the database. Press the key to call up “Object Menu” which includes each list of Messier objects, NGC/IC objects, planets, the sun, the moon, constellations, fixed stars and more. Select the list using the key and press ) key. -
Page 44: Constellation
Chapter 4 AUTOMATIC GOTO SLEWING Constellation This identifies locations of all 88 constellations. Additionally, it allows you to slew to any stars labeled with a Bayer designation (the letters of Greek alphabet) in the constellation. Call up “Object Menu” and choose “Constellation” with the direction key. -
Page 45: Coordinates
Chapter 4 AUTOMATIC GOTO SLEWING Calling up Bayer Designation Directly The list of the Bayer designation appears on the screen if you press the key a little longer. Choose a Bayer designation in the entry dialog box with the direction key. Press )key to display a star which have a Greek-letter designation. -
Page 46: Comet
Chapter 4 AUTOMATIC GOTO SLEWING Comet This allows slewing to comets. The orbital elements of the comet McNaught (2009 R1) are shown as an example. Entering the Orbital Elements of the Comet STAR BOOK TEN allows you to enter orbital elements of up to 10 comets for Go-To slewing. You can access the orbital elements of comets from commercially available astronomy magazines, internet websites and so forth. - Page 47 Chapter 4 AUTOMATIC GOTO SLEWING Setting, Changing or Deleting the Orbital Elements of the Comet OK: Choose OK to slew the telescope to the comet you chose. Press the key to start the Go-To slewing. To stop, shift the cursor to Cancel with the •...
-
Page 48: Satellite (Artificial Satellite)
Chapter 4 AUTOMATIC GOTO SLEWING Satellite (Artificial Satellite) This allows observing a satellite pass. Entering the Orbital Elements of the Satellite STAR BOOK TEN allows you to enter orbital elements of up to 10 satellites for Go-To slewing. You can access the orbital elements of satellites from commercially available astronomy magazines and internet websites. - Page 49 Chapter 4 AUTOMATIC GOTO SLEWING Press the key to complete the entry. Then, press the key again to leave this menu. If a wrong number is entered, the item for the entry will be highlighted in red to alert you. Setting, Changing or Deleting the Orbital Elements of the Satellite OK: Choose OK to slew the telescope to the satellite you chose.
-
Page 50: User Coordinates
Chapter 4 AUTOMATIC GOTO SLEWING User Coordinates STAR BOOK TEN allows you to add 10 new objects to the database by using celestial coordinates. It is possible to define and store terrestrial objects with altitude and azimuth for terrestrial objects. The tracking will be off if you choose an object in the altitude and azimuth setting. -
Page 51: Home Position
Chapter 4 AUTOMATIC GOTO SLEWING Change Data: Choose “Change Data” to rewrite the set points. To change the set point, display the entry dialog box and choose “Change Data” with the direction key. Then, press the key. Delete: Choose “Delete” to clear the orbital elements To delete the set point, display the entry dialog box and choose “Delete”... -
Page 52: Polar Alignment
Polar Alignment Reticle rotation in your imaging device. (Inside) (Inside) • It is not possible to use the SXD2 mount in the north latitude over 70 degrees and in the south latitude over 70 degrees. Focus Ring (Eyepiece) Focus Ring (Eyepiece) - Page 53 Chapter 5 APPLICATION Basic Op e ration Illumina tion ON and OFF Adjusting the Brightness There is a push switch on the top of the brightness adjustment dial of The brightness of the red light for the polar alignment reticle can be the polar alignment scope.
- Page 54 Polar Alignment in the Northern Hemisphere The p olar a xis of the SXD2 mount is aligned to the Nor th Celes tial Pole in the nor thern hemisphere. The p olar alignment s c ope utilizes 3 s t ar s of Polaris, Delt a UMi and 51 Cep near the Nor th Pole. Positions of the ab ove s t ar s are plot te d on the the p olar alignment reticle.
- Page 55 Chapter 5 APPLICATION Turn on the power switch of the mount and advance the initial settings until the telescope’s home position screen appears on the screen of the STAR BOOK TEN. While looking into the round transparent window for the polar alignment scope, on the declination body turn the declination body with the direction key so that the polar Opening...
- Page 56 Chapter 5 APPLICATION Big Dipper Field of view of the polar alignment scope. Re al field of view (in the nor thern sk y) Cassiopeia T he r eal s t ar s of the Big Dipp er (or Ca s siop eia) ar e not v isible in the fiel d of v iew of the p olar alignment s c op e.
- Page 57 Chapter 5 APPLICATION Turn the azimuth adjustment knobs so that Polaris comes as close as possible to the designated position on the reticle. Unfastening one side of the azimuth adjustment knob will allow fastening the knob on the other side to change the azimuth direction. A zim ut h A dj us tme nt Kn ob s Azi mu th Ad ju stm en t K no bs Turn the altitude adjustment handles so that Polaris comes as close...
- Page 58 Sin c e t h e r e i s n o m a r k t h a t p o in t s a t t h e N o r t h C e l e s t i a l Turn the polar alignment scope body so that Delta UMi Pole, you need to match the polar a xis of your SXD2 mount comes near to the location of the year 2014 on the scale.
- Page 59 Chapter 5 APPLICATION While looking into the eyepiece of the C eles t ial n or t h C eles t ial n or t h C eles t ial n or t h C eles t ial n or t h polar alignment scope, turn the altitude a d j u s t m e n t h a n d l e s...
- Page 60 Polar Alignment in the Southern Hemisphere The polar a xis of the SXD2 mount is aligned to the South Celestial Pole in the s outhern hemisphere. The polar alignment s c ope c ont a ins a r et i c le s h ow in g t he r ela t i ve p o s i t i ons of f our s t ar s near t he S.C.P. T he s e s t ar s ar e Si gma , Tau a n d Chi of O c t a ns.
- Page 61 Chapter 5 APPLICATION Note: Octans is a constellation located near the south celestial pole and it can be used to align the equatorial mount telescopes in the southern hemisphere. Unlike Polaris which is a bright 2nd magnitude star adjacent to the nor th celestial pole, Octans is made up of dark stars about 5th magnitude on average.
- Page 62 Chapter 5 APPLICATION W hile lo ok ing into the eyepie c e of the p olar alignment s c op e, a d jus t the direction of the mount by turning the altitude adjustment handles and azimuth adjustment knobs alternatively so that Sigma Octantis comes as close as possible to the designated position on the reticle.
- Page 63 Since there is no mark that points at the South Celestial Pole, Turn the polar scope body so that Tau Octantis comes near you need to match the polar axis of your SXD2 mount with the to the location of the year 2014 on the scale.
- Page 64 Chapter 5 APPLICATION While looking into the eyepiece of the polar alignment scope, turn the altitude adjustment handles and azimuth adjustment knobs so that Sigma Octantis comes to the gap between the two segments of the lines marked 2014 and 2040. Set Sigma Octantis to an approximate position that is corresponding to the year of your observation.
-
Page 65: About Pf-L Assist App
PF-L Assist The free download PF-L Assist app is available for iPhone, Android and Kindle fire. For details of the app, vist our web site at: ht tps:// w w w.vixen.co.jp. -
Page 66: Pre Cise Polar Alignment
Chapter 5 APPLICATION Precise Polar Alignment (Drift Alignment) If you align the mount with the provided polar alignment scope correctly, the mount will be able maintain tracking celestial objects within the field of view of your telescope's eyepiece. For astrophotography, it enables you to take exposures of 5 to 10 minutes with a telephoto lens of 200mm focal length or less. - Page 67 Chapter 5 APPLICATION lign the Mount in the direction of Altitude. Choose a bright star near celestial equator in east but not too low, and put it in the filed of view of the eyepiece. Turn off the power switch of the mount momentarily while looking into the eyepiece to see in which direction the star moves. Confirm the west and rotate the eyepiece so that one of the cross hairs is parallel to the east-west direction in the field of view.
- Page 68 Chapter 5 APPLICATION Drift Alignment in the Southern Hemisphere Align the mount to the south celestial pole by using the polar alignment scope. It will save you a lot of time in the process of drift alignment. Align the Mount in the direction of Azimuth Prepare an eyepiece with cross hairs reticle (illuminated).
- Page 69 Chapter 5 APPLICATION Change the Altitude Setting on the SXD2 Mount The SXD2 is set for use in the middle latitude zone (latitude of 35 Put back the bolt in place and tighten it with the Allen wench degrees plus/minus 15 degrees) at Vixen’s factory.
-
Page 70: Initial Configuration
Use Last Mount Setting This allows you to continue using the SXD2 mount with the same settings you used during your last observing session. If you choose this option, the STAR BOOK TEN retains its alignment data while the mount is powered off. -
Page 71: Night Vision
Night Vision To maintain your night vision, avoid white light. The “Night Vision” mode of the SXD2 mount turns the screen from the bright “white color” to gentle “red color”. You can use it together with the “LCD Adjust” for the best accommodation to your eyes. -
Page 72: Volume
Chapter 5 APPLICATION Volume The volume of the chimes can be adjusted from 0 to 20, i.e. “off to the loudest” divided by 20 steps. T h e s e t t i n g i s d ef au lte d t o “1 5 ” . In the “Initial Configuration”... -
Page 73: 言語 / Language
Chapter 5 APPLICATION 言 語 / L an gu ag e Language is available in Japanese, English, German, Italian and Spanish on the STAR BOOK TEN as of November 2012. T h e s e t t i n g i s d ef au lte d t o " Ja p a n e se ". In the “Initial Configuration”... -
Page 74: About Starbook Ten
Chapter 5 APPLICATION Abo u t S t a r B oo k T E N This allows you to access the program version, IP address and MAC address of your STAR BOOK TEN controller. This information is required for program updates and downloads from a PC through a local area network. In the “Initial Configuration”... -
Page 75: System Menu (Main Menu)
Chapter 5 APPLICATION Ⅲ . System Menu (Main Menu) Choose the settings for various functions to suite your preference. Press the key to call up “System Menu”. Chart Setting This menu allows various display settings on the star charts. In “System Menu”, choose “Chart Setting” with the direction key and press the key (or the key) to call up the “Chart... -
Page 76: Constellation
Chapter 5 APPLICATION Constellation This allows you to choose your preference for the display of the constellations from the following options. OFF: Neither constellation lines, names nor its aberrations are displayed. Const. Line: Only constellation lines are displayed. Const. Name: Only constellation names are displayed. Const. -
Page 77: Display Of Star
Chapter 5 APPLICATION Display of Star This allows you to limit the number of fixed stars displayed on the star chart by magnitude at the widest chart so that you can prevent the screen from being full of luminous stars. Brighter than Mag.8 : Fixed stars of 8th magnitude and brighter are displayed. -
Page 78: Star Popular Name
Chapter 5 APPLICATION Star Proper Name This allows you to limit the name of fixed stars displayed on the star chart by magnitude at the widest chart. Also,” Always ON” or “Always OFF” is available. Always ON : Names are always indicated. Brighter than Mag.5 : Names of fixed stars of 5th magnitude and brighter are displayed. -
Page 79: Bayer Designation
Chapter 5 APPLICATION Bayer Designation This allows you to limit Bayer designation of fixed stars displayed on the star chart by magnitude at the widest chart. Also,” Always ON” or “Always OFF” is available. Always ON: Bayer designation of fixed stars is always indicated. Brighter than Mag.5: Bayer designation of fixed stars of 5 t h magnitude and brighter are displayed. -
Page 80: Sun, Moon, Plane T
Chapter 5 APPLICATION Sun • Moon • Planet This allows you to choose your preference for the display of the name of the Sun, Moon and planets from the following options. It is not possible to hide the Sun, Moon and planets themselves. ON : The names of the Sun, Moon and planets are displayed. -
Page 81: Satellite
Chapter 5 APPLICATION Satellite This allows you to choose your preference for the display of Satellites from the following options. ON : Satellite is displayed. OFF : Satellite is hidden. T h e s e t t i n g i s d ef au lte d t o “O N” . In the “Chart Setting”... -
Page 82: Center Circle
Chapter 5 APPLICATION Center Circle This allows you to choose your preference for the display of the target circles from the following options. ON : Target circles are displayed. OFF : Target circles are hidden. T h e s e t t i n g i s d ef au lte d t o “O N” . In the “Chart Setting”... - Page 83 Chapter 5 APPLICATION Catalogue (Messier or NGC or IC) This allows you to choose the use of the catalogues of Messier, NGC and IC objects. All the deep sky objects from the catalogue will not appear on the star chart if it is set to OFF. Note: Your target object designated is displayed even If you set this function to OFF.
-
Page 84: Mount Setting
Choose this option when you want to move the SXD2 mount in the directions of right ascension and declination with the mechanical motion of the mount. Make sure that the direction keys display at the lower right of the screen is as follows. -
Page 85: Autoguider
Chapter 5 APPLICATION AutoGuide The STAR BOOK TEN can be used for auto guiding in conjunction with a CCD video camera installed on a guide scope and a built-in autoguider (sold separately) as an expansion module (called Advance Unit) for the STAR BOOK TEN. An external autoguider which is compatible with the ST series autoguiders from SBIG is available also. -
Page 86: Pec (Periodic Error Correction)
(e.g. 480 seconds with SXD2 mount) in the direction of R.A. This is caused by the motion of the tracking gear wheels and it is part of the design of equatorial mounts. - Page 87 Chapter 5 APPLICATION S to p p in g t he P E C Re co r d i n g Pressing any of the keys on the STAR BOOK TEN except the zoom and direction keys will stop the PEC recording. At the same time, the dialog box appears on the screen.
- Page 88 Chapter 5 APPLICATION S to p p in g P l ayb ac k of th e P E C I n t he “M ou nt Se tti n g” menu, c h oos e “ P E C ” wi t h t h e d i r e ctio n ke y a nd pr ess t he ke y to ca l l u p t he dialo g b ox .
-
Page 89: Backlash Compensation
Chapter 5 APPLICATION Backlash Compensation Backlash is a momentary stoppage of the tracking motion of the mount that occurs when the motor gears reverse their rotation. Backlash does not occur while the mount moves at a constant speed as the gears keep contact with each other. Backlash may occur when the telescope is moved with the direction keys manually. - Page 90 Chapter 5 APPLICATION Setting the Backlash The values for the backlash compensation are available between “0” and “99” both in R.A and DEC. In the “Mount Setting” menu, choose “Backlash Compensation” with the direction key and press the key to call up the dialog box. In the “Backlash Compensation”...
-
Page 91: Goto Speed
Chapter 5 APPLICATION GOTO Speed The maximum speed of automatic Go-To slewing can be chosen from the following 5 levels. 5 H igh : 1 0 0 0 x ( a bo ut 1000 t im e s o f s i d er e al r a te ) 7 0 0x ( abo ut 700 t i m e s o f si d e re a l ra te ) 4 0 0x ( abo ut... -
Page 92: Motor Power
Chapter 5 APPLICATION Motor Power This allows for the changing electricity consumption of the mount as the need arises. When electricity consumption is set to “3”, the mount will easily accomplish tracking and Go-To slewing of your telescope and equipment up to 10kgs (22 lbs). The smaller the value is set, the lower the electricity consumption is used, but it may cause a failure in tracking or Go-To slewing due to a drop of the motor torques. -
Page 93: Mount Type
Chapter 5 APPLICATION Mount Type This allows choosing a mount type either “Equatorial with Polar Setting” or “Equatorial without Polar Setting”. T h e s e t t i n g i s d ef au lte d t o “E q u a t o r ia l wi t h o u t P o la r S e t ti n g ” In the “Mount Setting”... -
Page 94: Cross Over Meridian
Cross Over Meridian If your object of observation with the SXD2 mount is located on the east side of the meridian, the gravity of center of your telescope would be on the west side of the R.A axis of the mount. - Page 95 Chapter 5 APPLICATION Warning for Telescope Reverse This allows setting a point of the warning message to warn you against turning of the optical tube to the opposite position. The alarm sounds at the same time the warning message is indicated. The timing of the warning message can be designated by angle and it can be set to recall repeatedly with an interval of every one degree and more until the mount stops.
-
Page 96: Delete Align Point Data
Chapter 5 APPLICATION Delete Align Point Data This allows calling up and deleting your alignment points from a list in the database. You cannot retrieve the deleted alignment point. This will not function if there is no alignment point. Keep pressing the key until the dialog box appears (or press the key to access Mount Setting). -
Page 97: System Setting
Note: Most of menus in “System Setting” are accessible at “Initial Configuration” which is displayed each time immediately after you turn on the power switch of the SXD2 mount. Local Time Setting In the “System Setting” menu, choose “Local Time Setting” with the... -
Page 98: Goto Message
Chapter 5 APPLICATION Key LED Brightness In the “System Setting” menu, choose “Key LED Brightness” with the direction key and press the key (or the key) to call up the dialog box. Refer to page 71. Atmospheric Refraction In the “System Setting” menu, choose “Atmospheric Refraction” with the direction key and press the key (or the... -
Page 99: Expansion Function
Chapter 5 APPLICATION 言 語 / L an gu ag e In “System Menu”, choose “Language” with the direction key and press the (or the key) to call up the dialog box. Refer to the Chapter 2 “Initial Setting”. Initialize Memory Data In System Menu, choose “Initialize Memory Data”... -
Page 100: Mount Information
T his displ ay s i nfo r ma ti on on t he nu m be r of t he t ee t h on th e w h e e l g e ar, ge ar r e du cti o n ra ti o . M oun t Ty p e: SXD2... -
Page 101: Using As A Stand-Alone Unit
There is no power switch on the STAR BOOK TEN and it will turn on if you connect a power source. You simply disconnect the power source to turn off the STAR BOOK TEN. Any functions that are related directly to motion of the SXD2 mount are inoperative and you cannot switch the display to SCOPE MODE... -
Page 102: Updating Your Star Book Ten
* Make sure that the PC is used under a stable power supply for transmission of data. * You may fail to reboot the STAR BOOK TEN if the power supply is cut during updating. If this is the case, ask your local Vixen dealer for repair (chargeable to you). - Page 103 Chapter 5 APPLICATION Click “Update Program” in the dialog box to continue. Updating will advance in the following procedure: Open the holder that contains the downloaded Select the program file and click it to open. Click on Submit Query button for sending the program file for updating.
-
Page 104: Entering Orbital Elements And User Defined Objects
Chapter 5 APPLICATION Ⅵ . Entering Orbital Elements and User Defined Objects The STAR BOOK TEN allows you to store orbital elements of comets and artificial satellites as well as user defined objects up to 10 of each for tracking and Go-To slewing. You need to prepare orbital elements for this purpose. Procedures Directly connect the STAR BOOK TEN and a PC with the LAN crossover cable. - Page 105 Chapter 5 APPLICATION Click “User Data Table” in the dialog box to continue. Clicking a number of an available space object (for comet, artificial satellite and user defined object) will display an entry dialog box. Available space for a name is a total 14 of single- space characters.
- Page 106 Chapter 5 APPLICATION Alternatively, you can make a list of the orbital elements and send it to the STAR BOOK TEN. You need to prepare the list in text file format for this purpose. Read page 107 on how to make it. Note: Previous data in the same line numbers will be overwritten by the new information.
- Page 107 Chapter 5 APPLICATION Data Transmission Forms Apply the following structure to create a list of the orbital elements. Send it to the STAR BOOK TEN by text file. Form of Orbital Elements for Comet STARBOOKCOMETFILE Line number, Name of comet, Time of periapsis passage (T) (YY/MM/DD/TT), Argument of periapsis(ω), Longitude of the ascending node (љ), Inclination (i), Minimum distance from periapsis (q), Eccentricity (e).
- Page 108 Chapter 5 APPLICATION Form of User Defined Object Choose from the following two types of formats according to coordinates you use. RA.DEC STARBOOKCOORDFILE Line number, Name of Object, Type of coordinates, RA in hour, RA in minute, RA in second, DEC in degree, DEC in arc minute. ALT.AZ STARBOOKCOORDFILE Line number, Name of point, Types of coordinates, Azimuth in degree, Azimuth in arc minute, Altitude in +/- degree, Altitude in arc minute.
-
Page 109: Appendix
Controller Cable Connecting Port (D-sub 9pin male) LAN Connecting Port (10BASE-T) External Autoguider Connecting Port Dec- Dec+ A.G. Connectors on the SXD2 Mount Power Switch C O NTRO LLE R DC12 V ○ Power Connection Port DC 12V, Center positive polarity... - Page 110 APPENDIX Dimensions of the SXD2 Mount 34 3 mm ( 1 3.5 0 ") 1 6 4 m m (6 .4 5 " ) 1 4 7 m m( 5 .7 9 " ) 1 2 3 mm (4 . 8 4 " ) Fulcrum (The intersection of the R.A.
- Page 111 APPENDIX Dimensions of the SXG-HAL130 Tripod (Sold separately) 145mm (5.71") 128mm (5.042) Dimensions of the SXG-P85DX Pillar (Sold separately) 128mm (5.04") 46.7m m( 1.84" ) 3- M6×1 Hex Cap Scr ew 15mm l ong M1 2 ×1 .75 φ 114.3 6- M8×1.
- Page 112 5-17-3 H i gash itokorozawa,Tokorozawa, Sa i tama 359-0021, Japan P h o n e +81-4-2944-4141 ( International ) https://www.vixen.co.j p F a x +81-4-2944-9722 ( International ) 68 キ -9-0.5S-730- (Miz) (K) (M)...
Need help?
Do you have a question about the SXD2 and is the answer not in the manual?
Questions and answers