Philips BT9295 User Manual
Hide thumbs
Also See for BT9295:
- User manual (175 pages) ,
- Important information manual (10 pages) ,
- User manual (146 pages)

Related Manuals for Philips BT9295


Summary of Contents for Philips BT9295
- Page 1 Always here to help you Register your product and get support at www.philips.com/welcome BT9295 BT9290 BT9280 User manual...
- Page 3 ENGLISH 4 EESTI 37...
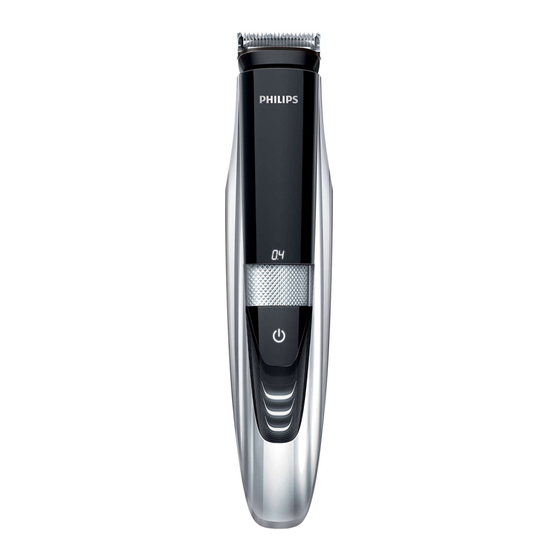
- Page 4 ENGLISH Introduction Congratulations on your purchase and welcome to Philips! product at www.philips.com/welcome. General description (Fig. 1) Precision trimming comb Standard trimming comb Turnable trimming head Laser guide Guiding groove for trimming comb Length setting display Zoom wheel for length setting...
- Page 5 The appliance complies with the internationally approved IEC safety regulations and can be safely cleaned under the tap. This Philips appliance complies with all applicable standards and Class 1 laser product The product contains a class 1 laser guide which complies with IEC60825-1.
- Page 6 ENGLISH At this point the battery contains enough energy for one cordless trimming session. show that the charge level of the battery increases. , When the appliance is fully charged, all battery lights light up solid white. battery lights go out after 30 minutes. Battery low and battery empty signals , When the battery is almost empty, the bottom battery light starts higher frequency when the battery is empty and if you:...
- Page 7 ENGLISH Using the appliance sideburns). This appliance is not intended for trimming lower body parts or scalp hair. Trimming with the laser guide and moustache. The laser guide can be used with the 32mm (1.25in) side as well as the 15mm (0.6in) side of the trimming head. Note: The laser guide can only be used when you trim without comb.
- Page 8 ENGLISH and use the laser guide to guide you during trimming. Tip: Hold the appliance so that the laser light shines exactly on the edge you want to trim and then place the trimming head on your skin. appliance. Tip: When the motor of the appliance is not operating, the laser guide switches off automatically within 3 minutes.
- Page 9 ENGLISH Press the on/off button to switch on the appliance. Hold the appliance in the position that is most convenient for the area you want to trim and make strokes in the desired direction. trimming head against your skin and make strokes in the desired direction. appliance.
- Page 10 ENGLISH Press the on/off button to switch on the appliance. To trim your beard, move the trimming comb through the hair slowly. appliance. Tips Always make sure that the tips of the trimming comb point in the direction in which you move the appliance. contact with the skin to obtain an even hair length result.
- Page 11 ENGLISH Cleaning the appliance and the combs Switch off the appliance. Pull the comb off the trimming head. Clean the trimming head under the tap with lukewarm water or clean it with the cleaning brush supplied. Clean the trimming combs under the tap or clean them with the cleaning brush supplied.
- Page 12 Clean the inside of the trimming head with the cleaning brush supplied. After cleaning, put the trimming head back onto the appliance. Ordering accessories www.shop.philips.com/service or go to your Philips dealer. You can also contact the Philips Consumer contact details). Guarantee and support www.philips.com/support Environment...
- Page 13 ENGLISH Frequently asked questions Question Answer Is the laser light harmful to my eyes? the light directly into your eyes. I cannot turn the You have to push the laser guide to ‘off ’ position before you can turn the trimming head.
- Page 14 ENGLISH Question Answer Why don’t I see a The laser light from the laser guide may be interrupted because: straight uninterrupted laser line? The laser window of the laser guide is dirty. Pop up the laser guide and wipe the laser window clean with a cloth. There is condensation behind the laser window.
- Page 15 www.philips.com/welcome.
- Page 23 www.philips.com/support...
- Page 26 Úvod výrobek na adrese www.philips.com/welcome. Všeobecný popis (Obr. 1) Kontrolky baterie situace.
- Page 27 aceton. Hladina hluku: Lc = 65 dB (A) Soulad s normami IEC60825-1.
- Page 30 rovné. strana.
- Page 32 Tipy aceton.
- Page 34 Záruka a podpora Philips www.philips.com/support...
- Page 36 laserovou linku?
- Page 37 EESTI paremaks kasutamiseks registreerige oma toode saidil www.philips.com/ welcome. Täppispiirlikamm Tavaline piirlikamm Pööratav piirlipea Laser Pikkuseseadete ekraan Pikkuseseadete reguleerimisratas Aku märgutuled 10 Väikese pistiku pesa 11 Adapter 12 Väike pistik 14 Vutlar (ainult mudelitel BT925/BT9290) Tähtis edaspidiseks alles. Hoidke adapterit kuivana.
- Page 38 EESTI originaalvaruosa vastu. abrasiivseid puhastusvahendeid ega ka sööbivaid vedelikke nagu bensiin või atsetoon. Müratase: Lc = 65 dB (A) Vastavus standarditele võib ohutult pesta voolava vee all. See Philipsi seade vastab kõikidele kokkupuudet elektromagnetiliste 1. klassi lasertoode vaadake otse laserkiire sisse. Laadimine Enne esmakasutust või pärast pikaaegset kasutamata seismist laadige seadme aku täielikult täis.
- Page 39 EESTI Umbes 3 minuti järel hakkab alumine aku märgutuli ainult valgelt vilkuma. Nüüd on akus piisavalt energiat, et seda juhtmevabalt ühe korra kasutada. Kui laadimisprotsess jätkub, hakkab rohkem tulesid vilkuma, mis näitab, et aku laetuse tase suureneb. Kui seade on täis laetud, jääb aku märgutuli ainult valgelt põlema. vilkuma.
- Page 40 EESTI Seadme kasutamine piiramiseks. Laseriga piiramine Märkus. Laserit saab kasutada ainult ilma kammita. Laseriga piiramiseks vajutage laseri peale, et see sisse lülitada. Laser hüppab välja ja valgus paistab üle piirlipea. Märkus. Kui te kasutate piirlit koos laseriga, lülitage laser kindlasti asendisse...
- Page 41 EESTI Alustage piiramist sealt, kus te soovite oma habet piirata ja kasutage abivahendina laserit. välja lülitada. lülitub. klõpsatust). Piiramine ilma kammita tolli) pikkune külg. Kui üks kammidest on ikka piirlipea küljes, tõmmake see seadme küljest ära. Ärge kunagi tõmmake kammi painduvast osast hoides. Tõmmake alati alumist osa.
- Page 42 EESTI Hoidke seadet asendis, mis on selle piirkonna jaoks kõige mugavam ning liigutage seadet soovitud suunas. välja lülitada. Piiramine kammiga kammid hoiavad piirlipead teie nahast teatud kaugusel. See kaugus määrab Kasutage habeme piiramiseks tavalist kammi. Lükake kulmukamm seadme kummalgi küljel olevatesse juhtsoontesse (kuulete klõpsatust).
- Page 43 EESTI Habeme piiramiseks liigutage piirlikammi aeglaselt läbi karvade. välja lülitada. Näpunäiteid suunas. alati täielikult vastu nahka. Pikkuseseaded Puhastage seadet alati pärast kasutamist. Ärge kunagi kasutage seadme puhastamiseks suruõhku, küürimiskäsna, abrasiivseid puhastusvahendeid ega ka sööbivaid vedelikke nagu bensiin või atsetoon.
- Page 44 EESTI Lülitage seade välja. Tõmmake kamm piirlipea küljest ära. Loputage piirlipead kraanivee all või kasutage kaasasolevat puhastusharja. Loputage piirlikamme kraanivee all või kasutage kaasasolevat puhastusharja. Piirlipea ühenduse puhastamine Märkus. Hoolitsege selle eest, et puhastate piirlipea ühendust vähemalt kord Lülitage seade välja. Tõmmake kamm piirlipea küljest ära.
- Page 45 Tarvikute või varuosade ostmiseks külastage veebilehte www.shop.philips.com/service või pöörduge oma Philipsi klienditeeninduskeskusega (vt kontaktandmeid üleilmselt garantiilehelt). www.philips.com/support või lugege läbi üleilmne garantiileht. Nii toimides aitate te hoida loodust. kogumispunkti viimist eemaldage alati seadmest akud. Akud tuleb utiliseerimiseks viia ametlikku akude kogumispunkti. Kui teil ei õnnestu...
- Page 46 EESTI Küsimus Vastus Kas laser on mu silmadele Ma ei saa piirlipead keerata. Miks? Kas seadet tohib voolava vee all puhastada? Miks ei sobi kamm piirlipeasse? esiosa poole. Kui kamm ei mahu: Mille poolest kammid Tavaline kamm sobib habeme ühtlaseks piiramiseks. Täppiskamm sobib eriti üksteisest erinevad? Miks ma ei näe laseri valgust?
- Page 47 Uvod www.philips.com/welcome. Laserska vodilica 11 Adapter 14 Torbica (samo BT925/BT9290) Opasnost Oprez...
- Page 48 Sukladnost standardima Laserski proizvod klase 1 Priprema za uporabu bijelo.
- Page 49 podrezivanje. postojano svijetliti bijelo. ako je baterija prazna i ako: aktivirate lasersku vodilicu...
- Page 50 Uporaba Kako biste podrezivali s laserskom vodilicom, pritisnite njezin vrh podrezivanje.
- Page 51 s nje. strane. bude usmjerena prema prednjem dijelu aparata.
- Page 53 benzina ili acetona.
- Page 54 Povucite glavu za podrezivanje s aparata.
- Page 55 Zaštita okoliša Pitanje Odgovor Ne mogu okrenuti glavu Mogu li aparat prati pod...
- Page 56 Pitanje Odgovor lasersku vodilicu? Koliko vremena treba da se aparat Zašto ne vidim ravnu...
- Page 57 11 Adapter Fontos! Vigyázat! lehet.
- Page 58 fali aljzatba.
- Page 59 Csatlakoztassa az adaptert a fali konnektorba.
- Page 61 szimmetrikus vagy egyenes-e.
- Page 62 keresztül.
- Page 63 Tippek:...
- Page 65 Nem tudom elforgatni a...
- Page 66 Mennyi ideig tart a automatikusan kikapcsol.
- Page 78 Bendrasis aprašymas (Pav. 1) Standartinio kirpimo šukos Ilgio nustatymo ekranas 11 Adapteris 14 Laikymo krepšelis (tik BT925/BT9290) Svarbu originalaus tipo adapteriu.
- Page 79 Triukšmo lygis: Lc = 65 dB (A) IEC60825-1. po ilgos pertraukos. balta spalvomis.
- Page 80 spalva. Tuo metu baterijoje yra pakankamai energijos plaukams nuolat degti balta spalva.
- Page 81 plaukus.
- Page 82 srities plaukus ir braukti norima kryptimi.
- Page 84 Patarimai Ilgio nustatymai acetono.
- Page 86 Klausimas Atsakymas akims? Negaliu pasukti kirpimo...
- Page 87 Klausimas Atsakymas Kuo skiriasi šukos? šviesos? Kiek laiko reikia krauti vienam kirpimui.
- Page 88 Ievads www.philips.com/welcome. 11 Adapteris Briesmas...
- Page 89 vai acetonu. Sagatavošana lietošanai...
- Page 91 matu apgriešanai.
- Page 92 simetriskas vai taisnas.
- Page 94 Padomi vai acetonu.
- Page 96 Vide...
- Page 97 Atbilde gaismu? vadotnes augšpuses. augšpuses.
- Page 98 Atbilde...
- Page 99 Wprowadzenie www.philips.com/welcome. Opis ogólny (rys. 1) Prowadnica laserowa Uwaga...
- Page 100 Produkt z laserem klasy 1 IEC60825-1. 60 minut. elektrycznego.
- Page 101 energii na jedno bezprzewodowe przycinanie. akumulatora. akumulatora przypadku:...
- Page 103 Przycinanie bez nasadki boki.
- Page 104 odpowiednim kierunku. brody.
- Page 105 Wskazówki takich jak benzyna lub aceton.
- Page 106 pomieszczeniu.
- Page 107 Zamawianie akcesoriów www.shop.philips.com/service www.philips.com/support...
- Page 108 Pytanie np. pod nosem.
- Page 109 Pytanie lasera?
- Page 110 Introducere www.philips.com/ welcome. Pieptene standard pentru tundere Cap de tundere rotativ Butonul Pornit/Oprit Leduri baterie 11 Adaptor 12 Conector mic Important Pericol...
- Page 111 pentru a evita orice accident. Conformitatea cu standardele Produs laser din clasa 1 cu IEC60825-1. 60 de minute.
- Page 112 baterie se aprind alb continuu. Utilizarea cu cablu...
- Page 113 Utilizarea aparatului perciunilor). Acest aparat nu este destinat pentru a rade sau a tunde partea cu cea de 15 mm a capului de tundere.
- Page 114 pielea dvs. aparatul. de 32 mm.
- Page 115 aparatul. Tunderea cu pieptenele...
- Page 116 aparatul. Sugestii...
- Page 118 Comandarea accesoriilor www.shop.philips.com/service de contact). web Philips la www.philips.com/support duce aparatul la un centru de service Philips. Personalul de la acest...
- Page 119 Întrebare Lumina laserului este Nu pot roti capul de tundere. De ce? capul de tundere. pieptenele pe capul de tundere? dintre piepteni? lumina laserului? acestuia. aparatul pentru doar o sesiune de tuns?
- Page 120 Întrebare...
- Page 121 www.philips.com/welcome.
- Page 129 www.shop.philips.com/service...
- Page 130 www.philips.com/support...
- Page 132 Úvod www.philips.com/welcome. Opis zariadenia (Obr. 1) Varovanie Výstraha...
- Page 133 Výrobok s laserom triedy 1 normou IEC60825-1.
- Page 134 na jedno ostrihanie bez pripojenia do siete.
- Page 136 vytiahnite ho.
- Page 138 Tipy acetón.
- Page 139 Vypnite zariadenie. raz za tri mesiace. Vypnite zariadenie.
- Page 140 Záruka a podpora www.philips.com/support alebo si...
- Page 141 vodou. svetlo?
- Page 142 alebo priestoru. ostrihanie?
- Page 143 Uvod www.philips.com/welcome. Splošni opis (Sl. 1) Lasersko vodilo 11 Adapter Pomembno Nevarnost Opozorilo Previdno...
- Page 144 Raven hrupa: Lc = 65 dB(A) Skladnost s standardi Laserski izdelek razreda 1 IEC60825-1. Priprava za uporabo napolnite.
- Page 145 prirezovanje. belo. ko je baterija prazna in ko: vklopite lasersko vodilo. Za vklop aparata pritisnite gumb za vklop/izklop.
- Page 146 Uporaba aparata glavnika. Za vklop aparata pritisnite gumb za vklop/izklop. vodila, da ga vklopite. prirezovalne glave. si med prirezovanjem pomagajte z laserskim vodilom.
- Page 147 Pritisnite na vrh laserskega vodila, da ga zaklenete na izklopljeni sprednjemu delu aparata. Za vklop aparata pritisnite gumb za vklop/izklop.
- Page 148 primer pod nosom. obrnite prirezovalno glavo, preden glavnik namestite na prirezovalno glavo. Za vklop aparata pritisnite gumb za vklop/izklop. dlake.
- Page 149 Nasveti Aparat izklopite. Povlecite glavnik s prirezovalne glave.
- Page 150 Namig: Da bo aparat res suh, preden ga pospravite v torbico, ga pustite, da se Aparat izklopite. Povlecite glavnik s prirezovalne glave. Prirezovalno glavo povlecite z aparata.
- Page 151 Odgovor Lahko laserska svetloba Ne morem obrniti...
- Page 152 Odgovor glavo? namestite glavnik. glavnikoma? svetlobe? da ga vklopite. vklopite. vodilo?
- Page 153 Uvod www.philips.com/welcome. Opšti opis (Sl. 1) 11 Adapter Opasnost Neka adapter bude suv. opasnosti. Oprez povrede.
- Page 154 opasnost. Laserski proizvod klase 1 Pre upotrebe belo.
- Page 155 Kada je aparat potpuno napunjen, svi indikatori baterije stalno svetle belo. kada je baterije prazna i ako:...
- Page 156 Upotreba aparata tela niti kose. podrezivanje.
- Page 157 bude okrenuta ka prednjoj strani aparata.
- Page 158 smeru. primer ispod nosa.
- Page 159 Saveti u kom pomerate aparat. benzin ili aceton.
- Page 160 meseca. Skinite glavu za podrezivanje sa aparata.
- Page 161 Philips na adresi www.philips.com/support garantni list. Zaštita okoline...
- Page 162 Pitanje Odgovor Ne mogu da okrenem Zašto? vode. Zašto ne mogu da vidim svetlo lasera? Zašto ne mogu da vidim...
- Page 163 Pitanje Odgovor...
- Page 164 www.philips.com/welcome.
- Page 172 Philips www.philips.com/support...
- Page 175 8222.002.0051.1...
Need help?
Do you have a question about the BT9295 and is the answer not in the manual?
Questions and answers