Anritsu Rubidium MG362 1A Series Operation Manual
Low-noise rf/microwave signal generators
Hide thumbs
Also See for Rubidium MG362 1A Series:
- Maintenance manual (294 pages) ,
- Operation manual (164 pages) ,
- Maintenance manual (276 pages)
Table of Contents
Advertisement
Quick Links
Advertisement
Table of Contents

Subscribe to Our Youtube Channel
Related Manuals for Anritsu Rubidium MG362 1A Series


Summary of Contents for Anritsu Rubidium MG362 1A Series
- Page 1 Operation Manual Rubidium™ MG362x1A Series Low-Noise RF/Microwave Signal Generators MG36221A, 9 kHz to 20 GHz MG36241A, 9 kHz to 43.5 GHz Anritsu Company P/N: 10370-10383 490 Jarvis Drive Revision: A Morgan Hill, CA 95037-2809 Printed: April 2022 Copyright 2022 Anritsu Company...
- Page 2 Anritsu Company. Export Management The Anritsu products identified herein and their respective manuals may require an Export License or approval by the government of the product country of origin for re-export from your country. Before you export these products or any of their manuals, please contact Anritsu Company to confirm whether or not these items are export-controlled.
-
Page 3: Table Of Contents
1-12 Contacting Anritsu for Sales and Service ........ - Page 4 Table of Contents (Continued) 2-11 Entering Data ............. 2-14 Opening a Parameter .
- Page 5 Table of Contents (Continued) Frequency Step Sweep Operation ..........3-7 SWEEP Menu .
- Page 6 Table of Contents (Continued) 3-15 Amplitude Modulation ............3-44 Setting AM SOURCE.
- Page 7 Table of Contents (Continued) Power Level Accuracy Test Procedure......... . . 4-6 Power Level Flatness Test Procedure .
- Page 8 Table of Contents (Continued) PN: 10370-10383 Rev. B MG362x1A OM...
-
Page 9: Chapter 1 - General Information
Chapter 1 — General Information About this Guide This manual provides general information, installation, and operating information for the Anritsu series MG362x1A synthesized signal generator. Throughout this manual, the terms MG362x1A, signal generator, and synthesizer will be used interchangeably to refer to the instrument. -
Page 10: Description
The MG362x1A is tested with most common antivirus software, but stability is not guaranteed with all anti- virus software. Anritsu recommends connecting the instrument only to a secure network. The user assumes the responsibility to provide virus protection because this is not supplied with the instrument. Contact your network administrator for information about your network security and antivirus protection policies. -
Page 11: Esd Caution
JEDEC-625 (EIA-625), MIL-HDBK-263, and MIL-STD-1686, which pertain to ESD and ESDS devices, equipment, and practices. Because these apply to the MG362x1A, Anritsu recommends that any static charges that may be present be dissipated before connecting coaxial cables to the signal generator. It is important to remember that the operator may also carry a static charge. -
Page 12: 1-10 Typographic Conventions
1-10 Typographic Conventions General Information 1-10 Typographic Conventions Sequential menu successions are presented as a string of actions separated with a vertical pipe. For example, to trigger a level-sweep: Press: SWEEP | LEVEL | TRIGGER PN: 10370-10383 Revision D MG362x1A... -
Page 13: Preparation For Storage/Shipment
To provide maximum protection against damage in transit, the signal generator should be repackaged in the original shipping container. If this container is no longer available and the unit is being returned to Anritsu for repair, advise Anritsu Customer Service; they will send a new shipping container free of charge. In the event neither of these two options is possible, instructions for packaging and shipment are detailed on the next page. - Page 14 1-12 Contacting Anritsu for Sales and Service General Information PN: 10370-10383 Revision D MG362x1A...
-
Page 15: Chapter 2 - Instrument Overview
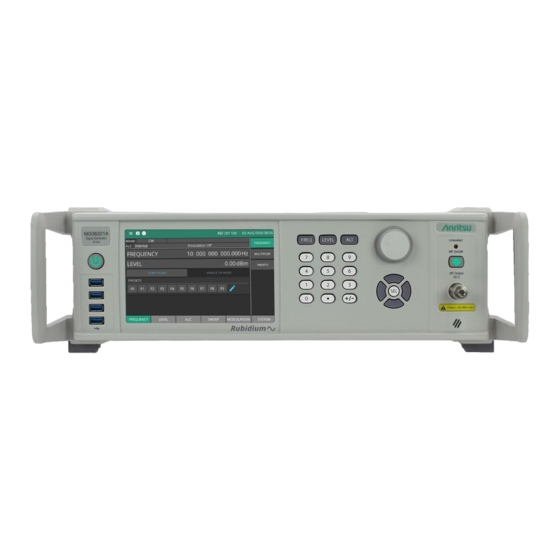
Chapter 2 — Instrument Overview Introduction This chapter provides an overview of the Anritsu MG362x1A signal generator. It describes the instrument hardware features, touch screen display, general system settings and instrument configurations, and the connector panels. Front Panel The MG362x1A front panel is divided into two main areas—the Graphical User Interface (GUI) and the data entry area. -
Page 16: Front Panel Controls
2-2 Front Panel Instrument Overview Front Panel Controls The value of a selected MG362x1A parameter can be changed using the numeric keypad, arrow hard buttons, or rotary data knob. The data entry area is identified in Figure 2-2 and described in the following paragraphs. 1. -
Page 17: Numeric Keypad
N-Type Connector: Torque to 0.9 N-M (8in-lb) for standard N connectors using Anritsu Model 01-203 13/16 in Torque End Wrench. K (2.92 mm) Connector: Torque to 0.9 Nm (8 lbf·in) using Anritsu Model 01-201 5/16 in Torque End Wrench and Anritsu Model 01-204 - 8 mm (5/16 in) Open End Wrench. -
Page 18: Rear Panel
2-3 Rear Panel Instrument Overview Rear Panel This section provides descriptions for the rear panel connectors on a typical Series MG362x1A RF/Microwave signal generator. Table 2-1 provides an overview of the MG362x1A rear panel. Note Connectors are option dependent. Table 2-1. Rear Panel Overview 10 MHz 100 MHz... -
Page 19: Rear Panel Bncs
Instrument Overview 2-3 Rear Panel Rear Panel BNCs The MG362x1A rear panel BNCs are described in Figure 2-4. 10 MHz 100 MHz 1600 MHz AM OUT FM OUT LOCKED/LEVELED EXT ALC REF IN REF IN REF IN 10 MHz 100 MHz 1600 MHz HORIZ OUT EXT TRIG... - Page 20 2-3 Rear Panel Instrument Overview PULSE IN: Accepts an external TTL compatible signal to pulse modulate the RF output signal or to trigger or to gate the optional internal pulse generator. Enabled with Option 0026. BNC type, rear panel 100 MHZ REF IN: Accepts an external 100 MHz ± 200 Hz or 2 ppm 12 ± 1 dBm (20 dBm no-damage level) reference signal.
-
Page 21: Installation And Power Requirements
This automatically places the signal generator into operation (front panel green Operate LED on). During power on and power down, the orange LED blinks for five to ten seconds. KCC-REM-A2J-0004 CAN ICES-1(A)/NMB-1(A) Anritsu Company 490 Jarvis Drive Morgan Hill, CA 95037-2809 10 MHz... -
Page 22: Standby Mode
2-5 Powering On the MG362x1A Instrument Overview Power on the signal generator. The front panel display is shown as in Figure 2-6 during power-on. The power on sequence shows the loading internal programs status-bar, the model number of the signal generator, the options installed, and the revision level of the installed firmware. -
Page 23: Common Gui Controls
Instrument Overview 2-6 Common GUI Controls Common GUI Controls In addition to the touch gestures described in the previous section, the following lists the most common controls that you will encounter when working with the Rubidium signal generator. 3-Line Icon: The toolbar's 3-line icon provides access to the MG362x1A system operation parameters. -
Page 24: Gui Overview
2-7 GUI Overview Instrument Overview GUI Overview The MG362x1A software controls all instrument functions. The software runs locally on the instrument. The User Interface provides the parameter settings and menu buttons as shown in Figure 2-8, which are each described in more detail later in this chapter. 1. -
Page 25: Title Bar
Instrument Overview 2-8 Title Bar Title Bar The title bar is located at the top of the interface screen. It displays icons that provide access to information and user actions as described below. All of the icons are active and will open the appropriate menu or item when touched. -
Page 26: Menu Buttons
2-9 Menu Buttons Instrument Overview Menu Buttons There main menu buttons are shown in Figure 2-10. FREQUENCY: Contains the frequency control settings: FREQUENCY, and PRESETS menus. See “FREQUENCY Menu” on page 3-3. LEVEL: Contains the level control settings: LEVEL, SETUP, ATTENUATOR, OFFSET, and PRESETS menus. See “LEVEL Menu”... -
Page 27: 2-10 Status Area
Instrument Overview 2-10 Status Area 2-10 Status Area The status area of the GUI provides a summary of instrument settings. Status text is displayed only if the condition is active. 1. Sweep Mode Panel 2. Error Message Panel 3. Modulation Mode Panel 4. -
Page 28: Entering Data
2-11 Entering Data Instrument Overview 2-11 Entering Data Entering data refers to changing a parameter's value by editing its current value or entering a new value to replace the current value. The following instructions describe how to open a parameter, edit its current value, and enter a new value. -
Page 29: Opening A Parameter
Instrument Overview 2-11 Entering Data Opening a Parameter Open a parameter for editing by pressing a function from the main menu. In the following example, to open the frequency function, press FREQUENCY. The menu display changes to show that the frequency parameter has been opened as shown in Figure 2-13. - Page 30 2-11 Entering Data Instrument Overview Figure 2-14. Edit Parameter Display 2-16 PN: 10370-10383 Rev. B MG362x1A OM...
- Page 31 Instrument Overview 2-11 Entering Data Termination Buttons Termination buttons are used to terminate keypad data entries and change the parameter values in memory. As shown on the left, termination soft buttons are located on the right side of the menu display. If the entered value is outside the allowable range of the open parameter, an error message will be displayed along with an audible “beep.”...
-
Page 32: Text Entry
2-11 Entering Data Instrument Overview Text Entry When an instrument function requires you to enter text, such as entering an Ethernet hostname, a touch screen alphabetic keyboard is displayed. See Figure 2-15. Press the “?123” button to toggle to the digits and symbols keyboard. - Page 33 Instrument Overview 2-11 Entering Data To change a key’s value: 1. Press the pencil (edit) button. The EZ buttons will become highlighted. Figure 2-17. Touch Screen EZ Keyboard 2. Press the button to be edited. This will display the standard keyboard for entering a new EZ key value. Figure 2-18.
-
Page 34: 2-12 System Menu
2-12 System Menu Instrument Overview 2-12 System Menu Press the 3-Line Icon to displays the System menu shown in Figure 2-19. HOSTNAME/IP ADDRESS: This field is used to specify the IP address or hostname of an instrument that is connected to the network. When localhost is toggled on, the software will connect locally to provide some UI functionality. -
Page 35: System Information
The INSTRUMENT menu is shown in Figure 2-20. Press: 3-Line Menu| SYSTEM INFORMATION | INSTRUMENT Manufacturer: The manufacturer name - Anritsu Options: Displays the options that are installed Serial Number: The serial number of the instrument CPU Temperature: Displays the current instrument internal CPU temperature... -
Page 36: Software Menu
2-12 System Menu Instrument Overview SOFTWARE Menu Click SOFTWARE to view the screen shown in Figure 2-21. Package Version: Displays the current version software installed. Boot Version: Provides the boot version. Front Panel Version: Provides the front panel software version. Client Version: Provides the client version. -
Page 37: Connectivity Menu
Instrument Overview 2-12 System Menu CONNECTIVITY Menu Click Connectivity to view the network settings screen shown in Figure 2-22 IP Type: There are two primary types of IP address formats used today, IPv4 and IPv6 Gateway: A TCP/IP network can have a gateway to communicate beyond the LAN identified by the network ID. A gateway is a computer or electronic device that is connected to two different networks and can move TCP/IP data from one network to the other. -
Page 38: 2-13 Settings Menu
2-13 SETTINGS Menu Instrument Overview 2-13 SETTINGS Menu The system Settings menu provides access to all instrument system-level settings such as network, GPS/GNSS, date and time, and display. Press: 3-Line Icon | SETTINGS. DISPLAY: “DISPLAY Settings” on page 2-25. SOUND: “SOUND Settings”... -
Page 39: Display Settings
Instrument Overview 2-13 SETTINGS Menu DISPLAY Settings The display can be adjusted as shown in Figure 2-24. Press: 3-Line Icon | SETTINGS | DISPLAY BRIGHTNESS: Use the scrollbar to adjust the display brightness. DIM DISPLAY AFTER: Set up to 15 minute idle time settings. Select Never will keep the display illuminated for as long as the instrument remains powered on. -
Page 40: Ethernet Settings
2-13 SETTINGS Menu Instrument Overview ETHERNET Settings From the Settings menu, press Ethernet to display the screen shown in Figure 2-26. Refer to “Network Settings” on page 2-27 for general network setup and information. Press: 3-Line Icon | SETTINGS | ETHERNET If an active Ethernet cable is connected to the instrument while it is turned on, a reboot may be Note required to establish a DHCP connection. -
Page 41: Network Settings
Instrument Overview 2-13 SETTINGS Menu Network Settings The MG362x1A fully supports the IEEE-802.3 standard. Most MG362x1A front panel functions (except power on/off) can be remotely controlled via a network server and an Ethernet connection. The MG362x1A software supports the TCP/IP network protocol. Ethernet uses a bus or star topology where all of the interfacing devices are connected to a central cable called the bus, or are connected to a hub. - Page 42 2-13 SETTINGS Menu Instrument Overview Network Connection Interface between the instrument and other devices on the network is via a category five (CAT-5) interface cable connected to a network. This cable uses four twisted pairs of insulated copper wires terminated into an RJ45 connector.
-
Page 43: 2-14 Connecting To The Mg362X1A Or Localhost
This interconnection is via a standard GPIB cable. The Anritsu part number for GPIB cables of proper length is 2100-1, -2, or -4 (1, 2, or 4 meters in length). The GPIB can accommodate up to 15 instruments at any one time. To achieve design performance on the bus, proper timing and voltage level relationships must be maintained. - Page 44 2-15 Remote Programming Setup and Interface Instrument Overview Type the new GPIB address and then press the ENTER button. GPIB: Select the address of the MG362x1A on the bus. Enter a new address, between one and 30. The new GPIB address will appear on the display.
-
Page 45: Screenshot Settings
Instrument Overview 2-15 Remote Programming Setup and Interface SCREENSHOT Settings SCREENSHOT menu provides setup and file saving parameters. The screenshot is saved in a internally or a users set file location Press: 3-Line Icon | SETTINGS | SCREENSHOT. Screenshots can be previewed and retrieved from the instrument display. See“”... -
Page 46: Previewing Screenshots
2-15 Remote Programming Setup and Interface Instrument Overview Previewing Screenshots While in File Manager, you can preview screenshots on the instrument display simply by touching the screenshot file name. While the preview is displayed, you can use the controls to: •... -
Page 47: Date Time Settings
Instrument Overview 2-15 Remote Programming Setup and Interface DATE TIME Settings Set the current date, time, and the time zone. Press: 3-Line Icon | SETTINGS | DATE TIME Settings: Date and Time: Manually set or Automatically synchronized. Set Manually to activate the MANUAL DATE TIME window. Here you can scroll to a selectable year, month, day, hour, and minute. -
Page 48: Options Settings
2-15 Remote Programming Setup and Interface Instrument Overview OPTIONS Settings Select OPTIONS to display the list of currently installed software options on the left pane and those that are available for installation on the right pane as shown in Figure 2-31. -
Page 49: Reset Menu
Instrument Overview 2-15 Remote Programming Setup and Interface RESET Menu The RESET menu is shown in Figure 2-32. Press: 3-Line Icon | SETTINGS | RESET SETTINGS RESET: FACTORY RESET: Restores the instrument to the factory default settings for all measurement modes and system settings, including language and the display and audio settings. -
Page 50: Resetting To Default Parameters
2-15 Remote Programming Setup and Interface Instrument Overview Resetting to Default Parameters You can reset the MG362x1A to the factory-selected default parameter values at any time during normal operation. To reset to Factory Reset, refer to “RESET Menu” on page 2-35. -
Page 51: 2-16 Files Menu
Instrument Overview 2-16 FILES Menu 2-16 FILES Menu Click the FILES Menu to save to a default file location in the local drive or to a user defined file location. Press: 3-Line Icon | FILES File Management The file management toolbar appears when in the FILES menu and a file is selected. Access the System menu from the 3-Line Icon in the upper left corner. -
Page 52: 2-17 Diagnostics Menu
2-17 DIAGNOSTICS Menu Instrument Overview Copy: Use the Copy icon to select files and folders to copy to a new location. Select the items you wish to copy, then press Copy to store the items on the clipboard. Navigate to the new location and press the Clipboard icon to paste the items. -
Page 53: Self Test
Instrument Overview 2-17 DIAGNOSTICS Menu SELF TEST The MG362x1A firmware includes internal diagnostics that self-test the instrument. Self-test performs a diagnostics of most of the PCBs and other internal assemblies. During self- test with RF OUTPUT set to ON, the output power level is set to 0 dBm. Always Caution disconnect sensitive equipment from the unit before performing a self test. - Page 54 2-17 DIAGNOSTICS Menu Instrument Overview Figure 2-38. SELF TEST Failed Self Test Results When Self Test is performed, a comprehensive status log of the measurement results can be viewed as shown Figure 2-39 on page 2-41. The results that are displayed for each module are option dependent. Self-test status results will be provided for each option installed.
-
Page 55: Service Mode
“SelfTest___2021-08-18-09-21-48.log (yyyy-mm-dd- hr-min-sec). The file name and location can be changed and saved per the user’s discretion. Figure 2-39. Self Test Status Log SERVICE Mode The SERVICE mode is for Anritsu Customer Service use only. Press: 3-Line Icon | DISGNOSTICS | SERVICE Figure 2-40. SERVICE Menu MG362x1A OM PN: 10370-10383 Rev. - Page 56 2-17 DIAGNOSTICS Menu Instrument Overview 2-42 PN: 10370-10383 Rev. B MG362x1A OM...
-
Page 57: Chapter 3 - Instrument Operation
Chapter 3 — Instrument Operation Introduction This chapter provides a brief overview of the Anritsu MG362x1A signal generator real-time operation and to provide a starting point for making basic measurement setups. This chapter describes general instrument operation including setting frequency, power level, modulation, sweep applications, and system configurations. -
Page 58: Self Testing The Mg362X1A
3-4 Self Testing the MG362x1A Instrument Operation Self Testing the MG362x1A The MG362x1A firmware includes internal diagnostics that self test the instrument. These self-test diagnostics perform a brief functionality test of most of the PCBs and other internal assemblies. For more on performing self test and viewing the results, see “Self-Test Messages”... -
Page 59: Cw Frequency Operation
Instrument Operation 3-6 CW Frequency Operation CW Frequency Operation This section describes how to place the MG362x1A in the CW frequency mode, select a CW frequency and power level for output. When the signal generator is PRESET, it automatically comes up operating in the CW frequency Note mode. - Page 60 3-6 CW Frequency Operation Instrument Operation FREQUENCY: Press to type or edit a CW frequency. MG36221A Range: 9kHz to 20 GHz MG36241A Range: 9kHz to 43.5 GHz LEVEL: Press to type or edit a power level. Range: –130 dBm to 33 dBm with step attenuator; –20 to 33 dBm without step attenuator COPY TO LIST: Copies the set frequency and level parameters to the LIST menu.
- Page 61 Instrument Operation 3-6 CW Frequency Operation Figure 3-5. Frequency Entered MG362x1A OM PN: 10370-10383 Rev. B...
-
Page 62: Frequency Presets Menu
3-6 CW Frequency Operation Instrument Operation FREQUENCY PRESETS Menu To select one of the preset frequencies for output, press the PRESETS button or press the Edit icon displayed in the Frequency menu shown in Figure 3-5. Press: FREQUENCY | PRESETS The PRESETS menu displays the settable frequencies shown in Figure 3-6. -
Page 63: Frequency Step Sweep Operation
Instrument Operation 3-7 Frequency Step Sweep Operation Frequency Step Sweep Operation In step sweep frequency mode, the output frequency changes in discrete, synthesized steps between the selected start and stop frequencies. Step sweeps can start from a low frequency to a high frequency or from a high frequency to a low frequency. -
Page 64: Summary Menu
3-7 Frequency Step Sweep Operation Instrument Operation SUMMARY Menu The SUMMARY Menu provides the MG362x1A Sweep On or Off status for Step Sweep, List Sweep, Level Sweep. Note the status bar displays CW when the Sweep menus are all off. Once a sweep menu is selected, the status bar will display the sweep that is selected. -
Page 65: Step Sweep Setup Menu
Instrument Operation 3-7 Frequency Step Sweep Operation Step Sweep SETUP Menu Pressing STEP from the SWEEP menu displays the SETUP menu. When the STEP SWEEP button is toggled on, the status bar displays Step Sweep - Single. Note that the sweep displayed at the status bar is dependent on the sweep selected in the TRIGGER menu. -
Page 66: Setting The Step Size
3-7 Frequency Step Sweep Operation Instrument Operation Setting the Step Size Press STEP SIZE to open the step size parameter. Open the parameter you wish to change, then edit the current value using the cursor control keys, the rotary data knob or enter a new value using the key pad and appropriate termination soft key. When you have finished setting the open parameter, close it by pressing its menu soft key or make another menu selection. -
Page 67: Setting Sweep Direction
Instrument Operation 3-7 Frequency Step Sweep Operation Setting SWEEP DIRECTION Sets the direction of the sweep as forward or reverse Up = Forward Sweep. Initiates the frequency sweep from the start frequency to stop frequency direction. Down = Reverse Sweep. Initiates the frequency sweep from the stop frequency to start frequency direction. Setting PRESET SWEEP RANGES To set the sweep range frequency parameters: Press: SWEEP | STEP | PRESET SWEEP RANGE.S... -
Page 68: Range Menu
3-7 Frequency Step Sweep Operation Instrument Operation RANGE Menu The STEP RANGE menu provides frequency parameter range settings. The RANGE menu is shown in Figure 3-9. Press: SWEEP | STEP | RANGE F1-F2: Frequency preset parameters. Sets as a pair when setting a sweep. F3-F4: Frequency preset parameters. -
Page 69: Starting A Step Sweep
Instrument Operation 3-8 Starting a Step Sweep Starting a Step Sweep Step sweep is initiated when the trigger sweep button is pressed as described below. TRIGGER Menu The TRIGGER menu is shown in Figure 3-10. Press: SWEEP | STEP | TRIGGER.| TRIGGER TRIGGER: Press to display the trigger types: Auto, Single, External, Manual, and Remote shown in Figure 3-12 on page... -
Page 70: Sweep Trigger Types
3-8 Starting a Step Sweep Instrument Operation Sweep TRIGGER TYPES Set the sweep type to generate. Press the TRIGGER button to display the sweep types shown in Figure 3-11. Figure 3-11. Press Sweep Trigger Press the question mark icon to display the TRIGGER TYPES dialog shown in Figure 3-12. -
Page 71: Initiate Step Sweep
Instrument Operation 3-8 Starting a Step Sweep Initiate Step Sweep To initiate an Auto or External sweep 1. Press Trigger Type 2. Press Auto or External sweep. 3. Press the Step Sweep button to activate the sweep. To initiate a Single sweep 1. -
Page 72: List Menu
3-9 LIST Menu Instrument Operation LIST Menu LIST sweep is a step sweep of preset frequency and level pairs. The pairs are defined in separate frequency and power levels. Sweeping in accomplished by defining start and stop indexes. List Mode provides two settings for creating a sweep: •... - Page 73 Instrument Operation 3-9 LIST Menu START INDEX: Select the sweep start index. The Index (0 through 3999) is enabled in all trigger modes. See “Editing the START INDEX” on page 3-17. STOP INDEX: Select the sweep stop index.The Index (0 through 3999) is enabled in all trigger modes. See “Editing the STOP INDEX”...
-
Page 74: List Trigger Menu
3-9 LIST Menu Instrument Operation LIST TRIGGER Menu When manual trigger mode is selected, the list start index, list stop index, and dwell time parameter are not used. Instead, the list index is incremented or decremented by using the front panel cursor control keys. In manual trigger mode, the list index can also be incremented by using an external trigger input. -
Page 75: List - List Menu
Instrument Operation 3-9 LIST Menu LIST - LIST Menu The LIST - LIST MENU provides a list index that identifies each frequency/power level set in the list. The list sweep menu consists of a 4000 (0 to 3999) rows of listed start index and stop index. Scroll through the list and edit the paired frequencies and power levels. -
Page 76: Copy To The List
3-9 LIST Menu Instrument Operation Copy to the LIST An easy method of entering frequency and power level information into the current list index is to copy the set parameters from the CW menu. From the main FREQUENCY menu, press the FREQUENCY and LEVEL to edit the parameters. Then press the COPY TO LIST button shown in Figure 3-17 to open the list index parameter. -
Page 77: 3-10 Power Level Operations
Instrument Operation 3-10 Power Level Operations 3-10 Power Level Operations The following paragraphs describe how to place the signal generator in fixed (non-swept) power level mode, select a power level for output, and activate level offset. Power level operations can consist of a single CW power level change, swept power level changes, to an ALC mode of operation—internal or fixed gain (ALC off). - Page 78 3-10 Power Level Operations Instrument Operation LEVEL: Press to edit the power level. Range is -130 dBm to 33 dBm with Option 2. Range is –20 to 33 dBm without Option 2. FREQUENCY: Press to edit the CW frequency. Range is same as described in Figure 3-8 on page 3-9.
-
Page 79: Level Setup Menu
Instrument Operation 3-10 Power Level Operations Figure 3-20. Power Level Entered LEVEL SETUP Menu The SETUP menu is shown in Figure 3-21. Press: LEVEL | SETUP. Figure 3-21. SETUP Menu MG362x1A OM PN: 10370-10383 Rev. B 3-23... - Page 80 3-10 Power Level Operations Instrument Operation RF LEVEL LIMIT: Sets the maximum power level when level limit state is enabled. Range is -130 dBm to 33 dBm with Option 2. Range is –20 to 33 dBm without Option 2. RF Level Limit State: When ON, the level status area displays “Limit” or “Lim”. Retrace RF: Controls the RF output On/Off during retraces.
-
Page 81: Units
Instrument Operation 3-10 Power Level Operations Units Press Units to show the power level units as shown in Figure 3-23. When SWEEP TYPE Log as described in “Setting SWEEP TYPE” on page 3-12 is selected, the units are displayed in dBm or dBV. When SWEEP TYPE Linear is selected, the units are displayed in mV. -
Page 82: Level Presets Menu
3-10 Power Level Operations Instrument Operation LEVEL PRESETS Menu Figure 3-24. The PRESETS menu provides ten selectable power levels. The Preset menu is shown in Press: LEVEL | PRESETS L0 - L9: Press or scroll to select and edit from ten power level parameters, L0 to L9. Six selectable power levels (L0 - L5 are available on the first page. -
Page 83: Setting Fixed Power
Instrument Operation 3-10 Power Level Operations Setting Fixed Power There are two ways to set the MG362x1A in a fixed power level mode. 1. From the main menu: a. Press FREQUENCY. The Frequency menu is displayed as shown in Figure 3-25. - Page 84 3-10 Power Level Operations Instrument Operation 2. From the main menu: a. Press LEVEL. The Level menu is displayed as shown in Figure 3-26. b. Edit the power level parameter as described below in “Editing the Power Level”. Figure 3-26. LEVEL Menu Editing the Power Level Press the LEVEL button to display the annotated power level parameter.
-
Page 85: Setting A Preset Power Level
Instrument Operation 3-10 Power Level Operations Setting a Preset Power Level. The PRESETS menu provides access to the level list menu. Press: LEVEL | PRESETS The PRESETS menu is displayed as shown in Figure 3-28. Select one of the preset power levels L0, L1, L2, L3, L4, L5, L6, L7, L8, L9. -
Page 86: Level Offset Menu
3-10 Power Level Operations Instrument Operation LEVEL OFFSET Menu The Level OFFSET menu provides a means to compensate for a test device on the signal generator's RF output at a point of interest. For example, the power level at the test device may be less or more than the displayed power level because of the loss through an external transmission line or the gain of an amplifier located between the MG362x1A RF output and the test device. -
Page 87: Edit The Offset Value
Instrument Operation 3-10 Power Level Operations Edit the Offset Value Enter an offset value and apply it to the displayed power level. Press: LEVEL | OFFSET Then press the LEVEL OFFSET parameter button. This opens the offset parameter for editing as shown in Figure 3-30. -
Page 88: Power Level Sweep Operation
3-11 Power Level Sweep Operation Instrument Operation 3-11 Power Level Sweep Operation The signal generator provides leveled output power sweeps at CW frequencies and in conjunction with frequency sweeps. Power level sweeps can be from a high level to a low level or vice versa. Power level sweeps can be selected to be linear or logarithmic. -
Page 89: Setting Cw Power Sweep, Step Size, And Dwell Time
Instrument Operation 3-11 Power Level Sweep Operation Setting CW Power Sweep, Step Size, and Dwell Time To set the size of each step of the CW power sweep, set the step size or set the number of steps. The step size range is 0.01 dB (Log) or 0.001 mV (Linear) to 163 dB;... - Page 90 3-11 Power Level Sweep Operation Instrument Operation The trigger types displayed are shown in Figure 3-34. Press the information icon to display the TRIGGER TYPES dialog shown in “Sweep TRIGGER TYPES” on page 3-14. Figure 3-34. Level Sweep Trigger Types •...
- Page 91 Instrument Operation 3-11 Power Level Sweep Operation TRIGGER SWEEP/TRIGGER POINT TRIGGER SWEEP: Available in all sweeps except Manual Sweep. See Figure 3-35. Pressing TRIGGER SWEEP starts a single sweep. If a single CW power sweep is in progress, pressing TRIGGER SWEEP again aborts the sweep and resets to the beginning sweep point.
-
Page 92: Range Menu
3-11 Power Level Sweep Operation Instrument Operation RANGE Menu The LEVEL RANGE menu is shown in Figure 3-37. Press: SWEEP | LEVEL | RANGE L1-L9: Level preset parameters. Select a pair of preset power level sweep range parameters to sweep. Sets as a L1-L2, L3-L4, L5-L6, L7-L8, L9-L0 pair when setting a level sweep. -
Page 93: Setting Sweep Type
Instrument Operation 3-11 Power Level Sweep Operation Selecting a Preset Power Level Sweep Range There are five preset power level sweep range parameters selectable in the power level sweep modes. These preset power level sweep range parameters are L1-L2, L3-L4, L5-L6, L7-L8, and L9-L0. Select one of the preset power level sweep ranges. -
Page 94: 3-12 Setting The Alc Control
3-12 Setting the ALC Control Instrument Operation 3-12 Setting the ALC Control The Automatic Level Control (ALC) system is a feedback control system. An ALC system controls the amplitude and power level of the RF output. The output power is measured at an internal detector and compared with the expected power level. - Page 95 Instrument Operation 3-12 Setting the ALC Control Setting Internal Leveling This is the normal default leveling mode. Output power is sensed by the MG362x1A’s internal detector. The detector output signal is fed back to the ALC circuitry to adjust the output power level. Internal ALC is selected from the leveling menu.
-
Page 96: Step Attenuator (Option 2)
3-13 Step Attenuator (Option 2) Instrument Operation 3-13 Step Attenuator (Option 2) With step attenuators, the ALC and attenuator work in conjunction to provide leveled output power down to –110 dB. In the normal (coupled) leveling mode, when the desired power level is set, the correct combination of ALC level and attenuator setting is determined by the instrument firmware. -
Page 97: Decoupling The Attenuator
Instrument Operation 3-13 Step Attenuator (Option 2) Decoupling the Attenuator The signal generator provides a decouple function that allows decoupling of the step attenuator (if equipped) from the ALC system and a user level (flatness correction) calibration function that provides compensation for path-variations-with-frequency in a test setup. - Page 98 3-13 Step Attenuator (Option 2) Instrument Operation Auto Attenuation With AUTO ATTENUATION toggled on, Press: ATTENUATION to display the decouple dialog of 10 dB steps to decouple the step attenuator in: (10. 20, 30, 40, 50, 60, 70, 80, 90, or 100 dB) as shown in Figure 3-42.
-
Page 99: Power Search Menu
Instrument Operation 3-13 Step Attenuator (Option 2) POWER SEARCH Menu The POWER SEARCH menu provides searching for ALC settings that give the best noise performance. The POWER SEARCH Menu is shown in Figure 3-43. Press: ALC | POWER SEARCH LOW NOISE SEARCH: Searches for ALC settings that give the best noise performance. Figure 3-43. -
Page 100: 3-14 Modulation
3-14 Modulation Instrument Operation 3-14 Modulation The signal generator provides Amplitude Modulation (AM), Frequency Modulation (FM), Phase Modulation (M), and Pulse Modulation (PM) of the output signal using modulating signals from either the internal AM, FM, M, and pulse generators or external sources that are TTL-compatible. FM and M can not be on at the same time;... -
Page 101: Amplitude Modulation Set To Internal
Instrument Operation 3-15 Amplitude Modulation Amplitude Modulation Set to Internal AM SOURCE set to Internal is shown in Figure 3-44 on page 3-45 Press MODULATION | AMPLITUDE | SOURCE | Internal SOURCE: Set Internal or External Amplitude modulation. STATE: Switch Internal Amplitude modulation on or off. TYPE: Set to Logarithmic or Linear AM. - Page 102 3-15 Amplitude Modulation Instrument Operation Setting TYPE (SOURCE Set to External) Linear AM: Sensitivity is continuously variable from 0 PCT/V to 100 PCT/V. The amplitude of the RF output changes linearly as the AM input changes. Logarithmic AM: Sensitivity is continuously variable from 0 dB/V to 25 dB/V. The amplitude of the RF output changes exponentially as the AM input changes.
- Page 103 Instrument Operation 3-15 Amplitude Modulation Setting AM WAVEFORM Press WAVEFORM to access the Modulation Waveform menu as shown in Figure 3-45. Set the modulating waveform from the internal AM generator for the internal modulation function as: • Gaussian Noise • Negative Ramp •...
-
Page 104: Amplitude Modulation Set To External
3-15 Amplitude Modulation Instrument Operation Amplitude Modulation Set to External To provide amplitude modulation of the output signal using a modulating signal from an external source, first set up the external signal generator and connect it to the MG362x1A rear panel AM IN BNC connector. This menu contains the external AM status window showing the current menu selections and the measured AM Depth. - Page 105 Instrument Operation 3-15 Amplitude Modulation Setting STATE Press STATE to switch AM on and off. The External AM status display will display as External On or Off. This error message is displayed when the external AM modulating signal exceeds the input voltage Note range.
-
Page 106: 3-16 Frequency Modulation
3-16 Frequency Modulation Instrument Operation 3-16 Frequency Modulation The two internal FM operating modes are Locked and Unlocked. In the Locked and Unlocked modes, frequency modulation of the output signal is accomplished by summing the modulating signal into the FM control path of the YIG phase-lock loop. -
Page 107: Frequency Modulation Set To Internal
Instrument Operation 3-16 Frequency Modulation Frequency Modulation Set to Internal FM SOURCE set to Internal is shown in Figure 3-47. Press: MODULATION | FREQUENCY | SOURCE | Internal. SOURCE: Set Internal or External modulation. STATE: Switch frequency modulation on or off. MODE : Set to Low Noise or Wide (Unlocked). - Page 108 3-16 Frequency Modulation Instrument Operation Setting Filter Press FILTER sets the high pass filter passband start frequency for the FM signal applied to the FM external input. Set DC for DC coupled, 63 Hz for a 63 Hz high pass filter, 1 kHz for a 1 kHz high pass filter as shown in Figure 3-48.
- Page 109 Instrument Operation 3-16 Frequency Modulation Figure 3-49. Frequency Modulation Waveforms Setting DEVIATION Press DEVIATION to open the FM Deviation parameter, then edit the current value using the cursor control keys, rotary data knob, or enter a new value using the keypad and the appropriate terminator key. MG362x1A OM PN: 10370-10383 Rev.
-
Page 110: Frequency Modulation Set To External
3-16 Frequency Modulation Instrument Operation Frequency Modulation Set to External The Frequency Modulation SOURCE set to External provides the modulating signal from an external source connected to the rear panel FM IN BNC connector. This menu contains the external FM status window that shows the current menu selections and the measured FM Deviation (The FM deviation measurement function measures the voltage of the external modulation signal and calculates the peak frequency deviation). - Page 111 Instrument Operation 3-16 Frequency Modulation Setting FILTER Press FILTER sets the high pass filter passband start frequency for the FM signal applied to the FM external input. Set DC for DC coupled, 63 Hz for a 63 Hz high pass filter, 1 kHz for a 1 kHz high pass filter as shown in Figure 3-48.
-
Page 112: 3-17 Pulse Modulation
3-17 Pulse Modulation Instrument Operation 3-17 Pulse Modulation The MG362x1A provides pulse modulation of the output signal using modulating signals from either its internal pulse generator or an external source. The internal pulse generator can be internally triggered, externally triggered, internally and externally triggered with delay. -
Page 113: Pulse Modulation Set To Internal
Instrument Operation 3-17 Pulse Modulation PULSE Modulation Set to Internal PULSE Modulation SOURCE set to Internal is shown in Figure 3-51 on page 3-57. Press MODULATION | PULSE | SOURCE | Internal Pulse SOURCE Set to Internal SOURCE: Set Internal or External pulse modulation. STATE: Toggle internal pulse modulation on or off. -
Page 114: Setting Period And (Prf) Frequency
3-17 Pulse Modulation Instrument Operation Setting Period and (PRF) FREQUENCY The PERIOD and FREQUENCY (PRF) buttons are interactive. Changing one of these parameters will change the other. Edit the current value using the cursor control keys, rotary data knob, or enter a new value using the keypad and the appropriate terminator key. - Page 115 Instrument Operation 3-17 Pulse Modulation Setting Pulse Count Press COUNT to type 1 (Single), 2 (Doublet), 3 (Triplet), or 4 (Quadruplet) pulse mode. Pulse COUNT of 3 (Triplet) is shown in Figure 3-53. Press ENTER. The Internal Pulse Status display will show your selection. Figure 3-53.
- Page 116 3-17 Pulse Modulation Instrument Operation Set TRIGGER From the additional Internal Pulse Status menu, press TRIGGER to access the Trigger Mode menu display shown in (Figure 3-55). Figure 3-55. Trigger Mode Menu This menu provides the triggering mode for the internal pulse generator. Each trigger mode is described in “Setting TRIGGER Waveforms”...
- Page 117 Instrument Operation 3-17 Pulse Modulation Polarity Press POLARITY to select the polarity of the signal that turns the RF on during pulse modulation, as follows: Normal: Specifies positive-true operation; a TTL-high level will turn on the RF output signal. Inverted: Specifies negative-true operation; a TTL-low level will turn on the RF output signal. Trigger Polarity Selects whether the internal pulse generator is triggered on the rising edge (positive) or falling edge (negative) of the external trigger signal.
-
Page 118: Pulse Modulation Set To External
3-17 Pulse Modulation Instrument Operation PULSE Modulation Set to External To provide pulse modulation of the output signal using a modulating signal from an external source, first set up the external pulse generator and connect it to the MG362x1A rear panel PULSE IN BNC connector. Press SOURCE from the menu shown in Figure 3-57 and set to External. -
Page 119: 3-18 Phase Modulation
Instrument Operation 3-18 Phase Modulation 3-18 Phase Modulation The MG362x1A can provide phase modulation (M) of the output signal using modulating signals from either its internal M generator or an external source. The MG362x1A has two M operating modes—Narrow M and Wide M. In Narrow M mode, the maximum M deviation is the lesser of ±3 radians or ±5 MHz for DC to 8 MHz rates. - Page 120 3-18 Phase Modulation Instrument Operation Setting Mode Press to set phase modulation to Low Noise or Wide Deviation as shown in Figure 3-59. Low Noise: See “Setting Sensitivity and Deviation” Wide Deviation: See “Setting Sensitivity and Deviation” Figure 3-59. Phase Mode Setting Sensitivity and Deviation The Low Noise ΦM mode allows a deviation range of 0.00001 radians to 25.1 radians, and a sensitivity range of ±0.00001 RADS/V to ±25.1 RADS/V.
- Page 121 Instrument Operation 3-18 Phase Modulation Setting Waveform Press WAVEFORM to access the Modulation Waveform Selection menu Figure 3-60. This menu displays the modulation waveforms that are available from the M generator. Figure 3-60. Phase Wave Selection MG362x1A OM PN: 10370-10383 Rev. B 3-65...
-
Page 122: Phase Modulation Set To External
3-18 Phase Modulation Instrument Operation PHASE Modulation Set to External To provide phase modulation of the output signal using a modulating signal from an external source, first set up the external signal generator and connect it to the MG362x1A rear panel FM IN BNC connector. Press: MODULATION | PHASE | SOURCE | External The Phase Modulation set to External is shown in Figure... -
Page 123: 3-19 Saving/Recalling Instrument Setups
Instrument Operation 3-19 Saving/Recalling Instrument Setups 3-19 Saving/Recalling Instrument Setups The SYSTEM menu provides browse, save, and recall settings files. Saving Setups Once you have decided that an instrument setup should be retained for future use, follow the procedure below to save the current setup: Press: SYSTEM The SYSTEM SETUPS menu is displayed in... -
Page 124: Erasing Stored Setups
3-19 Saving/Recalling Instrument Setups Instrument Operation Erasing Stored Setups The front panel setups are stored in non-volatile memory. A Factory Reset is required to erase the contents of the setups and reprogram them with default data. The Factory Reset function overwrites all information stored in the non-volatile memory with default Note values. -
Page 125: 3-20 Reference Calibration Menu
Instrument Operation 3-20 Reference CALIBRATION Menu 3-20 Reference CALIBRATION Menu The reference calibration function provides calibration of the internal 10 MHz or 100 MHz references of the MG362x1A using an external 10 MHz, 0 to +10 dBm reference signal. (References available are Option dependent) Press: SYSTEM | REFERENCE | CALIBRATION The CALIBRATION menu is shown in Figure... -
Page 126: 100 Mhz Calibration Menu (Standard Reference)
3-20 Reference CALIBRATION Menu Instrument Operation 100 MHz Calibration Menu (Standard Reference) To calibrate the 100 MHz internal reference: 1. To calibrate the 100 MHz internal reference, connect an external 10 MHz reference signal to the MG362x1A rear panel 10 MHz REF IN connector. 2. -
Page 127: 100 Mhz Menu
Instrument Operation 3-20 Reference CALIBRATION Menu 100 MHz Menu The 100 MHz menu is shown in Figure 3-66. To calibrate the 100 MHz reference, see “100 MHz Calibration Menu (Standard Reference)” on page 3-70. The menu display is depended on options ordered and external reference inputs. -
Page 128: 10 Mhz Menu (With Option 66)
3-20 Reference CALIBRATION Menu Instrument Operation 10 MHz Menu (With Option 66) The 10 MHz menu is shown in Figure 3-67. To calibrate the 10 MHz internal reference, see “10 MHz Calibration Menu (Option 3)” on page 3-70. The menu display is depended on options ordered and external reference inputs. -
Page 129: 3-21 Reference Status Conditions
Instrument Operation 3-21 Reference Status Conditions 3-21 Reference Status Conditions This section describes the reference source types and lock condition indicators. Reference Oscillator Current Source The title bar displays the source that is determining the RF output accuracy as described below: REF EXT 1600: 1600 MHz external REF EXT 100: 100 MHz external REF EXT 1PPS: 1PPS external, GNSS/GPS Atomic Clock Receiver (Option 66) or Ultra Stable Rubidium... -
Page 130: Reference Oscillator 100 Mhz Lock Status
3-21 Reference Status Conditions Instrument Operation Reference Oscillator 100 MHz Lock Status The 100 MHz reference lock status is described below: Acquiring: Attempting to lock the 100 MHz to an external 10 MHz reference. Low Phase Noise and Ultra High Stability (Option 3) is installed;... -
Page 131: Increment Menu
Instrument Operation 3-21 Reference Status Conditions INCREMENT Menu The INCREMENT menu provides an increment setting size for editing frequency and power level. The increment feature is a GUI function and affects only the Instrument UI or the remote UI. Press: SYSTEM | INCREMENT Increment Size Set the incremental size for editing CW frequencies and fixed power level. -
Page 132: Reset Menu
3-21 Reference Status Conditions Instrument Operation RESET Menu The RESET menu is shown in Figure 3-69. PRESET APPLICATION: Performs a system reset. SYSTEM RESET: Provides access to FACTORY RESET, FILE RESET. and RESET ALL. The function of these buttons are described in “RESET Menu”... -
Page 133: Chapter 4 - Operation Verification
Note Specifications shown in this chapter and in other chapters are for reference only. Refer to the performance specifications for the MG362x1A found in the technical data sheet. Anritsu part number: 11410-00928. Test Records... -
Page 134: Presetting The Mg362X1A
4-4 Presetting the MG362x1A Operation Verification Presetting the MG362x1A The signal generator should be preset to the factory-selected default parameters before continuing operation verification testing. Factory Reset clears the current setup parameters. If these parameter values are needed for future testing, save them as a stored setup before presetting the signal generator. Press: 3-Line Icon| FILES. -
Page 135: Frequency Synthesis Test
Operation Verification 4-5 Frequency Synthesis Test Frequency Synthesis Test The following test verifies that the CW frequency output of the MG362x1A under test is within tolerance. Table 4-1 contains a standard test record that you can copy and use to record test results for this test. MG362x1A Frequency Counter MG36221A... - Page 136 4-5 Frequency Synthesis Test Operation Verification Table 4-1. Frequency Synthesis Test Record Model MG362x1A Serial Number: Date: Test Frequency F0 (GHz) Recorded Frequency (GHz) Calculated Difference (Hz) COURSE FREQUENCY SETTINGS 2.000 000 000 000 5.000 000 000 000 8.000 000 000 000 11.000 000 000 000 14.000 000 000 000 17.000 000 000 000...
-
Page 137: Level Accuracy And Flatness Test
These tests use an Anritsu ML243xA Power Meter with a MA247xD power sensor. If you use another power meter and power sensor, consult your product’s user guide for proper test setup and operation. -
Page 138: Power Level Accuracy Test Procedure
2. Connect the power sensor to the RF Output of the MG362x1A (use a fixed attenuator when measuring power levels above +19 dBm). 3. Connect the special AUX I/O interface cable (Anritsu PN 806-97) to the MG362x1A rear panel AUX I/O connector. Connect the cable BNC connectors as follows: a. - Page 139 Operation Verification 4-7 Power Level Accuracy Test Procedure Table 4-2. Power Level Accuracy Test Record Model MG362x1A Serial Number: Date: Power Level Accuracy Power Level Accuracy Power Level Accuracy (CW Frequency = 500 MHz) (CW Frequency = 5.0 GHz) (CW Frequency = 15.0 GHz) Measured Measured Measured...
-
Page 140: Power Level Flatness Test Procedure
4-8 Power Level Flatness Test Procedure Operation Verification Power Level Flatness Test Procedure Power level flatness is checked by measuring the power level variation during a full band sweep in the step sweep mode. 1. Set up the MG362x1A as follows for a step sweep power level flatness test: a. - Page 141 Operation Verification 4-8 Power Level Flatness Test Procedure Table 4-3. Power Level Flatness Test Record Model MG362x1A Serial Number: Date: Set Power Maximum Power Minimum Power Variation +0 dBm Maximum variation is 1.6 dB for standard power instruments and 3.0 dB for high power (Option 15) instruments. MG362x1A OM PN: 10370-10383 Rev.
- Page 142 4-8 Power Level Flatness Test Procedure Operation Verification 4-10 PN: 10370-10383 Rev. B MG362x1A OM...
-
Page 143: Appendix A - Software Installation
• 1 GB disk space • Open GL (ES) 2.0 support • Display resolution 1280 x 800 • Ethernet (for connecting to an MG362x1A instrument) Installation Download the MG362x1A software from the product page: https://www.anritsu.com/en-us/test-measurement/products/mg362x1a MG362x1A OM PN: 10370-10383 Rev. B... -
Page 144: File (File Management
A-2 FILE (File Management) Software Installation Launch the MG362x1A executable file and follow the on-screen instructions after selecting YES to the User Account Control dialog. MG36221A Figure A-1. MG362x1A Installation SETUP Setup parameters for Step Sweep, Level Sweep, and List Sweep can be adjusted. PRESET Preset functions will preset the selected items and suppressed recalled measurement data. -
Page 145: Appendix B - Software Option Upgrades
Importing Software License Importing a new license file: After receiving a new license file from Anritsu, place the file on the USB memory device in the top (root) level, not in any directory. Open the System menu from the upper left 3-bar icon. - Page 146 B-3 Importing Software License Software Option Upgrades PN: 10370-10383 Rev. B MG362x1A OM...
-
Page 147: Appendix C - Instrument Messages
Appendix C — Instrument Messages Introduction This appendix provides a list of instrument error messages, their meaning and a sample self-test log. If any error condition persists, contact your local Anritsu Service Center (http://www.anritsu.com/contact-us). The MG362x1A signal generator displays the following message types: •... - Page 148 C-2 Error Messages Instrument Messages Pulse configuration error %1 In Toolbar, Log, Transient Reduce AM Input Level In Toolbar, Log, Persistent Reduce FM Input Level In Toolbar, Log, Persistent Reduce PM Input Level In Toolbar, Log, Persistent Reduce FM Deviation In Toolbar, Log, Persistent Reduce PM Deviation In Toolbar, Log, Persistent...
-
Page 149: Informational Messages
Instrument Messages C-3 Informational Messages Informational Messages No application loaded. Factory reset required In Toolbar, Log, Persistent Rebooting Instrument In Toolbar, No Log, Transient Rebooting instrument into Recovery mode In Toolbar, No Log, Transient Attempt to reboot instrument into Recovery mode failed In Toolbar, Log, Transient Presetting Instrument In Toolbar, No Log, Transient... - Page 150 C-3 Informational Messages Instrument Messages GPS reference detected – switching time reference source to GPS In Toolbar, Log, Transient GPS reference no longer available – switching time reference source to Internal High In Toolbar, Log, Transient Could not lock to internal reference In Toolbar, Log, Persistent Software update files found on USB In Toolbar, No Log, Transient...
-
Page 151: Warning Messages
Instrument Messages C-4 Warning Messages Options upgraded. Please restart the instrument to use new features In Toolbar, No Log, Transient Error %1 In Toolbar, Log, Transient File %1 import successfully In Toolbar, No Log, Transient File %1 export successfully In Toolbar, No Log, Transient Save failed. -
Page 152: Self-Test Messages
C-5 Self-Test Messages Instrument Messages Self-Test Messages The MG362x1A signal generator has built-in diagnostics that allow you to run a built-in self test. The test results can be viewed on the screen and saved to a log file. To run self test, use the “3-Line Icon”... - Page 153 Instrument Messages C-5 Self-Test Messages Table C-2. (Continued)SG Messages Name Type Actual Expected Tolerance Status SWF PA1 current monitor Current 0.30 A 0.70 A 0.70 A pass SWF PA2 current monitor Current 0.25 A 0.70 A 0.70 A pass SWF PA3 current monitor Current 0.50 A 0.70 A...
- Page 154 C-5 Self-Test Messages Instrument Messages PN: 10370-10383 Rev. B MG362x1A OM...
-
Page 155: Appendix D - Rack Mount Assembly (Option 1)
Appendix D — Rack Mount Assembly (Option 1) Introduction The rack mounting kit (Option 1) contains a set of track slides, mounting ears, and front panel handles for mounting the Rubidium MG362x1A into a standard equipment rack. The following procedure provides instructions for installing the rack mounting hardware on the instrument. -
Page 156: Install Hardware
D-1 Introduction Rack Mount Assembly (Option 1) The screws with green heads have metric threads. When it becomes necessary to replace any of Note these screws, always use the exact replacement green-headed screws to avoid damage to the instrument. Install Hardware Refer to the rack mount kit. - Page 158 Printed on Recycled Paper with Vegetable Soybean Oil Ink Anritsu Company 490 Jarvis Drive Morgan Hill, CA 95037-2809 http://www.anritsu.com...
Need help?
Do you have a question about the Rubidium MG362 1A Series and is the answer not in the manual?
Questions and answers