Advertisement
Quick Links
CONTENTS
Safety - 2
Tools needed - 2
Accessories - 2
Parts - 3
Dimensions - 4
Mount the Frame - 6
Final Assembly - 10
Use and Maintenance - 12
Warranty - 12
GENERAL INFORMATION
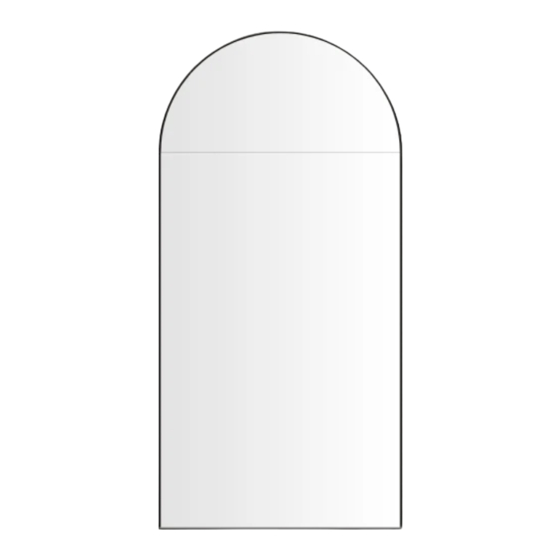
This instruction manual contains information on how to mount a Murray Hill Series framed cabinet. This series comes in different sizes.
Refer to the specific model numbers for dimensions. The framed cabinets can only be recess mounted.
Save these instructions for future use and reference. An improper installation voids the warranty. Installed cabinets cannot be returned.
If you experience any problems with your cabinet, contact your dealer or Robern directly.
Limited Warranty - One Year Term
© 2022 Robern, Inc. 701 N. Wilson Ave. Bristol, PA 19007 U.S.A.
800.877.2376
www.robern.com
INSTALLATION INSTRUCTIONS
Important safety instructions - Save these instructions
1
MURRAY HILL SERIES
Scan the QR code
to see the entire
Murray Hill Series
of cabinets.
Use the camera app on your
mobile device to look at this and
other QR codes. This will allow
you to quickly access web pages
and other relevant documents.
Part no. CB-209-1441 06/15/2022
Murray Hill Cabinet
Advertisement
Chapters

Related Manuals for Robern MURRAY HILL Series


Summary of Contents for Robern MURRAY HILL Series
-
Page 1: Table Of Contents
GENERAL INFORMATION This instruction manual contains information on how to mount a Murray Hill Series framed cabinet. This series comes in different sizes. Refer to the specific model numbers for dimensions. The framed cabinets can only be recess mounted. -
Page 2: Safety
WARNING: Electrical option cabinet must be wired to a Class A 20 Amp GFCI (Ground Fault Circuit Interrupter) protected circuit when used in bathrooms and all other locations required by the National Electric Code. SAVE THESE INSTRUCTIONS TOOLS NEEDED ACCESSORIES Scan the available QR codes to learn more about these accessories at Robern.com [P2ELECTRIC*] [QUICKCADDY*] [DLB-20] Portray Electric Upgrade... -
Page 3: Parts
(1) LH Door Corner (1) Push-To-Open Drill Jig (1) Push-To-Open Mechanism (4) 6-32 x 3/8" Screws (1) #31 Drill Bit © 2022 Robern, Inc. 701 N. Wilson Ave. Bristol, PA 19007 U.S.A. Part no. CB-209-1441 06/15/2022 800.877.2376 www.robern.com Murray Hill Cabinet... -
Page 4: Dimensions
(1014 mm) Rough Opening: 29-3/4” (755.6 mm) 1” (25.4 mm) Minimum frame to faucet 19-1/2" (495 mm) 3-3/4" (95 mm) © 2022 Robern, Inc. 701 N. Wilson Ave. Bristol, PA 19007 U.S.A. Part no. CB-209-1441 06/15/2022 800.877.2376 www.robern.com Murray Hill Cabinet... - Page 5 Minimum RO to vanity top 3”-4” (76-102 mm) Recommended Minimum frame to vanity top 19-1/2" (495 mm) 3-3/4" (95 mm) © 2022 Robern, Inc. 701 N. Wilson Ave. Bristol, PA 19007 U.S.A. Part no. CB-209-1441 06/15/2022 800.877.2376 www.robern.com Murray Hill Cabinet...
-
Page 6: Mount The Frame
4. Holding a level to the frame, insert and tighten the remaining screws. To avoid overtightening and potentially damaging the frame, shim behind the remaining screw locations as required. © 2022 Robern, Inc. 701 N. Wilson Ave. Bristol, PA 19007 U.S.A. Part no. CB-209-1441 06/15/2022 800.877.2376... -
Page 7: Mount The Cabinet
4. Use the included 2" screws [SS674] to mount the cabinet box, two screws per side. 5. Once the cabinet box has been mounted inside the frame, remove the alignment angles. [SS674] #10 x 2" Screw © 2022 Robern, Inc. 701 N. Wilson Ave. Bristol, PA 19007 U.S.A. Part no. CB-209-1441 06/15/2022 800.877.2376 www.robern.com... -
Page 8: Push-To-Open Installation
6. Press the push-to-open mechanism inward until the front face is flush with the outer cover. Rotate the push-to-open mechanism to adjust the door's position when closed. © 2022 Robern, Inc. 701 N. Wilson Ave. Bristol, PA 19007 U.S.A. Part no. CB-209-1441 06/15/2022 800.877.2376... - Page 9 8. Insert and press the included push-to-open door corner [right-hand corner shown, 211-1412] into the channel until completely seated and secure. © 2022 Robern, Inc. 701 N. Wilson Ave. Bristol, PA 19007 U.S.A. Part no. CB-209-1441 06/15/2022 800.877.2376 www.robern.com...
-
Page 10: Final Assembly
3B. Height adjustment – Rotate cam screw on mounting plate to adjust door. 3C. Depth adjustment – Rotate rear spiral tech cam screw to adjust door gap. © 2022 Robern, Inc. 701 N. Wilson Ave. Bristol, PA 19007 U.S.A. Part no. CB-209-1441 06/15/2022 800.877.2376... - Page 11 4. Press the shelf hole plugs [SS143] into the unused holes inside the cabinet. Place the screw head caps [SS672] over any exposed screw heads. 5. Install a Robern logo coverplate [211-1329] into each unused electrical access hole. 6. Insert clear shelf clips [221-1376 and 211-1377] into the holes in the back channel on the sides of the cabinet.
-
Page 12: Use And Maintenance
ROBERN in writing within one (1) year from the date of delivery. ROBERN is not responsible for installation costs. The warranty is void in the event the product is damaged in transit, or if damage or failure is caused by abuse, misuse, abnormal usage, faulty installation, damage in an accident, improper maintenance, or any repairs other than those authorized by ROBERN. - Page 13 Robern directamente. Garantie limitée — Durée d'un an Garantía limitada — Término de un año © 2022 Robern, Inc. 701 N. Wilson Ave. Bristol, PA 19007 U.S.A. No. de pièce / Pieza n.° CB-209-1441 06/15/2022 800.877.2376 www.robern.com...
-
Page 14: Sécurité
*Los modelos de Murray Hill que terminan en "TP" incluyen Portray niveau électrique Portray et le Quick Caddy. Electric Upgrade y Quick Caddy. © 2022 Robern, Inc. 701 N. Wilson Ave. Bristol, PA 19007 U.S.A. No. de pièce / Pieza n.° CB-209-1441 06/15/2022 800.877.2376 www.robern.com... -
Page 15: Pièce
Esquina de la Puerta Izquierda de Empujar-para-Obrir Empujar-para-Obrir Mecanismo Hélice / Tornillo Broca © 2022 Robern, Inc. 701 N. Wilson Ave. Bristol, PA 19007 U.S.A. No. de pièce / Pieza n.° CB-209-1441 06/15/2022 800.877.2376 www.robern.com Murray Hill Cabinet / Murray Hill Gabinete... -
Page 16: Dimensions
Mínimo para Grifo 19-1/2" (495 mm) 3-3/4" (95 mm) © 2022 Robern, Inc. 701 N. Wilson Ave. Bristol, PA 19007 U.S.A. No. de pièce / Pieza n.° CB-209-1441 06/15/2022 800.877.2376 www.robern.com Murray Hill Cabinet / Murray Hill Gabinete... - Page 17 Parte Superior del 19-1/2" tocador (495 mm) 3-3/4" (95 mm) © 2022 Robern, Inc. 701 N. Wilson Ave. Bristol, PA 19007 U.S.A. No. de pièce / Pieza n.° CB-209-1441 06/15/2022 800.877.2376 www.robern.com Murray Hill Cabinet / Murray Hill Gabinete...
-
Page 18: Montez Le Châssis
Para evitar apretar demasiado y dañar potencialmente el marco, calce detrás de las ubicaciones restantes de los tornillos según sea necesario. © 2022 Robern, Inc. 701 N. Wilson Ave. Bristol, PA 19007 U.S.A. No. de pièce / Pieza n.° CB-209-1441 06/15/2022 800.877.2376 www.robern.com... -
Page 19: Monter L'cabinet
ángulos de alineación. [SS674] #10 x 2" Screw © 2022 Robern, Inc. 701 N. Wilson Ave. Bristol, PA 19007 U.S.A. No. de pièce / Pieza n.° CB-209-1441 06/15/2022 800.877.2376 www.robern.com Murray Hill Cabinet / Murray Hill Gabinete... -
Page 20: Appuyez-Pour-Ouvrir
Gire el est fermée. mecanismo de empujar para abrir para ajustar la posición de la puerta cuando esté cerrada. © 2022 Robern, Inc. 701 N. Wilson Ave. Bristol, PA 19007 U.S.A. No. de pièce / Pieza n.° CB-209-1441 06/15/2022 800.877.2376 www.robern.com... - Page 21 [se muestra la esquina derecha, 211-1412] en el canal hasta complètement insérée et sécurisée. que esté completamente asentada y segura. © 2022 Robern, Inc. 701 N. Wilson Ave. Bristol, PA 19007 U.S.A. No. de pièce / Pieza n.° CB-209-1441 06/15/2022 800.877.2376 www.robern.com...
-
Page 22: Assemblage Final
3C. Ajuste de profundidad - Gire el tornillo de la leva técnica en espiral spirale arrière pour ajuster le jeu de la porte. trasera para ajustar la separación de la puerta. © 2022 Robern, Inc. 701 N. Wilson Ave. Bristol, PA 19007 U.S.A. No. de pièce / Pieza n.° CB-209-1441 06/15/2022 800.877.2376 www.robern.com... - Page 23 [SS672] sur les têtes de vis exposées. para el cabezal del tornillo [SS672] sobre cualquier cabezal que esté expuesto. 5. Installez la plaque du logo Robern [211-1329] dans le trou d'accès électrique inutilisé. 5. Instale la placa con el logotipo de Robern [211-1329] sobre el orificio de acceso eléctrico que no se vaya a utilizar.
-
Page 24: Garantie
écrit dans un délai d'un (1) an à compter de la date de livraison. ello a ROBERN por escrito en un plazo de un (1) año a partir de la ROBERN n’est pas responsable des frais d’installation. La garantie fecha de entrega del producto adquirido.
Need help?
Do you have a question about the MURRAY HILL Series and is the answer not in the manual?
Questions and answers