
Related Manuals for K&F Concept DQ201


Summary of Contents for K&F Concept DQ201
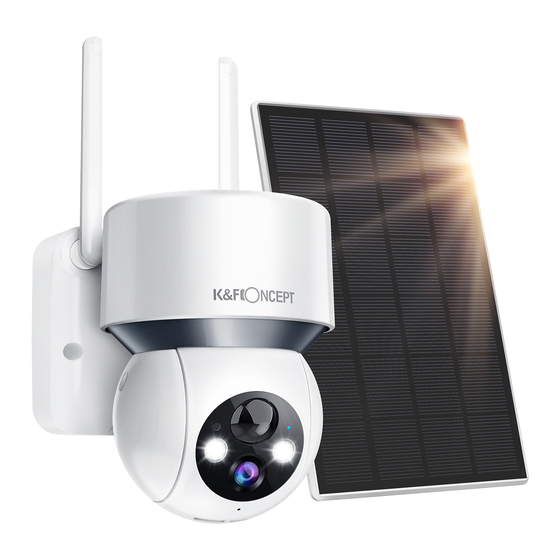
- Page 1 Solar Powered Wireless Security Camera DQ201 QUICK START GUIDE E-mail: service@kfconcept.com...
-
Page 2: Table Of Contents
FRANÇAIS CONTENU 1.NOTE ...................02 2.Contenu de la boîte ..............03 3.Présentation du produit .............04 4.Installation de l'application et enregistrement du compte ............07 4.1 Télécharger l'application «CloudEdge»........07 4.2 Créer un compte ..............08 5.Comment ajouter une caméra à l'application?......09 5.1 Allumer la caméra..............09 5.2 Connecter la caméra ..............09 6.Montage de la caméra ..............12 7.Paramètres de détection de mouvement PIR ......14... -
Page 3: Note
1.NOTE: En raison de la mise à jour continue du produit et de l'application, il peut y avoir une divergence entre ce manuel et l'interface de l'applica- tion. Toutes les instructions sont soumises à l'interface de fonctionne- ment réelle. Le contenu du manuel peut être modifié sans préavis conformément à notre politique d'amélioration continue des produits. -
Page 4: Contenu De La Boîte
2.CONTENU DE LA BOÎTE Caméra Panneaux solaires Paquet de vis Câble de charge Manuel d’utilisation Micro-USB E-mail: service@kfconcept.com... -
Page 5: Présentation Du Produit
3.PRÉSENTATION DU PRODUIT P I R (capteur infrarouge qui détecte la chaleur corporelle) Composants photosensibles IR LED Voyant Objectif de la caméra Microphone Power RESET Emplacement Haut-parleur pour carte Micro SD Interface Indicateur d'alimentation de charge E-mail: service@kfconcept.com... - Page 6 Appuyez sur le bouton d'alimentation et Bouton maintenez-le enfoncé pendant 5 secondes. La d'alimentation camera s'allume Appuyez sur la touche RESET pendant 5 secondes Bouton de pour réinitialiser l'appareil (si vous modifiez les réinitialisation paramètres, ils reviendront aux paramètres par défaut d'usine) Fente pour Prise en charge du stockage local sur carte SD...
- Page 7 Choisir un endroit approprié Face au soleil (angle 45°suggéré) Caméra à batterie Panneau solaire Caractéristiques: 1. Idéal pour la caméra de sécurité alimentée par batterie. 2. Connecter ce panneau solaire à la caméra aidera à obtenir une alimentation continue. Pas besoin de retirer les batteries et de charger la caméra lorsqu'elle est en faible puissance.
-
Page 8: Installation De L'application Et Enregistrement Du Compte
4.INSTALLATION DE L'APPLICATION ET ENREGISTREMENT DU COMPTE 4.1 TÉLÉCHARGER L'APPLICATION «CLOUDEDGE» Méthode 1: Téléchargez l'application «CloudEdge» depuis l'APP Store (iOS) ou le Play Store (Android) Méthode 2: Scannez le code QR de l'application «CloudEdge» pour le télécharger. Conseils : Veuillez activer 2 autorisations ci-dessous lorsque vous utilisez cette application pour la première fois. -
Page 9: Créer Un Compte
4.2 CRÉER UN COMPTE Les nouveaux utilisateurs doivent s'inscrire par e-mail, cliquer sur «S'inscrire» et suivre les étapes pour terminer l'enregistrement du compte, puis se connecter. Note: • Lors de l'enregistrement d'un nouveau compte, veuillez choisir la région dans laquelle vous vous trouvez réellement. (Différentes régions enreg- istrées ne peuvent pas partager la caméra.) •... -
Page 10: Comment Ajouter Une Caméra À L'application
5.COMMENT AJOUTER UNE CAMÉRA À L'APPLICATION Conseil : veuillez insérer la carte Micro SD avant la mise sous tension, sinon la carte SD ne peut pas être détectée. 5.1 ALLUMER LA CAMÉRA •Veuillez appuyer longuement sur le bouton d’alimentation pendant 5 secondes pour allumer la caméra. - Page 11 Étapes de la connexion Wi-Fi: E-mail: service@kfconcept.com...
- Page 12 E-mail: service@kfconcept.com...
-
Page 13: Montage De La Caméra
6.MONTAGE DE LA CAMÉRA SÉLECTIONNEZ LA HAUTEUR ET L'EMPLACEMENT Accrochez la caméra à 2-3m au-dessus du sol. Cette hauteur maximise la portée de détection du capteur de mouvement de la caméra. Évitez de placer la caméra sous la lumière directe du soleil. Champ de vision de la caméra Zone de détection de mouvement Jusqu'à... - Page 14 ASTUCES POUR L'INSTALLATION DE PANNEAUX SOLAIRES 1.Dans l'hémisphère nord, laissez les panneaux solaires face au sud. Dans l'hémisphère sud, laissez les panneaux solaires face au nord. 2.Installez les panneaux solaires dans une bonne position, évitez qu'ils ne soient bloqués par des choses comme les avant-toits et les branch- TESTEZ LE SIGNAL WIFI À...
-
Page 15: Paramètres De Détection De Mouvement Pir
7. PARAMÈTRES DE DÉTECTION DE MOU- VEMENT PIR Entrez dans l'application - Interface «Paramètres» - «Détection de mouvement». Distance de détection (pour Sensibilité les objets en mouvement) Niveau1-3(Faible) Jusqu'à 4-5 mètres Niveau4-7(Moyen) Jusqu'à 5-8 mètres Niveau8-10(Élevé) Jusqu'à 8-13 mètres Conseils chaleureux: •Lorsque vous rencontrez fréquemment une alarme manquée ou retardée lors de l'utilisation de cette caméra, vous pouvez régler la sensibilité... -
Page 16: Spécffication Du Produit
8.SPÉCFFICATION DU PRODUIT Résolution 1920 x 1080 @ 12-15fps Carte Micro SD (max.128 Stockage G), stockage en nuage Wi-Fi Seulement 2,4 GHz LED Infrarouges 850nm iOS (>8); Android (>4.2) Normes Wi-Fi IEEE 802.11b/g/n Pouvoir 5V2A Température de -20℃-50℃(-4℉-122℉) <90% (sans condensation) Travail et Humidité... -
Page 17: Faqs
9.FAQS 1) L'appareil vous indique « hors ligne »? •Vérifiez si l'équipement est en état de marche et observez si la lampe de travail de l'équipement est allumée normalement. •Vérifiez si le réseau Wi-Fi est en bon état et redémarrez le routeur. •Si l'appareil est situé... - Page 18 •Il est recommandé d'utiliser des cartes San Disk, Samsung et d'autres marques; •Il est recommandé d'utiliser une carte Micro SD de classe 10 standard; •Seul le format FAT32 est pris en charge. •La carte Micro SD ne peut pas être identifiée lorsque l'environnement Internet n'est pas bon.
- Page 19 7) Comment savoir si la charge est réussie? Le voyant de charge de l'appareil est rouge, ce qui signifie qu'il est en cours de charge. Une lumière bleue signifie que la charge est terminée. La charge complète prendra environ 10 heures ou plus. 8) Que dois-je faire si la charge échoue? •Vérifiez si l'adaptateur secteur est bon, essayez-en un autre.
- Page 20 *Montez votre panneau solaire dans des endroits bien éclairés et évitez les endroits comme l'ombre des arbres, des bâtiments ou d'autres obstacles pour assurer un ensoleillement suffisant. *Ajustez la direction de votre panneau solaire pour faire face au vrai sud (dans l'hémisphère nord) ou au vrai nord (dans l'hémisphère sud) et ajustez le à...
- Page 21 ENGLISH CATALOG 1.WARM SERVICE .................21 2.WHAT YOU WILL GET..............22 3.PRODUCT INTRODUCTION ............23 4.ADD CAMERA TO APP ..............26 4.1.Download CloudEdge App .............26 4.2.Register CloudEdge Account ..........28 4.3.Turn on Camera ..............29 4.4.Connect the Camera to Wi-Fi..........30 5.MOUNTING THE CAMERA TO THE WALL........34 6.SOLAR PANEL INSTALLATION ..........37 7.FUNCTION INTRODUCTION ............39 7.1.Main Page ................39...
-
Page 22: Warm Service
1.WARM SERVICE Due to the continuous updating of the product&software, there may be a discrepancy between this user guide and App interface. All the instructions are subject to the actual operation interface. Manual contents are subject to change without notice in accordance with our policy of continuous product improvement. -
Page 23: What You Will Get
2.WHAT YOU WILL GET Camera Solar panel Screw kit Micro-USB User Manual Charging Cable E-mail: service@kfconcept.com... -
Page 24: Product Introduction
3.PRODUCT INTRODUCTION Photosensitive components IR LED Indicator light Camera Lens Microphone Power switch RESET Micro SD Card Slot Speaker Power Interface Charging Indicator E-mail: service@kfconcept.com... - Page 25 Press and hold the power button for 5 seconds to Power Key turn on the camera Press and hold RESET for 5 seconds to reset the Reset Key device (if you have modified the settings, they will revert to the factory default settings) SD Card Slot Support local SD card storage (up to 128G) Lens...
- Page 26 Choose a suitable place Face ths Sun (Suggested angle 45°) Power battery camera Solar Panel Features 1. Perfect for battery-powered security cameras. 2. Connecting the solar panels to the camera will provide an uninterrupted charge that can be charged when the camera is low, and there is no need to remove the solar panel.
-
Page 27: Add Camera To App
4.ADD CAMERA TO APP 4.1.DOWNLOAD “ CLOUDEDGE ” APP Search the “ CloudEdge ” in App Store /Google Play, or scan the QR code below to download and install it on your mobilephone. TIPS Please turn on the following 2 permissions when using the application for the first time 1 Allow "CloudEdge"... - Page 28 The following is a screenshot of the IOS mobile phone opinion, Android mobile phone permissions open method is basically the same as this method. E-mail: service@kfconcept.com...
-
Page 29: Register Cloudedge Account
4.2. REGISTER CLOUDEDGE ACCOUNT New users must register by email Tips: 1.When registering a new account, please choose the region which you are actually in. (Different registered regions can't share the camera.) 2.Please choose to register by e-mail. E-mail: service@kfconcept.com... -
Page 30: Turn On Camera
4.3. TURN ON CAMERA Tips: Please insert the Micro SD card before power on, otherwise, the SD card can not be read. Press and hold the power-on button for 5 seconds, and you can hear the 'Bugu' (if it can't be powered on, please plug-in 5V/2A USB standard adapter to charge the camera for 15 min first) then the working indicator light up, red light flashing slowly means the camera is waiting for connecting to Wi-Fi (if the working status light is not flashing red, please... -
Page 31: Connect The Camera To Wi-Fi
4.4.CONNECT THE CAMERA TO Wi-Fi 30cm~100cm Router Smartphone Tips: 1.To connect the camera successfully, please allow Cloudedge to use your WLAN& Cellular Data at the first run of this App. 2.The camera only supports 2.4GHz Wi-Fi, and doesn't support 5GHz Wi-Fi. 3.Press the Power Button once to wake up the camera from sleep mode and make sure the LED indicator flashes RED slowly. - Page 32 Connecting by Scanning the QR Code Step 1: Log in to CloudEdge App,tap ' +' to add Battery Camera. Step 2: Press the power button to wake the device if it is asleep. Make sure the LED indicator flashes RED slowly. E-mail: service@kfconcept.com...
- Page 33 Step 3: Select 2.4Ghz Wi-Fi and enter the password, then generate a connection QR code. Align the QR code on your mobile devices with the lens of the camera and keep a distance of 5-8 inches. After the devices recognize the QR code,it will sound“...
- Page 34 Processing Steps of Camera and Wi-Fi connection failure: 1.Please make sure you are using 2.4GHz Wi-Fi. In our experience, most users fail to connect the WI-Fl because of selecting 5GHz Wi-Fi and adding the camera incorrectly. 2. Make sure you use the correct Wi-Fi password and a fast Wi-Fi network.(Note: It requires that the Wi-Fi password doesn't have special characters such as (/l!@#$)) 3.
-
Page 35: Mounting The Camera To The Wall
5.MOUNTING THE CAMERA TO THE WALL WARM TIPS: In order to obtain the best product performance and avoid unneces- sary environmental disturbances, please pay attention to the follow- ing during the installation process: 1.Do not install the product nearly to the heat sources, such as outdoor units of air conditioners, kitchen exhausts, etc. - Page 36 Step 1: Select the location where you need to install the camera, take the camera and the phone to the location, and use the "Installation Guide" in the application to diagnose the network and determine whether the Wi-Fi signal at the location is good. It is recommended to install the camera in a location with good Wi-Fi signal for smooth camera opera- tion.
- Page 37 Suggestion: the best downward till angle of the lens is 15°to obtain the best alarm detection range. Motion Sensor Motion Sensor 9.8ft 8.2ft Downward 10° Downward 10° Height Height Detection Coverage Detection Coverage E-mail: service@kfconcept.com...
-
Page 38: Solar Panel Installation
6.SOLAR PANEL INSTALLATION Mount the bracket in the position that you choose before with the screws provided. Fasten the solar panel onto the bracket's bolt until the solar panel is not loose. Tips: The threaded hole is on the back of the solar panel. - Page 39 Tips for the installation of solar panel 1. When installed in the northern hemisphere, the panel faces south, and when in the southern hemisphere, the panel faces north. 2. Please install the solar panel in the correct position to prevent it from being blocked by kinds of stuff like eaves and branches.
-
Page 40: Function Introduction
7.FUNCTION INTRODUCTION 7.1.MAIN PAGE Go to the video browsing page Muti-screen viewing Adding Devices Device Sharing View alarm pictures and video Cloud Storage 7.2.PREVIEW PAGE Enter settings menu (alarm settings,video, lighting, device information,firmware upgrade, etc.) Turn on/off the speaker Video definition settings (SD, HD options) Full screen option SD card video playback... -
Page 41: Video Replay Page
7.3.VIDEO REPLAY PAGE Stretch the video screen with two fingers to zoom in on the image and view image details. Video timeline with drag-and-drop times election Timeline zoom button Select video playback date Select alarm video clips Video Screen-shot Record video, first click to start recording,click again to end recording Save video screen-shots and... -
Page 42: Setup Page
7.4.SETUP PAGE Modify device name (The default is S/N of device) Get device information (network information, Mac address, time zone) Installation Guide,Network Diagnostics Turn off the light,night vision settings,check the battery level Set the length of recording, alarm interval, optimize the battery life Motion detection settings, adjust the detection sensitivity, etc. -
Page 43: Device Sharing
7.5. DEVICE SHARING Others share camera steps: This function can be achieved through "Device Share". 1) Invite your friends to download and install "CloudEdge" APP and login. 2) Click the "Device Share " icon to watch the operation video, and then follow the steps to complete device sharing. When sharing, please make sure the APP account is registered in the same region. -
Page 44: Pir Motion Detection Settings
How to watch videos on SD card: Click the "History" or "Alert" button on the alarm information icon in the app to enter the video playback interface. Drag the timeline or select the alarm point to find the corresponding time period you want to record. Insert the SD card into your computer.The video file is in MP4 format. - Page 45 WARM TIPS You can adjust the sensitivity of the motion detection to solve the following problems when using this product in the process . • If the phone receives alarm messages too often, the camera will greatly consume battery power. It is recommended to adjust the motion detection sensitivity downward and set the alarm interval to turn on the alarm plan.
-
Page 46: Battery Management
7.8. BATTERY MANAGEMENT A.Charging the camera It is recommended to use a 5V/2A power adapter for charging, connect the USB charging cable that comes with the product, and plug the charging cable into the USB charging port of the device. NOTE If there is no 5V/2A power adapter, other specifications of 5V power adapter can also be charged. - Page 47 Power Interface Power Light Red Light: Charging Blue Light: Charging Completed E-mail: service@kfconcept.com...
- Page 48 B.Battery life If the device does not detect a moving object, the device will go into sleep mode to reduce the power consumption of the device.If the device detects a moving object, it quickly wakes up and starts within 1 seconand takes a screen-shot and records a video.
-
Page 49: Troubleshooting/Faq
8.TROUBLESHOOTING/FAQ For more detailed FAQs, please log in the APP, "Me"-"FAQ"-"Out- door Camera". 8.1. Device prompted offline? Check whether the equipment is in the energized state and observe whether the working light of the equipment lights up normally. Check whether the Wi-Fi network is good and restart the router. If the location of the device according to the router is far away, resulting in the inability to obtain a good Wi-Fi signal, it is recommended to move the router to a closer location, or add a WiFi amplifier to enhance the... - Page 50 • It is recommended to use San Disk, Samsung and other brand cards; It is recommended to use a standard class 10 TF card; • Only FAT32 format is supported. • TF card can't be identified when the internet environment is not good. 8.5.
- Page 51 hours or more to fully charge. 8.8. What should I do if the charge fails? • Determine whether the power adapter is good, try another one. • Determine whether the USB charging cable is good, try another one. • The charging indicator may be defective, please check the charging condition in the phone APP.
- Page 52 sunlight. • Adjust the direction of your solar panel to face the true south (in the northern hemisphere) or the true north (in the southern hemisphere) and tilt it to the appropriate angle according to your latitude to ensure maximum sun exposure. •...
- Page 53 FCC WARNING STATEMENT Changes or modifications not expressly approved by the party responsi- ble for compliance could void the user's authority to operate the equipment.This equipment has been tested and found to comply with the limits for a Class B digital device, pursuant to Part15 of the FCC Rules. These limits are designed to provide reasonable protection against harmful interference in a residential installation.This equipment gener- ates uses and can radiate radio frequency energy and, if not installed and...
- Page 54 ence that may cause undesired operation. RF Exposure Statement To maintain compliance with FCC's RF Exposure guidelines,This equipment should be installed and operated with minimum distance of 20cm the radiator your body. This device and its antenna(s) must not be co-located or operation in conjunction with any other antenna or transmit- ter.
Need help?
Do you have a question about the DQ201 and is the answer not in the manual?
Questions and answers
The battery of the camera is empty and doesn’t charge when connected to the charger .
If the K&F Concept DQ201 camera battery is empty and does not charge when connected to the charger, do the following:
1. Check if the power adapter is working and try a different one.
2. Check if the USB charging cable is working and try a different one.
3. If the charging indicator is not working, check the charging status in the phone app.
4. Check if the device’s charging port is functioning properly.
Also, avoid charging in temperatures below -20°C, as the battery may enter self-protection mode and shut down. Wait for the temperature to rise for the battery to return to normal.
This answer is automatically generated
Camera will not scan QR code
The K&F Concept DQ201 camera may not scan QR codes due to the following reasons:
1. The camera is not in the correct mode—ensure the LED indicator is flashing red slowly, meaning it is ready to connect to Wi-Fi.
2. The camera may not be powered on properly—press and hold the power button for 5 seconds until a 'Bugu' sound is heard and the red light starts flashing slowly.
3. The camera may need to be reset—insert the reset pin into the reset hole and hold for 5 seconds until a 'Bugu' sound confirms the reset.
4. The app setup may have issues—try re-downloading the app, restoring the camera to factory settings, restarting the router, and then trying the setup again.
If the issue persists after these steps, contact customer service.
This answer is automatically generated