
Related Manuals for Endress+Hauser TOC Analyzer CA79


Summary of Contents for Endress+Hauser TOC Analyzer CA79
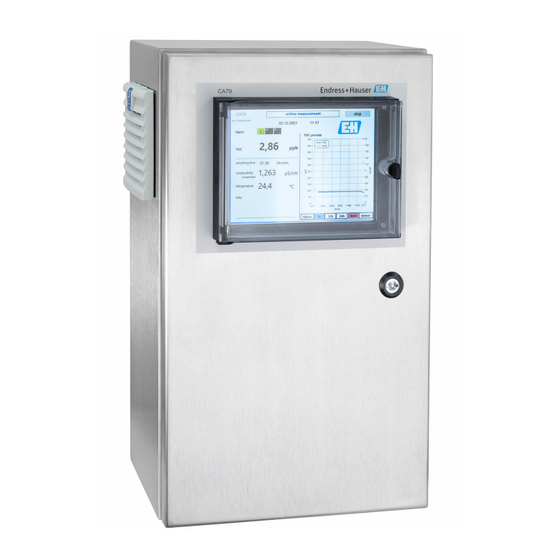
- Page 1 Products Solutions Services BA02220C/07/EN/01.21-00 71552245 2021-12-15 Operating Instructions TOC Analyzer CA79 Determination of total organic carbon (TOC) in the trace range Powerful compact device...
-
Page 3: Table Of Contents
TOC Analyzer CA79 Table of contents Table of contents About this document ....4 Diagnostics and troubleshooting . . . 42 Warnings ......4 10.1 Replacing the hose system . -
Page 4: About This Document
Reference to graphic Result of a step Symbols on the device Reference to device documentation Documentation The following manuals, which complement these Operating Instructions, can be found on the product pages on the Internet: Technical Information TOC Analyzer CA79, TI01623C Endress+Hauser... -
Page 5: Basic Safety Instructions
TOC Analyzer CA79 Basic safety instructions Basic safety instructions Requirements for the personnel • Installation, commissioning, operation and maintenance of the measuring system may be carried out only by specially trained technical personnel. • The technical personnel must be authorized by the plant operator to carry out the specified activities. -
Page 6: Product Safety
Basic safety instructions TOC Analyzer CA79 Product safety 2.5.1 State-of-the-art technology The product is designed to meet state-of-the-art safety requirements, has been tested, and left the factory in a condition in which it is safe to operate. The relevant regulations and international standards have been observed. -
Page 7: Incoming Acceptance And Product
TOC Analyzer CA79 Incoming acceptance and product identification Incoming acceptance and product identification Incoming acceptance 1. Verify that the packaging is undamaged. Notify the supplier of any damage to the packaging. Keep the damaged packaging until the issue has been resolved. -
Page 8: Scope Of Delivery
Incoming acceptance and product identification TOC Analyzer CA79 5. Click on the product image in the popup window. A new window (Device Viewer) opens. All of the information relating to your device is displayed in this window as well as the product documentation. -
Page 9: Product Description
TOC Analyzer CA79 Product description Product description Product design A0046933 1 Product design Main switch USB port Display Analog output 1 Analog output 2 Housing lock Fluid inlet, sample, UNF ¼ - 28 (order option) Fluid inlet 1, UNF ¼ - 28 Fluid inlet 2, UNF ¼... -
Page 10: Process Diagram
Product description TOC Analyzer CA79 Process diagram A0046935 2 Process diagram Waste Sample Input 1 Input 2 Input 3 Pump V1 - Valve 1, valve 2 (order option) and valve 3 (order option) LF1 - Conductivity and temperature sensors... - Page 11 TOC Analyzer CA79 Product description 4.3.2 Socket assignment (system with two connection sockets) Output 1 Socket Description 1: 4 (0) - 20 mA (GND) TOC 1 (0 to set limit) 2: 4 (0) - 20 mA (+) 3: 4 (0) - 20 mA (GND) Δ...
-
Page 12: Mounting
Mounting TOC Analyzer CA79 Mounting Mounting requirements 5.1.1 Dimensions (11. 200 (7.87) A0046932 3 Dimensions in mm (in) 5.1.2 Mounting options The analyzer is designed for bench-top mounting and wall mounting. The following graphic shows the location of the blind rivet nuts on the back of the housing. -
Page 13: Mounting The Analyzer
TOC Analyzer CA79 Mounting 18 (0.70) 18 (0.70) 264 (10.39) A0047197 4 Rear of the housing Blind rivet nut Mounting the analyzer WARNING The device is live! Risk of electric shock! ‣ Do not connect the analyzer to the electricity supply before the installation work is completed and the media are connected. -
Page 14: Post-Mounting Check
Mounting TOC Analyzer CA79 5. After the visual inspections, it is time to mount the sample feed lines and the waste line of the TOC system. It is important to keep the lines as short as possible and, when shortening, to cut them straight at a right angle with a hose cutter. - Page 15 TOC Analyzer CA79 Mounting 2. Inspect all the hoses for any damage. Replace damaged hoses. Endress+Hauser...
-
Page 16: Electrical Connection
Electrical connection TOC Analyzer CA79 Electrical connection Connecting instructions WARNING The device is live! Risk of electric shock! The line filter, the overvoltage module and the main switch are still connected to the power supply even when the main switch is switched off! ‣... -
Page 17: Operation Options
TOC Analyzer CA79 Operation options Operation options Overview of operation options A0047049 6 Operating elements Main switch USB port Touch screen monitor Structure and function of the operating menu The analyzer has the following menus: • Measure online • Viewer (History) •... -
Page 18: Access To The Operating Menu Via The Local Display
Operation options TOC Analyzer CA79 Access to the operating menu via the local display Function ‣ Measure Press the key. TOC measurement is started. ‣ Viewer Press the key. The Viewer menu is opened. All TOC measured values can be viewed via this menu. -
Page 19: Commissioning
TOC Analyzer CA79 Commissioning Commissioning Function check Incorrect or improperly connected hose connections cause liquid to leak and can cause damage! ‣ Check all connections and ensure they have been established correctly. ‣ In particular, check all hose connections to ensure they are secure and liquid cannot escape. - Page 20 Commissioning TOC Analyzer CA79 A0046940 Warnings If the TOC and/or conductivity is above the configured limit, the value is displayed in red digits. In addition, a warning is output via a digital output (optional). The limit can be shown as a red line in the chart.
- Page 21 TOC Analyzer CA79 Commissioning A0046944 8 Leak in the system UV intensity too low If the intensity of the UV lamp is too low or if the UV lamp is defective, the analyzer stops the measurement automatically and the UV lamp broken message is displayed. In this case, a new UV reactor is needed.
- Page 22 Commissioning TOC Analyzer CA79 Error during sampling This warning message can only appear with the order option Detection inlet pressure sample. If this message is displayed, the sensor has detected a closed input. ‣ Check that medium is correctly supplied to the device.
- Page 23 TOC Analyzer CA79 Commissioning A0046946 11 Qualification menu Calibration and adjustment The measurement must be stopped to perform the calibration. The system asks the user to provide the solutions. The solution concentration is specified in the Settings → 28 menu.
- Page 24 Commissioning TOC Analyzer CA79 3. Close the pop-up window by pressing the OK key. A pop-up window is displayed with the calibration results. A0046949 13 Calibration factor pop-up window 4. Press the Yes key to confirm the result.
- Page 25 TOC Analyzer CA79 Commissioning A0046948 15 Calibration curve Factors and R Calibration curve List of measured values It is recommended to repeat the measurement series three times. The standard volumes used are 500 ml and suffice for several measurements. The measurement results should be constant within this measurement series and be close to one another.
- Page 26 Commissioning TOC Analyzer CA79 Performing the system suitability test on a device with the "System suitability test, manual" order option 1. Connect the SST solution with the required concentration of sucrose to INPUT 1. The SST is performed semi-automatically with all the configured parameters from the Settings →...
- Page 27 TOC Analyzer CA79 Commissioning 8.3.4 System A function check on the following components can be performed in this menu: • Starting of the pump (normal < or fast <<<) • Switching of the valves • Switching on of the UV reactor •...
- Page 28 Commissioning TOC Analyzer CA79 A pop-up window appears once a menu is closed. It takes a few seconds until the analyzer has saved all the settings. A0046960 19 Chart The diagram curve of each value can be switched on or off with the individual color keys.
- Page 29 TOC Analyzer CA79 Commissioning The following settings can be changed via the Options 1 tab: Setting Description ppb limit (ppb) This limit indicates the maximum value at which the output signal for the detection limit value is switched. The maximum value for scaling the 4-20 mA outputs is also indicated here.
- Page 30 Commissioning TOC Analyzer CA79 Setting Description Record pause This value indicates the intervals for recording the measured values in the log file. 1 value (puse x2 = corresponds to 2 seconds. delaytime Max. limit This value indicates the conductivity limit; if this limit is exceeded a warning is generated.
- Page 31 TOC Analyzer CA79 Commissioning 8.3.6 Autostart If the system is interrupted during a measurement (due to a power outage, for example), the Autostart window appears when the system is restarted. If the user does not stop autostart by pressing the Deactivate autostart key, the interrupted measurement is restarted.
- Page 32 Commissioning TOC Analyzer CA79 4. Press OK in the Login window. Pressing the Enter character on a connected keyboard or moving the mouse to the next line will produce a login error. A pop-up window appears once the various pages are closed. Wait for approx. 30 seconds to ensure that all the data are saved.
- Page 33 TOC Analyzer CA79 Commissioning 1. Press the Interval list key to open the interval editor. The interval sequence can be edited in the editor once you press the Interval list key. A0046974 24 Editor The time is the measuring time with the rinse duration in minutes.
- Page 34 Commissioning TOC Analyzer CA79 A0046942 25 Main menu with user management A0046975 26 User management menu An administrator account and a password are needed to log in. During initial commissioning, the menu with the Install account opens. Once the menu has opened, the user is asked to replace the default password with a new password.
- Page 35 TOC Analyzer CA79 Commissioning A0046976 27 Drop-down menu Adding a new user 1. In the pull-down menu, select the Add user entry. A user can only create new users at the same authorization level (i.e. an assistant can only create an assistant).
- Page 36 Commissioning TOC Analyzer CA79 A0046979 6. Press the Yes key. Changing user properties 1. Press the User management key in the main menu. 2. From the drop-down list, select the user whose user properties should be changed. A0046980 3. Change the user properties as required (rights (1), deactivation (2), password validity (3) or reset password (4)).
- Page 37 TOC Analyzer CA79 Commissioning A0046982 Defining a new password The user logs in for the first time with default access rights. After logging in, the user is asked to set a new password. In the Rights menu, the administrator can define the minimum number of characters for the ID and password as one of the basic settings →...
- Page 38 Commissioning TOC Analyzer CA79 A0046985 Administration of rights The following steps must be taken to define the various rights of the user groups and to make additional basic settings under rights management. 1. Open the Settings menu. 2. Press the Rights management key.
- Page 39 TOC Analyzer CA79 Commissioning A0046987 31 Rights management menu The user and the rights assigned to the user ensures that every action on the analyzer can be recorded and tracked. This data can be viewed in the audit trail and cannot be modified or tampered with.
- Page 40 Commissioning TOC Analyzer CA79 A0046989 33 Screen displaying "wrong password" The number of remaining attempts to log in is displayed in this window. The user is blocked after three failed attempts to enter the password. The administrator can reset the password →...
-
Page 41: Operation
TOC Analyzer CA79 Operation Operation Reading off measured values The following measured values are displayed in the measuring screen of the analyzer: • TOC in ppb • Conductivity (display can be hidden as an option) • Temperature • Load curve: TOC, conductivity... -
Page 42: Diagnostics And Troubleshooting
Diagnostics and troubleshooting TOC Analyzer CA79 Diagnostics and troubleshooting 10.1 Replacing the hose system To ensure the hose fittings are seated correctly, it is advisable to cut the hoses to length with a special hose cutter to ensure a straight cut surface and to avoid the deformation of the hose ends. -
Page 43: Firmware History
TOC Analyzer CA79 Diagnostics and troubleshooting 5. Then place the fitting (which has been prepared as explained above) into a coupling (1). A0047338 38 Coupling 6. Screw the socket into the coupling and tighten it by hand A0047339 39 Screwing in the socket 10.2... -
Page 44: Maintenance
Maintenance TOC Analyzer CA79 Maintenance Incorrect maintenance can result in inaccurate operation and pose a safety hazard! ‣ All the maintenance processes described in this section must only be performed by a properly qualified technician. ‣ Before every maintenance activity: The specialist staff must be completely familiar with the entire process and have perfectly understood all the steps involved. - Page 45 TOC Analyzer CA79 Maintenance A0047335 40 Peristaltic pump Hose system Pump inlet Luer adapter Hose clips Hose fasteners of pump Pump head Pump housing Pump hose Pump outlet Perform the following steps to replace the pump hose: 1. Stop the flow of sample entirely.
- Page 46 Maintenance TOC Analyzer CA79 11.2.2 Reactor with UV lamp WARNING Radiation source with short-wave UV radiation! Improper handling can cause damage to eyes and skin! ‣ Before working on the reactor, always take the device out of service and disconnect it from the power supply! ‣...
-
Page 47: Taking Out Of Service
TOC Analyzer CA79 Maintenance 3. Disconnect fluid connections (2) to and from the reactor (4). A small amount of water can escape here (residual liquid in the reactor). 4. Release the connecting plug (1) to the electronic ballast. 5. Remove the reactor from the holders of the metal housing. For this purpose, the reactor must first be removed from the top holder (3) and then from the bottom holder (5). -
Page 48: Repair
The product must be returned if repairs or a factory calibration are required, or if the wrong product was ordered or delivered. As an ISO-certified company and also due to legal regulations, Endress+Hauser is obliged to follow certain procedures when handling any returned products that have been in contact with medium. -
Page 49: Accessories
TOC Analyzer CA79 Accessories Accessories The following are the most important accessories available at the time this documentation was issued. ‣ For accessories not listed here, please contact your Service or Sales Center. CA78/79 pressure reducer kit Supply pressure: max. 10 bar (145 psi), adjustable output pressure Order No. -
Page 50: Technical Data
Technical data TOC Analyzer CA79 Technical data 14.1 Input Measured variable Measuring range 0.5 to 1 000 µg/l (ppb) Input signal Controller input 24 V (order option) The controller input starts a measurement. The function is only available for 1-channel devices. -
Page 51: Power Supply
TOC Analyzer CA79 Technical data 14.4 Power supply Supply voltage 100/240 V AC, 47 - 63 Hz Power consumption Max. 60 W Power supply cable 2 m, Type E+F mains plug pre-installed 14.5 Performance characteristics Measuring range TOC (total organic carbon) Maximum measured error +/- 0.5 µg/l (ppb) or 1 %, the larger value applies in each case... -
Page 52: Process
Technical data TOC Analyzer CA79 Degree of protection IP 42 (standard device), IP54 (order option) Electromagnetic Interference emission and interference immunity as per EN 61326-1:2013, Class A for Industry compatibility Electrical safety According to EN/IEC 61010-1:2010, Class 1 equipment Low voltage: overvoltage category II... -
Page 53: Index
TOC Analyzer CA79 Index Index Maintenance effort ......51 Maintenance interval ......51 Access via local display . - Page 54 Index TOC Analyzer CA79 Safety instructions ......5 Sample outlet ......52 Sample quality .
- Page 56 *71552245* 71552245 www.addresses.endress.com...
Need help?
Do you have a question about the TOC Analyzer CA79 and is the answer not in the manual?
Questions and answers