Table of Contents
Advertisement
Advertisement
Table of Contents

Subscribe to Our Youtube Channel
Related Manuals for Technika A700


Summary of Contents for Technika A700
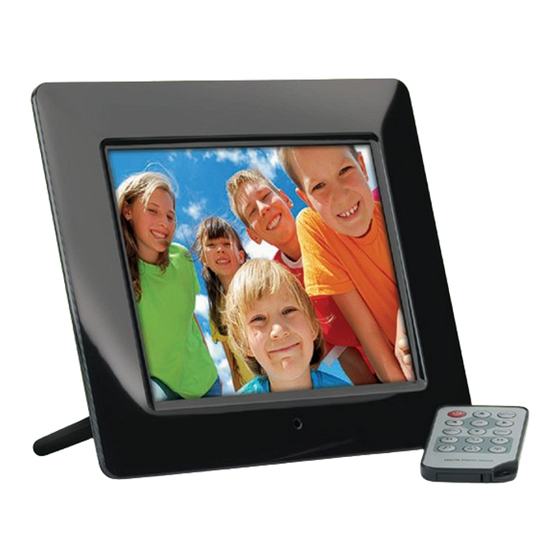
- Page 1 A700 Owner’s Handbook Picture Frame...
-
Page 2: Safety Information
IMPORTANT SAFETY INFORMATION Read these instructions. Keep these instructions. Heed all warnings. Follow all instructions. Do not use this apparatus near water. Clean only with a slightly damp cloth. Do not block any ventilation openings. Install in accordance with the manufacturer’s in- structions. -
Page 3: Table Of Contents
CONTENTS SAFETY INFORMATION ...2 INTRODUCTION ...4 UNPACKING ...4 CONTROLS AND FUNCTIONS ...5 REMOTE CONTROL HANDSET ...6 GETTING STARTED ...7 CONNECTING THE POWER SUPPLY ...8 SWITCHING ON ...8 INSERTING MEDIA ...8 NAVIGATING THE FRAME ...9 VIEWING PICTURES ...10 NAVIGATING A SLIDESHOW ...11 THUMBNAIL MODE ...11 VIEWING THE CLOCK AND CALENDAR ...12 SYSTEM SETUP ...13... -
Page 4: Introduction
IINTRODUCTION Your Digital Picture Frame (DPF) enables you to view digital pictures from either a memory card or from a USB drive. The DPF is compatible with the following card formats: SD™ (Secure Disk), MMC™(Multimedia Card), MS™ (Memory Stick) and SDHC (Secure Disk High Capacity). -
Page 5: Controls And Functions
CONTROLS AND FUNCTIONS SD/MMC/MS Card Slot USB Socket 5V DC Input Socket ON/OFF Switch Navigation Keys* Detachable Stand 7” Display Screen Remote Control Sensor *NAVIGATION KEYS Play/Pause; Confirm/Enter; hold to enter main menu Previous/Left button Down button; Rotate photo while playing a slideshow Next / Right button Up button;... -
Page 6: Remote Control Handset
REMOTE HANDSET HANDSET KEYS AND FUNCTIONS Press to set the player in and out of Standby. Press to move the cursor upward. Press to move the cursor leftward or select the previous picture. 4 MENU Press to return to the main menu. Press to move the cursor downward. -
Page 7: Getting Started
GETTING STARTED HANDSET PREPARATION Remove the protective strip from the battery compartment to activate the battery. If the handset behaves erratically or fails to operate the battery should be replaced. 1: Press the catch at the side of the battery compartment. -
Page 8: Connecting The Power Supply
CONNECTING POWER Plug the DC power jack of the adapter into the DC socket in the DPF. Plug the power adapter into the mains point. Switch on at the mains. Switch the ON /OFF switch on the frame to ON. •... -
Page 9: Navigating The Frame
INSTALLING A USB DEVICE OR MEMORY CARD To insert a memory card. Position the card with the cropped corner facing the top of the screen and press gently in. To release a memory card. Grip both sides of the card and gently pull out. When first switched on the pictures will display as a Slide Show. -
Page 10: Viewing Pictures
VIEWING PICTURES Switch the ON /OFF switch on the frame to ON or press the on the handset to bring the frame out of Standby. If there is a memory device inserted the device will start a slideshow. When the frame detects a memory devices it displays all the viewable images. -
Page 11: Navigating A Slideshow
NAVIGATING A SLIDESHOW VIA THE OSD MENU During a slideshow: Press the OSD key The OSD menu appears on the screen and slideshow pauses. Press the or key on the handset to navigate between the icons on the OSD menu. •... -
Page 12: Viewing The Clock And Calendar
Accessing Thumbnail Mode from the Main Menu Switch the ON /OFF switch on the frame to ON. or Press the key to bring the frame out of standby Press MENU to display the main menu Press the key on the handset to select a memory device. Press OK: Thumbnail Mode will deploy. -
Page 13: System Setup
SYSTEM SETUP Main Menu Access the Main Menu. Select SETUP: Press OK. (You can also enter the Setup Menu at by pressing the SETUP key on the handset) There are three Setup menus Photo Setup Sliding show time Photo Mode Transition Effect Date Stamp Shuffle... - Page 14 Press OK to confirm and return to the Photo Setup Menu. Press to select Transition Effect. Press Photo Setup Sliding show time Photo Mode Random Transition Effect Date Stamp Shuffle Press to select Off or Random. Off: the slides change with no effects in between Random: The slides change with a variety of effects between slides.
- Page 15 CLOCK/CALENDAR SETUP Press to select Clock/Calendar setup. Press OK Clock/Calendar Setup Show photo Set time Set time format Set date Set date format Press to select Show Photo. Press to select On or Off. Press OK to confirm and return. Press The “Show Photo”...
- Page 16 Setting the Date The Default Date format is Month/Date/Year (mm/dd/yy). Before setting the date you may wish to change the format to dd/mm/yy. Clock/Calendar Setup Show photo mm/dd/yy Set time dd/mm/yy Set time format yy/mm/dd Set date Set date format Press to select Set date format.
- Page 17 Auto Run This setting selects the display which comes on when the DPF is switched on or brought out of Standby, Photo is the default. . General Setup Language Photo Brightness MainMenu Contrast Clock Saturation Calendar Auto run Power on Press to select Auto Run.
-
Page 18: Troubleshooting
TROUBLESHOOTING If your DPF seems not to be working as well as you might expect, please work through this checklist before returning the product to Tesco. The DPF will not switch on. Switch off, Check the power supply connections, switch on again. The DPF will not recognise a memory card. -
Page 19: Care, Warranty & Specifications
263 grams WARRANTY Your Technika appliance is covered by a warranty for 12 months from the date of purchase. If a fault develops during this period, please contact the TESCO electrical help line on 0845 456 6767. Please have your original purchase receipt with you when you call. - Page 20 Tesco Stores Ltd, Delamare Road, Cheshunt, Herts, EN8 9SL Technika Helpline: 0845 456 6767 ( Calls cost up to 4p per minute from a BT landline, other providers may vary)
Need help?
Do you have a question about the A700 and is the answer not in the manual?
Questions and answers