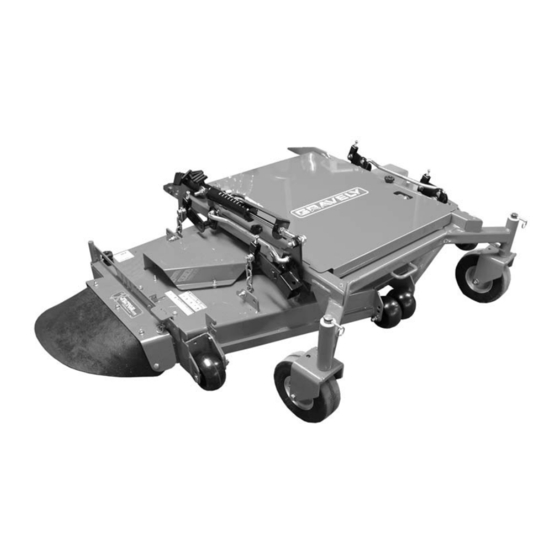
THE MANUAL PRODUCT REGISTRATION Before operation of unit, carefully and completely read your The Gravely dealer must register the product at the time of manuals. The contents will provide you with an purchase. Registering the product will help the company...
2. Understand all Safety Precautions provided in the Customer Note: Your Dealer has been provided complete manuals. setup and preparation instructions which must be completed prior to you taking delivery of this unit. The dealer is required 3. Review control functions and operation of the unit. Do to review important information in this manual with you not operate unit unless all controls function as described before or upon delivery of the unit or attachment.
Page 4
SAFETY DECALS AND LOCATIONS ALWAYS replace missing or damaged Safety Decals. Refer to Figure 2 for Safety Decal locations. DANGE R /PELIGRO 07731400D WARNING/A VERTISSEMENT/ADVERTENCIA Do not operate mo wer Ne jamais utiliser No operar segadora a unless guards are in la tondeuse sans menos que las defensas operating position or...
Page 5
Inspect unit before each use for: missing or damaged decals ALWAYS keep body and hands away from pin holes or and shields, correctly operating safety interlock system, and nozzles which eject hydraulic fluid under pressure. deterioration of grass catchers. Replace or repair as DO NOT touch parts which are hot.
Page 6
Stop and inspect equipment if you strike an object or if there This product is equipped with an internal combustion type is an unusual vibration. Repair, if necessary, before engine. DO NOT use unit on or near any unimproved, restarting. Never make adjustments or repairs with the forest-covered or brush covered land unless exhaust system engine running.
Assemble and Install Deck NOTE: To install the deck and connect the lift cylinder, you will use hardware that ships with the Promaster 320 as well as hardware that ships with the deck. Make sure you have all hardware available when assembling and installing the Electric PTO deck.
Page 8
3. Install the long PTO belt on the electric clutch pulley on unit. See Figure 6. 4. Connect the idler spring on the idler arm to the spring anchor. See Figure 6. Idler Spring Illustration In Progress 1. Mounting Hardware 3.
OPERATION Cylinder Stops WARNING: AVOID INJURY. Read and understand The cylinder stops ensure deck lowers to same cutting the entire Safety Section before attempting any height after raising the deck to clear an obstacle. The stops maintenance. are stored on a post mounted on the mower frame. The stops are supplied in two (2) sizes.
MAINTENANCE Gravely Dealers will provide any service or adjustments CHECK FASTENERS which may be required to keep your unit operating at peak Be certain that all hardware is tightened to the proper torque. efficiency. Should engine service be required, contact an...
SERVICE AND ADJUSTMENTS WARNING: AVOID INJURY. Read and understand the entire Safety Section before attempting any maintenance. REPLACING MOWER BELTS PTO BELT REMOVAL WARNING: MOVING PARTS can cut or amputate body parts. ALWAYS wait for moving parts to stop before performing maintenance or service. CAUTION: DAMAGED OR WORN BELTS may result in injury and/or damage to unit.
Page 13
DO NOT sharpen to this pattern PTO Idler Spring Length Measure PTO idler spring length here. Sharpen to this pattern OF3229 The PTO idler spring length range should be 13 – 13.25 in. (33 – 33.6 cm). Measure the spring length with the deck set at 2 in.
Page 14
2. Sharpen mower blade by removing an equal amount of 3. Place blocks at each corner of the deck to support the material from each end of mower blade. DO NOT weight of the deck. change angle of cutting edge or round the corner of the 4.
Page 15
Adjust Blade Height Blade Side-to-Side Level Level and pitch the mower with the height adjusters on each deck lift bracket (figure 17). Loosen the jam nut on the deck lift bracket bolt about a quarter turn to reduce clamp load on the height adjusters.
3. Mower blades damaged. 3. Replace mower blades. 4. Mower belt damaged or off pulleys. 4. Install or replace belt. ACCESSORIES SPECIFICATIONS See your authorized Gravely Dealer to add these optional Model Number 890018 accessories. Description Name 60" deck Part No.
Page 17
ARTS MODELS TABLE OF CONTENTS Decals Model 890018 Decals ........18 PM 320 60-Inch Deck Assembly Mower Decks Serial No.
Page 23
OUNTING RMS AND UARDS Item Part No. Qty. Description 09099300 Assembly, Mower Mounting Arm (Contains Items 2, 5) 09099253 AR Weldment, Mower Mounting Arm 04906700 Assembly, Mower Mounting Arm Left Hand (Contains Items 4,5) 04913853 (AR) Weldment, Mower Mount Arm 05435900 AR Bearing .75 x .875 x 1.00 05959400...
Genuine Ariens or Gravely brand service parts and accessories are warranted to be free from defects in material and workmanship for a period of 90 days after the date of purchase. An authorized Ariens or Gravely dealer will repair or replace any such part or accessory free of charge, except for labor, during that period.
Page 29
• Mufflers, belts and tires on Ariens and Gravely commercial lawn and garden products are not covered by this warranty. • Any misuse, alteration, improper assembly, improper adjustment, neglect, or accident which requires repair is not covered by this warranty.
Page 30
GRAVELY 655 West Ryan Street Brillion, WI 54110-1072 920-756-2141 Fax 920-756-2407 www.gravely.com...
Need help?
Do you have a question about the Promaster 320 and is the answer not in the manual?
Questions and answers