
Related Manuals for TSI Instruments BlueSky 8145


Summary of Contents for TSI Instruments BlueSky 8145
- Page 1 ™ BlueSky Air Quality Monitor Model 8145 Operation and Maintenance Manual P/N 6016553 Rev. A May 2022 www.tsi.com...
- Page 2 Start Seeing the Benefits of Registering Today! ® ® Thank you for your TSI instrument purchase. Occasionally, TSI releases information on software updates, product enhancements ® and new products. By registering your instrument, TSI will be able to send this important information to you. http://register.tsi.com As part of the registration process, you will be asked for your comments on TSI products and services.
- Page 3 Copyright© TSI Incorporated / 2022 / All rights reserved. Part Number 6016553 / Revision A / May 2022 Address TSI Incorporated / 500 Cardigan Road / Shoreview, MN 55126 / USA Fax No. (651) 490-3824 LIMITATION OF WARRANTY AND LIABILITY (effective May 2022) (For country-specific terms and conditions outside of the USA, please visit www.tsi.com.) Seller warrants the goods, excluding software, sold hereunder, under normal use and service as described in the operator's manual, to be free from defects in workmanship...
- Page 4 SHALL BE THE RETURN OF GOODS TO SELLER AND THE REFUND OF THE PURCHASE PRICE, OR, AT THE OPTION OF SELLER, THE REPAIR OR REPLACEMENT OF THE GOODS. IN THE CASE OF SOFTWARE, SELLER WILL REPAIR OR REPLACE DEFECTIVE SOFTWARE OR IF UNABLE TO DO SO, WILL REFUND THE PURCHASE PRICE OF THE SOFTWARE.
-
Page 5: Table Of Contents
Contents Contents ......................i Figures ......................ii Safety Information ..................v Description of Caution/Warning Symbols ..........v Caution ....................v Warning ....................v Caution and Warning Symbols ..............v Labels ....................viii Reusing and Recycling ................ix Chapter 1 Product Overview ............... 1 Unpacking .................... -
Page 6: Figures
Appendix A Specifications* ............... 45 Appendix B Status Flags and Error Codes ..........49 Examples: ..................50 Figures 1: Front view ....................1 2: Bottom view ....................2 3: Front view of BlueSky™ monitor in package ..........7 4: Activate new device ................... 9 5: Activate New Device icon ................ - Page 7 39: Disconnect sensor cable ................ 38 40: Remove sensor body ................39 41: Disconnect sensor cable ................ 40 42: Lift sensor board to remove it ..............40 43: Disconnect sensor cable ................ 41 44: Remove sensor ..................42 45: Reconnect cable connector ..............42...
- Page 8 (This page intentionally left blank)
-
Page 9: Safety Information
Safety Information Description of Caution/Warning Symbols Appropriate caution/warning statements are used throughout the manual and on the instrument that require you to take cautionary measures when working with the instrument. Caution C A U T I O N Failure to follow the procedures prescribed in this manual might result in irreparable equipment damage. - Page 10 W A R N I N G S • Use of components other than those specified by ® ® Incorporated (TSI ) may impair the safety features provided by the equipment. • When mains power adapters are used, the equipment should be positioned so the mains plug will remain accessible for emergency disconnect.
- Page 11 3. The power supply adapter provided is rated for outdoor use with an ingress protection rating of IP 68. It can be used outdoors or indoors under wet conditions in rain or snow. 4. The power supply is rated to operate between – 30°C to 80°C (–22°F to 176°F) with humidity ranging from 0% to 95% non-condensing but the BlueSky™...
-
Page 12: Labels
W A R N I N G The use of controls, adjustments, or procedures other than those specified in this manual may result in exposure to hazardous optical radiation. W A R N I N G If the BlueSky™ monitor is used in a manner not specified by the manufacturer, the protection provided by the equipment may be impaired. -
Page 13: Reusing And Recycling
Reusing and Recycling Incorporated’s effort to have a ® As part of TSI minimal negative impact on the communities in which its products are manufactured and used: ® If instrument becomes obsolete, return to TSI for disassembly and recycling. Safety Information... - Page 14 (This page intentionally left blank)
-
Page 15: Chapter 1 Product Overview
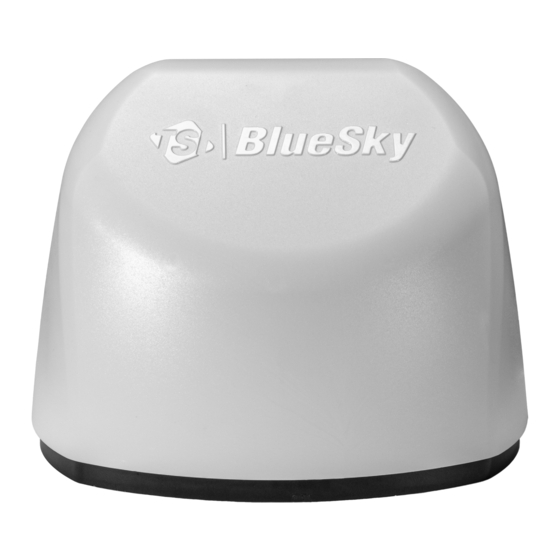
Chapter 1 Product Overview Incorporated’s BlueSky™ 8145 Air Quality Monitor is a real-time ® outdoor air quality sensor that is designed to provide accurate mass concentration measurements of PM2.5, CO , CO, NO , SO well as barometric pressure, temperature and relative humidity. The monitor is designed to be deployed in less than ten minutes and can be used in both indoor and outdoor applications. -
Page 16: Unpacking
Figure 2: Bottom view Unpacking Compare all the components you received with those listed in the table below. Part Item Number Description 8145 BlueSky™ Air Quality Monitor Mounting Bracket Screw IP68 Rated 5V Power Supply Zip Tie Chapter 1... -
Page 17: Bluesky™ Monitor Replacement Parts
BlueSky™ Monitor Replacement Parts Listed below are replacement items for the BlueSky™ Air Quality ® Monitor. Contact for purchase information. Part Item Number Description Replacement 814306 Mounting Bracket 814307 Maintenance kit— Screws, Screw Driver and PM Sensor screens 814301 Replacement Power Supply—... -
Page 18: Replacement Sensors
Part Item Number Description 8145-SS Replacement sensor shield Replacement Sensors Part Item Number Description Single PM sensor 814304 replacement 814305 5 pack PM sensors 8145-SO (Sulfur Dioxide), EC (Electrochemical Sensor) 8145-CO CO (Carbon Monoxide), EC (Electrochemical Sensor) 8145-NO (Nitrogen Dioxide), EC (Electrochemical Sensor) 8145-O... -
Page 19: Accessories
Accessories Item Part Number Description Cellular modem – 8145-CE NA version, FCC certified modem, w/indoor rated power supply Cellular modem – 8145-CEEU EU version, CE certified modem, w/indoor rated power supply 8145-SO Solar system, includes 1 12VDC (8) A-Hr battery, 1 charge controller, 1 panel, 1 outdoor enclosure and mounting hardware... - Page 20 (This page intentionally left blank) Chapter 1...
-
Page 21: Chapter 2 Setting Up
Chapter 2 Setting Up The BlueSky™ Outdoor Air Quality Monitor is delivered fully assembled and ready to be mounted on an outside wall or post. Start by unpacking the device and its contents from the shipping package. ® The monitor is intended to be connected to local 2.4 GHz Wi-Fi ®... - Page 22 N O T I C E S • As long as a suitable microSD card is installed, the BlueSky™ monitor will store data on the card whether or not the unit is ® ® connected to Wi-Fi . TSI is not liable for corrupt data on the memory card.
-
Page 23: Activating A New Device(S)
Activating a New Device(s) 1. Open the browser on your phone/computer and navigate to https://www.tsilink.com/. 2. Login using your TSI.com account credentials. If you do not have an TSI.com account, click on the “Create Account” button and create a new account. Figure 4: Activate new device 3. -
Page 24: Connecting Bluesky™ To A Wi-Fi Network
® Connecting BlueSky™ to a Wi-Fi Network N O T I C E It is recommended that the process of configuring the wireless network settings and connecting the instrument to the internet be performed in an office or a lab environment before setting up in the final location. -
Page 25: 7: Set Up Mode - Led Pulsing Yellow (Power Cord Not Shown For Clarity)
2. An LED next to the micro USB connector will pulse yellow to ® indicate that the monitor is in set up mode as a Wi-Fi hotspot. It will remain in this mode for 90 seconds. If you need more time, simply unplug and plug the monitor back in again. -
Page 26: 8: Qr Codes Label
3. Locate the label on the bottom of the monitor, that contains the QR codes. Figure 8: QR codes label 4. With your phone camera, scan the QR code on the left side of the label (Step 1) to connect to the monitor’s Wi-Fi ®... -
Page 27: 10: Manually Connect To Wi-Fi
5. If you are not connected automatically, you can still connect ® manually by searching for Wi-Fi networks and connecting to the one listed as “BlueSky OAQ 8145XXX…” ® Figure 10: Manually connect to Wi-Fi 6. Once connected to the BlueSky™ monitor Wi-Fi ®... -
Page 28: 12: Conwi-Fi Network
7. You should see a web page like the one below. Select your home ® or office Wi-Fi network from the list. ® Figure 12: Configure Wi-Fi network ® 8. Enter the Wi-Fi password and click Save. ® Figure 13: Enter Wi-Fi password Chapter 2... -
Page 29: 14: Led Pulsing Yellow (Power Cord Not Shown For Clarity)
9. The monitor should automatically power cycle and start again with a pulsing yellow LED next to the micro USB connector. Figure 14: LED pulsing yellow (power cord not shown for clarity) 10. The process of connecting to your local internet will be reflected in the color sequence shown below. -
Page 30: 15: Connections Made - Led Solid Blue
11. If all connections are made, the LED will be solid blue. 12. You should now be able to see measurement data from the device. Be patient, as it may take a few minutes for the device to start reporting its data to the cloud. Figure 15: Connections made –... -
Page 31: Installing The Bluesky™ Outdoor Air Quality Monitor
® Wi-Fi Cloud Pulse Yellow Set up Mode Pulse White Connecting Pulse Blue Connected Connecting Solid Blue Connected Connected Solid White No connection No connection Installing the BlueSky™ Outdoor Air Quality Monitor ™ 1. The BlueSky monitor comes with the mounting bracket and zip ties to secure the instrument to a pole or a wall. -
Page 32: 18: Pole Mount
3. Next, mount the instrument to a pole or wall using the mounting bracket for stability. Additionally, connect the power cable to the USB port on the bottom of the monitor. Make sure the power cable has some strain relief as shown below in the pole mount example. -
Page 33: 19: Wall Mount
N O T I C E Use 1/4” screws or #10 screws to mount the bracket to a surface like a wall. The type of screw used depends on the type of the material the surface is made up of. b. -
Page 34: 20: Water Resistant / Waterproof Outdoor Receptacle Enclosure
4. Plug the other end of the power supply into a weatherproof “in use” resistant/IP 68 rated outdoor receptacle enclosure, an example is shown below. Figure 20: Water resistant / waterproof outdoor receptacle enclosure W A R N I N G Improper outdoor installation could result in equipment damage and/or electrical shock. -
Page 35: 21: Start-Up Sequence Starts Again - Led Pulsing Yellow (Power Cord Not Shown For Clarity)
5. When power is now applied, the start-up sequence will start again with a pulsing yellow LED next to the micro USB connector. Figure 21: Start-up sequence starts again - LED pulsing yellow (power cord not shown for clarity) 6. The process of connecting to your local internet will be reflected in the color sequence shown below. - Page 36 ® Wi-Fi Cloud Pulse Yellow Set up Mode Pulse White Connecting Pulse Blue Connecting Connected Solid Blue Connected Connected Solid White No connection No connection 7. If the LED stops at solid white, then review the steps above and repeat as needed or see the troubleshooting section in Chapter 5.
-
Page 37: Chapter 3 Operation
Chapter 3 Operation Overview The BlueSky™ Air Quality Monitor’s primary use is in outdoor applications. It is designed to operate 24/7 when powered by a standard outdoor power outlet. Once you have setup your monitor(s) ® and connected them to a local wireless (Wi-Fi ) network, you can log ®... -
Page 38: 23: Device Registration Screen
6. Register your device by entering in the required information and click DONE. If you do not see the Device Registration screen, click the “Plus” icon on the bottom right of the map. • Note that you can enter Latitude and Longitude using the browser location or the tool by going to https://www.latlong.net/. -
Page 39: 24: Adjust Device Pin Location
7. Adjust the device pin location if needed and/or click Done. Figure 24: Adjust device pin location 8. Verify your device pin is displaying PM2.5 and other measurements to confirm you successfully signed up for an online account and registered your device. Figure 25: Map view Operation... -
Page 40: 26: Api Menu
9. If you have both TSI Link™ Software and Data Services subscriptions or TSI Link™ Data Services subscription go to the API menu. Enter device or devices that you want to register to this TSI Link™ Account. Click SUBMIT. Figure 26: API menu 10. -
Page 41: 28: Verify Device Pin Is Displaying Pm2.5
11. If you run into issues or need additional information please go to https://tsi.com/resources/tsi-link-monitoring-and-research-faqs/tsi- link-solutions-faqs-installation-and-setup/ 12. Verify your device pin is displaying PM2.5 and other measurements to confirm you successfully signed up for an online account and registered your device. Figure 28: Verify device pin is displaying PM2.5 Operation... -
Page 42: How To View Data From One Or More Bluesky™ Outdoor Air Quality Monitors
How to View Data from one or more BlueSky™ Outdoor Air Quality Monitors 1. Go to www.tsi.com/tsilink and log in. 2. Click on the map and zoom in to the area where your BlueSky™ Outdoor Air Quality device pin is located. 3. -
Page 43: How To Download Data From The Microsd Card In The Bluesky™ Monitor
How to Download Data from the microSD Card in the BlueSky™ Monitor 1. Disconnect the power to the unit by disconnecting the USB cable from the power adapter. 2. The microSD card is located inside the monitor, which for security reasons, needs to be opened to access the SD card. -
Page 44: 31: Location Of Microsd Card Holder
4. The microSD card holder is located on the top left corner as shown below. Figure 31: Location of microSD card holder 5. Remove the card and download the data. You have the options to put the card back in, insert a new card, or choose to not install an SD card. -
Page 45: Interpreting The Data Downloaded From The Microsd Card Or From The Cloud
Interpreting the Data Downloaded from the microSD Card or from the Cloud Data downloaded from the BlueSky™ Outdoor Air Quality Monitor from the microSD card or cloud is stored as an ASCII format file with the serial number and date as the filename and .csv as the extension (e.g. -
Page 46: Logging Interval Options And How To Change The Settings
Logging Interval Options and How to Change the Settings By default, the BlueSky™ Outdoor Air Quality Monitor will log a sample (data point) every 15 minutes. Depending on your software license, logging intervals include 1, 5, 10, 15, 30 and 60 minutes. The logging interval can be changed by logging into TSILINK.com and accessing the device settings. -
Page 47: Chapter 4 Maintenance
Chapter 4 Maintenance ® Replacement sensors can be ordered from TSI Incorporated. Although sensor life times vary depending on the conditions they are exposed to, conservative recommended replacement intervals are listed below for each sensor: Bi-Annual Maintenance Checks N O T I C E For extreme conditions it is recommended that more frequent maintenance be performed. -
Page 48: Annual Maintenance Checks
Annual Maintenance Checks N O T I C E For extreme conditions it is recommended that more frequent maintenance be performed. 1. Any maintenance should be performed only after powering the unit down by disconnecting the USB cable from the power adapter. -
Page 49: Replacing The Pm Sensor Module
Replacing the PM Sensor Module 1. The PM sensor is easy to replace. It is mounted on a carrier board that can be removed from the base of the unit. 2. First disconnect the cable by unplugging the top connector at the PCB. -
Page 50: 36: Remove Sensor
Figure 36: Remove sensor 4. Insert the new module by aligning the sides of the carrier board and pushing down evenly on both sides until the board bottoms out and snaps in place. Insert the black connector into the PCB. Figure 37: Install new sensor Chapter 4... -
Page 51: Replacing The Electrochemical Sensors
Replacing the Electrochemical Sensors 1. The electrochemical sensors are easy to replace. They are supplied as a smart module that contains a calibration for plug- and-play installation. Figure 38: Replace electrochemical sensors Maintenance... - Page 52 2. If replacing multiple sensors, replace one at a time. To replace a sensor, remove the snap on top cover holding the connectors in place and lift the connector and cable straight up. Figure 39: Disconnect sensor cable Chapter 4...
-
Page 53: Replacing The Co Sensor Module
3. Next remove the sensor body by pulling it straight up. Figure 40: Remove sensor body 4. Note the type of sensor (in this case O ) and replace it with a new sensor of the same type. The new sensor should sit at the same depth as the other sensors. - Page 54 Figure 41: Disconnect sensor cable 3. Grip the CO board in the middle and lift up to remove it Figure 42: Lift sensor board to remove it Chapter 4...
-
Page 55: Replacing The T/Rh/Bp Sensor Module
4. Replace with a new module by aligning the PCB in the slots and pushing down. Note that the housing cover holds the sensor in place so it does not need to snap in place. Insert the connector. Replacing the T/RH/BP Sensor Module 1. - Page 56 3. Pull the cable out of the way and pull up from the base on the PCB. Figure 44: Remove sensor 4. Insert the new module in the slots and reconnect the cable connector. Figure 45: Reconnect cable connector Chapter 4...
-
Page 57: Chapter 5 Troubleshooting The Bluesky™ Monitor
Chapter 5 Troubleshooting the BlueSky™ Monitor Detailed troubleshooting and frequently asked questions can be ® found on TSI website. The table below lists the symptoms, possible causes and recommended solutions for common problems encountered with the BlueSky™ Air Quality Monitor. Possible Cause Corrective Action The BlueSky™... - Page 58 Possible Cause Corrective Action Note that BlueSky™ IAQ monitor can only connect to Cannot connect to ® ® ® Wi-Fi or the 2.4 GHz Wi-Fi signals. Most Wi-Fi routers provide internet. several frequency channels. Please make sure you are connecting to the 2.4 GHz channel. The monitor does not have the capability to connect to public networks that require a second step of browser authentication, such as a free public hotel or...
-
Page 59: Appendix A Specifications
Appendix A Specifications* PM Sensor Sensor Type ....Light scattering single particle counting Aerosol Concentration 0 to 1000 μg/m Range ......Measurements ... PM1.0, PM2.5 PM4.0, and PM10 on SD Card and PM2.5, PM10 on Cloud Resolution ....1 µg/m Counting Efficiency .. - Page 60 Ozone (O ) Sensor Sensor Type…………. Electrochemical Range………………… 0 – 5,000 ppb Accuracy……………... ± 30 ppb Resolution ....1 ppb Limit of Detection ..2 ppb Optimal Temperature Range ...... -20 to 40ºC Optimal Humidity Range ...... 15 to 90% non-condensing Carbon Monoxide (CO) Sensor Sensor Type………….
- Page 61 Sulfur Dioxide (SO ) Sensor Sensor Type…………. Electrochemical Range………………… 0 – 5,000 ppb Accuracy……………... ± 50 ppb Resolution ....1 ppb (3) ..Limit of Detection 5 ppb Optimal Temperature Range ...... -20 to 50ºC Optimal Humidity Range ...... 15 to 90% non-condensing Temperature Sensor Range ......
- Page 62 (This page intentionally left blank) Appendix A...
-
Page 63: Appendix B Status Flags And Error Codes
Appendix B Status Flags and Error Codes Type Value Definition General Sensor is not factory calibrated Sensor Status Sensor specific fault. See specific sensor status for more details Sensor communication error Sensor data corrupt Data not available Sensor measurement over detectable limit Sensor measurement under detectable limit... -
Page 64: Examples
N O T I C E There can be more than one error in the same or different categories. Examples: 1027 = 1024 + 2 + 1 = “Fan blocked” + “Sensor PM status = specific fault " + “Sensor is not factory calibrated” 258 = 256 + 2 = “Measurement not Gas Sensor compensated”... - Page 66 TSI Incorporated – Visit our website www.tsi.com for more information. Tel: +1 800 680 1220 India Tel: +91 80 67877200 Tel: +44 149 4 459200 China Tel: +86 10 8219 7688 France Tel: +33 1 41 19 21 99 Singapore Tel: +65 6595 6388 Germany Tel: +49 241 523030 P/N 6016553 Rev.
Need help?
Do you have a question about the BlueSky 8145 and is the answer not in the manual?
Questions and answers