
Subscribe to Our Youtube Channel
Related Manuals for infobit iShare X

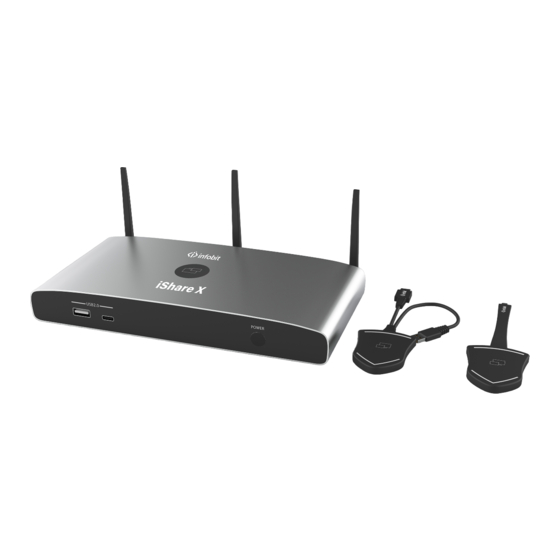
Summary of Contents for infobit iShare X
- Page 1 X Wireless Conferencing System BYOD/ BYOM User Manual_V1.0 Receiver: iShare X400 Transmitter: iShare HX (HDMI dongle), iShare CX (Type C dongle) www.infobitav.com info@infobitav.com 1 / 108...
- Page 2 The iShare X is our brand-new wireless conference product that’s designed to meet today’s hybrid workforce’s requirement with not only local presentation but also collaborate with remote participants, it enables people to connect the room camera, mic, speaker and display with their own laptops wirelessly, so people can take advantage of room A/V system to collaborate with both in-room and remote meeting participants, without cable limitation and hassle.
-
Page 3: Table Of Contents
Content Overview: ................................6 Specification: ..............................8 Panel Layout ..............................8 Hardware Interface ..........................9 3.1.1 iShare X400 Front Panel ........................9 3.1.2 iShare X400 Rear Panel ........................11 3.1.3 Factory Reset ............................12 3.1.4 Dongle Front Panel ...........................13 Software Interface ..........................16 3.2.1 Home Screen ............................16 Installation...............................18... - Page 4 5.3.7 Quad view mirroring ........................43 5.3.8 Mobiles Devices ..........................44 5.3.9 Miracast on Android Devices and WIN10 PC/laptop ...............47 5.3.10 Chromecast on PC ..........................50 Preview Window ..........................52 Whiteboard & Annotation .......................53 5.5.1 Whiteboard ............................54 5.5.2 Annotation ............................56 Strat video conferencing via USB-over-WiFi technology ................59 6.1 Start with USB drive or PC application ......................59 Start with HDMI dongle or Type C dongle ..................61 7.
- Page 5 Other settings ...........................92 7.7.1 Auto create launcher..........................92 7.7.2 Clear history after meeting ........................92 About device ............................93 Updating iShare X ............................93 8.1 Check current firmware information ......................94 8.2 Upgrading firmware of base unit: .........................97 Upgrading and Pairing of Dongle: ....................98 8.4 Upgrading Launcher: .............................99 8.5 Clean left files of older versions of Launcher program in laptop ...............101...
-
Page 6: Overview
1. Overview: iShare X iShare X makes connecting or participate in a meeting by a most simple way, touching a button. It also allows the others to join in the meeting more actively. Making your meeting more efficient and productive. - Page 7 Name Description Base Unit Host unit Transmitters For PC/laptop to share the desktop/extended desktop. “iShareX” App for Android For smart android devices to share the screen. Airplay for iOS For smart iOS devices to share the screen. Accessories Name Description 3 pcs of antenna are included in the box.
-
Page 8: Specification
12V / POE POE standard IEEE802.3af Power Consumption 10W (MAX) 3. Panel Layout About this chapter The installation chapter gives an overview of the interface of iShare X. Overview ⚫ Hardware Interface ◼ iShare X400 Front Panel 8 / 108... -
Page 9: Hardware Interface
◼ iShare X400 Rear Panel ◼ iShare HX/iShare CX Front panel ⚫ Software Interface ◼ Home Screen 3.1 Hardware Interface 3.1.1 iShare X400 Front Panel Note: Front USB A port and type C port cannot be used at the same time, type C port is prior to USB A port. - Page 10 Initializing indicates RED, power on indicates flashing Back-lit LED indicator GREEN, “Ready to share” indicates static GREEN, “Sharing” indicates static cyan. USB A port ⚫ Used to update the software of the iShare X400. ⚫ Used for pairing the dongle and base unit when the transmitter is plugged in. ⚫...
-
Page 11: Ishare X400 Rear Panel
3.1.2 iShare X400 Rear Panel Name Description 2 channel analog audio output, Connect a 3.5mm mini-jack PC Line audio output connector from this jack to an audio system. RS-232 Connect an RS-232 cable from this port to control device. One end is wrapped around a fixed object and the other end insert Kensington Lock into this port to keep safety. -
Page 12: Factory Reset
LAN Ethernet port 100Mbps, Connect an Ethernet cable between this jack and a LAN. To connect iShare X400 to LAN. LAN Ethernet port 1,000Mbps, Connect an Ethernet cable between this jack and a LAN to connect iShare X400 to LAN. Support POE. Connect the included power adapter to this socket and connect DC Power socket the plug to an available electrical outlet. -
Page 13: Dongle Front Panel
Default Configuration ⚫ Ethernet: ◼ Proxy: None ◼ DHCP: Enable ⚫ Wireless network: ◼ Frequency: 5GHZ ◼ Channel: Auto ◼ Auto change Wi-Fi hotspot password: 5minute ⚫ Display & Audio ◼ HDMI resolution: Auto ◼ HDMI CEC: ◆ Device auto power off: ON ◆... - Page 14 When LED indicator is blinking Green, it indicates 1) the button is plugged in the laptop and initializing or waiting for user to start the iShare X application, 2) pairing/software upgrading of the button in the Base Unit is in progress.
- Page 15 Model: iShare CX Note: iShare CX is full function type-C interface with DP Alt mode inside, which supports Audio and video transmission. Thus PC’s type C connector also requires full function for mirroring screen. Name Description Type C (DP) Using Type C (DP) connector of the button can be plugged into a connector PC/laptop for sharing your screen.
-
Page 16: Software Interface
3.2 Software Interface 3.2.1 Home Screen Name Description Wi-Fi Direct mode: internal access point is enabled Wi-Fi Infrastructure mode: “Client-Mode“, Wi-Fi connection to router is established, icon displays the current signal strength. Wi-Fi Indicator A secure Wi-Fi connection is established, or connection to a router failed: Wi-Fi is not available: LAN Infrastructure mode: access point is disabled... - Page 17 First-time users must install the starter program Quick Start from the web page or from the USB stick one time. Steps to use your UC software with iShare X BYOM guide Preview function of the Preview contents of all connected transmitters and mobile screen contents of the devices.
-
Page 18: Installation
2. At the bottom of Base Unit, turn in 2 flat screws into 2 holes of its smallest diameter to be fasten enough. Note: Mounting screws are not included in the iShare X package. The type of screws depends on the type of wall (stone, wood, plasterboard, ...) you are mounting the Base Unit on. -
Page 19: Wiring Diagram
Due to the radio pattern of the dipole antennas, the antennas should not be placed just above potential positions of iShare X users. As a result, the advised position for the antennas is at the side of the meeting room. -
Page 20: Video Connection
1. Plug the power connector to the power adapter 2. Choose the appropriate power plug (US, UK, EU or AU) to be installed on the power adapter 3. Connect the power cable plug into the wall outlet. Note: Once the base unit is powered, it starts up. From now on please use the POWER button with Status LED on front of Base-unit to switch ON or OFF. -
Page 21: Audio Connection
Check Setting configuration, to adjust the Volume set in iShare X setting tab. PC/laptop Sound As default set, iShare X will mute the internal speaker of PC/laptop and route the audio to the base unit, after PC/laptop is successfully mirroring to the main screen, to avoid the repeated audio. -
Page 22: Lan Connection
4.6 LAN connection The Base Unit can be connected to a local network or directly to a PC/laptop. For normal operation, a LAN connection is not necessary. When needed, it’s suggested to connect the iShare X400 to the Internet. 1. Connect a network cable with RJ-45 connector into the LAN port of Base Unit. 2. - Page 23 2. To control the sharing PC/laptop. 3. To activate system upgrading 4. For white board or annotation during a presentation, iShare X transmits Video, Audio and the USB-HID function for mouse-control and click-function of a touchscreen. Connect touch-interface of your screen to the USB-port on your laptop or PC.
-
Page 24: Quick-To-Start
iShare X400 support USB Camera, USB speakerphone over wifi sharing. 3 USB A ports and 1 Type C port in rear panel for connecting the external USB devices such as Microphone, camera… to start meeting with all kinds of video conference software such as Skype, Teams, Zoom... 5. -
Page 25: Enable Portable Hotspot
LAN connection, to connect the iShare X400 and mobile both in LAN network, to discover and connect to iShare X400. After Factory reset, iShare X starts in standard configuration "Wireless Direct Mode" ("Linked Single Network"), where the base unit creates its own wireless access point, to which all the transmitters connect. This is typical for quick setup, temporarily installations or for small business meetings with a small number of meeting rooms. -
Page 26: Enable Lan Connection
5.1.2 Enable LAN connection: Be sure the iShare X400 is connected to the Network. When Local IP shows an active IP address, such like 192.168.31.211, it indicates iShare X400 is successfully connected to the LAN and get an appointed IP address. Note: When it shows “N/A”, means the iShare X400 is not connected to the LAN (Local Area Network) by CAT cable or it failed to get an available IP address by the corporation router. -
Page 27: Pairing Transmitter With Base Unit
5.2 Pairing transmitter with base unit 1. Connect the iShare HX (HDMI dongle) to USB port, or iShare CX (Type C dongle) to type C port, to pair all the transmitters with base unit. The home page displays as shown below. 2. - Page 28 3. Then, the message table shows “Pairing, please wait…” as below 4. After completing the pairing, the message table shows “Pairing successful!” on the home page, as below. Then, please un-plug the transmitters and use it for the mirroring on your laptop. 28 / 108...
-
Page 29: Mirroring
5.3.1 Microsoft Windows PC/laptop with Dongle You can operate iShare X for Windows optionally with Dongle or PC Application. If there are several participants in a meeting, mixed operation is also possible. Operating system requirement: Windows XP/Vista/7/8/8.1/10 32 & 64 bit. - Page 30 30 / 108...
- Page 31 Now, the driver is installed. iShare HX (HDMI dongle) 31 / 108...
-
Page 32: Microsoft Windows Pc/Laptop With Application
Microsoft Windows PC/laptop with application For first time user, you must copy the launcher program ”iShare X for Windows” to your laptop. 1. Use a universal USB stick to create a “Launcher” that is stored in the base unit. Connecting the USB stick to base unit and click the DOWNLOAD icon to download “iShare X-windows.exe”, “iShare X-macOS.app”, “User Manual”... - Page 33 Connect your laptop to Wi-Fi network displayed on the Home screen, or connect to the LAN network. Double-click the "iShare X-windows.exe" Launcher program , a list of all available “iShare X” in the same network will be displayed, select which device you want to connect to. The connections are password protected (lock icon ).
- Page 34 Enter base unit password and click “connect”, the system now is ready to share. You can also manually connect by entering the name (SSID) or IP address. (click icon Enter the corresponding base unit password, press 'OK', the system is “Ready to share”. Click “Ready to share”, when window color is static red, the desktop is mirroring to the main screen.
-
Page 35: Options For Microsoft Windows Pc / Laptop - Extended Screen
Click the visual button again, to stop mirroring, window color turns green again. You can minimize the APP-window, and on the Windows taskbar you can see if screen is mirroring or not Right click the iShare X status icon to open up the context- menu. ⚫... - Page 36 “Options”: ⚫ Extended Screen: Transfers extended desktop of active source. (depending on your operating system, may require the installation of the virtual driver “ExtendedDisplay“ for function with Windows 10). The primary screen (1) is displayed on the laptop and the virtually extended screen (2) is displayed on the main screen. If the PC has already connected an extended screen (3), the extended screen (2) will always be displayed on the main screen.
- Page 37 If you select the “Extended Screen” feature, Windows automatically switches to “Extended Mode”. If you stop the transfer with “iShare X” (Pause), Windows remains in " Extended Mode" until you press "Windows key + P" on the laptop to select the "PC screen only"...
-
Page 38: Mac Os Pc/Laptop With Dongle
⚫ Keep Aspect Ratio: Keep the original aspect ratio to display on the main screen. ⚫ Stream Mode: ◼ Fluency Priority: (Default) Image transmission delay is small, image resolution will be lower, suitable for PPT presentation mode. ◼ Quality Priority: The image resolution is relatively high, but when the image content is complex, the transmission delay will be relatively larger, suitable for video playing. -
Page 39: Mac Os Pc/Laptop With Application
MAC OS PC/laptop with application For first time user, you have to copy the Launcher program ”iShare X for Mac” first on your Mac. 1. Use a universal USB stick to create a “Launcher”, which is stored in the base unit. Connecting the USB stick to base unit and click the DOWNLOAD icon on the homepage to download “iShare X-windows.exe”... - Page 40 3. Double-click the "iShare X for Mac" Launcher program , a list of all available “iShare X” in the same network will be displayed, select which device you want to connect to. The connections are password protected (lock icon...
- Page 41 6. Click the visual button again, to stop mirroring, window color shows green again. You can minimize the APP-window, in top menu-bar you can see if screen is mirroring or not Right click the iShare X status icon in top menu-bar to open up the context- menu. ⚫...
-
Page 42: Operations For Apple Macos, Macbook - Extended Screen
⚫ “Exit”: End APP. Exiting the App completely. If you click the “close” in the menu bar of the app, the app in the top menu-bar is only minimized and can be recalled again from the top menu-bar at any time. 5.3.6 Operations for Apple MacOS, MacBook –... -
Page 43: Quad View Mirroring
Transmits the Extended desktop (“Use a Separate Display”) only via AirPlay, when activated for Display on iShare X. ⚫ Keep Aspect Ratio: Keep the original aspect ratio to display on the main screen. ⚫ Lowest Latency (Mouse): The setting is applied individually for this laptop only. The shape of mouse-pointer is equal the shape in application. -
Page 44: Mobiles Devices
2. Connect your mobile device to one of the displayed Wi-Fi networks. 3. Open the “iShare X” application in your mobile device, and you will see the Home Page of “iShare X” as shown below. and click the device list refresh button... - Page 45 4. Select the base unit you want to connect, enter password and mirror. 5. After completing the pairing, it shows OSD “Welcome ***” on the home page. For example, if we connect it by a HUAWEI-PAR-AL00, it shows a “HUAWEI-PAR-AL00” on screen, as shown below. 6.
- Page 46 Click the upper right corner icon, check the “iShare X” application version information. Sharing on iOS devices 1. With AirPlay technology, user can stream his screen or music, (YouTube-) videos, pictures … wireless to Base-unit. Connect your iOS device with the same Wi-Fi network from iShare X400.
-
Page 47: Miracast On Android Devices And Win10 Pc/Laptop
It will show OSD on home screen after connecting successfully. 5.3.9 Miracast on Android Devices and WIN10 PC/laptop Android Devices Steps as below: 1. Make sure the Wi-Fi or WLAN is enabled. 2. Swipe down from the top of phone’s screen and click the wireless display icon in the popup page. 47 / 108... - Page 48 3. It will pop out the wireless display window, find the proper base unit iShare X400 in the available list to connect. Note: under Security Level 1 mode, there is no need to enter password to connect. Under Security level 2 and Security level 3 mode, it will need to enter password on iShare X400 home screen to connect and mirror.
- Page 49 WIN10 PC Miracast 1. Make sure the Wi-Fi or WLAN is enabled. 2. Click the PC bottom right corner operation zone icon as below. 3. Click “project” icon to enter password on home screen to connect and mirror. Note: under Security Level 1 mode, there is no need to enter password to connect. Under Security level 2 and Security level 3 mode, it will need to enter password on iShare X400 home screen to connect and mirror.
-
Page 50: Chromecast On Pc
4. After entering password, it will show your mobile content on display. 5. Click the “project” icon again, disconnect to stop mirroring. 5.3.10 Chromecast on PC iShare X400 support Chromecast function on WIN 7 and WIN 10 PC. PC and iShare X400 base unit need to be in the same LAN network to start cast content onto screen via Chromecast. 1. - Page 51 2. Click “cast” to start Chromecast function. 3. Find target base unit SSID as below. Click to connect. 51 / 108...
-
Page 52: Preview Window
Once the preview windows are activated, you see live-pictures (1) of all connected transmitters and android devices via “iShare X” APK at the right edge of the screen. -
Page 53: Whiteboard & Annotation
Just scroll UP or DOWN (3) to see further preview pictures. As soon as presenter is clicking with mouse of Base-unit, or clicking with finger at touch-screen, the appropriate participants of the meeting is activated, another click at the arrow shows his picture at the main screen in full format. A red frame is shown for the active picture. -
Page 54: Whiteboard
It is easy to use, makes collaboration in your business more productive and effective: documents can be easily written, edited, captured and shared. Whiteboard: write all your ideas and share the digital notes with anybody. Different colors of pen and background can be selected. - Page 55 Use the toolbar to select one of the following functions. Icons Function Tool bar 1 Add an empty page Delete the actual page Display previous or next page Undo: one step backward in changes Redo: one step forward in changes Tool bar 2 Erase part of drawings or annotation, change diameter by a longer tap...
-
Page 56: Annotation
Draw basic geometric shapes Select color of board, the drawing will be kept will pop up, when “Pen” or “Draw shape” or “Select color of board” is Tool bar 3 selected, for individual change of size of Pen, Shape or color. Tool bar 4 Save the current screenshot on local storage (PNG+WMN) File options... - Page 57 Use the toolbar to select one of the following functions. Icons Function Undo: one step backward in changes Redo: one step forward in changes Erase part of drawings or annotation, change diameter by a longer tap Tool bar 1 Clear the entire drawing/writing on the screen Pen allows writing/drawing in different colors Draw basic geometric shapes 57 / 108...
- Page 58 Close Whiteboard to go back to Home screen, actual project can be saved on local storage (WMN) Close Whiteboard to go back to Home screen, Tool bar 1 Save the current screenshot on local storage (PNG) Download the drawings to connected users Scan the QR-code with your mobile’s camera or enter the given IP-address in a browser.
-
Page 59: Strat Video Conferencing Via Usb-Over-Wifi Technology
6. Strat video conferencing via USB-over-WiFi technology To start the soft video conference easily with your own laptop, but utilize the room USB devices like camera, microphone and speaker to have a better AV experience. 6.1 Start with USB drive or PC application 1. - Page 60 Settings>Audio For Speaker, select Virtual Meeting Audio For Microphone, select Virtual Meeting Audio 60 / 108...
-
Page 61: Start With Hdmi Dongle Or Type C Dongle
Note: when starting a wireless conference via dongle, for first time use, it will need to double click the “iShare X.exe” application to run, which is in your CD Drive of PC as below path. Since second time use, the software will be run in the background of Windows OS automatically, this is a patent avoiding operation, end user can ignore it. - Page 62 1. Make sure the room USB devices and display are well connected with iShare X400 by cables. 2. Refer to chapter 5.3.1 make sure the laptop is well connected with iShare X400 wirelessly in the same network, by HDMI dongle iShare HX or USB-C dongle iShare CX. 3.
-
Page 63: Web Setting Management Configuration
Connect base unit ID & Password or LAN IP to laptop, to enter Wi-Fi IP browser page to configure settings of base unit. The “iShare X-windows.exe” and “iShare X-Pro.exe” for windows PC/laptop, “iShare X-macOS.app” for Mac OS X, “user manual”... - Page 64 Note: after setting, user need to wait for at least 1 min to restart the unit. Otherwise, the modification on the setting will not be saved. Click Setting button on the top right corner to enter into menu to configure. A password is required to enter the configuration menu.
- Page 65 The main interface of Setting is shown as below, including Network settings, Display & Audio, Moderator control, System settings, Security settings, Firmware upgrade, Other settings, About device. 65 / 108...
-
Page 66: Network Settings
7.1.1 Wireless network To take the full benefits of the iShare X possibilities, iShare X400 should be properly integrated in the organization’s network (company/university/school). This wizard allows user to create a custom configuration for integration of iShare X into the existing wireless infrastructure in larger organizations. - Page 67 Wi-Fi access point of Base-unit to present with all their units. No Internet access is required. The LAN-Port of Base-unit is not connected. The PC-users can present with or without dongle by iShare X PC driver (Windows 67 / 108...
- Page 68 or MacOS). Android users (BYOD) can share their content by installing the free APP on their device and iOS users can use AirPlay (Apple only). Recommended Environment This option is best for temporary operation, small installations, and rooms without network access or networks that do not allow network access for Guests, due to strict security concerns, and are completely separate from the corporate network.
- Page 69 Password: Click in the input filed to fill out the appropriate password with length of 8 characters. Click “Next step” to edit or change Guest network SSID and STAFF network SSID. This information will be shown at Home Screen of iShare X. Click “Submit settings” to finish configuration.
- Page 70 7.1.1.3 Wireless Infrastructure mode iShare X can connect to a wired and a wireless network simultaneously. The basic unit is firmly "connected to the company network with LAN. Guest users connect to Wi-Fi "Guest" access. The employees (“Staff”) connect to their usual access point of the corporate network, without having to change the Wi-Fi.
- Page 71 The dongle is connected to the Wi-Fi access Point of Guest network, which in turn is connected to the internal Wi-Fi access Point of iShare X. (The dongle can also be configured to connect to the enterprise’s access point.) Mobile users stay connected to their current network, have access to their normal corporate environment, as well as Internet access.
- Page 72 Click “Next step” to edit or change Guest network SSID and Staff network SSID. Wi-Fi name of guest and staff will be shown on home screen after “Submit settings”. After submitting successfully, please re-pair dongle with base unit. “Dongle connects to base unit via LAN.” Choose a LAN network which is used for the company staff users.
- Page 73 Click “Next step” to edit or change Guest network SSID and Staff network SSID. Wifi name of guest and staff will be shown on home screen after “Submit settings” After submitting successfully, please re-pair dongle with base unit. 73 / 108...
- Page 74 The dongle and/or the mobile devices can connect to the secured wireless access point of the company network. The Base- unit of iShare X is hard-wired connected via LAN to the Ethernet of the Company network. The Staff-users connect to their usual access point of Company network, without the need to change the Wi-Fi.
-
Page 75: Ethernet
Click “Next step” to choose a LAN network which is used for the company staff users and pair the dongle into this network. Click “Next step” to edit or change Guest network SSID and Staff network SSID. Wifi name of guest and staff will be shown on home screen after “Submit settings” After submitting successfully, please re-pair dongle with base unit. -
Page 76: Auto Change Password
7.1.3 Auto change password The password remains unchanged for all participants of the meeting, while at least one dongle or a Wi-Fi network of a mobile device is connected with Base-unit. After the user is disconnected, a configurable time runs. ⚫... -
Page 77: Display & Audio
Click to set the configuration, including ⚫ Never: never change Wi-Fi password. (Even after POWER-OFF condition) ⚫ 5 minutes: change Wi-Fi password every 5 minutes. ⚫ 30 minutes: change Wi-Fi password every 30 minutes. ⚫ 1 hour: change Wi-Fi password every 1 hour. ⚫... - Page 78 Note: if the display is only support FULL HD, the 4K resolution will not be shown on the list of the below resolution. HDMI CEC Base unit support CEC function if the connected display support CEC function. Note: when you find the HDMI CEC doesn’t work, you need to check whether monitor supports CEC feature or not, since some brand model monitor doesn’t support CEC.
-
Page 79: Audio
7.2.2 Audio Audio Choose audio output: Jack: output only 3.5mm mini-jack audio. HDMI: output only HDMI audio. Jack&HDMI (Default): output Jack & HDMI audio 79 / 108... -
Page 80: Airplay Screen Quality
Volume User can select volume of display from 0 to 100. 7.2.3 Airplay screen quality Click to select the image quality when transmit apple device by “AirPlay” mode. 80 / 108... -
Page 81: Start Screen
7.2.5 Home Screen background image When powering iShare X the start screen will be displayed. User can change background image of Home screen. Select the image (jpg, bmp, png, gif with resolution 1920x1080 p.) from suitable directory and activate box for selection. -
Page 82: Moderator Control
7.3 Moderator control ⚫ Add a sub-window bar to enable previewing the connected devices. Tick the icon, it will show the sub window as below once devices are connected to base unit. 82 / 108... - Page 83 ⚫ Real time preview If tick the icon, the preview window will show real time preview, if not tick, the preview window will only show a static picture as below. 83 / 108...
-
Page 84: System Settings
7.4 System settings 7.4.1 Buttons: Show Device name, MAC Address, Serial Number, Device Version, Device Status, Last Action, Item Operate. Paired Show properties of connected dongles and can be managed from this page. 84 / 108... -
Page 85: Date & Time
Select time zone: Click in the input filed to fill out the appropriate time zone. 7.4.3 Auto standby If the Auto Standby mode is activated, iShare X will automatically switch to power saving mode, a selectable time after the 85 / 108... -
Page 86: Language
last dongle was plugged out, or Wi-Fi of a mobile unit was disconnected, or there is no operation at the system. Time is selectable from Never to 30 minutes. In Standby green LED in top of Base-unit is flashing and HDMI-output is switched off. When a dongle is plugged in and connected, or a mobile unit is connected, Standby is deactivated. -
Page 87: Reset
7.4.5 Reset Doing factory reset to restore unit. 7.4.6 Configuration File Configuration File is a packaged file which contains all the configuration parameter of the iShare X400, which could be downloaded copied multiple device which needs same configuration. 87 / 108... -
Page 88: Series Port Setting
7.4.7 Series Port Setting To configure telnet command and RS-232 command. 7.4.8 Telnet switch Switch on or off the telnet function. 88 / 108... -
Page 89: Security Settings
Security level Based on user requirements, three different security levels can be set in the menu of iShare X, to satisfy different security requirements, according to different security sensitive environments or security policies. A security level is a predefined set of settings. -
Page 90: Login Password
Level 1: normal safety; keeps the security in normal and daily usage for any organization, such like classroom, regular meeting room etc. Level 2: higher security; provides increased security for companies, organizations, government agencies, etc., through powerful encryption of audio and video data; other security features include limiting the transmission of "AirPlay"... -
Page 91: Firmware Upgrade
7.6 Firmware upgrade 7.6.1 Firmware Update To upload local updating files to upgrade base unit. 7.6.2 Automatic Upgrading Tick to choose upgrading from OTA via Internet or from local files. 91 / 108... -
Page 92: Other Settings
7.7 Other settings 7.7.1 Auto create launcher Determines, when using a USB memory at one USB-port of Base-unit, the Launcher program “iShare X” will be copied automatically on USB memory. Enable or disable the corresponding box. 7.7.2 Clear history after meeting Pictures, videos, music of mobile units will be stored in memory of Base-unit. -
Page 93: About Device
8. Updating iShare X An update of the firmware can be useful to take the advantage of new features of iShare X or to fix known issues and bugs. iShare X includes two methods of updating. Updating by USB stick and webserver. -
Page 94: Check Current Firmware Information
Base-unit: webserver “console” menu / About device. Windows OS Dongle/Launcher: firmware version can be visual in the ““iShare X”.exe” program icon in windows status bar by right-clicking the ““iShare X”” icon and select “About”, as shown below. Click “About” to check dongle and launcher program version. - Page 95 MAC OSX: Dongle/Launcher: firmware version can be visual in the ““iShare X”.app” program icon in MAC OSX status bar, by clicking ““iShare X”” icon select “About”, shown below. Click “About” to check dongle and launcher program. 95 / 108...
- Page 96 When dongle firmware or “Launcher” firmware are older version, or in other words dongle firmware or “Launcher” firmware doesn’t match with the base unit version, it shows up ““iShare X” ATTENTION” alert message box in the window OS or MAC OSX, as below.
-
Page 97: Upgrading Firmware Of Base Unit
Connect the USB drive to either USB port of Base-unit. Note: The USB port can only support maximum 500ma. Please use a small power U-disk as upgrading USB drive. iShare X recognizes the “update.img”-file at a plugged-in USB stick automatically and starts the “Full Update” procedure. -
Page 98: Upgrading And Pairing Of Dongle
Only when the associated “Release notes” are requiring an additional „Factory Reset “, perform it via the menu “System settings” / “Reset” on websever console menu. All data of configuration will be lost. So that you do not have to re-configure all data in an elaborate process, therefore note all settings within the Sub-menus before doing Factory Reset. -
Page 99: Upgrading Launcher
2. “Pairing” to the Base-unit is done automatically afterwards 3. Plug out the dongle. Now, the upgrading progress is finished. Update all other dongles accordingly. 8.4 Upgrading Launcher: Attention: The USB driver should be FAT 32 format not NTSC format. After upgrading Base unit and Dongle, the launcher should be written with the actual launcher program for Windows, MAC and Apps for mobile-units. - Page 100 The Launcher “iShare X” is written to the USB-stick, an OSD-windows shows the progress. When ready, unplug the USB- stick. Method 2: Via WIFI 1. Connect PC to iShare X400’s SSID and enter password in homepage, see pictures as below: 2.
-
Page 101: Clean Left Files Of Older Versions Of Launcher Program In Laptop
8.5 Clean left files of older versions of Launcher program in laptop There are some old version “iShare X” files left in the lap-top, which may influence the performance of the newer “iShare X” program. Currently, it needs to manually clear them, before start to use the newly updated “iShare X” firmwares. - Page 102 If the “*.service“ “*.serviceC3” can’t be removed and shows up an alert message as below, please use combined hot key to open the task manager by pressing “Ctrl+Alt+Delete”, as shown below. 102 / 108...
- Page 103 End Process Tree. Check again the task manager, to be sure there is no more any “iShare X” programs still running in the task manager. And check again to be sure there is no more any “iShare X” in the C:\Users\***(userame)\AppData\Local\”iShare X”.
-
Page 104: Wifi Recommendation Setting
If not, please try to take the following measures, as in the problem shooting---Bad wireless connection congestion. 10. Problem Shooting Here you can find some fundamental problems and possible causes, which can be happen during the use of “iShare X”. Find out the problem you’ve encountered in the table below and apply the solution. Problem... - Page 105 ⚫ Can’t get the “iShare X” run when plug When you are using “iShare X” There are 2 possibilities to load the the transmitter to lap-top for the first time on your laptop Launcher program, see chapter 7.4.
- Page 106 Power-supply is missed. ⚫ When using window 7 the following iShare X uses resource from the GPU. It’s safe to ignore this message message about the Window Aero In combination with other programs and choose “Keep the current color scheme apprears “Windows has...
- Page 107 Adjust level in menu configuration iShare X console in on webserver settings. The volume level is set too low in the Adjust the volume in the "iShare X" options of the "iShare X" Launcher Launcehr program on PC. program on PC.
- Page 108 Operation System Requirement Mac To use AirPlay, you must connect Macbook/Iphone/iPad. OS 10.9 the iOS device to the Wi-Fi of iOS 8.0 and later (iShare X app) WireleeMedia and enable the AirPlay feature in the Control Center. ⚫ Update the iOS device to a newer operating system.
Need help?
Do you have a question about the iShare X and is the answer not in the manual?
Questions and answers