Advertisement
Quick Links
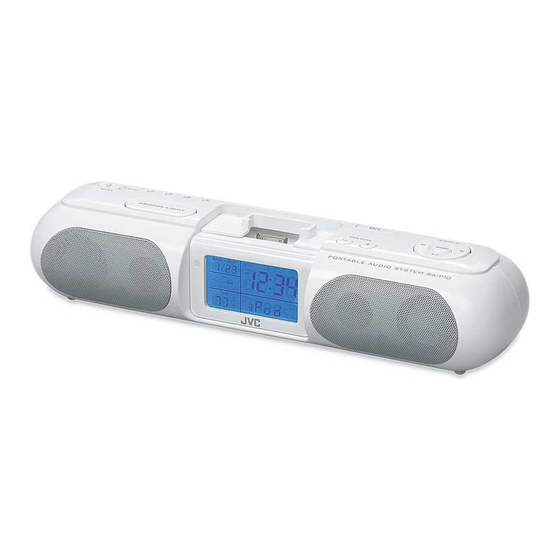
PORTABLE AUDIO SYSTEM
RA-P10
INSTRUCTIONS
LVT1634-004A [B]
Warnings, Cautions and Others
CAUTION
• Do not block the ventilation openings or holes.
(If the ventilation openings or holes are blocked
by a newspaper or cloth, etc., the heat may not be
able to get out.)
• Do not place any naked fl ame sources, such as
lighted candles, on the apparatus.
• When discarding batteries, environmental problems
must be considered and local rules or laws
governing the disposal of these batteries must be
followed strictly.
• Do not expose this apparatus to rain, moisture,
dripping or splashing and that no objects fi lled
with liquids, such as vases, shall be placed on the
apparatus.
• Rating label is placed on the exterior of the bottom.
Dear Customer,
This apparatus is in conformance with the valid
European directives and standards regarding
electromagnetic compatibility and electrical safety.
European representative of Victor Company of
Japan, Limited is:
JVC Technology Centre Europe GmbH
P.O. Box 10 05 52
61145 Friedberg
Germany
SAFETY INSTRUCTIONS
"SOME DOS AND DON'TS ON THE SAFE USE OF EQUIPMENT"
This equipment has been designed and manufactured to meet international safety standards but, like any
electrical equipment, care must be taken if you are to obtain the best results and safety is to be assured.
Do read the operating instructions before you attempt to use the equipment.
Do ensure that all electrical connections (including the mains plug, extension leads and interconnections
between pieces of equipment) are properly made and in accordance with the manufacturer's instructions.
Switch off and withdraw the mains plug when making or changing connections.
Do consult your dealer if you are ever in doubt about the installation, operation or safety of your equipment.
Do be careful with glass panels or doors on equipment.
DON'T continue to operate the equipment if you are in any doubt about it working normally, or if it is
damaged in any way—switch off, withdraw the mains plug and consult your dealer.
DON'T remove any fi xed cover as this may expose dangerous voltages.
DON'T leave equipment switched on when it is unattended unless it is specifi cally stated that it is designed
for unattended operation or has a standby mode.
Switch off using the switch on the equipment and make sure that your family know how to do this.
Special arrangements may need to be made for infi rm or handicapped people.
DON'T use equipment such as personal stereos or radios so that you are distracted from the requirements
of traffi c safety. It is illegal to watch television whilst driving.
DON'T listen to headphones at high volume as such use can permanently damage your hearing.
DON'T obstruct the ventilation of the equipment, for example with curtains or soft furnishings.
Overheating will cause damage and shorten the life of the equipment.
DON'T use makeshift stands and NEVER fi x legs with wood screws—to ensure complete safety always fi t
the manufacturer's approved stand or legs with the fi xings provided according to the instructions.
DON'T allow electrical equipment to be exposed to rain or moisture.
ABOVE ALL
– NEVER let anyone, especially children, push anything into holes, slots or any other opening in the
case —this could result in a fatal electrical shock.;
– NEVER guess or take chances with electrical equipment of any kind—it is better to be safe than sorry!
EN
©2006 Victor Company of Japan, Limited
0906NSMCREBET
Caution: Proper Ventilation
To avoid risk of electric shock and fi re, and to prevent damage, locate the apparatus as follows:
Front: No obstructions and open spacing.
Sides/ Top/ Back: No obstructions should be placed in the areas shown by the dimensions below.
Bottom: Place on the level surface. Maintain an adequate air path for ventilation by placing on a stand
with a height of 10 cm or more.
Front
Side
15cm
15cm
15cm
15cm
15cm
10cm
Precautions
• Install in a place which is level, dry and neither too hot nor too cold–between 5°C and 35°C.
• Install the System in a location with adequate ventilation to prevent internal heat buildup inside the System.
DO NOT install the System in a location
near heat sources, or in a place subject to
direct sunlight, excessive dust or vibration.
• Leave suffi cient distance between the System and the TV.
• Keep the speakers away from the TV to avoid interference with TV.
Getting Started
Insulation sheet
Supplied Accessories
Prepare the Remote
Control
After unpacking, check to be sure
• When you use the remote
that you have all the following items.
control for the fi rst time, pull
out the insulation sheet.
• Remote control
• AC adaptor
(Front side)
• Attachments (6 types)
Replacing the Battery
• Rubber pads (A type×2, B type×2)
in the Remote Control
• CR2025 (×2) lithium coin batteries
• Insert the battery into the
One is loaded on the remote
remote control by matching
control at the factory.
the polarity (+ and –)
correctly.
Preparation of the Unit
(Rear side)
Loading batteries for the Unit (The battery power supply)
Insert three batteries to each compartment (six batteries total). Be sure to match the poles (+/-) correctly.
While the AC adaptor is connected to the wall outlet, the unit works without batteries.
R6 (SUM-3)/AA (15F) (not supplied)
Open the battery compartment
cover by pressing the small tab.
Close the cover in the order shown by the numbers.
9V 1.5A
Connecting the AC adaptor
Loading batteries for the Clock
Be sure to match the poles (+/-) correctly.
Lithium coin
battery
(CR2025)
9V 1.5A
(supplied)
AC adaptor: AA-R9030 (supplied)
CAUTION:
To avoid risk of fi re, and to prevent damage.
Press the tab to open
Close the cover in the order
• Do not use AC adaptors except for the supplied AC adaptor.
the cover.
shown by the numbers.
• Do not use the supplied AC adaptor for other equipment.
Troubleshooting
If you are having a problem with your System, check this list for a possible solution before calling for service.
In These Cases
Check the following points
Power does not come on.
• AC adaptor is not inserted securely. Plug in securely.
• The batteries are exhausted.
No longer works.
Press the "RESET" button (see "Resetting the unit").
Cannot set the iPod.
• Is the selected attachment compatible to your iPod? Confi rm the
compatibility of iPod and attachments in "iPod Compatibility Chart".
• Is the attachment properly mounted on the unit? Make sure to mount the
attachment properly.
Cannot operate iPod.
• Is the iPod fi rmly connected to the connector plug of the unit?
• Is the iPod properly functioning? Test the iPod functions in stand alone
condition.
iPod cannot be charged.
• Is the iPod fi rmly connected to the connector plug of the unit?
• Is the AC adaptor connected? The iPod cannot be charged while the Unit
is operated on batteries.
• For iPod 3rd Generation, set the "CHARGING SWITCH" to "FIREWIRE"
(see "Charging the iPod").
Hard to listen to broadcasts
The FM antenna is not properly extended and positioned.
because of noise.
Unable to operate the System
• The path between the remote control and the remote sensor on the
from the remote control.
System is blocked.
• The batteries are exhausted.
When the volume level is
The unit's battery runs low (The "---" (Low battery) appears on the display).
manually set higher than "08",
Replace the batteries with new ones.
the unit automatically lowers
the level to "08".
Resetting the unit
If "Troubleshooting" does not eliminate malfunctioning (failure to operate or
display properly, etc.), press the "RESET" button on the rear of the unit with
something having a sharp point, while the unit is turned on. After pressing
"RESET" button, unplug the AC adaptor and wait a while before plugging it
again.
• When using "RESET" button, make sure the lithium coin battery is loaded.
• While resetting the unit, the clock is also reset. Adjust the clock after resetting
the unit.
Warning
• Store the battery in a place where children cannot reach. If a child accidentally swallows the battery,
consult a doctor immediately.
• Do not recharge, short, disassemble or heat the battery or dispose of it in a fi re. Doing any of these things
may cause the battery to give off heat, crack, or start a fi re.
• Do not leave the battery with other metallic materials. Doing this may cause the battery to give off heat,
crack, or start a fi re.
Lithium
• When throwing away or saving the battery, wrap it in tape and insulate; otherwise, the battery may start to
coin battery
give off heat, crack, or start a fi re.
(CR2025)
• Do not poke the battery with tweezers or similar tools. Doing this may cause the battery to give off heat,
crack, or start a fi re.
• Dispose of battery in the proper manner, according to federal, state, and local regulations.
• The batteries (battery pack or batteries installed ) shall not be exposed to excessive heat source such as
sunshine, fi re or the like.
CAUTION:
Danger of explosion if battery is incorrectly replaced.
Replace only with the same or equivalent type.
Operating on the Remote Control
SOURCE button
1
Switch the sound source.
FM MODE button
2
Switch FM stereo/monaural.
5
MUTING button
3
Turn off the sound. Return to original mode by
pressing again.
6
1
PRESET +/- button
4
FM wire antenna
7
Select a registered FM radio station (P01 to 20).
(Pass through the notch in the cover)
iPod 6 button
2
5
8
Play/pause the iPod.
3
button
6
Switch the backlight on/off.
4
To a wall outlet
4/¢ button
7
Plug the AC adaptor
Fast-forward/rewind the iPod song.
only after all connections
Change frequencies to tune in to FM radio
are completed.
station.
VOLUME +/- button
8
You can adjust the volume level from 00 to a
maximum of 20.
NOTES
• Point the remote control at the remote control sensor on the front panel.
• The remote control sensor is designed to receive signals from up to
approximately 7 m distance when the remote control is pointed directly. If the
remote control is pointed with an angle, the distance may become shorter.
Specifi cations
Model
RA-P10
Type
Portable audio system
Power Output
4W x 2
Amplifi er
1kHz 10% THD, 6Ω (IEC268-3)
Input Sensitivity/ Impedance
AUX Input
250mV/47kΩ
Tuning Range
87.50MHz - 108.00MHz
FM Tuner
Frequency Step
50kHz
Preset Stations
20
Speaker
1way full range, diameter 35mm x2
External DC IN ( for AC adaptor)
Input Terminal
AUX IN (mini jack)
DC9V
1.5A (EXTERNAL DC IN)
Power Source
DC9V
(SIZE R6, AA BATTERY OR EQUIVALENT x6)
DC3V
(CR2025, for the clock)
Input : AC 110-240V , 50/60Hz
AC adaptor
Output : DC 9V
1.5A
Dimensions (W x H x D)
(W) 331 mm x (H) 71 mm x (D) 98 mm
Weight (Without batteries)
0.7kg
Accessory
See Supplied Accessories
Specifi cations and appearance are subject to change without prior notice.
Advertisement

Related Manuals for JVC RA-P10


Summary of Contents for JVC RA-P10
- Page 1 • Keep the speakers away from the TV to avoid interference with TV. Japan, Limited is: from the remote control. System is blocked. JVC Technology Centre Europe GmbH • The batteries are exhausted. Specifi cations and appearance are subject to change without prior notice. P.O. Box 10 05 52 When the volume level is The unit’s battery runs low (The “---”...
- Page 2 • iPod is a trademark of Apple Computer, Inc., registered in the U.S. and other countries. • JVC is not responsible for any loss of or damage to iPod that might result from the use of • You can set the duration of time between timer-on and timer-off from 10 minutes to 30 minutes in TIMER 1 Switch to current time display with the “SET”...
Need help?
Do you have a question about the RA-P10 and is the answer not in the manual?
Questions and answers