Advertisement
Quick Links
sauder.com
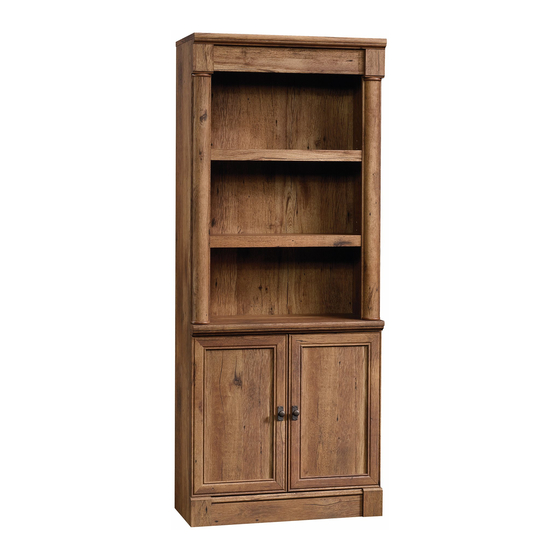
Library with Doors
Carson Forge Collection | 416967
Need help? Visit Sauder.com to view video assembly tips or chat with a live rep.
Prefer the phone? Call 1-800-523-3987.
Share your journey!
Here's one for
the books.
NOTE: THIS INSTRUCTION
BOOKLET CONTAINS IMPORTANT
SAFETY INFORMATION.
PLEASE READ AND KEEP FOR
FUTURE REFERENCE.
English pg 1-22
Français pg 23-25
Español pg 26-28
Lot # 361928
05/20/14
Purchased: __________________
Be sure to give us a ring before
making any returns. 1-800-523-3987
Advertisement

Related Manuals for Sauder Carson Forge 416967


Summary of Contents for Sauder Carson Forge 416967
- Page 1 Carson Forge Collection | 416967 NOTE: THIS INSTRUCTION BOOKLET CONTAINS IMPORTANT SAFETY INFORMATION. Need help? Visit Sauder.com to view video assembly tips or chat with a live rep. PLEASE READ AND KEEP FOR FUTURE REFERENCE. Prefer the phone? Call 1-800-523-3987.
- Page 2 ADJUSTABLE SHELF (2) VALANCE MOLDING (1) TOP (1) SMALL ADJUSTABLE SHELF (1) BOTTOM MOLDING (2) BOTTOM (1) RIGHT FRONT LEG (1) SHELF MOLDING (2) SHELF (1) LEFT FRONT LEG (1) BACK (1) RIGHT REAR LEG (1) Page 2 416967 www.sauder.com/services...
- Page 3 Now you know Part Identifi cation our ABCs. www.sauder.com/services 416967 Page 3...
- Page 4 BLACK 9/16" LARGE HEAD SCREW - 7 BLACK 1-7/8" FLAT HEAD SCREW - 5 BLACK 1/2" FLAT HEAD SCREW - 8 15S SILVER 5/8" MACHINE SCREW - 2 BLACK 1-1/8" MACHINE SCREW - 2 BLACK 9/16" FLAT HEAD SCREW - 4 Page 4 416967 www.sauder.com/services...
- Page 5 Look for this icon. It means a Step 1 video assembly tip is available at www.sauder.com/services/tips Assemble your unit on a carpeted fl oor or on the empty å carton to avoid scratching your unit or the fl oor. Push twenty-four HIDDEN CAMS (1F) into the ENDS (A å...
- Page 6 Step 2 Turn sixteen CAM SCREWS (8F) into å the LEGS (J, K, L, and M). Remember: Righty tighty. Lefty loosey. (16 used) Page 6 416967 www.sauder.com/services...
- Page 7 Fasten the REAR LEGS (L and M) to the ENDS (A and B). å Tighten eight HIDDEN CAMS. These surfaces should be even. Angled edge These surfaces should be even. Edge with CAM DOWELS Edge with CAM DOWELS www.sauder.com/services 416967 Page 7...
- Page 8 Tighten Risk of damage or Arrow injury. HIDDEN CAMS must be completely Arrow Maximum tightened. HIDDEN 210 degrees CAMS that are not completely tightened may loosen, and parts may separate. To Minimum completely tighten: 190 degrees Page 8 416967 www.sauder.com/services...
- Page 9 LEFT END. Push the DOOR STOP (4I) into the hole in the SHELF (E). å BLACK 1-7/8" FLAT HEAD SCREW (2 used in this step) Rounded edge fi n i s h r f a www.sauder.com/services 416967 Page 9...
- Page 10 BLACK 1-7/8" FLAT HEAD SCREWS (2S). I D D u t H i t h o f a c S u r BLACK 1-7/8" FLAT HEAD SCREW (2 used in this step) Maximum Arrow 210 degrees Minimum 190 degrees Page 10 416967 www.sauder.com/services...
- Page 11 SCREWS in the ENDS. These edges should be even. Shoulder BLACK 9/16" FLAT HEAD SCREW (4 used in this step) Apply pressure with your hands as you guide the MOLDINGS over the SCREWS and onto the ENDS. www.sauder.com/services 416967 Page 11...
- Page 12 Step 8 Fasten two CORNER ACCENTS (8E) to the FRONT LEGS (J å and K). Use two SILVER 5/8" MACHINE SCREWS (15S). SILVER 5/8" MACHINE SCREW (2 used in this step) Page 12 416967 www.sauder.com/services...
- Page 13 Step 9 Fasten the FRONT LEGS (J and K) to the ENDS (A and B). å Tighten eight HIDDEN CAMS. Hey! It's starting to look like something! Angled edge Angled edge www.sauder.com/services 416967 Page 13...
- Page 14 ANGLE BRACKETS and into the VALANCE MOLDING. NOTE: There are no pre-drilled holes in the VALANCE å BLACK 9/16" LARGE HEAD SCREW MOLDING. The SCREWS will tighten into the groove. (6 used in this step) Page 14 416967 www.sauder.com/services...
- Page 15 Fasten the BACK (F) to your unit using the NAILS (1N). å NOTE: Be sure to tap NAILS into the holes that line up å over the SHELF (E). NAIL (46 used in this step) These holes must line up over the SHELF (E). www.sauder.com/services 416967 Page 15...
- Page 16 Step 12 Push four FEET (10E) onto the LEGS (J, K, L, and M). å With your hammer, gently tap four TACK GLIDES (12E) å through the FEET and into the LEGS (J, K, L, and M). Page 16 416967 www.sauder.com/services...
- Page 17 Step 13 Fasten two HINGES (14H) to each DOOR (G). Use eight å BLACK 1/2" FLAT HEAD SCREWS (11S). BLACK 1/2" FLAT HEAD SCREW (8 used in this step) www.sauder.com/services 416967 Page 17...
- Page 18 Fasten a KNOB (52K) to the DOOR (G). Use a BLACK å Mounting 1-1/8" MACHINE SCREW (21S). screw Repeat this step for the other DOOR (G). å See the next step for DOOR adjustments. Hinge å BLACK 1-1/8" MACHINE SCREW (2 used for the KNOBS) Page 18 416967 www.sauder.com/services...
- Page 19 To adjust the DOORS in or out (depth), loosen the mounting å screw one turn and move the DOORS in or out, as needed. Tighten the mounting screw after making adjustments. Mounting screw (depth) Adjusting screw (horizontal) (vertical adjustment) www.sauder.com/services 416967 Page 19...
- Page 20 Slide a SHELF MOLDING* (P) onto the notched edge of å one of the ADJUSTABLE SHELVES (H). Repeat this step for the other ADJUSTABLE SHELF (H). å *U.S. Patent No. 5,499,886 å Notched edge Slide the SHELF MOLDING (P) onto the notched edge. Page 20 416967 www.sauder.com/services...
- Page 21 FLAT HEAD SCREW (2S) into a stud in your wall. BLACK 1-7/8" FLAT HEAD SCREW (1 used into a stud in your wall) BLACK 9/16" LARGE HEAD SCREW (1 used into the top of your unit) www.sauder.com/services 416967 Page 21...
- Page 22 This completes assembly. Clean with your favorite furniture polish or a damp cloth. Wipe dry. å And to celebrate, why not share your success story? No load (12 used) 25 lbs. To cover HIDDEN CAMS 25 lbs. 40 lbs. (12 used) 25 lbs. 40 lbs. Page 22 416967 www.sauder.com/services...
- Page 23 QUANTITÉ d’ a chat de cet élément et conserver le livret pour future référence. EXTRÉMITÉ DROITE ..........1 ACCENT D’ANGLE .............2 Pour contacter Sauder EXTRÉMITÉ GAUCHE ..........1 10E PIED ..................4 en ce qui concerne cet DESSUS ................1 12E PATIN ..................4 élément, faire référence au numéro de lot et...
- Page 24 (F). Si besoin est, enfoncer sur les coins opposés de l'élément pour s'assurer d'être « d'équerre ». Fixer l'ARRIÈRE (F) à l'élément à l'aide des CLOUS (1N). REMARQUE : S'assurer de bien enfoncer les CLOUS dans les trous qui sont alignés au-dessus la TABLETTE (E). Page 24 416967 www.sauder.com/services...
- Page 25 Serrer les vis après avoir ajusté. Pour ajuster les PORTES vers l'intérieur où vers l'extérieur (profondeur), desserrer la vis de montage un tour et déplacer les PORTES vers l'intérieur ou vers l'extérieur. Serrer la vis de montage après avoir ajusté. www.sauder.com/services 416967 Page 25...
- Page 26 EXTREMO DERECHO ..........1 ACENTO DE ESQUINA ...........2 et conserver le livret EXTREMO IZQUIERDO ..........1 10E PIE ...................4 pour future référence. Pour contacter Sauder 12E TACHUELA DESLIZANTE ........4 PANEL SUPERIOR ............1 en ce qui concerne cet EXCÉNTRICO ESCONDIDO ......24 FONDO .................1 élément, faire référence...
- Page 27 Fije el EXTREMO DERECHO (A) al PANEL SUPERIOR (C) y al ESTANTE (E). Apriete cuatro EXCÉNTRICOS ESCONDIDOS. Fije el EXTREMO DERECHO (A) al FONDO (D). Utilice dos TORNILLOS NEGROS DE CABEZA PERDIDA de 48 mm (2S). www.sauder.com/services 416967 Page 27...
- Page 28 Para ajustar las PUERTAS hacia atrás o hacia adelante (profundidad), afl oje el tornillo de montaje una vuelta y mueva las PUERTAS hacia el interior o hacia el exterior según sea necesario. Apriete el tornillo de montaje después de hacer los ajustes. Page 28 416967 www.sauder.com/services...
- Page 29 Les téléviseurs peuvent être un téléviseur. cet eff et. particulièrement lourds. De plus, le poids et l’emplacement du tube image ont tendance à rendre les téléviseurs instables et enclins à tomber vers l’ a vant. www.sauder.com/services 416967 Page 29...
- Page 30 Además, el peso y la ubicación del tubo de imagen tienden a causar la inestabilidad de televisores y propensa a volcarse hacia adelante. Page 30 416967 www.sauder.com/services...
- Page 31 à compter de la date d'achat la première fois et qui sont signalés à Sauder dans les limites de couverture de la contre tout défaut de matériaux ou de fabrication des composantes de mobilier Sauder.
- Page 32 Dear Valued Customer: So, how did it go? Thanks so much for choosing Sauder® furniture. I hope the Set a world record for speed? purchase and assembly process was a positive experience Feeling good about yourself? and you feel good about the furniture you just built. If you Nice.
Need help?
Do you have a question about the Carson Forge 416967 and is the answer not in the manual?
Questions and answers