
Related Manuals for St George 8500100 Series

Summary of Contents for St George 8500100 Series
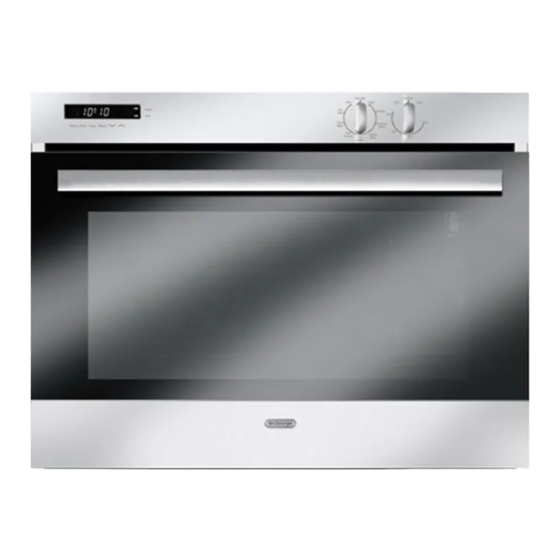
- Page 1 9 Function Electric Wall Ovens Model No’s 8500100, 8500200 Series Single Oven With Pull Down Door 8600100, 8600200 Series Single Oven 8700100, 8700200 Series Double Oven 8800100, 8800200 Series Wide Oven...
-
Page 2: Table Of Contents
Contents Safety Notes First Time Use And Quick Start Guide Set The Clock To Manual Mode Using The Mechanical Timer Initial Heating Clean The Oven Basic Cooking Oven Functions Defrost Normal Oven Classic Bake Fan Assist Fan Forced High Bake Fan Grill Grill Using The Programmable Clock... -
Page 3: Safety Notes
Safety Notes • This appliance is not intended for use by young children or infirm persons unless they are being adequately supervised by a responsible person to ensure that they can use the appliance safely. • Young children should be supervised to ensure they do not play with the appliance. •... -
Page 4: First Time Use And Quick Start Guide
First Time Use And Quick Start Guide The purpose of this section is to get you using your oven to cook a meal with minimal delay. More detailed instructions that will give you greater control of your oven are contained later. Set The Clock To Manual Mode (Electronic Timer Models Only) When power is first connected to your oven: The time of day “(0:00)”... -
Page 5: Basic Cooking
First Time Use And Quick Start Guide Basic Cooking Set The Cooking Mode MODE Light No heat or fan. Light only. Grill Light Defrost No heat, fan only. Defrost Grill Normal Oven Concealed bottom element plus outer top High element Normal Oven Bake... - Page 6 Oven Cooking Functions Your St George oven has a number of different cooking functions. On these pages are the basic functions contained in all models in this range. These cover the majority of cooking needs. All functions are simple to use and can be set by turning the Mode control to the desired setting.
-
Page 7: Oven Functions
Oven Functions Classic Bake When To Use This Function Choose this function when you want a well cooked base and minimal browning. Helpful Hints • It is a good idea to pre-heat the oven when cooking more than one dish at a Heat is provided time. -
Page 8: High Bake
Oven Functions High Bake When To Use This Function This function is most suitable when cooking foods that require a high heat and a crisp base. High bake is also good for reheating. Quick and consistent heat is evenly distributed throughout the oven. This function is especially successful for pastry foods and pizza. -
Page 9: Using The Programmable Clock
Using The Programmable Clock Not only does the clock allow you to read the time of the day but it also allows you to automatically time cooking. Other features include an alarm and a timer which can also be used for other household activities. A Quick Tour Of The Programmable Clock Indicator Lights 12 45... -
Page 10: Set The Time Of Day
Using The Programmable Clock Set The Time Of Day Press the Reset button. 12 45 Immediately (within 5-10 seconds) press the “^” or “v” buttons until the T C S R correct time is displayed. • When these buttons are pressed and released the time will change in 1 minute steps, •... -
Page 11: How To Set The Oven To Stop Automatically
Using The Programmable Clock How to Set the Oven to Stop Automatically Here you switch the oven on to your required function and temperature so that cooking starts immediately, and then set the clock to switch off automatically after a preset number of minutes. -
Page 12: How To Start And Stop The Oven Automatically
Using The Programmable Clock How to Start And Stop The Oven Automatically Here you set the cooking duration and the time which cooking must stop, so the oven automatically calculates when to switch on and when to switch off. NOTE: With double oven models, the clock controls the upper oven only. The lower oven must be turned on and off manually. -
Page 13: Using The Oven
Telescopic Sliders This range of St George ovens come fitted with telescopic Sliders. The baking tray sits on the sliding arms, allowing the tray to be pulled forward more easily. -
Page 14: The Roast Probe
Using The Oven The Roast Probe The roast probe is inserted into the fleshiest part of a meat joint and plugged into the socket in the oven compartment. The oven automatically turns off when the temperature of the meat joint reaches your pre-set temperature providing a carefree and simple method of cooking roasts. -
Page 15: Maintenance
Maintenance Cleaning The Exterior • Using a warm, damp, non abrasive cloth, wipe down the control panel, handles, glass, stainless steel and enamel surfaces. • Normal stains can be removed by wiping them with a clean cloth soaked in soapy water before the spill becomes cold or dries up. •... - Page 16 t n i s n I s l l i t c : s l s e a r e o i . s r S “ ” f e , ) t n e o e u f c l i l l l s s i s...
- Page 17 t n i l l i y l l r e p r e u t c e r “ ” l l i c u e s c l l r e p l l i “ ” E i t r “...
- Page 18 (Note above the separate directions for catalytic panels) • The high quality vitreous enamel used in your St George oven has a hard durable finish which is resistant to wear and discolouration and makes cleaning easy. However, to maintain the appearance and durability of the finish, it is best to wipe off any spills or spatters immediately.
-
Page 19: Removing And Replacing The Door Glass - Side Opening Doors
Removing And Replacing The Door Glass - SIDE OPENING DOORS Your St George oven has a quadruple glazed door to keep the front surface as cool as possible. The inside glass panels can be easily removed for quick and convenient cleaning. Once the three removable glass panels have been removed, the remaining glass panel can be cleaned on both sides. - Page 20 Maintenance Removing And Replacing The Door Glass - SIDE OPENING DOORS (continued) 3) Removing And Replacing The Door Handle Using a phillips head screwdriver, undo the two screws that hold the door handle in place. Hold the glass while the handle is being removed to prevent it from dropping. To replace the handle, remember to place the rubber washer closest to the glass panel, then the large steel washer closest to the head of the screw.
-
Page 21: Removing And Replacing The Door Glass - Pull Down Doors
Removing And Replacing The Door Glass - PULL DOWN DOORS Depending on your model, your St George oven has a triple or quadruple glazed door to keep the front surface as cool as possible. The inside glass panels can be easily removed for quick and convenient cleaning. - Page 22 Maintenance Removing And Replacing The Door Glass - PULL DOWN DOORS (continued) 4) Removing And Replacing The Door Handle Using a phillips head screwdriver, undo the two screws that hold the door handle in place. To replace the handle, remember to place the rubber washer closest to the glass panel, then the large steel washer closest to the head of the screw.
-
Page 23: Removing And Replacing The Door - Pull Down Doors Only
Maintenance Removing And Replacing The Door - PULL DOWN DOORS ONLY Although not necessary for cleaning, it may sometimes be helpful to remove the door to allow easier access to the inside of the oven. Removing The Door To remove the door, proceed as follows: Place the two pins into the door hinges as explained in the section “Secure The Door In The Open Position”. -
Page 24: Changing The Light Bulb
Unscrew the light bulb (anticlockwise, looking up) Replace with an identical new bulb. Replacement bulbs are available from St George Appliances. Push the glass cover back into place. The semi-circular cutout on the inside of the glass cover goes toward the top. -
Page 25: Recipes
Recipes The recipes on these pages are provided to help demonstrate the various oven functions, and to help you understand how to fully and effectively use your oven. All recipes are © The Margaret Fulton Cookbook. BEEF BOURGUIGNONNE Normal Oven 1.25 kg stewing beef such as chuck, Preheat the oven to 150°C. -
Page 26: Quiche Lorraine
Recipes QUICHE LORRAINE Fan Assist The classic quiche lorraine contains no cheese, but a few tablespoons of grated cheese can be added to the egg mixture, if desired. 3-4 rashers bacon Trim the rind off the bacon and grill or fry until crisp. Cut into bite-sized pieces. -
Page 27: Pizza Crust
Recipes TARTE AUX POMMES (APPLE TART) Classic Bake I quantity sweet an pastry Preheat the oven to 190°C . Line a 20 cm an ring or case with pastry, then prick well and chill until rm. Line with 6-8 medium cooking apples grease proof paper and half- ll with pie weights or dried I tablespoon water beans and bake ‘blind’... -
Page 28: To Grill Fish
Recipes TO GRILL FISH Fan Grill This method is simple and is excellent for whole fillets or steaks. Preheat the griller. Butter or oil the griller rack or line with buttered foil. Wipe fish with paper towels. Dust with flour and brush with melted butter or oil and season with sea salt and pepper. -
Page 29: Temperature Guide
Temperature Guide Temperature Guide For Meats Type of meat Cuts of meat Time/kg Oven Temperature Beef Standing rib, Rolled 60 minutes per kg 180 - 200 C rib, Sirloin, Bolar Blade, Corned Topside Fillet, Scotch Fillet 40 mins per kg 180 - 200 C Veal Shoulder or leg (with... -
Page 30: Technical Specifications & Installation
Technical Specifi cations Cavity Specifi cations Single ovens can be installed under a bench top or in a cooking column. Double ovens must be installed in a column at least 500 mm above the floor. This range of ovens must be installed into adequately vented cabinets. A cutout must be created in the bottom of the cabinet according to the dimensions below. - Page 31 Technical Specifi cations Double Ovens 8700100, 8700200 Series Double Oven Cutout Flush Trim Exposed Dimensions Mounting (Proud Mounting) Height 1001 mm 996 mm Width 600 mm 570 mm Depth (min) 590 mm 565 mm Electrical Main Oven Oven (Max) 3800 W Grill 2700 W Oven Fan &...
-
Page 32: Wiring Diagrams
Wiring Diagrams 8500100 Series Single Oven 8600100 Series Single Oven... - Page 33 Wiring Diagrams 8700100 Series Double Oven 8800100 Series Wide Oven...
- Page 34 Wiring Diagrams 8500200 Series Single Oven (Steam Clean) WIRE No 2 WIRE No 9 TIMER WIRE No 4 WIRE No 4 STAT OVEN 85°C C/O SWITCH WIRE No 21 WIRE 2 OF 51163-1 Join COOLING FAN WIRE 2 OF 51163-1 WIRE No 20 WIRE No 19 OVEN...
- Page 35 Wiring Diagrams 8700200 Series Double Oven (Steam Clean) STAT ROAST UPPER CLOCK OVEN 1 PILOT PROBE STAT SOCKET. OVEN 1 RELAY AC/L AC/N LOWER PILOT JOIN JOIN LOWER OVEN LAMP COOLING FAN COOLING FAN UPPER OVEN LAMP1 OVERHEAT 800W 800W THERMOSTAT 300C UPPER OVEN...
- Page 36 St George Appliances 3-5 Birmingham Avenue Chester Hill New South Wales 2162 Phone:: 1300 305 366 Part #: 52399 Website::www.sga.com.au oven_inb_care_0610...
Need help?
Do you have a question about the 8500100 Series and is the answer not in the manual?
Questions and answers