Hyster N35ZDR Manual
Hide thumbs
Also See for N35ZDR:
- Safety precautions maintenance and repair (14 pages) ,
- Quick start manual (6 pages)
Table of Contents
Advertisement
Advertisement
Table of Contents

Related Manuals for Hyster N35ZDR


Summary of Contents for Hyster N35ZDR
- Page 1 Hyster C264 (N45ZR, N35ZDR) Forklift...
- Page 2 REACH CARRIAGES N35ZDR, N45ZR [C264]; N35ZDR2, N45ZR2 [D264]; N30ZDR, N35-40ZR [D470]; N35-40ZR2, N30ZDR2 [E470]; N30ZDRS, N35-40ZRS [A265]; N35-40ZRS2, N30ZDRS2 [B265] PART NO. 1590957 4500 SRM 1196...
- Page 3 • Keep the tools clean and in good condition. • Always use HYSTER APPROVED parts when making repairs. Replacement parts must meet or ex- ceed the specifications of the original equipment manufacturer. • Make sure all nuts, bolts, snap rings, and other fastening devices are removed before using force to remove parts.
-
Page 4: Table Of Contents
Clean and Inspect ............................. 31 Assemble ................................31 Install .................................31 Reach Cylinders ..............................32 Remove ................................32 Disassemble ...............................34 Clean and Inspect ............................. 35 Assemble ................................36 Install .................................36 Tilt Cylinder ................................37 Remove ................................37 Clean, Inspect, and Repair ..........................37 Install .................................37 ©2016 HYSTER COMPANY... - Page 5 Clean and Lubricate ............................46 Adjust Main-Lift Chains ...........................46 Adjust Free-Lift Chains ............................46 Specifications .................................48 Troubleshooting ..............................50 This section is for the following models: (N35ZDR, N45ZR) [C264]; (N35ZDR2, N45ZR2) [D264]; (N30ZDR, N35-40ZR) [D470]; (N35-40ZR2, N30ZDR2) [E470]; (N30ZDRS, N35-40ZRS) [A265]; (N35-40ZRS2, N30ZDRS2) [B265]...
- Page 6 Thanks very much for your reading, Want to get more information, Please click here, Then get the complete manual NOTE: If there is no response to click on the link above, please download the PDF document first, and then click on it. Have any questions please write to me: admin@servicemanualperfect.com...
-
Page 7: General
Periodic Maintenance For additional information on hydraulic 8000SRM1197. systems for models N35ZDR, N45ZR, N30ZDR, and N35-40ZDR, see the section Hydraulic System 1900SRM1189. For Safety Procedures When Working Near Mast The forks may be difficult to see when the mast is WARNING raised. -
Page 8: Description
Safety Procedures When Working Near Mast 4500 SRM 1196 3. Wrap a safety chain, 9.5 mm (3/8 in.) minimum size, around crossmembers of inner and outer weldment. Secure it in place. See Figure 1. 4. Lower mast until safety chain stops mast. Make sure there is no movement of mast. -
Page 9: Rear Selector Valve
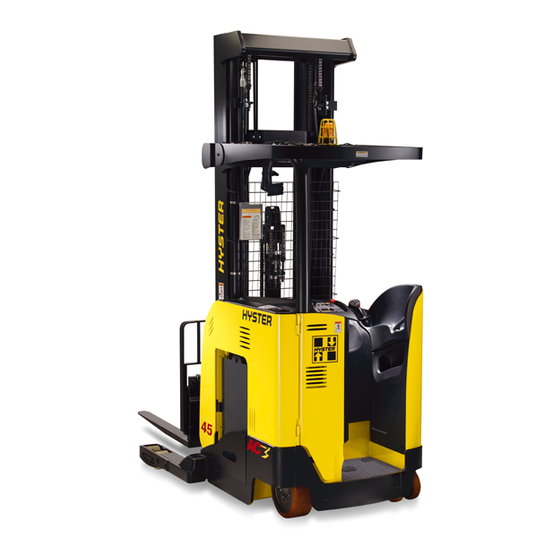
4500 SRM 1196 Description A. SINGLE-REACH CARRIAGE B. DOUBLE-REACH CARRIAGE 1. FORK CARRIAGE 6. FRONT FRAME ASSEMBLY 2. TILT CYLINDER 7. FRONT SELECTOR VALVE 3. REAR FRAME ASSEMBLY 8. VALVE COVER PLATE 4. REAR SELECTOR VALVE 9. HOSE AND WIRING GUIDE 5. -
Page 10: Repair - General
Repair - General 4500 SRM 1196 Repair - General NOTE: Most repairs of the reach carriage can be WARNING done without removing the carriage from the mast. These repair procedures require that the carriage is Hydraulic oil is hot after system operation and installed in the mast and the scissor arms are fully can cause burns. -
Page 11: Remove
4500 SRM 1196 Forks Remove 1. Pull the latch pin and turn it 180 degrees to lock the pin in a retracted position. 2. Slide the fork to the fork removal notch located in the center of the bottom crossmember of the fork carriage. - Page 12 Reach Carriage Assembly 4500 SRM 1196 Figure 4. Install C-Clamps to Rear Frame b. Ensure clamps are secure before lifting the 7. Disconnect the lift chains from the reach car- reach carriage assembly. riage assembly: c. Install a chain loop or sling through each a.
-
Page 13: Inspect
Welding repairs to the reach carriage assembly or 2. Raise the inner mast until clearly higher than ® mast must be factory approved by Hyster before the reach carriage assembly. Position the reach the repair is performed. Written instructions out-... -
Page 14: Reach Assembly Adjustments
Reach Carriage Assembly 4500 SRM 1196 3. Lower the inner mast channels onto the load 7. Reconnect the lift chains to anchors on reach rollers of the rear frame. If the inner mast does carriage assembly as removed. Install anchor not lower smoothly and completely, raise the pins and cotter pins. -
Page 15: Reach Carriage Assembly Repair
4500 SRM 1196 Reach Carriage Assembly Repair Reach Carriage Assembly Repair NOTE: Most repairs of the reach carriage assembly WARNING can be done without removing the reach carriage assembly from the mast. These repair procedures Hydraulic oil is hot after system operation and require that the reach carriage assembly is instal- can cause burns. -
Page 16: Load Rollers Repair
Load Rollers Repair 4500 SRM 1196 Load Rollers Repair 1. Remove the rear frame from the mast as re- quired to remove and install the load rollers. See Reach Carriage Assembly. WARNING Be careful when removing or installing snap rings. Snap rings can eject during removal or in- stallation with enough force to cause an injury. -
Page 17: Side Rollers Repair (6.9 Mast Only) (N30Zdrs And N35-40Zrs)
4500 SRM 1196 Side Rollers Repair (6.9 Mast Only) (N30ZDRS and N35-40ZRS) Side Rollers Repair (6.9 Mast Only) (N30ZDRS and N35-40ZRS) 1. Remove the reach carriage assembly from the mast to adjust or replace the side rollers. See CAUTION Reach Carriage Assembly. Correct placement of shims is critical for the oper- ation of the reach carriage assembly. -
Page 18: Disassemble (With Sideshift)
Reach Assembly Front Frame 4500 SRM 1196 1. Orient front frame assembly with roller guides WARNING down and secure the unit. There are pinch points on the reach carriage as- 2. Remove the selector valve. Refer to Front Selec- sembly that can cause an injury. Use clamps and tor Valve. - Page 19 4500 SRM 1196 Reach Assembly Front Frame 10. Remove bushings from fixed frame. 13. Remove tilt cylinder. 11. Disassemble sideshift cylinder only if needed 14. Remove bushings from tilt cylinder. for service. See Sideshift Cylinder. 15. Disassemble tilt cylinder only if repair is neces- 12.
-
Page 20: Disassemble (Without Sideshift)
Reach Assembly Front Frame 4500 SRM 1196 5. Use a punch to remove pivot pins (8) from each DISASSEMBLE (WITHOUT SIDESHIFT) side of tilting frame. For the following procedures, refer to Figure 10. 6. Remove tilting frame from fixed frame. 1. -
Page 21: Clean And Inspect
4500 SRM 1196 Reach Assembly Front Frame 8. Install wear strips (2, 3, and 19) to tilting CLEAN AND INSPECT frame. 9. Install fork carriage to tilting frame. WARNING Cleaning solvents can be flammable and toxic and 10. Install brackets and hardware (24) to fork car- can cause skin irritation. -
Page 22: Install
Reach Assembly Front Frame 4500 SRM 1196 2. Use a crane to lift the front frame. Align the INSTALL front frame with the outer scissor arms. Install the pivot pins that retain the inner scissor arms WARNING to the front frame. The points between the scissor arms and the front 3. - Page 23 9. LUBE FITTING 24. PIN 10. CAPSCREW 25. RH CYLINDER ASSEMBLY 11. BEARING 26. LH CYLINDER ASSEMBLY 12. SETSCREW 27. POSITION SENSOR (N35ZDR, N45ZR, 13. JAM NUT N30ZDR, N35-40ZR) 14. LOAD ROLLER AND SHIMS 28. BRACKET 15. INNER SCISSOR ARM 29. CAPSCREW...
- Page 24 Single-Reach Scissor Arms 4500 SRM 1196 4. Remove the shoulder bolt and nut from the WARNING reach cylinder pins. Use a drift to drive out the cylinder rod end pins attaching the reach cylin- There are pinch points on the reach carriage as- ders to the inner scissor arm.
- Page 25 4500 SRM 1196 Single-Reach Scissor Arms 7. Models N35ZDR, N45ZR, N30ZDR, N35-40ZR have a position sensor mounted to the right side inner scissor arm pivot pin at the rear frame. Remove the position sensor as fol- lows: a. Disconnect the wiring harness, carefully clip...
-
Page 26: Clean And Inspect
Single-Reach Scissor Arms 4500 SRM 1196 b. Remove the screw securing the pin retainer WARNING to the scissor arm and slide the pin retainer from behind the sensor. Use safety chains on the rear frame and mast weldments to keep the rear frame and mast weld- c. - Page 27 4500 SRM 1196 Single-Reach Scissor Arms WARNING The scissor arms are heavy and can cause an in- jury if allowed to fall. Have another person help you support the scissor arm during removal and installation. NEVER put any part of your body be- tween the parts of the scissor arm assembly.
-
Page 28: Double-Reach Scissor Arms
Double-Reach Scissor Arms 4500 SRM 1196 Double-Reach Scissor Arms 4. Install the clamps and blocks at the channels of DISASSEMBLE the rear frame to make sure the load rollers cannot move in the channel and the scissor The entire scissor assembly may not need to be dis- arms cannot retract.
Need help?
Do you have a question about the N35ZDR and is the answer not in the manual?
Questions and answers