Page 1
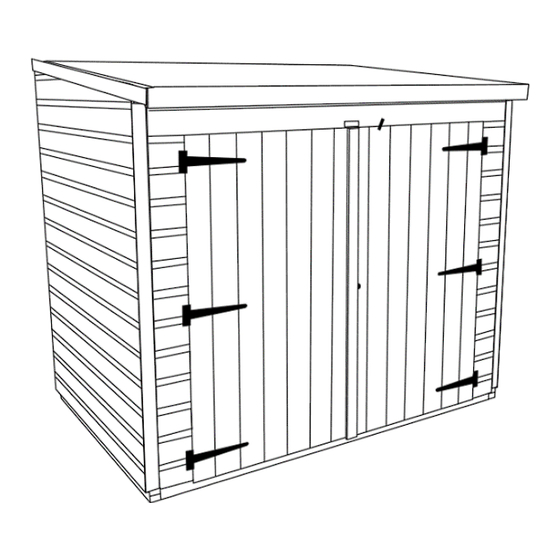
Pent Bike Shed Instruction Manual 8-10ft Models __________________________________________________ WARNING UNPACKING SAFELY Please follow these instructions to unpack your garden building safely • Two people minimum to unpack • Place the pallet on firm level ground • Cut the plastic banding •...
Page 2
(Please note – this image is for illustration purposes only. The shed you ordered may be a different size or roof sloping other way) Watch the video! We recommend watching our installation video before starting assembly of your Power shed. This video can be applied to all pent sheds in our range www.Powersheds.com/faqs/how-do-you-assemble-a-power-shed/...
We also strongly advise you to wear safety glasses when installing the felt to protect your eyes. 2 persons recommended Power Sheds Ltd cannot be held responsible for any damage or injury sustained due to incorrect unloading, unpacking, or assembly of any of our products.
Page 5
(75mm of concrete on top of 75mm of hardcore) or a paving slab base (slabs laid on top of 50mm of sharp sand). Power Base Kit If you have ordered a Power Base Kit the instructions can be found in the small base kit fixing pack. Please scan the QR code to watch our base kit installation video -...
• 40mm galvanised nails If you have ordered a Power Base, you will also receive 80mm and 100mm screws. Please note 35mm screws are not needed for a pent (This is a standard pack used for both pent and apex sheds) On the rare occasion that not enough screws are provided please contact us and make us aware so we can send more out to yourself.
Reminder Ensure bearers are added to the floor! USEFUL TIP! If you have purchased a POWER Base you can screw the floor to the timber POWER base below for maximum strength and security. Page 9 of 21...
Please see the components table to confirm which panels you should have for your Power Pent Bike Shed. Start with the 2ft panel that will be part of your back wall (the long wall without the door) – position this on top of the floor panel.
Page 12
Keep going until the back wall and both ends are secured together leaving the front section open. The back of our 8ft buildings will need to be built using a 2ft, then a 4ft, then another 2ft panel. Our 10ft buildings will need to built using one 2ft panel, then two 4ft panels.
Page 13
Once the two panels are on which go at the side both sides of the doors (door wings), you can add the door head. This is the part which has the ‘Power’ brand on. To secure these to the panels below you need to screw up through the door wings and into the door head.
Page 14
Make sure all the side walls are square and aligned at the When you have secured all the wall panels together you then need to secure these to the floor using 70mm screws provided. Screw into the floor with 2x screws for every wall panel (internally) ensuring the screws are driven through the framing at the bottom of the side/gable walls, through the floorboards and into the floor joists.
Front Top & Gables The Power Pent Shed can be higher at the front or the back – you can choose this as you assemble it. Add the pent front tops to the side you want to be higher and screw to the panels below with 50mm screws.
Roof Your pent will come with two or more roof panels, please refer to your component checklist to ensure you have the correct pieces for your size shed. Place the roof panel(s) in place so that the framing on the roof panel run parallel with the gables i.e. from the high side to the low side.
Doors Your shed will come with two doors which you will need to hang. The door with the lock on will go on the right (as you look at the shed from the outside) and the door with the shoot bolts will go on the left. Position one of the doors in place ensuring the gap between the edge of the door and the shiplap tongue and groove cladding (which you will be screwing the doors in to) is approx.
Felt Health and Safety – Use safety goggles when installing the roofing felt. Before laying the felt, you will need to attach the back bargeboards (80mm) with the 40mm galvanised nails. Please refer to the components checklist to see how many you’ll require for your size shed. These bargeboards may come in more than one section and may need cutting down to size with a saw depending on which size shed you have chosen.
There is no bargeboard for the low side as it could trap rainwater from running off the roof. Secure cover lats which are 58mm wide, at each corner of your Power shed with 40mm nails (at least four per strip). Extra strips are provided to cover the joins between side wall panels.
USEFUL TIP – Looking for some inspiration? Our Instagram has images of hundreds of Power Sheds which have all been sent to us by customers and is a great way to look at the different ways you can build and paint your shed!
Page 21
(4x) board lengths (at either 4ft or 6ft depending what you ordered). Please note: These are 70mm wide and are the same material as the bargeboards. Be careful not to use these during assembly of your Power Shed – These boards are usually taped together. •...
Page 22
Returns If Power is not for you and you’d like to return your shed within 14 days of delivery then we will collect the item from you without charging a collection fee. No fuss, no fees! All we ask is that you do not unpack the shed or take the shed off the pallet. You will be able to see the shed panels on the pallet if you want to double check the quality of the shed panels.
Need help?
Do you have a question about the 8ft and is the answer not in the manual?
Questions and answers