Table of Contents
Advertisement
Advertisement
Table of Contents

Related Manuals for Feelworld USB10X

Summary of Contents for Feelworld USB10X
- Page 1 PTZ Camera User Manual...
-
Page 2: Table Of Contents
Content Declarations.................................. 2 Chapter 1 Your Product...............................4 1.1 In the Box................................4 1.2 Product Overview.............................. 4 1.2.1 Product Model............................4 1.2.2 Dimension..............................4 1.2.3 Main Features.............................5 Chapter 2 Install Your Product..........................7 2.1 Camera Interface Explanation.........................7 2.1.1 External Interface............................7 2.1.2 RS-232 Interface............................8 2.2 Bracket Mount.............................. -
Page 3: Declarations
Thank you for choosing our product! This User Manual is designed to show you how to use this camera quickly and make use of all the features. Please read all directions and instructions carefully before using this product. Declarations Operators Safety Summary The general safety information in this summary is for operating personnel. - Page 4 For all camera installation procedures, please observe the following important safety and handling rules to avoid damage to yourself and the equipment. To protect users from electric shock, ensure that the chassis connects to earth via the ground wire provided in the AC power Cord. The AC Socket-outlet should be installed near the equipment and be easily accessible.
-
Page 5: Chapter 1 Your Product
USB video signal is transmitted by black end; if power adapter is used, USB2.0 video cable is not required for power supply, and ordinary USB2.0 video cable is enough. 1.2 Product Overview 1.2.1 Product Model The User Manual is applicable to: USB10X PTZ Camera 1.2.2 Dimension... -
Page 6: Main Features
Product Dimension 1.2.3 Main Features Camera Performance This series camera has perfect functions, superior performance and rich video output interfaces; Featuring with advanced ISP processing algorithms, offering vivid and high resolution video with a strong sense of depth and fantastic color rendition. Full HD Resolution: 1/2.9 inch high quality CMOS sensor. - Page 7 Focus Auto / Manual/ One Push Focus Exposure Auto / Manual On/Off Video Adjustment Brightness, Color, Saturation, Contrast, Sharpness, B/W mode, Gamma curve >50dB Input/output Interface Video Output USB2.0 Interface, A Type Interface Video Compression MJPG, H.264, H.265 Format Control Interface RS232 (IN/OUT), RS485 Control Protocol VISCA/Pelco-D/Pelco-P...
-
Page 8: Chapter 2 Install Your Product
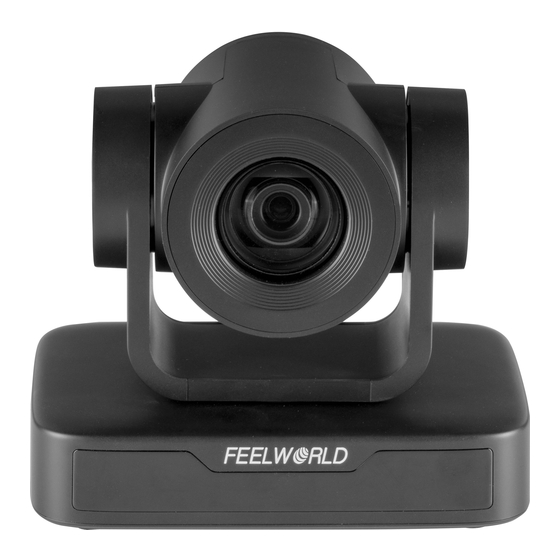
Chapter 2 Install Your Product 2.1 Camera Interface Explanation Product Interfaces 1. Camera Lens 5. Screw Hole for Tripod 9. USB 2.0 Interface 2. Remote Control Receiving 10. DC12V Input Power Supply 6. RS232 Control Interface(Input) Indicator Socket 3. Camera Base 7. -
Page 9: Rs-232 Interface
2.1.2 RS-232 Interface 1)RS-232 Interface Definition Connection to PC or Camera Controller Camera WindowsDB-9 1.DTR 1.DCD 2.DSR 2.RXD 3.TXD 3.TXD 4.GND 4.DTR 5.RXD 5.GND 6.GND 6.DSR 7.IR OUT 7.RTS 8.NC 8.CTS 9.RI 2)RS-232 Mini-DIN 8-pin Port Definition Port Definition Data Terminal Ready Data Set Ready Transmit Data Signal Ground... -
Page 10: Bracket Mount
Definition Port Data Carrier Detect Receive Data Transmit Data Data Terminal Ready System Ground Data Set Ready Request to Send Clear to Send Ring Indicator 4)VISCA networking as shown below Camera cascade connection Camera 1 Camera 2 1.DTR 1.DTR 2.DSR 2.DSR 3.TXD 3.TXD... - Page 11 2)Ceiling Mounting...
-
Page 13: Chapter 3 Use Your Product
Chapter 3 Use Your Product 3.1 Video Output 3.1.1 Power on initial configuration The remote control receiving indicator flashes after power on, the pan-tilt turns left to the lowest left to the lowest, and then turns to the HOME position (both the horizontal and vertical positions are in the middle), while the movement first shrinks and then stretches. - Page 14 2. Camera Selection Select the camera address to control. 3. Focus Control Auto: auto focus mode Manual: manual focus mode Focus + (near):Press【FOCUS +】 key (Valid only in manual focus mode) Focus - (far): Press 【FOCUS -】 key (Valid only in manual focus mode) Press and hold the keys, the action of focus will keep continue and stop as soon as the key is released.
-
Page 15: Menu Setting
6. Pan/Tilt Control Up: press Down: press Left: press Right: press Back to middle position: press“【HOME】” Press and hold the up/down/left/right key, the pan/tilt movements will keep running, from slow to fast, until it runs to the endpoint; stop as soon as the key is released. -
Page 16: System Setting
MENU ================ (Setup) (Camera) (P/T/Z) (Version) (Restore Default) [↑↓]Select [← →]Change Value [Menu]Back[Home]OK Setup: System parameter setting Camera: Camera parameter setting P/T/Z: Enter into sub menu Version: Enter into sub menu Restore Default: Enter into reset setting, select YES or NO to confirm [↑↓] Select: For selecting menu [←... -
Page 17: Camera Setting
Auto Filp: On/Off 3.3.3 Camera Setting Move the pointer to the (CAMERA) in the Main Menu, click the 【HOME】key and enter the (CAMERA) as follow, CAMERA ================= (Exposure) (Color) (Image) (Focus) (Noise Reduction) Style Default [↑↓]Select [← →]Change Value [Menu]Back [Home]OK Exposure: Enter into Exposure setting Color: Enter into color setting... - Page 18 Anti-Flicker: OFF/50Hz/60Hz for options (only available in Auto/Iris priority/Brightness priority modes) Gain limit: 0~15 (only available in Auto/ Iris priority /Brightness priority mode) WDR: Off, 1~8 ShutterPriority:1/25,1/30,1/50,1/60,1/90,1/100,1/120,1/180,1/250,1/350,1/500,1/1000,1/2000,1/3000,1/4000,1 /6000, 1/10000 (only available in Manual and Shutter priority mode) IRIS Priority: OFF, F11.0, F9.6, F8.0, F6.8, F5.6, F4.8, F4.0, F3.4, F2.8, F2.4, F2.0, F1.8(only available in Manual and Iris priority mode) Brightness: 0~23 (only available in Brightness priority mode) 2)Color...
- Page 19 IMAGE ================ Brightness Contrast Sharpness Flip-H Flip-V B&W-Mode Color Gamma Default Close Low-Light Mode [↑↓]Select [← →]Change Value [Menu]Back Brightness: 0~14 Contrast: 0~14 Sharpness: 0~15 Flip-H: On/Off Flip-V: On/Off B&W Mode: color, black/white Gamma: Default/0.45/0.50/0.5/0.63 DCI: Dynamic Contrast: Off/1~8 Minimum Illumination: On/Off 4)Focus Move the pointer to the (FOCUS) in the Menu, click the【HOME】and enter the (FOCUS) as follow, FOCUS...
-
Page 20: P/T/Z
NOISE REDUCTION ================= NR-2D NR-3D Dynamic Hot Pixel [↑↓]Select [← →]Change Value [Menu]Back 2D Noise Reduction: Auto, close, 1~7 3D Noise Reduction: Close, 1~8 Dynamic Hot Pixel: Close, 1~5 3.3.4 P/T/Z Move the pointer to the (P/T/Z) in the Main Menu, click the【HOME】and enter the (P/T/Z) as follow, P/T/Z ================... -
Page 21: Restore Default
VERSION ================= MCU Version 3.1.0 2019-09-26 Camera Version 1.0.5 2019-09-27 AF Version 1.0.0 2019-09-07 [↑↓]Select [← →]Change Value [Menu]Back [Home]OK MCU Version: Display MCU version information Camera Version: Display camera version information AF Version: Display the focus version information 3.3.6 Restore Default Move the pointer to the (RESTORE DEFAULT) in the Main Menu, click the 【... -
Page 22: Chapter 4 Support
Chapter 4 Support 4.1 Camera Maintenance and Troubleshooting 4.1.1 Camera Maintenance 1) Please power off the camera and disconnect the power adapter and socket, if it’s not used for a long run. 2) Use soft cloth or tissue to clean the camera cover. 3) Wipe it with a soft, dry cloth when cleaning the camera lens. -
Page 23: Chapter 65Appendix
Chapter 5 Appendix The camera could be controlled through RS232/RS485 interface; RS232C serial parameter are as follows: Baud rate: 2400/4800/9600/115200 bits / sec; Start bit: 1; data bits: 8; Stop bit: 1; Parity: None. After power on, the camera first goes left, then back to the middle position. Self-test is finished after the zoom moved to the farthest and then back to the nearest position. - Page 24 Command Function Command packet Note Auto Focus 8x 01 04 38 02 FF Manual Focus 8x 01 04 38 03 FF One Push mode 8x 01 04 38 04 FF 8x 01 04 47 0p 0q 0r 0s pqrs: Zoom Position CAM _Zoom Focus Direct 0t 0u 0v 0w FF...
- Page 25 Command Function Command packet Note 8x 01 04 0E 02 FF Down 8x 01 04 0E 03 FF Direct 8x 01 04 4E 00 00 0p 0q FF pq: ExpComp Position 8x 01 04 33 02 FF Back Light CAM_Back Light Compensation 8x 01 04 33 03 FF Reset...
-
Page 26: Inquiry Command
Command Function Command packet Note system 0:1080P60 8:720P30 1:1080P50 9:720P25 2:1080i60 A:1080P59.94 3:1080i50 B:1080i59.94 4:720P60 C:720P59.94 5:720P50 D:1080P29.97 6:1080P30 E:720P29.97 7:1080P25 8x 01 06 01 VV WW 03 01 FF Down 8x 01 06 01 VV WW 03 02 FF Left 8x 01 06 01 VV WW 01 03 FF Right... - Page 27 CAM_ShutterPosInq 8x 09 04 4A FF y0 50 00 00 0p 0q FF pq: Shutter Position CAM_IrisPosInq 8x 09 04 4B FF y0 50 00 00 0p 0q FF pq: Iris Position CAM_Gain LimitInq 8x 09 04 2C FF y0 50 0p FF p: Gain Positon CAM_ BrightPosiInq 8x 09 04 4D FF...
-
Page 28: Pelco-D Protocol Command List
y0 50 0w 0w 0w 0w wwww: Pan Position zzzz: Tilt Pan-tiltPosInq 8x 09 06 12 FF 0z 0z 0z 0z FF Position Note:[X] in the above table indicates the camera address to be operated,【y】=【x + 8】. 5.2 Pelco-D Protocol Command List Function Byte1 Byte2... -
Page 29: Pelco-P Protocol Command List
5.3 Pelco-P Protocol Command List Function Byte1 Byte2 Byte3 Byte4 Byte5 Byte6 Byte7 Byte8 0xA0 Address 0x00 0x08 Pan Speed Tilt Speed 0xAF Down 0xA0 Address 0x00 0x10 Pan Speed Tilt Speed 0xAF Left 0xA0 Address 0x00 0x04 Pan Speed Tilt Speed 0xAF Right...
Need help?
Do you have a question about the USB10X and is the answer not in the manual?
Questions and answers