Table of Contents
Advertisement
Available languages
Available languages
Quick Links
Klemm-Markise
Original
Montage- und Bedienungsanleitung
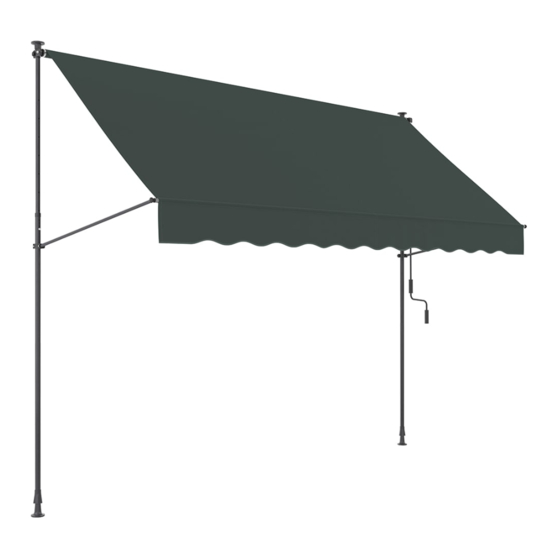
Abbildung beispielhaft
Lesen Sie vor Montage und Inbetriebnahme sorgfältig alle Punkte dieser
Anleitung durch! Anleitung aufbewahren und bei Weitergabe des Produktes mit
aushändigen!
Deutsch __________ 1-21
English __________ 22-42
Francaise ________ 43-63
V1/2021-30314
1
Advertisement
Chapters
Table of Contents

Related Manuals for empasa 30314


Summary of Contents for empasa 30314
- Page 1 Klemm-Markise Original Montage- und Bedienungsanleitung Abbildung beispielhaft Lesen Sie vor Montage und Inbetriebnahme sorgfältig alle Punkte dieser Anleitung durch! Anleitung aufbewahren und bei Weitergabe des Produktes mit aushändigen! Deutsch __________ 1-21 English __________ 22-42 Francaise ________ 43-63 V1/2021-30314...
-
Page 2: Table Of Contents
Inbetriebnahme __________________________________________________________________________________________ 17 Wichtige Hinweise vor Inbetriebnahme ������������������������������������������������������������������ 17 Inbetriebnahme ������������������������������������������������������������������������������������� 17 Wartung _________________________________________________________________________________________________ 18 Demontage und Entsorung ________________________________________________________________________________ 19 Demontage ����������������������������������������������������������������������������������������� 19 Entsorgung ����������������������������������������������������������������������������������������� 19 Problembehandlung ______________________________________________________________________________________ 20 Service __________________________________________________________________________________________________ 20 Web ����������������������������������������������������������������������������������������������� 20 Downloads ����������������������������������������������������������������������������������������� 20 Garantiebestimmungen ___________________________________________________________________________________ 21 V1/2021-30314... -
Page 3: Lieferumfang
Lieferumfang Teileübersicht V1/2021-30314... -
Page 4: Teilebezeichnung
Dieses Symbol gibt Ihnen nützliche Zusatzinformationen zur Montage/Zusammenbau oder zum Betrieb. HINWEIS! Dieses Signalwort warnt vor möglichen Sachschäden. Dieses Signalsymbol/-wort bezeichnet eine Gefährdung mit einem mittleren Risikograd, die Warnung wenn sie nicht vermieden wird, den Tod oder eine schwere Verletzung zur Folgen haben kann. V1/2021-30314... -
Page 5: Allgmeine Informationen
Stand fuß-Unterteil sowie dem Höhenausgleich besteht. Die verwendeten Materialien sind widerstandsfähig gegen Verschleiß, der durch die Verwendung und durch Witterungseinflüsse entsteht, wobei von normalen Nutzungsverhältnissen und mediterranen Klimabedingungen ausgegangen wird. Die Hersteller-/Produktkennzeichnung finden Sie auf dem Bauteil „Höhenausgleich“. V1/2021-30314... -
Page 6: Sicherheit
Haftung für eventuell daraus folgende Schäden befreit. Der Nutzer muss den Händler umgehend über eventuelle Mängel und/oder Störungen der Sicherheitsvorrichtungen bzw. das Auftreten gefährlicher Situationen informieren. Die Installation, erste Inbetriebsetzung, Einstellung und außerordentliche Wartung der Klemm-Markise darf ausschließlich nach dieser Montage-/Bedienungsanleitung erfolgen. Restrisiken STOSSGEFAHR: Bei ausgefahrenem/heruntergelassenem Fallarm besteht Verletzungsgefahr durch Anstoßen. V1/2021-30314... -
Page 7: Pflichten Des Betreibers
Urteilsvermögen beeinträchtigen. Dazu zählen z. B. Übermüdung, Alkoholkonsum. • Minderjährige sowie Personen die unter Drogen-, Alkohol- oder Medikamenteneinfluss stehen dürfen keinerlei Arbeiten wie Montage, Demontage, Wartung oder Reinigung durchführen. • Die beauftragte Person muss bei allen anfallenden Arbeiten und der Umgebung entsprechende Schutzausrüstung tragen. V1/2021-30314... -
Page 8: Technische Daten
Technische Daten Bezugsmodelle Die vorliegende Gebrauchsanleitung bezieht sich auf das Klemm-Markisen-Modell 30314 gemäß der Leistungserklärung Nr. 018�2021: Produktbezeichnung Klemm-Markise Produktgröße 1,5 x 1,2 m Verwendungszweck Textiler Sonnenschutz / Markise zur Anbringung im Außenbreich Kenncode des Produkttyps 30314_018_2021 Gesamtbreite: 1,5m Aufbaumaß... -
Page 9: Transport Und Verpackung
Zum Öffnen der Verpackung eine Schere mit abgerundeten Spitzen verwenden, damit das Tuch und die Einzelteile nicht beschädigt werden. Warnung ACHTUNG: KEINESFALLS CUTTER ODER PAPIERMESSER VERWENDEN. Die Verpackungsmaterialien außerhalb der Reichweite von Kindern lagern, da sie eine Gefahrenquelle darstellen könnten V1/2021-30314... -
Page 10: Benötigtes Werkzeug
Das Befestigungsmaterial muss vom Monteur mit dem vorhandenen Montageuntergrund abgestimmt werden. Allein der Monteur haftet dafür, dass das Befestigungsmaterial für das jeweilige Mauerwerk geeignet ist und dass die Montage fachgerecht ausgeführt wird. Je nach Untergrund ist das mitgelieferte Montagematerial gegebenenfalls gegen anderes geeignetes zu tauschen. V1/2021-30314... -
Page 11: Zusammenbau
Halterungen verwendet oder andere technische Lösungen gefunden werden, wie das Einmauern interner Gegenhalterungen, die Verwendung von Verbunddübeln o.ä. Zusätzlich ist der Untergrund an welchem die Klemm-Markise angebracht werden soll, auf versteckte Leitungen wie z. B. Wasser, Strom, Gas zu prüfen. V1/2021-30314... - Page 12 Die Teile der Klemm-Markise vorsichtig aus dem Karton nehmen und die Schutzpolster entfernen. Die Teile aus dem Polybeutel nehmen. Die Gesamthöhe der komplett ausgefahrenen Klemm-Markise beträgt ca. 3,2 Meter. Bestimmen Sie zuerst Ihre Installationshöhe A. Schritt 2: Je einen Ausfallarm auf ein Standfuß-Oberteil schieben und vorübergehend festschrauben. V1/2021-30314...
- Page 13 In jeweils einen Standfuß-Oberteil einen Höhenausgleich einsetzen und mittels Schraube und Mutter (vormontiert) befestigen. Verwenden Sie hierzu die Schraubenschlüssel. Wählen Sie hier bereits die Rasterhöhe, welche dem Abstand zwischen Decke und Boden am nächsten kommt, welchen Sie unter Schritt 1 festgelegt/gemessen haben. V1/2021-30314...
- Page 14 Je nachdem auf welcher Seite die Bedienung gewünscht ist, ändert sich auch die Kurbelrichtung für das Ein- und Ausfah- ren (Abbildungen zeigen eine Bedienung LINKS von Innen gesehen) Schritt 7: Den Ausfallarm links und rechts an die Klemm- Markise anhalten und mit Fixierschraube festschrauben. V1/2021-30314...
- Page 15 Achten Sie auf festen Sitz, damit sich die Klemm-Markise nicht lösen kann. Es besteht die Gefahr das sich beim Lösen Personen verletzen. Prüfen Sie die Klemm-Markise daher regelmäßig auf festen Sitz. Schritt 8: Fertig montierte Klemm-Markise an die gewünschte Position anhalten, ausrichten und mit den Klemm-Füßen unten zwi- schen Decke und Boden vorübergehend verklemmen. V1/2021-30314...
- Page 16 Schritt 11: Befestigen Sie die Klemm-Markise mit den Schrauben Schritt 12: Neigungswinkel einstellen: Lösen Sie die Schrauben der Ausfallarme (nicht ausdrehen) und schieben die Ausfallarme hoch oder runter, bis der ge- wünschte Neigungswinkel erreicht ist. Jetzt die Schrauben wieder festdrehen. V1/2021-30314...
-
Page 17: Inbetriebnahme
Betrieb Handbetriebene Klemm-Markise Die Klemm-Markise wird mit Hilfe der Kurbelstange aus- und eingefahren. HINWEIS! Die Klemm-Markise nur einrollen, wenn sie komplett trocken ist; wird sie feucht eingerollt, kann sie leichter von Schimmel befallen werden, wodurch das Problem aufgequollener Nähte auftreten kann. V1/2021-30314... -
Page 18: Wartung
Verlängerungsrohr reinigen, um keine Leiter benutzen zu müssen (beachten Sie auch nachfolgende Hinweise zum Stoff ). Von unten die sichtbare Seite des Klemm-Markisentuchs reinigen. Anschließend die Klemm-Markise um ein weiteres Stück von 10-15 cm ausrollen und den neuen Abschnitt reinigen. In der gleichen Weise fortfahren, bis die gesamte Klemm-Markise gereinigt ist. V1/2021-30314... -
Page 19: Demontage Und Entsorung
Die Materialien, aus denen die Klemm-Markise besteht, gehören nicht zu den Gefahrenstoffen. WICHTIG: Nach Gebrauchsende der Klemm-Markise die jeweils gültigen Bestimmungen für die Entsorgung beachten. Denken Sie an den Umweltschutz. Entsorgen Sie die Verpackung sortenrein. Geben Sie Pappe und Karton zum Altpapier, Folien in die Wertstoff-Sammlung. V1/2021-30314... -
Page 20: Problembehandlung
Downloads Eine Leistungserklärung für die in dieser Montageanleitung betreffende Klemm-Markise kann unter folgender Internet-Adresse heruntergeladen werden. https://www.empasa.de/LE empasa GmbH Im Herrmannshof 10 91595 Burgoberbach GERMANY Hinweis: Irrtümer, Änderungen und Druckfehler vorbehalten. Aktuellste Version als PDF im Downloadbereich unter www.empasa.de. V1/2021-30314... -
Page 21: Garantiebestimmungen
Garantiebestimmungen Klemm-Markise Die empasa GmbH, Im Herrmannshof 10, 91595 Burgoberbach, gewährt Ihnen als Verbraucher in Deutschland eine Garantie von drei (3) Jahren auf die Funktionalität Ihrer Klemm-Markise, beginnend mit Rechnungsdatum. Unberührt davon bestehen Ihre gesetzlichen Gewährleistungsrechte der Nacherfüllung, der Rücktritt oder die Minderung sowie Schadensersatz (§ 437 BGB). - Page 22 Clamp Awning Original Assembly and Operation Manual Figures for illustrative purposes only Read all points in these instructions carefully before assembly and initial operation! Always include this instruction manual when passing on to third parties! V1/2021-30314...
- Page 23 Important information for first-time operation ������������������������������������������������������������� 17 Operating for first time �������������������������������������������������������������������������������� 17 Maintenance _____________________________________________________________________________________________ 18 Disassembly and disposal __________________________________________________________________________________ 19 Disassembly ���������������������������������������������������������������������������������������� 19 Disposal �������������������������������������������������������������������������������������������� 19 Troubleshooting __________________________________________________________________________________________ 20 Service __________________________________________________________________________________________________ 20 Web ����������������������������������������������������������������������������������������������� 20 Downloads ����������������������������������������������������������������������������������������� 20 Warranty provisions _______________________________________________________________________________________ 21 V1/2021-30314...
-
Page 24: Scope Of Delivery
Scope of delivery Partial overview V1/2021-30314... -
Page 25: Part Description
This symbol indicates additional useful information on assembly or operation. IMPORTANT! This signal word warns of possible material damage. This signal symbol/word indicates danger at a medium level of risk which Warning if disregarded, may result in serious injury or death. V1/2021-30314... -
Page 26: General Information
The materials used are resistant to wear caused by use and weathering, assuming normal conditions of use Mediterranean climates. The manufacturer/product identification can be found on the height adjuster components. V1/2021-30314... -
Page 27: Safety
Installation, initial operation, adjustment and exceptional maintenance of the clamp awning should only be carried out in accord- ance with these installation/operating instructions. Residual risk DANGER OF IMPACT: There is a risk of injury from impact if the drop arm is left extended/down. V1/2021-30314... -
Page 28: Operator Responsibilities
Minors and persons under the influence of drugs, alcohol or medications may not carry out any kind of work on the awn- ing, including assembly, disassembly, maintenance or cleaning. • The installer must wear protective equipment appropriate to the work to be done and the environment. V1/2021-30314... -
Page 29: Technical Data
Technical Data Reference models These instructions refer to the clamp awning model 30314 in accordance with Declaration of Performance No. 018�2021: Product description Clamp Awning Product size 1.5 x 1.2 m Intended use Textile sunshade / awning for outdoor installation... -
Page 30: Transport And Packaging
When opening the packaging, use scissors with rounded tips to avoid damaging the fabric and parts. Warning CAUTION: NEVER USE BOX CUTTERS OR BLADES. Store the packaging materials out of reach of children as they may constitute a hazard V1/2021-30314... -
Page 31: Tools Needed
The installer alone is liable for ensuring that the mounting material is suitable for the respective masonry and that the installation is carried out professionally. Depending on the surface, it may be necessary to replace supplied mounting material with another suitable material. V1/2021-30314... -
Page 32: Assembly
If the necessary requirements are not met, additional mounts must be used or other technical solutions found, such as mounting internal counter brackets, using compound dowels, or similar. In addition, the surface to which the clamp awning is to be attached must be checked for hidden utility lines, such as water, elec- tricity, and gas. V1/2021-30314... - Page 33 Remove the parts from the polythene bag. The clamp awning measures 3.2 metres in height when fully extended. First determine your installation height A. Step 2: Slide one drop arm each onto a stand (top part) and screw in temporarily. V1/2021-30314...
- Page 34 , insert a height adjuster and attach with screw and nut (pre-mounted). Use the spanners for this. Select the grid height here that comes closest to the distance between the ceiling and the floor, which you have you defined/measured in Step 1. V1/2021-30314...
- Page 35 (illustrations show operation on LEFT as seen from the inside). Step 7: Hold the drop arm on the left and right of the clamp awning and screw tight with the fixing screw V1/2021-30314...
- Page 36 Therefore, check the clamp awning regularly to ensure that it is firmly attached. Step 8: Hold the fully assembled clamp awning in the desired posi- tion, align it, and with the stand feet at the bottom temporar- ily clamp it between the ceiling and the floor. V1/2021-30314...
- Page 37 Secure the clamp awning with the screws Step 12: Adjust the pitch angle: Loosen the screws for the drop arms (do not unscrew) and move the drop arms up or down until the desired angle of pitch is reached. Now tighten the screws again. V1/2021-30314...
-
Page 38: Operating For First Time
The clamping awning is extended and retracted using the connecting rod. IMPORTANT! Retract the clamp awning only when it is completely dry; if it is rolled up when damp, it can be subject to mould, which can cause the seams to swell. V1/2021-30314... -
Page 39: Maintenance
(also observe the following instructions for the fabric). Clean the exposed side of the awning fabric from below. Then unroll the awning by another 10-15 cm and clean the new section. Continue in the same way until the entire awning fabric is cleaned. V1/2021-30314... -
Page 40: Disassembly And Disposal
The clamp awning's materials are not designated as hazardous substances. IMPORTANT: Observe the applicable regulations for disposal after the clamp awning is no longer in use. Consider the environment. Sort the packaging before disposal. Paperboard and cartons should be recycled with paper, plastic film with plastics. V1/2021-30314... -
Page 41: Troubleshooting
A Declaration of Performance for the clamp awning referred to in these installation instructions can be downloaded from the following Internet address. https://www.empasa.de/LE Empasa GmbH Im Herrmannshof 10 91595 Burgoberbach GERMANY Note: Errors, changes and misprints reserved. The latest version can be downloaded as PDF from www.empasa.de. V1/2021-30314... -
Page 42: Warranty Provisions
Clamp Awning The company empasa GmbH, located at Im Herrmannshof 10, 91595 Burgoberbach, Germany, grants you as consumer in Germa- ny a two (3) year warranty on the functionality of your clamp awning, beginning on the date presented on the bill. This does not affect your statutory warranty rights of subsequent performance, rescission or reduction as well as damages (§... - Page 43 Les illustrations ne sont pré- sentées qu'à titre indicatif Veuillez lire l'ensemble de cette notice attentivement avant de démarrer l'assem- blage et avant la première utilisation ! Joignez toujours ce mode d'emploi lorsque ce produit est transmis à un tiers ! V1/2021-30314...
- Page 44 Remarques importantes avant la première utilisation ������������������������������������������������������� 17 Première utilisation ����������������������������������������������������������������������������������� 17 Entretien ________________________________________________________________________________________________ 18 Démontage et élimination _________________________________________________________________________________ 19 Démontage ����������������������������������������������������������������������������������������� 19 Élimination ����������������������������������������������������������������������������������������� 19 Résolution des problèmes _________________________________________________________________________________ 20 Service __________________________________________________________________________________________________ 20 Web ����������������������������������������������������������������������������������������������� 20 Téléchargements ������������������������������������������������������������������������������������� 20 Conditions de garantie ____________________________________________________________________________________ 21 V1/2021-30314...
-
Page 45: Contenu De La Livraison
Contenu de la livraison Aperçu partiel V1/2021-30314... -
Page 46: Description Des Pièces
Ce symbole fournit des informations utiles sur le montage ou l'assemblage. IMPORTANT ! Cet avertissement met en garde contre d'éventuels dommages matériels. Ce symbole ou mot d'avertissement indique un danger de niveau moyen qui, Avertissement si l'avertissement n'est pas respecté, peut entraîner des blessures graves ou même la mort. V1/2021-30314... -
Page 47: Informations Générales
Les matériaux utilisés sont résistants à l'usure causée par l'utilisation et les intempéries dans des conditions normales d'utilisation et sous un climat méditerranéen. Vous trouverez l'identification du fabricant / du produit sur les composants des dispositifs de réglage de la hauteur V1/2021-30314... -
Page 48: Sécurité
L’installation, la première utilisation, le réglage et l'entretien exceptionnel du store extérieur doivent toujours se faire conformé- ment aux présentes consignes de montage et d’utilisation. Risques résiduels RISQUE D'IMPACT : Il y a un risque de blessure par impact si un bras articulé est laissé en position dépliée/basse. V1/2021-30314... -
Page 49: Responsabilités De L'utilisateur
Les mineurs et les personnes sous l'influence de drogues, d'alcool ou de médicaments ne doivent en aucun cas manipuler le store, y compris pour le montage, le démontage, l'entretien ou le nettoyage. • L'installateur doit porter l'équipement de protection approprié au travail à effectuer et à l'environnement. V1/2021-30314... -
Page 50: Données Techniques
Données techniques Modèles de référence Ces instructions font référence au modèle de store extérieur 30314 conformément à la Déclaration de performance N° 018�2021 : Description du produit Store extérieur Dimensions du produit 1,5 x 1,2 m Utilisation prévue Parasol textile / store pour installation extérieure Code d'identification du... -
Page 51: Transport Et Emballage
Utilisez des ciseaux à bouts ronds lors de l'ouverture de l'emballage pour éviter d'abîmer la toile et les pièces. Avertissement ATTENTION : N'UTILISEZ JAMAIS DE CUTTERS OU DE LAMES. Entreposez les matériaux d'emballage hors de portée des enfants, car ils peuvent constituer une source de danger pour ceux-ci. V1/2021-30314... -
Page 52: Outils Nécessaires
L'installateur s'engage exclusivement à garantir que le matériel de fixation est adapté à la maçonne- rie correspondante et que l'installation est effectuée de manière professionnelle. Selon le type de surface, il pourra être nécessaire de remplacer le matériel de fixation fourni par un autre matériel adapté. V1/2021-30314... -
Page 53: Montage
De plus, la présence cachée de passage d'eau, d'électricité ou de gaz doit être contrôlée sur toute la surface sur laquelle le store extérieur doit être fixé. V1/2021-30314... - Page 54 Sortez les pièces du sac de polyéthylène. Le store extérieur mesure 3,2 m de hauteur quand il est entièrement déployé. Commencez par déterminer votre hauteur d'installation A. Étape 2 : Glissez chaque bras articulé sur l'un des pieds (partie supérieure) et vissez-les provisoirement. V1/2021-30314...
- Page 55 à l'aide d'une vis et d'un écrou (pré-monté). Utilisez pour cela les clés. Sélectionnez ici la hauteur modulaire qui se rapproche le plus de la distance entre le plafond et le sol que vous avez définie / mesurée à l'étape 1. V1/2021-30314...
- Page 56 également selon le côté choisi pour le fonctionnement (les illustrations montrent un fonctionnement sur la GAUCHE tel qu'il est vu depuis l'intérieur). Étape 7 : Maintenez le bras articulé à gauche et à droite du store extérieur et vissez à fond à l'aide des vis de fixation V1/2021-30314...
- Page 57 à se détacher. Vérifiez donc régulièrement le store extérieur pour vous assurer qu'il est solidement fixé. Étape 8 : Maintenez le store extérieur entièrement assemblé dans la position voulue, alignez-le et, avec les pieds descendus, serrez-le provisoirement entre le plafond et le sol. V1/2021-30314...
- Page 58 Fixez le store extérieur à l'aide des vis Étape 12 : Ajustez l'angle de chute : Desserrez les vis des bras articulés (sans les dévisser com- plètement) et déplacez les bras vers le haut ou vers le bas jusqu'à atteindre l'angle de chute désiré. Resserrez ensuite les vis. V1/2021-30314...
-
Page 59: Première Utilisation
Le store extérieur est déployé et replié à l’aide de la bielle. IMPORTANT ! Ne repliez le store extérieur que lorsqu'il est complètement sec ; si celui-ci est enroulé mouillé, il risque de moisir et cela risque de faire gonfler les coutures. V1/2021-30314... -
Page 60: Entretien
éviter d'avoir à utiliser une échelle (respectez également les consignes suivantes pour la toile). Nettoyez la partie visible de la toile de store par dessous. Déroulez ensuite la toile d’environ 10 à 15 cm supplémentaires et net- toyez cette nouvelle section. Continuez ainsi jusqu’à ce que la totalité de la toile soit nettoyée. V1/2021-30314... -
Page 61: Démontage Et Élimination
IMPORTANT : À la fin de la durée de vie du store extérieur, respectez les règles en vigueur pour son élimination. Tenez compte de la protection de l’environnement. Triez les emballages avant leur élimination. Les cartons et les boîtes doivent être recyclés avec le papier, les films plastiques avec le plastique. V1/2021-30314... -
Page 62: Résolution Des Problèmes
Une déclaration de performance pour le store extérieur mentionné dans ces consignes de montage peut être téléchargée à l'adresse Internet suivante. https://www.empasa.de/LE Empasa GmbH Im Herrmannshof 10 91595 Burgoberbach ALLEMAGNE Remarques : Sous réserve d'erreurs, de modifications et de fautes d'impression. Dernière version téléchargeable au format PDF à l'adresse www.empasa.de. V1/2021-30314... -
Page 63: Conditions De Garantie
2021 Cette publication, y compris toutes ses parties, est protégée par le droit d'auteur. Toute utilisation en dehors des limites étroites de la loi sur les droits d'auteur sans le consentement d'empasa GmbH est inadmis- sible et passible de poursuites judiciaires.
Need help?
Do you have a question about the 30314 and is the answer not in the manual?
Questions and answers