Table of Contents
Advertisement
Quick Links
Advertisement
Table of Contents

Related Manuals for JEICO JREMO 6K


Summary of Contents for JEICO JREMO 6K
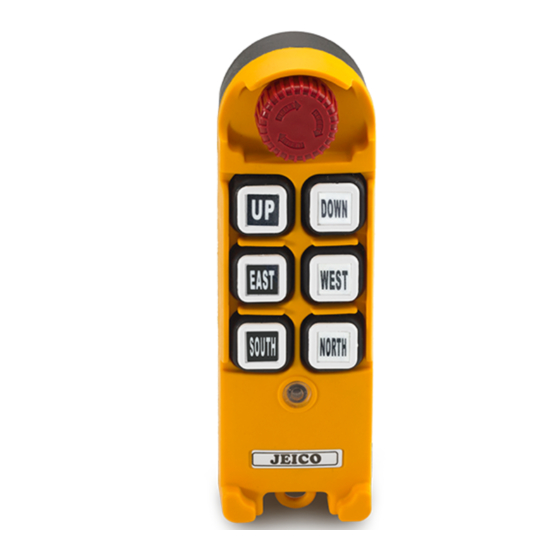
- Page 1 JREMO 6K REMOTE CONTROL O&M MANUAL www.jeico.com...
- Page 2 WARRANTY JREMO® Remote Controllers must be handled, installed, operated, and maintained by (an) authorized and (a) qualified person(s), and Upon the above condition guaranty period from the date of (delivery, installation, inspection) shall be one calendar year. Subject to confirming defects not caused by improper installation, improper operation and/or insufficient maintenance, unauthorized modification, ignorance of environmental specifications, or improper interfacing,...
-
Page 3: Table Of Contents
…………… 1.1. COMMON SPECIFICATION ……………………………… 1.2 Transmitter (Tx) …………………………………………… 1.3 RECEIVER (Rx) ……………………………………………… 1.4 Model Suffixing …………………………………………… CHAPTER 2. JREMO 6K Standard Set ……………… 2-1 Standard set ……………………………………………… 2-2 CONTROL CONTACTS WIRE DIAGRAMS ……………… CHAPTER 3. INSTALLATION & FUNCTION SETTING ………... - Page 4 Industrial radio remote controller PRECAUTIONS A. ANNOUNCEMENT ▪ This O&M Manual is for JREMO 6K and the specification in each model is referred to Chapter 1. ▪ Before installation and operation look through this manual and make sure having a full acknowledgement of this manual.
- Page 5 ▪ JREMO 6K is the insertion of battery exchange. ▪ During operation of 6K when found power is weak replace all the batteries with all new 2 AA batteries.
-
Page 6: Chapter I. General Specifications
- Size, mm : 90 x 152 x 105 - Weight, gr. : 950(Antenna & Power/Relay Cable Incl.) 1.4 Model Suffixing (No marking at 6 P/B) (Receiver Type, Normally not written) JREMO 6K F A Suffix Type Model Model Name... -
Page 7: Chapter 2. Jremo 6K Standard Set
Industrial radio remote controller CHAPTER 2. JREMO 6K Standard Set CHAPTER 2. JREMO 6K Standard Set JREMO 6K Standard Set comprises one transmitter and one receiver as following as a set. 2-1 STANDARD SET Single P/B 173 x 62 x 46 mm 90 X 152 x 105mm Approx. -
Page 8: Control Contacts Wire Diagrams
▪RELAY SPEC. : “A” CONTACT 250VAC/5A, 125VAC/10A ▪FUSE (20MM Glass Fuse) 1A(F1) / 10A(F2) ▪POWER : AC 100 ~ 440V 50/60Hz Free Volts (Option : AC48V) DC 12 ~ 40V(JREMO 6K M model) ▪Standard Rx Setting : Auto off after 1 hour non-use... -
Page 9: Chapter 3. Installation & Function Setting
JREMO 6K Industrial radio remote controller CHAPTER 3. INSTALLATION & FUNCTION SETTING CHAPTER 3. INSTALLATION & FUNCTION SETTING 3-1 CAUTIONS FOR INSTALLATION 1. Follow up all the safety rule of equipment (ex. crane) 2. Switch off the main power of equipment (ex. crane) in a first action. - Page 10 JREMO 6K Industrial radio remote controller CHAPTER 3. INSTALLATION & FUNCTION SETTING 3-2 HOW TO INSTALL JREMO® SERIES TX 3-2-1. BATTERIES A. Insert 2 AA batteries at right position with + and -. An opposite position will cause an excessive heat to cause battery leakage, burning, and so on, any malfunction caused by such the poor batteries' handling will not be of free recovery no matter how long the guarantee period remained.
- Page 11 3. Paring (Copying) from Rx to Tx done. 4. Unplug the connector and place the s/w to RUN position. D. Consult JEICO distributor and/or agent for further support. 3-3 HOW TO INSTALL JREMO® SERIES RX 3-3-1. PREPARATIONS A.
-
Page 12: How To Start
JREMO 6K Industrial radio remote controller CHAPTER 3. INSTALLATION & FUNCTION SETTING 3-3-2. INSTALLATION SEQUENCE A. Power off equipment(ex. crane). B. Use with the Fixing Plate provided together with Rx for sure installation for absorbing and preventing vibration, shock, etc possibly causing upon operation. -
Page 13: Chapter 4. Maintenance
JREMO 6K Industrial radio remote controller CHAPTER 4. MAINTENANCE CHAPTER 4. MAINTENANCE 4-1 STANDARD OPERATION A. Twist up the EMS button of Tx and do as START ON function procedure preset and find the Rx Main Lamp ON. During normal operation see if the... -
Page 14: Chapter 5. Troubleshooting
JEICO takes a type of Led signaling error message for better, quick restoration in normal even at site. - Page 15 JREMO 6K Industrial radio remote controller CHAPTER 5. TROUBLESHOOTING 5-3 Troubleshooting Appearances Causes Measures 1. Wrong Bat. Direction 1. Place in right pole direction Tx Led 2. Battery Consumed 2. Replace with new batteries No Signal & 3. Old Batteries 3.
-
Page 16: Appendix Ⅰ - 433 Band Frequency Table
JREMO 6K Industrial radio remote controller APPENDIX I : 433 BAND FREQUENCY TABLE APPENDIX I : 433 BAND FREQUENCY TABLE TOTAL NUMBERS : 70 CHANNELS Channel Spacing : 25 Kc CH. NO. CH. NO. 433.050 433.925 433.075 433.950 433.100 433.975 433.125... -
Page 17: Appendix Ⅱ - 447 & 173 & 429 Frequency Table
JREMO 6K Industrial radio remote controller APPENDIX II : 447 & 173& 429 FREQUENCY TABLE APPENDIX II : 447 & 173 & 429 FREQUENCY TABLE TOTATAL NUMBERS : 32 (447 Bands) / 35 (173 Bands) / 40 (429 Bands) CHANNELS Channel Spacing : 12.5Kc... -
Page 18: Appendix Iii - Optional Accessories
JREMO 6K Industrial radio remote controller APPENDIX Ⅲ : OPTIONAL ACCESSORIES APPENDIX Ⅲ : OPTIONAL ACCESSORIES RAIN/DUST COVER Tx Hook MAGNET ANTENNA Rx Fixing Plate Rx Fixing Bracket Copier PC Gender & Software Full Cover Silicon & (Water & Oil free) - Page 19 J Building, 94-1, Choryang-ro, Dong-gu, Busan, 48805, Korea Tel. +82-51-818-7727 Fax. +82-51-804-2150 Email. jeicorp@kita.net www.jeico.com...
Need help?
Do you have a question about the JREMO 6K and is the answer not in the manual?
Questions and answers