Table of Contents
Advertisement
Quick Links
Advertisement
Table of Contents

Related Manuals for Harman Martin ERA 150 Wash


Summary of Contents for Harman Martin ERA 150 Wash
- Page 1 ERA 150 Wash User Guide...
- Page 2 Martin is a registered trademark of HARMAN PROFESSIONAL DENMARK ApS registered in the United States and/or other countries. HARMAN PROFESSIONAL DENMARK ApS, Olof Palmes Allé 44, 8200 Aarhus N, Denmark HARMAN PROFESSIONAL SOLUTIONS U.S., 8500 Balboa Blvd., Northridge CA 91329, USA www.martin.com...
-
Page 3: Table Of Contents
Table of contents Safety information ................4 Introduction..................10 Before using the product for the first time ........10 Fixture overview ................. 11 Physical installation ................12 Fastening the fixture to a flat surface ......... 12 Mounting the fixture on a truss ........... 12 AC power ................... -
Page 4: Safety Information
Safety information WARNING! Read the safety precautions in this manual before installing, operating or servicing this product. The following symbols are used to identify important safety information on the product and in this manual: Warning! Warning! Warning! Warning! Warning! Safety hazard. Powerful light See user Hazardous... - Page 5 Document revisions are indicated at the bottom of page 2. Technical Support If you have questions about how to install or operate the fixture safely, please contact Harman Professional Technical support: • For technical support in North America, please contact: HProTechSupportUSA@harman.com...
- Page 6 Before using the fixture, check that all power distribution equipment and cables are in perfect condition and rated for the electrical requirements of all connected devices. Use only Neutrik PowerCON TRUE1 TOP cable connectors to connect to the fixture’s power sockets. Do not connect devices to power in a chain that will exceed the electrical ratings of any cable or connector used in the chain.
- Page 7 and materials. Allow the fixture to cool for at least 15 minutes before handling. Keep flammable materials well away from the fixture. Keep all combustible materials (e.g. fabric, wood, paper) at least 0.5 m (1.7 ft.) away from the fixture housing. Ensure that there is free and unobstructed airflow around the fixture.
- Page 8 Ensure that persons are not looking directly into the front of the fixture when the product lights up suddenly. This can happen when power is applied, when the product receives a DMX signal, or when certain control menu items are selected. To minimize the risk of eye irritation or injury, disconnect the fixture from power at all times when the fixture is not in use and provide well-lit conditions to reduce the pupil diameter of...
- Page 9 In the event of an operating problem, stop using the fixture immediately and disconnect it from power. Do not attempt to use a fixture that is obviously damaged. Do not modify the fixture in any way not described in this manual or install other than genuine Martin parts.
-
Page 10: Introduction
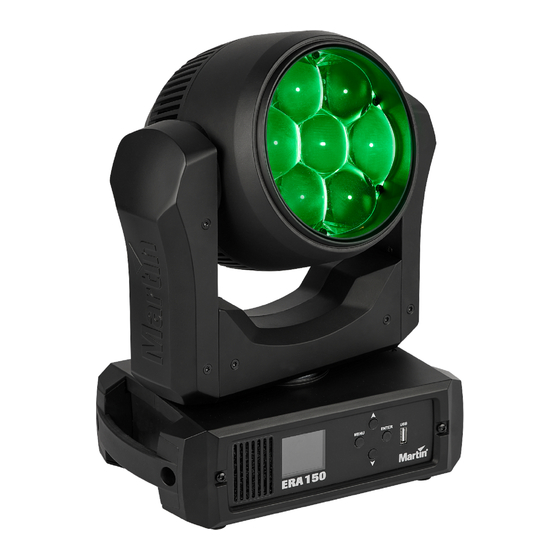
Introduction The ERA 150 Wash is a fast, powerful LED moving head wash effect incorporating seven long-life LEDs with full RGBW color mixing and 48 color presets. The fixture also provides smooth electronic dimming, strobe effects, and a motorized zoom with an angle that varies from 5.1° to 58.6° (field angle, one-tenth peak) or 4.2°... -
Page 11: Fixture Overview
Fixture overview 1 – Control panel display 2 – Control buttons 3 – USB port 4 – Carrying handle (x 2) 5 – AC mains power input (Neutrik PowerCon TRUE1 TOP) 6 – AC mains power thru / output (Neutrik PowerCon TRUE1 TOP) 7 –... -
Page 12: Physical Installation
Physical installation Warning! Read ‘Safety information’ on page 3 before installing the fixture. The fixture is designed for indoor use only and must be used in a dry location with adequate ventilation. Ensure that none of the fixture’s ventilation slots are blocked. Fasten the fixture to a secure structure or surface. - Page 13 3. The fixture is supplied with an omega-type bracket to which a rigging clamp can be attached. Bolt a rigging clamp that is approved for the weight of the fixture securely to the bracket. The bolt used must be M12, grade 8.8 steel minimum, and fastened with a self-locking nut.
- Page 14 8. Make sure that there is no possibility of the head colliding with other fixtures or objects when it moves through its full pan and tilt ranges, Your Martin dealer can supply suitable safety cables and rigging clamps (see ‘Accessories’ on page 49). Martin ®...
-
Page 15: Ac Power
AC power Warning! Read ‘Safety information’ on page 4 before connecting the fixture to AC mains power. Before you connect other fixtures to the POWER OUT socket, see ‘Linking fixtures to power in a chain’ on page 15. For protection from electric shock, the fixture must be grounded (earthed). - Page 16 power in a linked daisy-chain, POWER OUT throughput socket to POWER IN input socket. Using 12 AWG / 2.5 mm cables from Martin, you can create a daisy chain of linked fixtures that contains: • maximum four (4) ERA 150 Wash fixtures in total at 100-120 V, or •...
-
Page 17: Connecting To Data
Connecting to data A DMX 512 data link is required in order to control the fixture via DMX. The fixture has 5-pin XLR connectors for DMX data input and output. The number of daisy-chained fixtures is limited by the number of DMX channels required by the fixtures in relation to the maximum 512 channels available in one DMX universe. -
Page 18: Fixture Setup
Fixture setup This section explains the fixture characteristics that can be set to determine how it can be controlled and will behave. These settings are made using the menus available in the control panel. Settings are retained in memory when the fixture is powered off. -
Page 19: Dmx Address Setting
Shortcuts menu Pressing and holding the MENU button for two seconds opens a small Shortcuts menu with two items: • RESET ALL carries out a complete reset of the fixture with all its effects. • ROTATE DISPLAY rotates the control panel display through 180°. This function makes it easier to read the control panel menus when changing from standing to hanging installation. -
Page 20: Pan/Tilt Speed
To adjust the tilt inversion settings: 1. Select TILT INVERSE and press ENTER to confirm. The currently set mode will blink in the display. 2. Use the DOWN and UP buttons to select YES (tilt inversion) or NO (normal) mode. 3. -
Page 21: Dimming Curves
Dimming curves Four dimming curves are available: • LINEAR – The increase in light intensity appears to be linear as DMX value is increased. • SQUARE LAW – light intensity control is finer at low levels and coarser at high levels. •... -
Page 22: Cooling Mode
2. Using the DOWN and UP buttons, select BLACKOUT or HOLD to decide how the fixture should respond if it stops receiving a DMX signal: If you select BLACKOUT, the fixture will black out If you select HOLD, the fixture will continue to show the effect that it is displaying at the time. -
Page 23: Display Intensity
3. Press ENTER to confirm your choice (or press MENU to exit without making a change). Display intensity To set the brightness of the control panel display: 1. Select DISPLAY → DISPLAY INTENSITY and press ENTER. 2. Use the DOWN and UP buttons to adjust the brightness of the display from 10% to 100%. -
Page 24: Fixture Information
Manual effects tests You can also manually test individual effects. To test LED dimming: 1. Select FIXTURE TEST → TEST DIMMER and press ENTER. 2. To stop the test and return to the previous level of the menu structure, press MENU. To test an individual effect: 1. -
Page 25: Dmx Live
2. Use the DOWN and UP buttons to increase or decrease the current fixture ID number until you reach the ID number that you want to allocate to the fixture. 3. Press ENTER to confirm the new ID number (or press MENU to exit without making a change). -
Page 26: Manual Control
• To reset only the fixture’s effects, select MANUAL CONTROL → RESET → EFFECTS and press ENTER. The fixture’s effects will reset. The effects reset process will take several seconds. Manual control You can control the fixture’s effects manually without needing a DMX signal. This lets you set up a stand-alone scene. - Page 27 The following options are available on the Control / Settings DMX channel: Hibernation mode Hibernation mode sets light output intensity to zero and disables effect deployment. The main purpose of this mode is to protect the fixture from the intake of airborne material such as dust and confetti and to provide an option for situations where noise is critical.
-
Page 28: Effects
Effects See ‘DMX protocol’ on page 36 for a full list of the DMX channels and values required to control the different effects. Shutter effect The electronic ‘shutter’ effect provides instant open and blackout, variable speed regular and random strobe. Dimmer Overall intensity can be adjusted 0-100% using smooth continuous electronic dimming with 16-bit control resolution. - Page 29 Pan and Tilt The ERA 150 Wash’s head can pan through a range of 540° and tilt through 260°. The control resolution is 16-bit. Martin ® ERA 150 Wash User Guide...
-
Page 30: Rdm
The ERA 150 Wash responds to the following RDM PIDs: Name Description 0x0001 DISC_UNIQUE_BRANCH Fixture discovery 0x0002 DISC_MUTE Fixture discovery 0x0003 DISC_UN_MUTE Fixture discovery 0x0020 QUEUED_MESSAGE Get Queued Messages Get Status/Error 0x0030 STATUS_MESSAGES Information 0x0031 STATUS_ID_DESCRIPTION Status/Error Description 0x0032 CLEAR_STATUS_ID Clear Status/Error Queue 0x0050 SUPPORTED_PARAMETERS... - Page 31 Enable/Disable Fixt. Off via 0x8001 DMX_RESET User-Changeable Fixture 0x8003 FIXTURE_ID Number 0x8004 COLOR_MODE Set Color Mode 0x8301 EFFECT_SPEED Set Effects Speed 0x8308 DISPLAY_ERRORS_ENABLE Show Errors on Display 0x8312 DISPLAY_AUTO_OFF Display Auto Off 0x8400 PAN_TILT_SPEED Set Pan Tilt Speed 0x8604 FAN_MODE Fan Mode 0x8700 SERIAL_NUMBER...
-
Page 32: Maintenance
Maintenance Warning! Read ‘Safety information’ on page 3 before servicing the fixture. Refer any service operation not described in this user manual to a qualified service technician. Disconnect the fixture from mains power before cleaning or servicing. Service fixtures in an area where there is no risk of injury from failing parts, tools or other materials. -
Page 33: Uploading New Firmware
3. Clean surfaces by wiping gently with a soft, clean lint-free cloth moistened with a weak detergent solution. Do not rub glass surfaces hard: lift particles off with a soft repeated press. Dry with a soft, clean, lint-free cloth or low-pressure compressed air. Remove stuck particles with an unscented tissue or cotton swab moistened with glass cleaner or distilled water. - Page 34 Installing using a Martin Companion Cable To install the ERA 150 Wash firmware using a Martin Companion Cable: 1. Apply power to the ERA 150 Wash fixture(s) and allow it to boot 2. Connect the Martin Companion Cable’s USB connector to a USB port on your PC.
-
Page 35: Service And Repairs
6. Apply power to the fixture and allow it to boot. The fixture should illuminate the display and the contents of the root directory should appear in the display. If the fixture does not recognize the USB drive automatically, navigate to SERVICE → USB → UPDATING FILES in the fixture’s control panel. -
Page 36: Dmx Protocol
DMX protocol Fade Channel Value Function type fault Strobe and shutter effects 0-19 Shutter closed 20-49 Shutter open Snap 50-200 Strobe, slow → fast 201-210 Shutter open 211-255 Random strobe, slow → fast Dimming coarse 0→100% 0-65535 Fade Dimming fine Red coarse 0→100% 0-65535 Fade... - Page 37 Fade Channel Value Function type fault 37-38 Full CT Blue (LEE 201) (contd.) 39-40 Half CT Blue (LEE 202) 41-42 Steel Blue (LEE 117) 43-44 Lighter Blue (LEE 353) 45-46 Light Blue (LEE 118) 47-48 Medium Blue Green (LEE 116) 49-50 Dark Green (LEE 124) 51-52...
- Page 38 Fade Channel Value Function type fault Random colors (contd.) 244 - 247 Random color, fast Snap 248 - 251 Random color, medium 252 - 255 Random color, slow Zoom narrow → wide coarse 0→100% 0-65535 Fade 32768 Zoom narrow → wide fine Pan left →...
- Page 39 Fade Channel Value Function type fault Pan & tilt limit = ON – 5 s. (contd.) Pan & tilt limit = OFF – 5 s. Store lower pan limit – 5 s. Store upper pan limit – 5 s. Store lower tilt limit – 5 s. Store upper tilt limit –...
-
Page 40: Control Menus
Control menus To access the control menus, press the MENU button. Use the UP and DOWN buttons to navigate the menus. Select any required menu option using the ENTER button. For more information, see ‘Using the control menus’ on page 18. Default fixture settings are shown in bold. - Page 41 REGULATED Fans normal temp.-regulated FANS COOLING MODE THEATER Fans low-noise temp. regulated MODE (reduced max. output) FULL Fans constant full speed NORMAL Normal orientation DISPLAY ROTATE Inverted orientation ROTATION 180° Control panel DISPLAY 10 - 100 display intensity in INTENSITY DISPLAY All temperature °C...
- Page 42 Display a user-settable 4-digit FIXTURE ID 0 - 9999 fixture ID number Display the fixture’s unique RDM RDM UID xxxxxxxxxxxx ID number Display temperatures of all PCBs TEMPERATURES LED / PSU and the integrated PSU Display speeds in RPM of all FAN SPEED LED / PSU cooling fans including the PSU...
- Page 43 0 - 255 Adjust 6000 K center point 0 - 255 Adjust green/ CTC Tint magenta tint 0 - 255 Adjust 6000 K RAW CTC center point 0 - 255 Adjust green/ RAW CTC Tint magenta tint ZOOM -128 - 127 Calibrate zoom Load the factory LOAD...
- Page 44 • Important! SAVE SETTING → SAVE permanently overwrites the original factory settings with either the custom settings created using LOAD DEFAULTS → SAVE or the zero values created using CLEAR ALL VALUES → RESTORE. The SAVE SETTING → SAVE command should normally be used by Martin Service only! Martin ®...
-
Page 45: Troubleshooting
Troubleshooting This section describes a few common problems that may occur during operation and provides some suggestions for easy troubleshooting: Symptom Potential Causes Remedies No light from fixture, Power supply issue Ensure that the mains or fans not working. such as blown internal supply is connected and fuse, faulty connector supplying power to the... -
Page 46: Dimensions
Dimensions All dimensions are in millimeters Martin ® ERA 150 Wash User Guide... -
Page 47: Specifications
Specifications Physical Dimensions( LxWxH)..... 276 x 176 x 356 mm (10.9 x 7.0 x 14.1 in.) Weight ..................7.3 kg (16.1 lbs.) Dynamic Effects Color mixing ..................RGBW Color presets ........ 48 color presets, virtual color wheel effects Color temperature control ........Variable 1800 – 10 000 K Electronic dimming ........ - Page 48 Minimum distance to combustible material* ........ 0.5 m (1.7 ft.) Minimum clearance around fans and vents ........ 0.5 m (1.7 ft.) *Distance from fixture, not mounting bracket Connections AC power in/thru ..........Neutrik PowerCON TRUE1 TOP DMX data in/thru ............Neutrik 5-pin locking XLR Electrical AC power ............
- Page 49 Included Items Martin Omega bracket for rigging clamp attachment ....P/N 91602001 Accessories Power input cables, 16 A Power Input Cable, H07RN-F, 2.5 mm2, bare ends to TRUE1 TOP NAC3FX-W (female), 1.5 m (4.9 ft.) ....P/N 91611797 Power Input Cable, H07RN-F, 2.5 mm2, bare ends to TRUE1 TOP NAC3FX-W (female), 5 m (16.4 ft.) ....
- Page 50 Martin products Supplier’s Declaration of Conformity Harman Professional, Inc. have issued an FCC Supplier’s Declaration of Conformity for this product. The Declaration of Conformity is available for download from the ELP PAR area of the Martin website at www.martin.com...
- Page 52 www.martin.com...
Need help?
Do you have a question about the Martin ERA 150 Wash and is the answer not in the manual?
Questions and answers