Yamaha SILENT Piano SH Owner's Manual
Hide thumbs
Also See for SILENT Piano SH:
- Owner's manual (78 pages) ,
- Owner's manual (78 pages) ,
- Owner's manual (78 pages)
Table of Contents
Advertisement
Quick Links
Advertisement
Table of Contents

Subscribe to Our Youtube Channel
Related Manuals for Yamaha SILENT Piano SH


Summary of Contents for Yamaha SILENT Piano SH
- Page 1 Owner’s manual...
- Page 2 SPECIAL MESSAGE SECTION This product utilizes an external power supply (adaptor). DO NOT connect this product to any power supply or adaptor other than one described in the manual, on the name plate, or specifically recommended by Yamaha. WARNING: IMPORTANT:...
- Page 3 You can enjoy the natural expression of the music. Realistic Piano Voice • The piano voice is faithfully sampled from the Yamaha CFX concert grand piano. You can enjoy the clear and beautiful tone of the piano. • The piano voice is sampled with the binaural sampling* method. Even if you listen through headphones, you can enjoy the immersive sound, as if it sounds from the piano.
- Page 4 Introduction Accessories Check that the following items are supplied with your piano. • AC adaptor (PA-150A, PJP-PS04 or an equivalent recommended by Yamaha) × 1 • Power cable × 1 * • Headphones (HPH-200P) × 1 • Headphones hanger × 1 •...
-
Page 5: Table Of Contents
Introduction Table of Contents Chapter Chapter Getting Started .........6 Connecting to Other Devices ....33 Part Names and Functions .........6 Connecting to Audio Devices ......33 Connecting the AC Adaptor ......9 Connecting to MIDI Devices ......35 Attaching the Headphones Hanger ....10 Connecting the USB Storage Device ....36 Turning the Power On ........10 Connecting Powered Speakers [for Grand Piano] ..........37... -
Page 6: Chapter 1 Getting Started
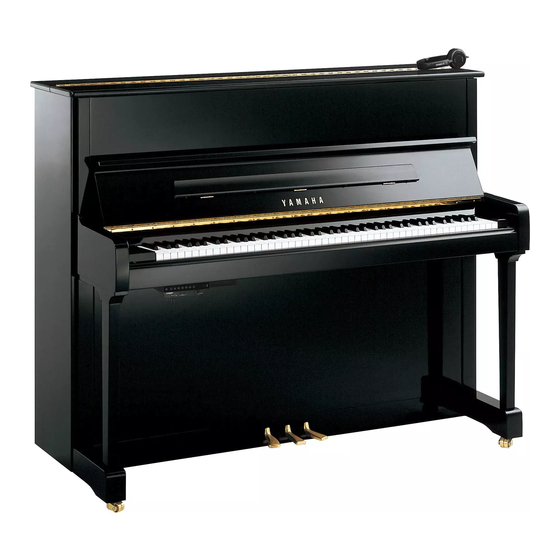
Chapter Getting Started Part Names and Functions ■ Piano Upright piano Grand piano [for models equipped with a sostenuto pedal] (on the rear of the piano) Control box Control box GM unit (page 7) (page 7) (page 8) Silencing lever DC12V jack Activates the Silent Piano™... - Page 7 Chapter Getting Started Part Names and Functions ■ Control box (front panel) Upright piano Grand piano POWER button FUNC. button Turns the digital piano on and off. Switches the function. The function will be switched as follows each time you press this button. PIANO button [For upright pianos] Switches the voice of the digital piano to the Piano...
- Page 8 Chapter Getting Started Part Names and Functions ■ Control box (bottom panel) DC IN 12V jack AUX IN/AUX OUT jacks (stereo mini jack) Connect the supplied AC adaptor (page 9). Connect to the input or output jacks of external audio devices.
-
Page 9: Connecting The Ac Adaptor
AC wall outlet. PJP-PS04 Warning Use the Yamaha PA-150A/PJP-PS04 AC adaptor, or an equivalent recommended by Yamaha. Use of other AC adaptors may result in damage, overheating, or fire. Caution • Do not stretch the cord or bend its ends. -
Page 10: Attaching The Headphones Hanger
Chapter Getting Started Attaching the Headphones Hanger Attach the hanger to the underside of the control box with the two screws supplied. Screw d r i v er Turning the Power On Press the POWER button. The POWER lamp lights up. The display shows the voice number “1”... -
Page 11: Playing The Piano
Chapter Playing the Piano Using the Silent Piano™ Function [For upright pianos not equipped with a sostenuto pedal] Press the center pedal and slide it to the left. [For upright pianos equipped with a sostenuto pedal] Pull the silencing lever towards you until you hear a click and feel the mechanism catch. -
Page 12: Selecting Voices
Voice Explanation The unit does not use any voices. Piano A piano sound sampled from the Yamaha CFX concert grand piano. Electric Piano 1 An electronic piano sound produced by an FM synthesizer. Electric Piano 2 The sound of an electric piano using hammer-struck metallic “tines.”... - Page 13 Chapter Playing the Piano Selecting Voices ■ Changing the voice to that of a piano [for upright piano] You can change the voice to that of a piano with the touch of a button. Press the PIANO button. The PIANO lamp lights up and the voice is changed to that of a piano.
-
Page 14: Applying The Reverb Effect
Chapter Playing the Piano Applying the Reverb Effect A piano sounds differently depending on the size of the room, or the material of the building in which it is played. The reverberation is the major reason for this difference. Using the reverb functions and simulating the reverberation in a concert hall, gives you the feeling of the being at a live performance. -
Page 15: Using The Metronome
Chapter Playing the Piano Using the Metronome The unit features the built-in metronome that helps you to play at the accurate tempo. Press the FUNC. button repeatedly to switch the function to METRO. The current tempo setting appears on the display. Press the PLAY/PAUSE button to start the metronome. -
Page 16: Playing Back Songs
• Keys do not move during the song playback. • Use headphones or commercially available powered speakers to listen to the song. • You can also play back the music software for Disklavier purchased from the “Yamaha MusicSoft” website. For further information, refer to the following website: Yamaha MusicSoft: http://www.yamahamusicsoft.com/... -
Page 17: Playing Back The Demonstration Song
Chapter Playing Back Songs Playing Back the Demonstration Song You can play back any of the demonstration songs stored in this unit. Press the FUNC. button repeatedly to switch the function to SONG. The song number of the currently selected category appears on the display. -
Page 18: Playing Back The Preset Song
Chapter Playing Back Songs Playing Back the Preset Song Besides the demonstration songs, 50 piano songs are preset in this unit. These correspond to the score in the music book “50 greats for the Piano.” This will help you to practice playing along with the song playback. Press the FUNC. -
Page 19: Playing Back The Song Recorded On The Internal Memory
Chapter Playing Back Songs Playing Back the Song Recorded on the Internal Memory Your performance that has been recorded as a MIDI song and saved on the internal memory can also be played back. Note To record your performance, see “Recording Your Performance on the Internal Memory” on page 24. Press the FUNC. -
Page 20: Playing Back The Song Saved On The Usb Storage Device
Chapter Playing Back Songs Playing Back the Song Saved on the USB Storage Device Connecting commercially available USB storage device to the unit allows you to play back songs stored on that device. Connect the USB storage device to the USB port at the front of the control box. - Page 21 Chapter Playing Back Songs Playing Back the Song Saved on the USB Storage Device Press the +/YES or –/NO button to select the desired song number. Song Number Explanation S.00 – S.99 F.00 – F.99 100 – 399 Plays back only the selected song. When the playback advanced to the end of the selected song, playback stops.
-
Page 22: Operations During Playback
Chapter Playing Back Songs Operations during Playback Pause Move to the previous/next song S t op Fast-forward/rewind (Hold) ■ Pausing playback You can pause playback and restart it from where the song was paused. Press the PLAY/PAUSE button during playback. While playback is paused, the PLAY/PAUSE lamp blinks. Press the PLAY/PAUSE button to restart playback again. -
Page 23: Changing The Playback Tempo
Chapter Playing Back Songs Changing the Playback Tempo You can speed up or slow down the playback tempo. Slowing down the playback tempo can be useful when practicing a difficult piano part. During playback or pause, hold the FUNC. button for a second to switch to the tempo setting display. -
Page 24: Recording Your Performance
Chapter Recording Your Performance Recording Your Performance on the Internal Memory You can record your performance on the internal memory of the unit. Recorded performances are saved as a MIDI song (SMF0). Note • You can record up to 10 songs on the internal memory. • You can record up to approximately 500 KB, which equates to a standard song of approximately 30 minutes in length, per one recording. - Page 25 Chapter Recording Your Performance Recording Your Performance on the Internal Memory Press the +/YES and –/NO buttons to select the destination song number. Note • If you select an empty song (which contains no data), the song number and the blank indication (- - -) appears alternately on the display. • Note that the new recording will erase the existing data if you select a song which contains data.
-
Page 26: Recording Your Performance On The Usb Storage Device
Chapter Recording Your Performance Recording Your Performance on the USB Storage Device You can record your performance directly on the USB storage device. Recorded performances are saved as a MIDI song (SMF0) or an audio song (USB Audio Recorder, 44.1kHz/16bit stereo WAV). Note • You can record as much as the capacity of the USB storage device allows. - Page 27 Chapter Recording Your Performance Recording Your Performance on the USB Storage Device Press the +/YES or –/NO button to select the destination song number. Note • If you select an empty song (which contains no data), the song number and the blank indication (- - -) appears alternately on the display.
-
Page 28: Recording With The Metronome
Chapter Recording Your Performance Recording with the Metronome You can use the metronome to record performance. Press the FUNC. button repeatedly to switch the function to METRO. The current tempo setting appears on the display. Press the PLAY/PAUSE button to start the metronome. -
Page 29: Handling Song Files
Chapter Handling Song Files Copying a Song File to the USB Storage Device You can copy the user song on the internal memory to the USB storage device. You can use this function to make a backup on the USB storage device to protect your valuable music data. Note You can copy only the user song on the internal memory to the USB storage device. - Page 30 Chapter Handling Song Files Copying a Song File to the USB Storage Device Hold the REC button for 3 seconds. “SAv” appears on the display. Hold Then the smallest number of empty song in the USB MIDI user song category and the blank indication (- - -) appears alternately on the display.
-
Page 31: Deleting A Song File
Chapter Handling Song Files Deleting a Song File You can delete the user song on the internal memory or the USB storage device. Note You can delete only the user song on the internal memory or the USB storage device. To delete the song file stored on the USB storage device, connect the USB storage device to the USB port at the front of the control box. - Page 32 Chapter Handling Song Files Deleting a Song File Hold the REC and STOP buttons simultaneously for 3 seconds. “n-y” and “dEL” appears alternately on the display. Hold Note You cannot delete songs other than user songs. If you try to delete such songs, “E01”...
-
Page 33: Connecting To Other Devices
Chapter Connecting to Other Devices Connecting to Audio Devices Caution Be sure to turn the unit and audio devices off before attempting to connect them. Note The AUX IN or AUX OUT jack on this unit is a stereo mini jack. If your connection cable is not compatible, you will need to use an adaptor. - Page 34 Chapter Connecting to Other Devices Connecting to Audio Devices ■ Connecting to the AUX IN jack When connected to other sound modules or playback devices (such as CD players): You can use the Silent Piano™ function together with the sound received from the connected devices. Control box bottom panel To AUX IN jack Other sound modules...
-
Page 35: Connecting To Midi Devices
Chapter Connecting to Other Devices Connecting to MIDI Devices Caution Be sure to turn the unit and MIDI devices off before attempting to connect them. ■ Connecting to the MIDI OUT jack When connected to other MIDI device: You can reproduce the Silent Piano™ performances using sound modules such as synthesizers and other MIDI devices. -
Page 36: Connecting The Usb Storage Device
■ Compatible devices USB flash memory You can use commercially available USB flash memories. The USB flash memory should be formatted in FAT16 or FAT32 file system. Note Yamaha does not assure the operation of the commercially available USB flash memories. -
Page 37: Connecting Powered Speakers [For Grand Piano]
Chapter Connecting to Other Devices Connecting Powered Speakers [for Grand Piano] The OUTPUT L (L+R)/R jacks let you connect the optional powered speakers. You can also use the OUTPUT VOL. knob to fine-adjust the volume of these jacks. GM unit Powered speakers L ( L + R ) VOL. -
Page 38: Using Various Functions
Chapter Using Various Functions Setting the Various Convenient Functions (Function Setup) To get the most out of your piano, set some of the various convenient functions, such as fine tuning of the pitch, adjusting the metronome volume, etc. ■ Function Setup items Function Setup Item Item Number Page... - Page 39 Chapter Using Various Functions Setting the Various Convenient Functions (Function Setup) ■ Basic operations Press the FUNC. button repeatedly to turn off all function indicators. The unit enters the Function Setup mode and the Function Setup item number appears on the display. Press the +/YES or –/NO button to select the desired item.
-
Page 40: Details On Each Function Setup Item
Chapter Using Various Functions Details on Each Function Setup Item ■ Brilliance ■ FIXED Velocity You can adjust the timbre brilliance of the sound from You can change the velocity when you select Off mellow to bright. (FIXED) in the Touch Sensitivity setting. Setting range –2 The unit produces soft and... - Page 41 Chapter Using Various Functions Details on Each Function Setup Item ■ Scale ■ Base Note Certain genres of music are composed based on scales You need to specify the root when you select a scale other than equal temperament, which is the common other than equal temperament in the Scale setting.
- Page 42 Chapter Using Various Functions Details on Each Function Setup Item ■ Song Balance ■ Damper Resonance Depth You can adjust the volume balance between keyboard You can set the depth of the Damper Resonance effect, playing and song playback (MIDI and audio). Increase which is applied when you press the damper pedal.
- Page 43 Chapter Using Various Functions Details on Each Function Setup Item ■ Sustain Sample Depth ■ MIDI Transmit Channel You can set the depth of the Sustain Sample effect, You can assign the channel on which the unit transmits which is applied when you press the damper pedal. the MIDI data of keyboard playing.
- Page 44 Chapter Using Various Functions Details on Each Function Setup Item ■ Local Control ■ Control Change You can select whether the keyboard playing data is You can select whether the unit transmits or receives transmitted to the internal tone generator of the unit. control change messages.
-
Page 45: Restoring The Default Settings
Chapter Using Various Functions Restoring the Default Settings You can erase the backup of all settings made and restore the factory default settings. While holding the STOP button, press the POWER button to turn the unit on. “CLr” appears on the display and all settings are reset to factory default. -
Page 46: Deactivating The Auto Power-Off Function
Chapter Using Various Functions Deactivating the Auto Power-off Function While holding the FUNC. button, press the POWER button to turn the unit on. “PoF” appears on the display and the auto power-off function is deactivated. Note If you deactivate the auto power-off function with this step, “F9 Auto Power-off” in Function Setup (page 44) is automatically set to off. -
Page 47: Chapter 8 Appendix
A malfunction has occurred in the unit. Contact your nearest Yamaha dealer or authorized distributor. The capacity of the internal memory on the unit or the Delete unnecessary files to ensure sufficient capacity... -
Page 48: Troubleshooting
Troubleshooting If you have problems with the unit, here are a few troubleshooting tips. If you cannot solve the problem easily yourself, consult your Yamaha piano dealer. DO NOT attempt to repair the piano or the AC adaptor yourself. Symptom... -
Page 49: Preset Voice List
Explanation Piano This sound was sampled from the Yamaha CFX concert grand piano. It uses different samples depending on the strength of your playing and produces smoother tonal changes. Even the tonal changes produced by the damper pedal and the subtle sounds of releasing a key are reproduced. -
Page 50: Song List
Chapter Appendix Song List ■ Demonstration songs Title <Composer> d.01 Polonaise op.53 “Héroïque” <F. F. Chopin> d.02 Piano Sonate No.18 K.576 1st mov. <W. A. Mozart> d.03 “Little Overture” from The Nutcracker op.71a <P. I. Tchaikovsky> ■ Preset songs Title <Composer> Title <Composer>... -
Page 51: Playback Sequence Of Song Files On The Usb Storage Device
Chapter Appendix Playback Sequence of Song Files on the USB Storage Device The illustration below shows the playback sequence of song files stored on the USB storage device. USB storage device First level Second level Third level Fourth level Folder A Sub Folder A Sub Folder A Sub Folder A... -
Page 52: Specifications
4 kg 10 kg Accessories AC adapter (PA-150A, PJP-PS04 or an equivalent recommended by Yamaha), Power cable , Headphones (HPH-200P), Headphones hanger, Attachment screws for headphones hanger, Owner’s manual, Music book “50 greats for the Piano” * 1 For models equipped with a sostenuto pedal. -
Page 53: Index
Chapter Appendix Index AC adaptor ..................4, 9 Pause ....................22 Accessory ....................4 Piano playback channel ..............43 Administrative file ................51 Playback ....................16 All playback ..............17, 18, 19, 21 Playback sequence ................51 Audio device ................33, 34 Playback tempo .................23 Audio song ..................16, 51 Power ....................10 Auto power-off ................44, 46 Powered speakers ................33, 37...
Need help?
Do you have a question about the SILENT Piano SH and is the answer not in the manual?
Questions and answers