Advertisement
Quick Links
INfaa022V01_UK
370-006_370-009
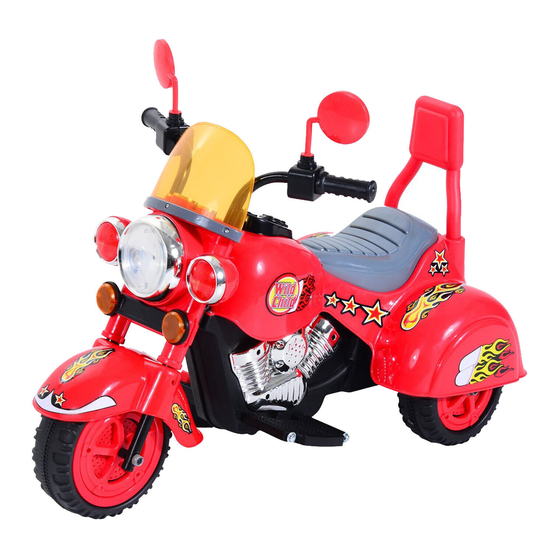
CHILDREN'
ELECTRIC TOY CAR
Please keep this manual for future reference as it contains important
information.
Before first time use, charge the battery for at least 4-6 hours.
IMPORTANT, RETAIN FOR FUTURE REFERENCE: READ CAREFULLY
OWNER'S MANUAL
Advertisement

Subscribe to Our Youtube Channel
Related Manuals for HOMCOM 370-006


Summary of Contents for HOMCOM 370-006
- Page 1 INfaa022V01_UK 370-006_370-009 CHILDREN' ELECTRIC TOY CAR Please keep this manual for future reference as it contains important information. Before first time use, charge the battery for at least 4-6 hours. IMPORTANT, RETAIN FOR FUTURE REFERENCE: READ CAREFULLY OWNER'S MANUAL...
- Page 2 Table of Contents 1. About Your New Vehicle 2. Parts List 3. Parts Diagram 4. Assembly Steps 5. How To Operation Your Vehicle 6. Charging The Vehicle 7. Troubleshooting Guide 8. Maintaining Your Vehicle 9. Disposal Of Battery About Your New Vehicle Thank you for your purchasing our products, we wants your child to enjoy this product for years to come.
- Page 3 Parts List Q’ty REMARKS Q’ty REMARKS PART PART PART PART Par t Par t PICTURE PICTURE (pcs) (pcs) NAME NAME Placed on the Vehicle Seat vehicle body body Mirror Backrest Mirror Mirror base base (front) (back) Fender Handlebar Placed Front Front on the axle...
- Page 4 Parts List Q’ty REMARKS Q’ty REMARKS PART PART Par t PART PART Par t PICTURE PICTURE (pcs) (pcs) NAME NAME Placed Placed Iron Ø3x8 in the on the bush screw assembly handle package M5x12 Placed on the machine Charger seat screw Placed Ø5x25...
- Page 6 Assembly Steps • Your new vehicle requires adult assembly. Please set aside at least 40 minutes for assembly. Children can be harmed by small parts, sharp edges and sharp points in the vehicle's unassembled state. Care should be taken in unpacking and assembly of the vehicle.
- Page 7 Assembly Steps 2. Fender assembly ● Remove the front axle, bush, 2*Ø10 nut Front from the handle bar. ● Fit the fender into the handle bar. ● Secure it with a Ø5x25 screw. Repeat for Fender the other side. 5x25 Ø...
- Page 8 Assembly Steps 5. Mirror assembly ● Insert the mirror base(front) into the holes Mirror on handle bar. ● Fit the mirror into the mirror base(front). Mirror ● Fit the mirror(back) into the mirror(front). base Mirror base(back) ● Use 4*Ø3x8 screws to secure it. (front) ●...
- Page 9 Assembly Steps 8. Backrest assembly Fit the backrest into the holes on vehicle Backrest body. Push until you hear this click into place.
- Page 10 How To Operate Your Vehicle WARNING! PREVENT INJURIES AND DEATHS: • NEVER LEAVE CHILD UNATTENDED.DIRECT ADULT SUPERVISION IS REQUIRED. Always keep child in view when child is in vehicle. • Never use in roadways, near cars, on or near steep inclines or steps, swimming pools or other bodies of water.
- Page 11 How To Operate Your Vehicle Use Operation( Ensure the power switch has been turned on IMPORTANT! Headlight button Sounds button Always stop vehicle when changing the speed or direction to avoid damage the gear box and motor. Forward-backward Power switch switch Audio input Foot pedal...
- Page 12 Charging Your Vehicle handling. • Do not open the battery. Battery contains lead acid and other materials that are toxic and corrosive. • Do not open the charger. Exposed wiring and circuitry inside case may cause electric shock.• Only adults may handle or charge the battery. NEVER allow child to handle or charge the battery.
- Page 13 Troubleshooting Guide PROBLEM: The vehicle does not run ■ PROBLEM CAUSE: The battery may low on power. After each use, or once a month minimum, charge the battery for a full 10 hours. Do not leave the battery on the charger for more than 20 hours. POSSIBLE CAUSE: Thermal fuse has tripped.
- Page 14 Troubleshooting Guide PROBLEM: The vehicle does not run very long. ■ POSSIBLECAUSE: Battery may be undercharged. You may not be charging the battery long enough. After each use, or once a month minimum, charge the battery for 8 to 10 hours. Do not leave the battery on the charger for more than 20 hours. POSSIBLE CAUSE: Battery is old.
- Page 15 Disposal Of Battery Disposal Of Batter y ● Your sealed lead-acid battery must be recycled or disposed of in an environmentally sound manner. ● Do not dispose of your lead-acid battery in a fire. The battery may explode or leak. ●...
Need help?
Do you have a question about the 370-006 and is the answer not in the manual?
Questions and answers