Table of Contents
Advertisement
Quick Links
Advertisement
Table of Contents

Related Manuals for Roughneck 67151


Summary of Contents for Roughneck 67151
- Page 1 Digital Oil Meter Owner’s Manual WARNING: Read carefully and understand all ASSEMBLY AND OPERATION INSTRUCTIONS before operating. Failure to follow the safety rules and other basic safety precautions may result in serious personal injury. Item #67151 READ & SAVE THESE INSTRUCTIONS...
- Page 2 ® Thank you very much for choosing a Roughneck product! For future reference, please complete the owner’s record below: Serial Number/Lot Date Code: ________________________________ Purchase Date: ____________________________________________ Save the receipt, warranty, and this manual. It is important that you read the entire manual to become familiar with this product before you begin using it.
-
Page 3: Table Of Contents
Table of Contents Intended Use ............................4 Packaging Contents ..........................4 Technical Specifications ........................4 Important Safety Information ....................... 4 Specific Operation Warnings ....................... 6 Main Parts of Product ........................... 6 Installation Instructions ........................7 Before Each Use ............................ 7 Operating Instructions ........................ -
Page 4: Intended Use
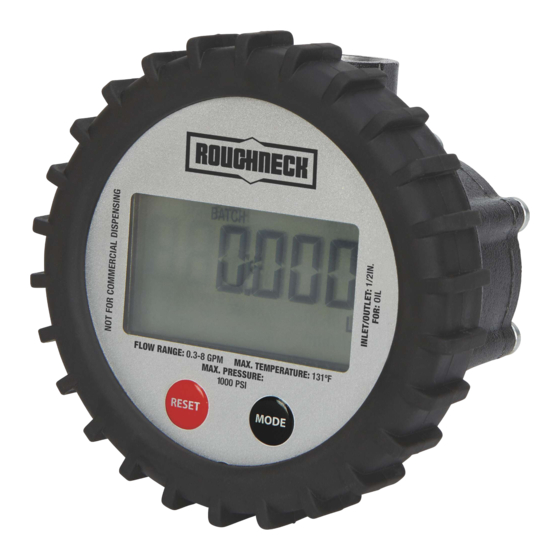
Intended Use The Roughneck Digital Oil Meter is ideal for measuring oil in the automotive industry. The high pressure, positive displacement meter is suitable for both in-line and end of line applications. Packaging Contents • • Owner’s Manual Digital Oil Meter... - Page 5 aware of the environment and ensure that the tool is used in a safe and responsible manner. • Do not allow persons to operate or assemble the product until they have read this manual and have developed a thorough understanding of how it works. •...
-
Page 6: Specific Operation Warnings
⚠CAUTION DIGITAL OIL METER USE AND CARE • Do not force the digital oil meter. Products are safer and do a better job when used in the manner for which they are designed. Plan your work, and use the correct product for the job. •... -
Page 7: Installation Instructions
Subassembly Electronic Display Protective Shroud Meter Body Installation Instructions • The meter can be installed in any position, with flexible and rigid piping, as well as directly on pumps and tanks. • Once installed, the meter is ready for use. Press the reset button until the batch total returns to zero. - Page 8 3. Press the RESET button to reset BATCH total to zero. The TOTAL display cannot be reset. Accessing the Programming Menu (setting the decimal place) 1. To enter in the programming menu, press the RESET button for 5 seconds. 2. The LCD will display MENU in the lower left-hand corner and the number of decimal places currently set on the main display.
- Page 9 4. Once the required unit has been selected, press the RESET button to move to the attached totalizer. 5. The LCD will now display UNIT in the lower left-hand corner and TOTAL on the main display. Press the MODE button to cycle through options available, as mentioned step 2. 6.
-
Page 10: Operating Instructions
4. Run the fluid through meter into a graduated container until the Test Volume has been reached (e.g., 100). Press the MODE button to stop the test. 5. The unit will now compare the Measured Volume to the Test Volume and perform an Auto Calibration if the difference between the two volumes are within ±... - Page 11 Changing the Battery 1. Remove the rubber shroud (1). Unscrew the four screws (2) with a Phillips head screwdriver in a diagonal sequence and separate the electronic module (3) from the meter body (5). 2. Remove the PCB from the clear, plastic housing by unscrewing the 3 retaining screws.
-
Page 12: Troubleshooting
Troubleshooting Use the table below to troubleshoot problems before contacting service personnel or your local dealer. If the problem continues after troubleshooting, call your local dealer for assistance. Failure Possible Cause Corrective Action Oval gears are stuck in place Dismantle meter and clean gears Clean the meter body (refer to Cleaning Soiled or blocked meter body the Meter Body) -
Page 13: Parts Diagram
Parts Diagram Page 13 of 16... -
Page 14: Parts List
Parts List Reference Part Number Part Description Quantity Protective Shroud Screws Electronic Module O-Ring Meter Body Oval Gears O-Ring Meter Cap Meter Cap Screws Replacement Parts • For replacement parts and technical questions, please call Customer Service at 1-800-222-5381. • Not all product components are available for replacement. -
Page 15: Limited Warranty
Northern Tool and Equipment Company, Inc. ("We'' or "Us'') warrants to the original purchaser only ("You'' or "Your") that the Roughneck product purchased will be free from material defects in both materials and workmanship, normal wear and tear excepted, for a period of one year from date of purchase. - Page 16 Distributed by: Northern Tool & Equipment Company, Inc. Burnsville, Minnesota 55306 www.northerntool.com Made in India Page 16 of 16...