Dahua EVS50 Quick Start Manual
Embedded video storage
Hide thumbs
Also See for EVS50:
- Quick start manual (55 pages) ,
- User manual (246 pages) ,
- Quick start manual (52 pages)
Table of Contents
Advertisement
Quick Links
Advertisement
Table of Contents

Related Manuals for Dahua EVS50


Summary of Contents for Dahua EVS50
- Page 1 Embedded Video Storage (EVS50/EVS70) Quick Start Guide V2.1.2...
-
Page 2: Foreword
Foreword General This User’s Manual (hereinafter referred to as "the Manual") introduces the functions and operations of the EVS series (hereinafter referred to as "the Device"). Models Series Model Middle-class Middle-class 16-HDD single-controller, middle-class 24-HDD single-controller, middle-class 36-HDD single-controller, middle-class 48-HDD single-controller High-end High-end 24-HDD single-controller, high-end 48-HDD single-controller Safety Instructions... - Page 3 Version Revision Content Release Time V2.0.1 Add privacy protection notice. May 2018 V2.0.0 Baseline switch. October 2017 V1.0.0 First release. January 2017 About the Manual The manual is for reference only. Slight differences might be found between the manual and the ...
-
Page 4: Important Safeguards And Warnings
Important Safeguards and Warnings This section introduces content covering the proper handling of the Device, hazard prevention, and prevention of property damage. Read carefully before using the Device, comply with the guidelines when using it, and keep the manual safe for future reference. Operation Requirement Transport, use and store the Device under allowed humidity and temperature conditions. -
Page 5: Table Of Contents
Table of Contents Foreword ................................I Important Safeguards and Warnings ......................III 1 Overview ................................ 1 Introduction ....................................1 Front Panel ....................................1 Rear Panel ..................................... 2 2 Installation and Power Up..........................4 Installing HDD ..................................... 4 2.1.1 Middle-class 16-HDD Single-controller Series ....................4 2.1.2 Other Series .................................. -
Page 6: Overview
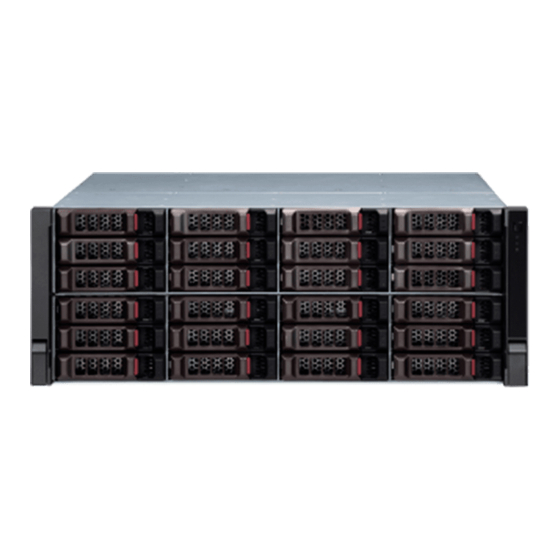
Overview Introduction The Device is designed for the management, storage and application of high-definition video data. It uses Linux operation system and professional customized hardware platform, and it is configured with multiple Hard Disk Drive (HDD) management system, front-end HD device management system, HD video analysis system and large capacity video storage system. -
Page 7: Rear Panel
Indicator/Button Description Network status The blue light keeps on if there is network failure, IP conflict or MAC indicator conflict. Rear Panel Rear panel (5 Ethernet ports) Rear panel (7 Ethernet ports) - Page 8 Rear panel (9 Ethernet ports) Table 1-2 Rear panel interfaces Interface Description Used for case cooling. Power Connects AC power. interface Main control See Table 1-3. module Table 1-3 Main control module interfaces Interface/Indicator Description 1–4/5–8 Gigabit data port. Used for data transmission. USB3.0 Connects the mouse and USB storage devices.
-
Page 9: Installation And Power Up
Installation and Power Up Installing HDD The HDD is not installed by default on factory delivery. You need to install it by yourself. WARNING Some devices are heavy and should be carried jointly by several persons to avoid any personnel injury. -
Page 10: Other Series
Fastening the screws To avoid any damage to the slot, do not close the handle if the HDD box has not been pushed to the bottom. Insert the HDD box into the HDD slot, push it to the bottom, and then lock the handle. 2.1.2 Other Series Press the red button on the HDD box in the front panel and unlock the handle. -
Page 11: Powering Up
HDD box Put the HDD into the disk box and fasten the screws at the bottom of the box. See Figure 2-6. Locking the screws To avoid any damage to the slot, do not close the handle if the HDD box has not been pushed to the bottom. -
Page 12: Powering Up The Device
Different models of devices need different sources of power supplies. Make sure that all power lines are connected correctly. Check whether the supplied power voltage complies with the device requirement. Check whether the network cables and SAS cables are connected correctly. ... -
Page 13: Web Basic Operations
Web Basic Operations The system supports device access and management through web at personal computer (PC). The web client system provides functions such as information viewing, storage management, system configuration, and playback monitoring. The following contents are only for your reference. Different models have different functions. See the corresponding model. - Page 14 Install plugins interface Install plugins only when logging in to the web for the first time. Click Install. Complete the installation as prompted. Password setting In the New Password box, enter the new password. The password consists of 8 to 32 characters. It combines letter(s), number(s) and symbol(s) (at least two of them).
-
Page 15: Logging In Web
Password protection In the Assigned Email box, enter the assigned email. After entering the assigned email, you can reset the admin password through the email. If you do not need to set the password protection, you can clear the Assigned Email ... - Page 16 Open the browser, enter the IP address in the address bar, and then press Enter. Click Install. The system downloads the control automatically. Click Run to install the control. The Web login interface is displayed after successful installation. See Figure 3-5. You need to install the control only when logging in for the first time.
-
Page 17: Initial Configuration
Table 3-1 System manager Name Description Function You can view the basic system information, configure system parameters and play monitoring images and videos. Displays the current login user name. Click at the right side of the user name and you can perform quickly set User name configuration and user logout. - Page 18 Setting TCP/IP (dual-control device) Table 3-2 TCP/IP setting parameters Parameter Description Enter the virtual IP address of the dual-control device. Enable IP Address The main control board and sub control board of dual-control device have their respective physical IP. After setting the virtual IP, in spite of switching Subnet Mask between the main and sub control boards, the user can always log in web normally with the virtual IP.
- Page 19 Editing Configure the parameters. For details, see Table 3-3. Table 3-3 NIC editing parameters Parameter Description Ethernet Displays the current NIC name. Card...
- Page 20 Parameter Description Displays the network mode of the Device. Single NIC: The NIC is used alone. You can select one NIC to provide HTTP or RTSP service. You need to set one default NIC (default is Network Card1) to request the network service started by Email and File Transfer Protocol (FTP).
-
Page 21: Adding Remote Device
Parameter Description Enter the MTU (Maximum Transmission Unit) value of the NIC. The default value is 1,500 bytes. The suggested value is 1,500 or 1,492. 1,500: The maximum and default value of the Ethernet packet. It is a typical network connection setting without PPPoE and VPN. It is the default setting of some routers, network adapters and switches. - Page 22 Remote device Add remote device. You can use adding by search, adding one device, batch add or importing from template. Adding by search at the right side of Auto Search. Click Automatic search Click Device Search. The results are displayed. See Figure 3-12. For details, see Table 3-4. When the obtained IP address and port number is the same as that of the remote device you have already added, this device will not appear in the result list.
- Page 23 Search results Table 3-4 Auto search icons Icon/Parameter Description Select the remote devices you need to add through IP address or MAC address. Click to select IP Address or MAC Address. Enter the IP address or MAC address of the remote device in the text box at the right side of Click Search.
- Page 24 Adding one device Configure the parameters. For details, see Table 3-5. Table 3-5 Adding device Parameter Description Select the manufacturer in the drop-down box according to the actual situation. Manufacturer Different models support different manufacturer protocols. You need to refer to the actual situation.
- Page 25 Parameter Description Set the HTTP port of the remote device. The default is 80. HTTP Port You do not need to configure it when the Manufacturer is set as Private or Custom. HTTPS communication port. It can be set according to your actual needs. The default is 443.
- Page 26 Batch add Enter the search range for the fourth segment of the IP address. Batch add only supports devices with the first three segments of the IP address are the same. You need to enter the search range of the fourth segment. For example: 192.168.1.1–192.168.1.255.
-
Page 27: Configuring Record Plan
3.4.3 Configuring Record Plan The system performs video recording according to record plan. For example, when you set the time period of alarm videos to 6:00–18:00, the system automatically takes records if any alarm occurs during this period. The factory default plan is 24-hour continuous ordinary record for all the channels. You can modify it according to the actual needs. - Page 28 Parameter Description When multiple disks are available in the Device, select one disk to be the redundancy to realize secondary backup of records. The records are stored in different disks at the same time to guarantee data security. Set a redundant disk. Select the check box to enable redundancy.
-
Page 29: Enabling Record Function
Select the All check box and you can synchronously edit or draw the periods for all the weekdays. You can select multiple weekdays to edit at the same time. Hold the left button of the mouse and move the mouse in the period bar to draw the period. - Page 30 time. Manual record: The system takes 24-hour continuous records in the channel. Manual record requires the user to have the storage setting authority. Select Direct Storage > Record Control. Record control Configure the parameters. For details, see Table 3-7.
-
Page 31: Video Direct Storage
Table 3-7 Record control parameters Parameter Description Displays all the channels with remote devices added. Channel You can select a single channel or multiple channels or select All for all the channels. Displays the current status of the corresponding channel. : Not selected. -
Page 32: Ai Playback
RAID management Create RAID. For details, see "3.8.1 Creating RAID." Click Next. Adding remote device Add remote device. For details, see "3.4.2 Adding Remote Device." Click Finished to save the configuration. AI Playback AI playback is an intelligent function for you to check and play back the results of IVS analyse, vehicle analyse, face detect and human trait. - Page 33 AI playback at the right side of the user name. Select Quickly Set > AI PlayBack. Click The steps to quick configure the AI playback scenario are displayed at the top right of the screen. RAID management Create RAID. For details, see "3.8.1 Creating RAID." Click Next.
- Page 34 Setting AI playback HDD and special HDD group Set AI playback HDD and HDD group. Set the HDD Operation of one or several disks to AI PlayBack Disk. Set the HDD Group of the AI playback disk to Special HDD Group. Click OK to save the configuration.
-
Page 35: Ip San
Adding remote device Add remote device. For details, see "3.4.2 Adding Remote Device." Click OK to save the configuration. After the configuration, you can search the AI playback video. IP SAN Internet Protocol Storage Area Network (IP SAN) is a kind of network storage technology based on IP network. -
Page 36: Creating Storage Pool
Configuring IP SAN 3.7.2 Creating Storage Pool Storage pool is a logical device that is virtualized by the storage devices, which is managed by the system and can be composed of multiple actual disks or RAID. It is one of the main means to realize virtual storage. -
Page 37: Managing Share Account
Click Adding storage pool Enter the Pool Name and select the disk or RAID group. By default, sdx (x ranges from a to z) refers to disk, such as /dev/sda. Mdx (x is a number) refers to RAID group, such as /dev/md0. Click OK to save the configuration. - Page 38 Share account management Click Adding shared user Configure the parameters. For details, see Table 3-8. Table 3-8 Adding user parameters Parameter Description User Name Enter the name of the share account. Select the corresponding service type of the share account: iSCSI, FTP/SAMBA or Server Type iSCSI/FTP/SAMBA.
-
Page 39: Setting Share Folder
Parameter Description Memo Enter memo to help recognize and manage the account. Click OK to save the configuration. The system returns to the Share Account interface. You can view the new account information here. 3.7.4 Setting Share Folder You can access the share folder on other devices through the share account. Select IP SAN >... - Page 40 Adding share folder (iSCSI) Configure the parameters.
- Page 41 Table 3-9 Share folder parameters Parameter Description Directory Enter the name of the share folder. Name Select the pool in which you need to create the share folder. Pool Name Free capability refers to the max available volume of the storage pool. Share Enter the available space of the share folder.
-
Page 42: Setting Ftp Parameters
The system returns to the Share Folder interface. You can view the new share folder information here. When you create the share folder for the first time or create share folder under the condition of system auto maintenance, the system will force off the auto maintenance. After configuring the IP SAN, you can enable auto maintenance manually. -
Page 43: Raid Management
Share control Start or stop the share service according to actual needs. Click OK to save the configuration. RAID Management Redundant Arrays of Independent Disks (RAID) organizes multiple independent physical disks to a logical disk group, so that it can provide higher storage performance and data redundancy technology. The disk group set for AI playback disk cannot be used to create RAID. - Page 44 Raid management Click Creating RAID Select the parameters. For details, see Table 3-11. Table 3-11 RAID creation parameters...
- Page 45 Parameter Description Select the RAID creation type, including manual, shortcut, and Raid2.0. When you choose shortcut RAID creation, the system automatically creates RAID 5 according to the shortcut RAID creation strategy. For details, see Table 3-12. Type Raid2.0 provides different storage strategies for the same RAID based on your data security requirements.
-
Page 46: Hotspare Management
to delete a RAID, and click Refresh to update the RAID list. Click Double-click the RAID line, and you can view the detailed information. Shortcut RAID Creation Strategy When the disks are fully installed, the system creates RAID5 according to the policy in Table 3-12. In the below table, the value 9, 5 and 3 refer to the HDD number in the RAID and 1 refers to hot spare. - Page 47 Hotspare management Double-click the corresponding Type to set the disk to general HDD, private hot spare or general hot spare. General HDD: A general disk member in the RAID. Private hot spare: Double-click the corresponding Name, select the RAID group, and ...
-
Page 48: Cybersecurity Recommendations
Cybersecurity Recommendations Cybersecurity is more than just a buzzword: it’s something that pertains to every device that is connected to the internet. IP video surveillance is not immune to cyber risks, but taking basic steps toward protecting and strengthening networks and networked appliances will make them less susceptible to attacks. - Page 49 We suggest you to enable HTTPS, so that you visit Web service through a secure communication channel. MAC Address Binding We recommend you to bind the IP and MAC address of the gateway to the device, thus reducing the risk of ARP spoofing. Assign Accounts and Privileges Reasonably According to business and management requirements, reasonably add users and assign a minimum set of permissions to them.
Need help?
Do you have a question about the EVS50 and is the answer not in the manual?
Questions and answers