Table of Contents
Advertisement
Quick Links
Advertisement
Table of Contents

Related Manuals for Dahua IVSS


Summary of Contents for Dahua IVSS
- Page 1 Intelligent Video Surveillance Server Quick Start Guide Version 1.0.1...
-
Page 2: Table Of Contents
3.2 Device Initialization ......................7 3.3 Quick Settings ........................9 3.4 Register Remote Device ....................16 Operations ..........................21 4.1 Login IVSS ........................21 4.2 Preview and Monitor....................... 22 4.3 Playback Record File ..................... 29 4.4 AI Detection ........................30... - Page 3 Welcome Thank you for purchasing our intelligent video surveillance server (IVSS)! This quick start guide will help you become familiar with our device in a very short time. Before installation and operation, please read the following safeguard and warning carefully! Important Safeguard and Warning The following description is the correct application method of the device.
- Page 4 Caution DO NOT CHANGE OR REPLACE THE AI MODULE WHEN DEVICE IS RUNNING. Shut down the device first and then remove the AI module, otherwise, the data on the AI module may result in damage.
- Page 5 Cybersecurity Recommendations Cybersecurity Recommendations Mandatory actions to be taken towards cybersecurity 1. Change Passwords and Use Strong Passwords: The number one reason systems get “hacked” is due to having weak or default passwords. It is recommended to change default passwords immediately and choose a strong password whenever possible.
- Page 6 6. Forward Only Ports You Need: ● Only forward the HTTP and TCP ports that you need to use. Do not forward a huge range of numbers to the device. Do not DMZ the device's IP address. ● You do not need to forward any ports for individual cameras if they are all connected to a recorder on site;...
- Page 7 14. Physically Lock Down the Device: Ideally, you want to prevent any unauthorized physical access to your system. The best way to achieve this is to install the recorder in a lockbox, locking server rack, or in a room that is behind a lock and key. 15.
- Page 8 Device or system refers to intelligent video surveillance server (IVSS) or IVSS system if not otherwise specified. The remote device in this manual refers to the devices connected to the IVSS via the network such as network video recorder (NVR), IPC(IP camera or network camera), or PTZ camera (speed dome).
-
Page 9: General Introduction
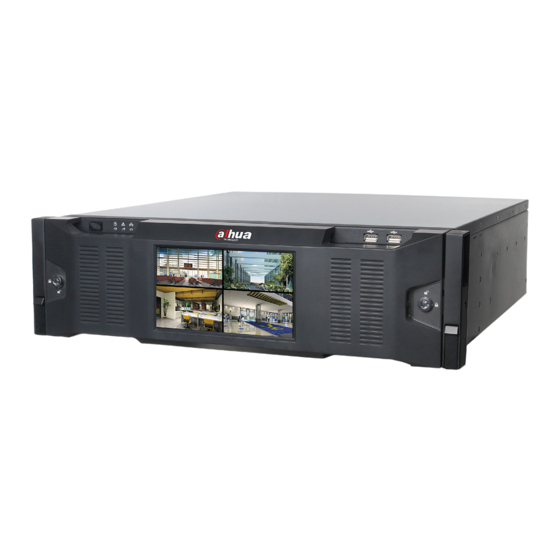
1 General Introduction 1.1 Overview Intelligent video surveillance server is a product of new form. Compatible with the general functions of video surveillance of security industry, it has added AI functions such as human face recognition, features extraction based on the deep learning technology. - Page 10 Figure 1-2 Please refer to the following sheet for detailed information. Name Function Once the front panel lock is secure, it can prevent HDD Front panel stealing or remove by mistake. Unlock the front panel lock lock and remove the front panel, you can view 16 HDD slots. Figure Boot up or shut down device.
- Page 11 1.2.2 Rear Panel For the single-power series, the interface is shown as in Figure 1-3. Figure 1-3 For the redundant series, the interface is shown as in Figure 1-4. Figure 1-4 Please refer to the following sheet for rear panel button information. Name Note Power port...
- Page 12 Name Note AUDIO OUT Audio output port RS232 port RS232 COM debug. It is for general COM debug, set IP address, transmit transparent COM data. eSATA port SATA peripheral port. Connect to device of SATA port. USB port USB port. Connect to mouse, USB storage device ,etc. SAS extension port.
-
Page 13: Installation And Connection
2 Installation and Connection This chapter is to introduce HDD installation, cable connection, etc. Warning Some series product is heavy. It needs several persons to carry or move in case there is person injury. 2.1 Unpacking After you received the device from the forwarder, please open the box and then check with the following sheet. -
Page 14: Cable Connection
①Press the red button on ② Pull out to take the ③Secure the screws at the HDD box at the front empty HDD box and the bottom of the box, panel, open the handle. then Install the HDD to insert the HDD box to the the HDD box HDD box slot and then push to the end, and then... -
Page 15: Start-Up
3 Start-Up If it is your first time to boot up the device, please initialize the device, set basic information and functions, etc. 3.1 Boot up Warning Before the boot up, please make sure: The rated input voltage shall match the device power on-off button. Please make sure the power wire connection is OK. - Page 16 Figure 3-1 Step 2 Set admin login password. Name Function User The default user name is admin. The password ranges from 8 to 32 digitals. It can contain letters, numbers and special characters (excluding “'”,“"”, “;”,“:”,“&”) . The Password password shall contain at least two categories. Usually we recommend the strong password.
-
Page 17: Quick Settings
Step 4 Set password protection information. Setting the security questions here, you can use the email you input here or answer the security questions to reset admin password. Refer to user’s manual for detailed information. Note Click to cancel the email or security questions box. Password Note protection... - Page 18 Step 1 On initialization interface, click Enter quick settings button. Enter time setting interface. See Figure 3-4. Figure 3-4 Step 2 Set parameters. Name Function It is to set system date and time. You can set manually or set device to synchronize time with the NTP server. Manual setting: Select manual setting and then input actual ...
- Page 19 Figure 3-5 Step 2 Set IP address. 1. Click the of the corresponding Ethernet port. Enter Edit Ethernet setting interface. See Figure 3-6. Figure 3-6 2. Set parameters. Name Function Speed Current NIC max network transmission speed. When there is a DHCP server on the network, check the box to dynamic use dynamic IP address, system can allocate an dynamic IP IP address...
- Page 20 Name Function Check the box to use static IP address. Please set static IP Use static IP address, subnet mask and gateway. It is to set a static IP address address for the device. Set NIC MTU value. The default setup is 1500 Byte. We recommend you to check the MTU value of the gateway first and then set the device MTU value equal to or smaller than the gateway value.
- Page 21 Figure 3-7 Step 2 Click to enable P2P function. The function is disabled by default. Step 3 Click Finish to save settings. After the configuration, you can register a device to the APP to view remote video, playback record file, etc. Refer to corresponding cellphone APP for detailed information.
- Page 22 Step 3 Register a device to the cellphone APP. Note Before register the device to the APP, make sure the device you want to register has been initialized. Otherwise, you cannot properly use the device. 1. Tap and then select Device manager. Enter Device manager interface.
- Page 23 Figure 3-10 3. Select device connection type, and then follow the prompts to connect to the device. System displays device SN. See Figure 3-11. Note You can scan the QR code to connect to the device. Follow the steps listed below: , enter the QR code of current device.
-
Page 24: Register Remote Device
4. Set device name, user name and password according to the actual situation. Step 4 Click Start live preview. System begins connecting to the device. After device successfully registered to the system, you can view the real-time surveillance video. 3.4 Register Remote Device After you register the remote device to the system, you can view the real-time video from the remote device, change remote device settings, etc. - Page 25 Figure 3-13 Step 3 Click at the bottom left corner and then select Smart add. Enter add device interface. See Figure 3-14. Figure 3-14 Step 4 Search remote device. Note Device searches the remote devices on the device same IP segment by default if there is no search criteria.
- Page 26 1. Click Enter Add interface. See Figure 3-15. Figure 3-15 2. Select manufacturer name, and then set IP address you want to search. IP address: Set remote device IP address. Device only searches the remote device of the specified IP address. ...
- Page 27 Figure 3-16 Step 5 Add remote device. Add 1-channel remote device. Select a remote device and then click Add bottom. Device begins adding remote device and pops up confirmation interface. See Figure 3-17. Note During the adding process, click Cancel button, you can cancel adding process.
- Page 28 Add multiple-channel remote device 1. Select a remote device and then click Add button. Enter add confirmation interface. See Figure 3-18. Figure 3-18 2. Double click select a channel. Enter video device interface. See Figure 3-19. Figure 3-19 3. Select a channel you want to add. Click and then input the key words, it can quickly search the channel you want to add.
-
Page 29: Operations
4 Operations 4.1 Login IVSS After boot up device, please input the corresponding user name and password to login. Note After initialize the device, you have logged in by default. Now you can set system settings and operate. Steps Step 1 Boot up device. -
Page 30: Preview And Monitor
Figure 4-2 Name Function It is to display enabled application icon. Move the mouse to the app and then click to close the app. Task column Note The preview function is enabled by default and cannot be closed. Click to display or hide app interface. On app interface to Add icon view or enable appl. - Page 31 After logged in the device, system displays Live interface by default. 4.2.1 View Management View is a video component of several remote devices. Go to the view pane at the top left corner of the Live interface to view or call the view. See Figure 4-3. ...
- Page 32 Enter edit vide interface. See Figure 4-4. Figure 4-4 Step 2 Double click a remote device on the device tree, or drag the remote device to the right pane. After added one remote device, the view edit pane displays layout split line. See Figure 4-5.
- Page 33 Figure 4-5 Step 3 Set view name. The view group name ranges from 1 to 64-digital. It can contain English letters, number and special character. Step 4 Click OK to save settings. System pops successful interface. 4.2.1.2 Enable view Follow the steps listed below to enable view. ...
- Page 34 When enable the view, you can change video position, zoom video window ,etc. Note When you are adjusting view window position, you can only drag the view window to the grid of green background color. You cannot drag the view window to the grid of red background color.
- Page 35 Note Refer to user’s manual to enable AI detect function. Go to the Live interface, enable view, device displays view video. See Figure 4-7. The view window displays currently detected human face rule rectangle. The view window displays properties pane such as human face detected image and human face comparison results on the right pane.
- Page 36 Double click AI detection image, system displays the the 20 seconds video before and after the image. Click to pause play. Now the icon becomes , click to continue play. Click to exit record interface. See Figure 4-10. Figure 4-10 4.2.2.2 AI display settings On the preview interface, click...
-
Page 37: Playback Record File
4.3 Playback Record File Search and playback record file according to remote device, record type, and record time. Steps Step 1 On the Live interface, click and then select Search. Enter Search interface. See Figure 4-12. Figure 4-12 Step 2 Select a remote device, and then click Record tab. Step 3 Set record type and record search time. -
Page 38: Ai Detection
Figure 4-13 4.4 AI Detection AI detection is to process and analyze the video and take the key information, compare the key information with the pre-set detection rule and trigger an alarm once the detected behavior matches the detection rule. Note Make sure the remote device supports AI detection function. - Page 39 Figure 4-14 Step 3 Click to enable AI detection plan. Step 4 Click Save. 4.4.2 Human face detection It is to analyze the video from the remote device, and system can trigger an alarm once there is any detected human face information. Preparation Please make sure you have enabled human face detection plan.
- Page 40 Figure 4-15 Step 3 Click AI by camera or AI by device, and then click to enable intelligent function. AI by camera: The remote device supports intelligent detection such as smart network camera. The system needs to support detect and display the intelligent alarm information from the remote device and use the remote device to set intelligent detect and record playback.
- Page 41 If there is no plan or the added plan does not fit the actual requirements, click to add a schedule. Refer to user’s manual for detailed information. Step 7 Set corresponding linkage event. Set alarm to trigger Record or Snap: Click and then select Record or Snap, and then select the corresponding device to record or snap when an alarm occurs.
- Page 42 Figure 4-16 Step 3 Click AI by camera or AI by device, and then click to enable intelligent function. AI by camera: The remote device supports intelligent detection such as smart network camera. The system needs to support detect and display the intelligent alarm information from the remote device and use the remote device to set intelligent detect and record playback.
-
Page 43: Logout/Reboot/Shut Down
Figure 4-17 Set parameters. Name Function AI alarm rule Click the color zone to set alarm rule box color. Features pane Check the box to enable features pane function. System displays stranger pane once there is an alarm. Click to set alarm activation events. Step 6 Set triggered human face database. - Page 44 Reboot: Click and then select reboot. Click OK on the pop-up window. Shut down: Click and then seelct shut down. Click OK on the pop-up window. Note Slight difference may be found in user interface. All the designs and software here are subject to change without prior written notice.
Need help?
Do you have a question about the IVSS and is the answer not in the manual?
Questions and answers