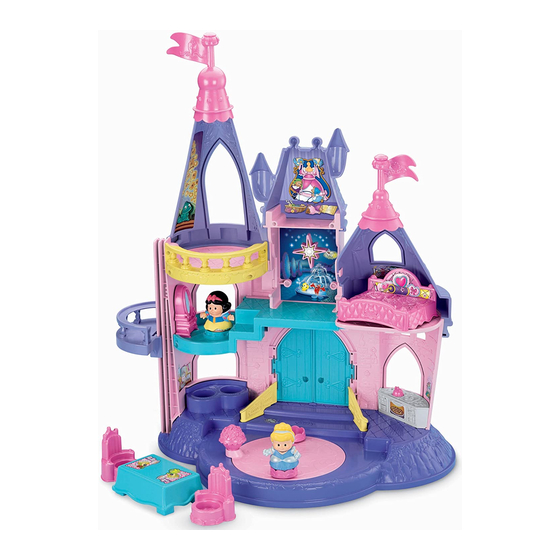
Advertisement
Quick Links
• Please keep this instruction sheet for
future reference, as it contains
important information.
• Requires three "AAA" (LR03) alkaline
batteries (not included) for operation.
• Adult assembly is required. Tool required:
Phillips screwdriver (not included).
• English speaking toy
• Conserver ce mode d'emploi pour s'y
• Le produit fonctionne avec trois piles
• Assemblage par un adulte requis.
• Jouet d'expression anglaise.
www.fi sher-price.com
référer en cas de besoin car il contient
des informations importantes.
alcalines AAA (LR03), non incluses.
Outil requis : un tournevis cruciforme
(non fourni).
X6031
Advertisement

Summary of Contents for Fisher-Price X6031
- Page 1 X6031 • Please keep this instruction sheet for • Conserver ce mode d’emploi pour s’y future reference, as it contains référer en cas de besoin car il contient important information. des informations importantes. • Requires three “AAA” (LR03) alkaline • Le produit fonctionne avec trois piles batteries (not included) for operation.
- Page 2 Consumer Information Renseignements pour les consommateurs ICES-003 Care • This Class B digital apparatus complies • Wipe this toy with a clean, damp cloth. with Canadian ICES-003. Do not immerse. • Operation is subject to the following two • This toy has no consumer serviceable conditions: (1) this device may not cause parts.
- Page 3 Assembled Parts Éléments à assembler CAUTION MISE EN GARDE This package contains small parts. For adult assembly only. Cet emballage contient de petits éléments devant être assemblés par un adulte. Clock Tower Balcony Tour de l’horloge Balcon 2 Flags 2 drapeaux Short Tower Tall Tower Petite tour...
- Page 4 Assembled Parts Éléments à assembler 3 mm x 15 mm Washer Head Screw – 2 Vis à rondelle 3 mm x 15 mm – 2 3 mm x 15 mm Screw – 7 Vis de 3 mm x 15 mm – 7 Shown Actual Size Tighten and loosen all screws with a Phillips screwdriver.
- Page 5 Assembly Assemblage Wall Tall Tower Grande tour • Fit the pegs on the tall tower into the • Insérer les tiges de la grande tour dans openings in the wall. les ouvertures du mur. Short Tower Petite tour • Fit the pegs on the short tower into the •...
- Page 6 Assembly Assemblage Clock Tower Tabs Languettes de la tour de l’horloge Floor Slots Fentes du plancher • Fit the tabs on the clock tower into the • Insérer les languettes de la tour de slots in the floor. Push to “snap” in place. l’horloge dans les fentes du plancher.
- Page 7 Assembly Assemblage Clock Tower Assembly Tab Cheville Cheville Languette de la tour de l’horloge Wall Assembly Tige Tige SIDE VIEW VUE DE CÔTÉ • Carefully lay the wall assembly on a flat • Déposer soigneusement le mur sur une surface with the inside facing up. surface plane, le côté...
- Page 8 Assembly Assemblage 2 Washer Head Screws 2 vis à rondelle • Align the slots in the clock tower assem- • Aligner les fentes de la tour de l’horloge bly with the holes in the posts in the wall sur les trous des tiges du mur. Insérer assembly.
- Page 9 Assembly Assemblage Screws Screws Screws • Insert two 3 mm x 15 mm screws into the • Insérer deux vis de 3 mm x 15 mm dans balcony and two 3 mm x 15 mm screws le balcon et deux vis de 3 mm x 15 mm into the wall assembly and tighten.
- Page 10 Assembly Assemblage 2 Flags 2 drapeaux • Place the flags on top of the towers. • Placer les drapeaux en haut des tours.
- Page 11 Decoration Décoration • Apposer les autocollants exactement • Place the labels exactly as shown in the illustrations. comme indiqué dans les illustrations. • Pour de meilleurs résultats, éviter de • For best results, avoid repositioning a repositionner un autocollant une fois label once it has been applied.
- Page 12 Decoration Décoration Back Arrière Table Table...
-
Page 13: Battery Installation
Battery Installation Installation des piles 1,5V x 3 “AAA” (LR03) • Locate the battery compartment door on • Repérer le compartiment des piles situé sous le jouet. the bottom of the toy. • Desserrer les vis du couvercle du • Loosen the screw in the battery compartment door with a Phillips compartiment des piles avec un tournevis screwdriver and remove the door. - Page 14 Battery Safety Information Mises en garde au sujet des piles In exceptional circumstances, batteries Lors de circonstances exceptionnelles, may leak fluids that can cause a chemical des substances liquides peuvent s’écouler burn injury or ruin your product. To avoid des piles et provoquer des brûlures battery leakage: chimiques ou endommager le produit.
- Page 15 Timeless stories…Endless play! Des contes éternels… des heures de plaisir! • Slide the power/volume switch to ON with • Place a figure on the dance floor and low volume or ON with high volume press down. The castle recognizes and .


Need help?
Do you have a question about the X6031 and is the answer not in the manual?
Questions and answers