Table of Contents
Advertisement
Available languages
Available languages
Quick Links
BURGsmart PROTECT
Contact
2032
BURG-WÄCHTER KG
Altenhofer Weg 15
58300 Wetter
Germany
www.burg.biz
www.burg.biz
BURGsmart PROTECT
Contact
2032
Bedienungs- und
de
Montageanleitung
Assembly and
en
user manuals
www.burg.biz
Language
Deutsch
English
und
, sowie weitere Sprachen auf:
www.burg.biz
and
, as well as further languages at:
www.burg.biz
2
Contact 2032
3
21
Advertisement
Table of Contents

Related Manuals for Burg Wächter BURGsmart PROTECT Contact 2032


Summary of Contents for Burg Wächter BURGsmart PROTECT Contact 2032
- Page 1 Language Deutsch English BURGsmart PROTECT BURGsmart PROTECT , sowie weitere Sprachen auf: www.burg.biz Contact Contact 2032 2032 , as well as further languages at: www.burg.biz Bedienungs- und BURG-WÄCHTER KG Montageanleitung Altenhofer Weg 15 58300 Wetter Assembly and Germany user manuals www.burg.biz Contact 2032 www.burg.biz...
- Page 2 Aufbau / Manuel Lieferumfang 1x CONTACT 2032 2x LR6 AA 1.5V Batterien 1x Set Distanzstücke mit Kleberücken 1x Anleitung Ausstattungsmerkmale • WLAN Tür- / Fenster Kontakt Sensor • Inkl. Distanzstücke zum Pfalzausgleich für Fenster- und Türrahmen • Betrieb mit 2x AA LR6 1.5V Batterien, bis zu 3 Jahre Standby •...
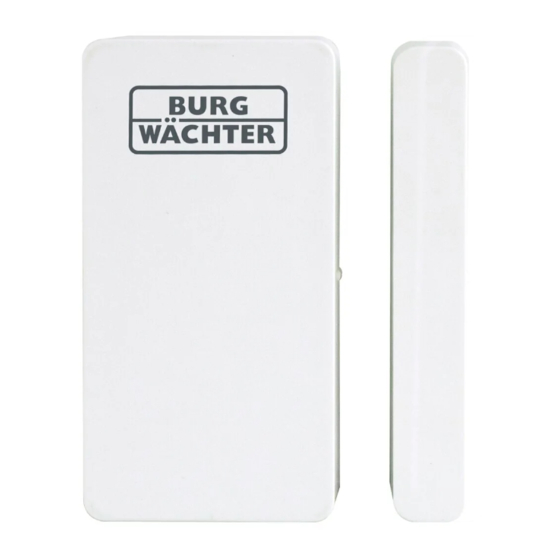
- Page 3 Produktbeschreibung Der BURGsmart PROTECT Contact 2032 ist zur Detektion und Zustandsmeldung von geöffneten/ geschlossenen Türen, Fenstern, Schränken usw. im Innenraum vorgesehen. Dank des energiesparenden Prozessors können bis zu 4000 Schaltzyklen oder bis zu 3 Jahre vergehen, ehe die Batterie gewechselt werden müssen.
- Page 4 Sicherheitshinweise Lesen Sie die Anleitung sorgfältig durch. Für durch Nichtbeachten entstandene Schäden wird keine Haftung übernommen. Das Gerät ist ausschließlich für den in der Anleitung genannten Zweck einzusetzen. Das Gerät soll Sie im Ernstfall informieren und alarmierend wirken! Bitte prüfen Sie die Funktion und den Batteriestand des Gerätes daher regelmäßig, um für den hoffentlich nicht eintreffenden Ernstfall gewappnet zu sein.
-
Page 5: Status Led
Zeichnung 44,5 44,5 13,2 21,1 13,2 21,1 44,5 13,2 21,1 21,1 21,1 Status LED LED Anzeige Beschreibung Einmal blinken Änderung des Öffnungszustands Schnelles anhaltendes Gerät befindet sich im blinken Einrichtungsmodus Langsames anhaltendes Gerät befindet sich blinken im Access Point (AP) Einrichtungsmodus 4 Sek. -
Page 6: Technische Daten
Technische Daten Betriebsspannung =3V DC Batterietyp 2x AA LR6 1.5V Max. Reichweite innen < 20m* Frequenzband 2,4 GHz Unterstützte IEEE 802.11b/g/n Funkstandards Max. Sendeleistung <10 mW 10dBm Arbeitstemperatur- 0°C – 40°C bereich Luftfeuchtigkeit 20% – 85% Gewicht 150g Abmessungen Sensor: 84 mm x 44,5 mm x 21,1 mm Magnet: 84 mm x 13,2 mm x 21,1 mm... - Page 7 Installationshinweise 1. Prüfen Sie die WLAN Signalstärke am Installationsort mit Ihrem Smartphone. Die Empfangsqualität sollte mindestens zwei Teilstriche betragen, um eine Alarmierung gewährleisten zu können. 2. Entfernen Sie zuerst den Batteriestreifen aus dem Sensor. 3. Richten Sie den Sensor vor der Installation in der App ein und testen Sie die Funktion.
- Page 8 Richtiger Installationsort Das Funksignal des Sensors ist stark von den Umgebungsbedingungen abhängig. Metallgegenstände, Betondecken, Wände, metallische Leitungen verringern die Reichweite. Störungen können auch durch andere Funksender und Umgebungseinflüsse auftreten. Prüfen Sie nach der Installation die Funktion. Max. 1 cm WICHTIGER HINWEIS: Der Melder kann nur so gut funktionieren, wie es die Installation und Umgebung zulässt.
-
Page 9: Rücksetzen Auf Werkseinstellung
Batteriewechsel / Reset-Taste Zum Wechseln der Batterie oder Betätigen der Reset-Taste muss der Sensor geöffnet werden. Schieben Sie hierzu den oberen Teil des Sensorgehäuses mit leichtem Druck nach oben, sodass dieser sich von der Bodenplatte löst. Rücksetzen auf Werkseinstellung Um das Gerät auf die Werkseinstellungen zurückzusetzen, halten Sie den Reset Button für mindestens 10 Sekunden gedrückt. - Page 10 Einrichtung über die BURG-WÄCHTER Key App Die folgende Einrichtung beschreibt den Stand der App zum Zeitpunkt der Produktion. Der neueste Stand der App kann abweichen. Bitte laden Sie die aktuelle Version des Handbuchs von unserer Webseite herunter: Datenschutz-Hinweis: Die aktuelle Datenschutzerklärung finden Sie in der App und auf unserer Homepage unter: https://www.burg.biz/datenschutz/...
- Page 11 Einrichtung Die Einrichtung der aufgelisteten BURGsmart PROTECT Komponenten erfolgt identisch. • BURGsmart PROTECT Contact 2032 • BURGsmart PROTECT Motion 2012 • BURGsmart PROTECT Noise 2162 • BURGsmart PROTECT Water 2062 Contact 2032 Deutsch | 13...
- Page 12 Einrichtung 1. Verbinden Sie Ihr Smartphone mit dem 2.4 GHz WLAN, in welches Sie den Sensor einbinden möchten. Deaktivieren Sie das 5 GHz WLAN für die Dauer der Einrichtung. 2. Entfernen Sie die Batteriesicherung. Die LED des Systems beginnt schnell zu blinken (~3x pro Sekunde).
- Page 13 3. Starten Sie die Key App und wählen Sie im Menü BURGsmart PROTECT. 4. Im erscheinenden Menü „Register and Settings“ auswählen. 5. In der Geräteliste „+“ Button betätigen. 6. Geben Sie eine individuelle Gerätebe- zeichnung und Ihr WLAN Passwort ein, um die Anmeldung durchzuführen. Der Anmeldevorgang kann bis zu eine Minute andauern.
- Page 14 Bedienung über die BURG-WÄCHTER Key App Im Menüpunkt BURGsmart PROTECT/ Show State können durch Auswählen der gewünschten Komponente aus der Geräteliste die gerätespezifischen Einstellungen aufgerufen und angepasst werden. Wählen Sie den Contact 2032 Sensor aus, um in die sensorspezifische Ansicht zu gelangen. Durch Antippen der Buttons gelangen Sie in die jeweiligen Untermenüs und können sich z.B.
- Page 15 Haftungsbeschränkung Das vorliegende Gerät entspricht dem aktuellen technischen Standard zum Zeitpunkt der Herstellung. Wir sind fortlaufend bestrebt, unsere Ware auf dem neuesten Stand der Technik und Handbücher Up to Date zu halten. Daher behalten wir uns vor, technische Änderungen und Überarbeitung/Anpassung der Anleitung, ohne vorherige Ankündigung vorzunehmen.
-
Page 16: Gewährleistung
Gewährleistung BURG-WÄCHTER Produkte werden entsprechend den zum Produktionszeitpunkt geltenden technischen Standards und unter Einhaltung unserer Qualitätsstandards produziert. Die Gewährleistung beinhaltet ausschließlich Mängel, welche nachweislich auf Herstellungs- oder Materialfehler zum Verkaufszeitpunkt zurückzuführen sind. Die Gewährleistung endet nach zwei Jahren, weitere Ansprüche sind ausgeschlossen. Festgestellte Mängel müssen schriftlich inkl. - Page 17 Weiteres BURGsmart PROTECT Zubehör Gerne möchten wir Ihnen folgende Produkte zur Kombination mit diesem Artikel empfehlen: Noise 2162 Motion 2012 PIR Bewegungsmelder mit Temperatur- Alarmsirene mit Temperatur- und Luftfreuchtigkeitsmessunger und Luftfreuchtigkeitsmessung Plug 2142 Water 2162 Wasser-Einbruchmelder Steckdosen-Einsatz BURGcam LIGHT 3010 Weißlicht LED Leuchte mit Tag- / Nachtkamera und Gegensprechfunktion für...
- Page 18 Hinweise zur Geräteentsorgung Wir weisen darauf hin, dass derart gekennzeichnete Elektro- und Elektronikgeräte sowie Batterien nicht über den Hausmüll, sondern getrennt bzw. separat gesammelt werden müssen. Bitte erkundigen Sie sich bei der zuständigen Stelle in Ihrer Stadt / Gemeinde nach Sammelstellen für Batterien und Elektromüll. Hiermit erklärt die BURG-WÄCHTER KG, dass das vorliegende Gerät der Richtlinie 2014/53/EU (EMC), 2011/65/EU (RoHS), 2014/53/EU (RED) entspricht.
- Page 19 Aufbau / Manuel The line marks must be next to each other with less than 1 cm of distance between them. Use the spacer strips of different thicknesses to compensate for height differences. Contact 2032 English | 21...
-
Page 20: Equipment Features
Scope of delivery 1x CONTACT 2032 2x LR6 AA 1.5V batteries 1x set of spacers with adhesive backing 1x instructions Equipment features • Wi-Fi door/window contact sensor • Including spaces to compensate for any gap on window and door frames •... -
Page 21: Product Description
Product description The BURGsmart PROTECT Contact 2032 is intended for the detection and status signalling of open/closed doors, windows, cabinets, etc. indoors. Thanks to the energy-saving processor, up to 4000 switching cycles or up to 3 years can pass before the battery needs to be changed. -
Page 22: Safety Guidelines
Safety guidelines Please read the instructions carefully. No liability can be assumed for any damage which may result from failure to follow instructions. The device must be used only for the purpose specified in the instructions. The device should work effectively as an alarm in an emergency! Please check regularly that the device is in working order and that the batteries are charged. - Page 23 Drawing 44,5 44,5 13,2 21,1 13,2 21,1 44.5 13.2 21.1 21,1 21,1 Status LED LED display Description Single flash A change of the opening state Rapid, persistent Device is in setup mode flashing Slow, persistent flashing Device is in Access Point (AP) setup mode 4 seconds on / Reset...
-
Page 24: Technical Details
Technical details Battery voltage =3V DC Type of battery 2x AA LR6 1.5V Max. range inside < 20 m* Frequency band 2.4 GHz Supported radio IEEE 802.11b/g/n standards Max. output <10 mW 10 dBm Operating temperature 0°C – 40°C range Air humidity 20 % –... -
Page 25: Installation Instructions
Installation instructions 1. Check the strength of the Wi-Fi signal at the site of installation with your smartphone. The reception quality should be at least two graduation marks to be able to guarantee an alarm. 2. First remove the battery strap from the sensor. - Page 26 Correct location for installation The radio signal of the sensor is highly dependent on environmental conditions. Metal objects, concrete surfaces, walls and metallic wiring can also reduce the range. The device can also be impaired by other radio signals and environmental influences.
- Page 27 Replacing the battery / reset button To change the battery or press the reset button, the sensor must be opened. To do this, push the upper part of the sensor housing upwards with slight pressure so that it detaches from the base plate.
- Page 28 Setup via the BURG-WÄCHTER Key App The following setup describes the state of the app at the time of production. The latest version of the app may differ. Please download the latest version of the manual from our website: Privacy notice: You can find the current privacy policy in the app and on our homepage at: https://www.burg.biz/datenschutz/ secuentry-apps/...
- Page 29 Setup The setup of the listed BURGsmart PROTECT components is identical. • BURGsmart PROTECT Contact 2032 • BURGsmart PROTECT Motion 2012 • BURGsmart PROTECT Noise 2162 • BURGsmart PROTECT Water 2062 Contact 2032 English | 31...
- Page 30 Setup 1. Connect your smartphone with the 2.4 GHz Wi-Fi connection in which you would like to integrate the sensor. Disable the 5 GHz Wi-Fi for the duration of the setup. 2. Remove the battery fuse. The LED of the LED of the system starts flashing quickly (~3x per second).
- Page 31 3. Start the key app and select BURGsmart PROTECT in the menu. 4. Select “Register and Settings” in the menu that appears. 5. Press the “+” button in the device list. 6. Enter an individual device name and your Wi-Fi password to carry out the registration. The registration process can take up to one minute.
- Page 32 Operation via the BURG-WÄCHTER Key App In the BURGsmart PROTECT/Show State menu item, the device-specific settings can be opened and adjusted by selecting the desired component from the device list. Select the Contact 2032 sensor to access the sensor-specific view. Tapping the buttons takes you to the respective submenus and you can, for example, view the alarm history and the opening status or change...
-
Page 33: Limitation Of Liability
Limitation of liability This device complies with the technical standards in force at the time of production. We constantly strive to ensure that our products are in line with the latest technologically and that our handbooks are kept up to date. We therefore reserve the right to undertake technical changes and modifications or adjustments to the instructions without providing advance notice. -
Page 34: Warranty
Warranty BURG-WÄCHTER products comply with the technical standards in force at the time of production and adhere to our own quality standards. The guarantee only covers defects which can be proved to have resulted from production or material defects at the time of purchase. - Page 35 More BURGsmart PROTECT accessories We would like to recommend the following products for combination with this device: Noise 2162 Motion 2012 PIR motion detector with temperature Alarm siren with temperature and air humidity sensor and air humidity sensor Plug 2142 Water 2162 Water detector Wall socket adapter...
-
Page 36: Legal Notice
Notes on disposing of the device Please be aware that electrical and electronic equipment and batteries marked in this way must not be disposed of with household waste but collected separately. Please obtain information on the collecting points for electrical waste from the responsible authority of your city/municipality. - Page 37 Notes Contact 2032 English | 39...
- Page 38 Notes 40 | English CONTACT 2032...
Need help?
Do you have a question about the BURGsmart PROTECT Contact 2032 and is the answer not in the manual?
Questions and answers