Table of Contents
Advertisement
Advertisement
Table of Contents

Related Manuals for Sanyo DC-MX30


Summary of Contents for Sanyo DC-MX30
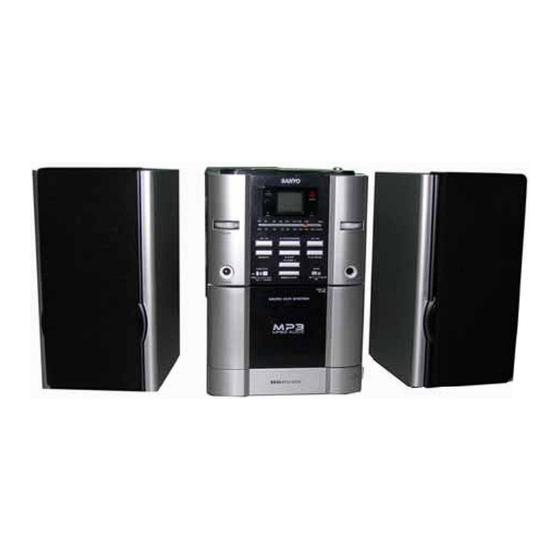
- Page 1 DC-MX30 INSTRUCTION MANUAL MICRO Hi-Fi SYSTEM...
-
Page 2: Table Of Contents
CONTENTS PAGE IMPORTANT SAFETY INFORMATION……………………………………………………………………2 HEARING IMPORTANT NOTE……………………………………………………………………………..3 LOCATION OF CONTROLS AND FUNCTIONS………………………………………………………….4 SETTING UP AND CONNECTING THE UNIT…………………………………………………………….6 BASIC OPERATION………………………………………………………………………………………….7 RADIO OPERATION………………………………………………………...……………………………….7 COMPACT DISC OPERATION…………………………………….….……………………………………8 MP3/WMA DISC OPERATION……………………………………………………………………...………9 CASSETTE RECORDER OPERATION.……………………………………………...…………………11 MAINTENANCE……………………………………………………………………………………………..12 TROUBLESHOOTING GUIDE…………………………………………………………………………….14 SPECIFICATIONS…………………………………………………………………………………………..15... -
Page 3: Important Safety Information
IMPORTANT SAFETY INFORMATION Keep this unit away from dripping or splashing water. Ensure that no objects filled with liquids, such as vases, are placed on or near the unit. To completely disconnect the power input, the mains plug of apparatus shall be disconnected from the mains. -
Page 4: Hearing Important Note
You can see the label on the back of the unit LASER SAFETY This unit employs a laser. Only qualified service personnel should attempt repair. You can see this WARNING: RISK OF INVISIBLE LASER RADIATION WHEN CD LID IS label in the CD OPEN OR INTERLOCKS FALL. -
Page 5: Location Of Controls And Functions
LOCATION OF CONTROLS AND FUNCTIONS MAIN UNIT Power Indicator REMOTE Sensor BASSXPANDER Indicator DISPLAY FM ST Indicator +VOLUME- Control TUNING Control Dial Pointer PLAY / PAUSE Button Button Button 12. PROGRAM Button 13. PLAY MODE Button STOP Button 15. FOLDER+ Button 16. - Page 6 Remote Control PLAY/ PAUSE Button STOP Button F.F. Button F.R Button 39. PLAY MODE Button 40. FOLDER - Button 41. FOLDER + Button 42. PROGRAM Note: The distance between the remote control and the main unit should not be too far. The remote control should be within approx.
-
Page 7: Setting Up And Connecting The Unit
SETTING UP AND CONNECTING THE UNIT Replacing battery of the remote control Squeeze the notched tab A while pulling the battery door latch B out to take the battery holder out. Insert a “CR2025” 3V lithium battery. Make sure the polarity (the + and –... -
Page 8: Basic Operation
Unwind the AC Power Cord completely. Insert the plug into any convenient AC outlet. As soon as the unit has been connected with the mains voltage, parts of the unit are in operation due to the standby function. Turn off the unit completely before pulling the mains plug out of the AC outlet. -
Page 9: Compact Disc Operation
Notes when operating the CD disc Only press the CD Door Open button to open the CD door. To remove the disc, hold it by the edges and remove from the holder. Loading Compact Disc Slide the FUNCTION selector to CD position. Press the OPEN button to open the CD door. -
Page 10: Mp3/Wma Disc Operation
If necessary, press the PLAY/PAUSE select a track to play from the disc. Note: In program mode, Random playback can’t be selected. Clear play mode Press the PLAY MODE button fourth times to cancel the play mode and normal playback will resume. - Page 11 Because of none-standardized format definition / production of MP3 / CD, playback quality & performance are not guaranteed. SANYO is not responsible for the playability of MP3 in any case due to recording conditions such as PC performance, writing software, media ability and etc.
-
Page 12: Cassette Recorder Operation
CASSETTE RECORDER OPERATION Checking the Cassette Make sure that the cassette tape has on slack before inserting it to cassette compartment. If the tape slacks, the trouble may result when you play the tape, use a pencil as shown to take up slack on one of the reels.(Refer to figure on the right.) PLAYBACK Slide FUNCTION selector to TAPE-OFF. -
Page 13: Maintenance
Insert a blank tape with exposed side downwards and full spool to the left side into cassette compartment and close cassette door. Press the RECORD button to start recording Press the STOP/EJECT button to stop recording and the CD will be change to pause mode, press the RECORD button to continue recording. - Page 14 Compact Discs Maintenance Treat the disc carefully. Handle the disc only by its edge. Never allow your fingers to contact with the shiny, unprinted side of the disc. Do not attach adhesive tape, stickers etc., to the disc label. Clean the disc periodically with a soft, lint-free, dry cloth. Never use detergents or adhesive cleaners to clean the disc.
-
Page 15: Troubleshooting Guide
If you experience any difficulties in operating this unit, please take the time to read the hints and tips shown in the troubleshooting guide below. Symptom Radio No signal from the Radio Noise or sound distorted on AM or FM broadcasting FM STEREO indicator does not light AM or FM no sound... -
Page 16: Specifications
Radio Section Frequency Range -------------------------------- CD / MP3 Player Playback System -------------------------------- Memory Program -------------------------------- Laser Output (Maximum) ------------------------ Wavelength--------------------------------- Cassette Recorder Recording System ------------------------------- Erase System ------------------------------------- Audio Section Power Output ------------------------------------- Headphone Impedance ------------------------ Speaker System Impedance------------------------------------------ Driver ----------------------------------------------- General Power Source ------------------------------------ Power Consumption ----------------------------... - Page 17 CODE NO: 172-G401043010-OSY SANYO Electric Co., Ltd. Made in China...
Need help?
Do you have a question about the DC-MX30 and is the answer not in the manual?
Questions and answers