
Subscribe to Our Youtube Channel
Related Manuals for Rohde & Schwarz TSME6


Summary of Contents for Rohde & Schwarz TSME6
- Page 1 ® R&S TSME6 Ultracompact Drive Test Scanner Getting Started (a00K2) 4900002702 Version 06...
- Page 2 Rohde & Schwarz GmbH & Co. KG. Trade names are trademarks of the owners. ® 4900.0027.02 | Version 06 | R&S TSME6 Throughout this manual, products from Rohde & Schwarz are indicated without the ® symbol , e.g. ® R&S TSME6 is indicated as R&S TSME6.
-
Page 3: Table Of Contents
3.2 Setting up indoors................11 3.3 Considerations for test setup............14 3.4 Connecting to power................15 3.5 Putting into operation.................17 3.6 Connecting R&S TSME6 with R&S TSMA6/6B-BP......28 3.7 Switching on or off R&S TSME6............28 4 Instrument tour..............30 4.1 Front panel view..................30 4.2 Rear panel view...................31... - Page 4 ® Contents R&S TSME6 6.3 Disposal....................36 7 Contacting customer support..........38 Index..................39 Getting Started 4900.0027.02 ─ 06...
-
Page 5: Safety And Regulatory Information
Intended use The R&S TSME6 is intended for efficient drive and walk tests with a maximum degree of freedom and upgradeability. With the ultracompact design and multi- band and multitechnology support for simultaneous measurements, the scanner fulfills all requirements for a state-of-the-art measurement tool. - Page 6 ® Safety and regulatory information R&S TSME6 Safety instructions Never open the casing of the product. Only service personnel authorized by Rohde & Schwarz are allowed to repair the product. If any part of the product is damaged or broken, stop using the product. Contact Rohde & Schwarz customer service at http://www.customersupport.rohde-schwarz.com.
- Page 7 ® Safety and regulatory information R&S TSME6 Safety instructions Handling batteries safely The product contains exchangeable or built-in lithium polymer or lithium ion cells or batteries. The use of the word battery in the following always means all types. Only the battery contents are potentially hazardous. As long as a battery is undamaged and the seals remain intact, there is no danger.
-
Page 8: Labels On The Product
● Product and environment safety, see Table 1-1 ● Identification of the product, see bottom label of the R&S TSME6. Table 1-1: Labels regarding product and environment safety Labeling in line with EN 50419 for disposal of electrical and electronic equipment after the product has come to the end of its service life. -
Page 9: Welcome
2.1.1 Getting started manual Introduces the R&S TSME6 and describes how to set up and start working with the product. Includes basic operations, typical measurement examples, and gen- eral information, e.g. safety instructions, etc. A printed version is delivered with the instrument. -
Page 10: Key Features
2.1.5 Brochures The brochure provides an overview of the instrument and deals with the specific characteristics and contains the technical specifications of the R&S TSME6. It also lists the firmware applications and their order numbers, and optional acces- sories. www.rohde-schwarz.com/brochure-datasheet/tsmx 2.1.6... -
Page 11: Preparing For Use
Setting up indoors 3.2.1 Placing the product on a bench top If you want to set up the R&S TSME6 on a benchtop or prepare the R&S TSME6 for mobile use, proceed as follows. To place the product on a bench top 1. - Page 12 Rackmounting The R&S TSME6 can be installed in a 19 inch rack using a rack adapter kit for one to four R&S TSME6s (option R&S TSME6-Z2, R&S no. 4900.1030.02). The installation instructions are part of the adapter kit.
- Page 13 ® Preparing for use R&S TSME6 Setting up indoors Figure 3-2: Rackmounting of 2 R&S TSME6s (reverse orientation of R&S TSME6s) Figure 3-3: Rackmounting of 4 R&S TSME6s Getting Started 4900.0027.02 ─ 06...
-
Page 14: Considerations For Test Setup
® Preparing for use R&S TSME6 Considerations for test setup Figure 3-4: Rackmounting of 4 R&S TSME6s (reverse orientation of R&S TSME6s) Considerations for test setup Electromagnetic interference (EMI) can affect the measurement results. To suppress electromagnetic radiation during operation: ●... -
Page 15: Connecting To Power
Connecting to a vehicle DC power supply via cigarette lighter The R&S TSME6 is delivered with a 12 V DC power supply cable with a cigarette lighter connector. 1. Check the rating of the vehicle DC power supply. It has to be 12 V. - Page 16 ● R&S TSME-Z1 has an output power of about 30 W, sufficient for up to two products, one TSME6 and one TSME30/44DC. ● R&S TSMA6-Z1 has an output power of 105 W and is suitable for multiple TSMx products.
-
Page 17: Putting Into Operation
3.5.1 Setting up the LAN connection to the host PC To control and run measurements with the R&S TSME6, a host PC or notebook with LAN interface is required. The R&S TSME6 is equipped with a network interface and can be connected to an Ethernet LAN (local area network). - Page 18 Note: This is the IP address set by the R&S TSME Device Manager. ● "Static IP" operating mode IP address is manually set on PC and a static IP used on R&S TSME6 if the following conditions are met: – PC LAN interface is configured to use a user-defined IP address, not in range 169.254.0.1 –...
- Page 19 These ranges are important to prevent conflicts with IP addresses dynami- cally generated for the PC LAN interfaces. Note: If a R&S TSME6 is shared with 2 or more PCs, and its stored IP address is not in the defined range above, this may lead in rare cases to IP conflicts.
- Page 20 IP address 192.168.0.1 to the host PC or configure the host PC to obtain an IP address automatically ("Auto-IP"). To control the R&S TSME6 from the host PC, the LAN interface of the host PC must be configured as follows: 1.
- Page 21 ® Preparing for use R&S TSME6 Putting into operation 7. Select the "Properties" button. 8. Configure the following TCP/IP settings: a) Use any "Auto-IP" operating mode. Select "Obtain an IP address automatically". Getting Started 4900.0027.02 ─ 06...
- Page 22 ® Preparing for use R&S TSME6 Putting into operation b) Use "Static IP" operating mode. ● Select "Use the following IP address" (fixed IP, no dynamic range) ● IP address: 192.168.0.1 (recommended) ● Subnet mask: 255.255.255.0 ● No Default Gateway 9.
- Page 23 See R&S TSME6 User Manual, chapter Troubleshooting for help. 10. Close the control panel, reboot the host PC and check if the connection can be established successfully (see R&S TSME6 User Manual, chapter Trouble- shooting for help). If your firewall is active, make sure that it is configured as described in Chapter 3.5.1.2, "Firewall...
- Page 24 ● Multicast IP address for TSME: 224.17.4.76 ● Multicast Address for TSME6: 239.192.1.7 ● IP-Address of TSME6 has to be allowed as well: 192.168.0.2 (example) Note: In "full auto-IP" operating mode, the IP address generated for the R&S TSME6 has to be allowed.
- Page 25 Chapter 3.4, "Connecting to power", on page 15. ● Connect the PC or notebook LAN port to the LAN port of the R&S TSME6 as described in Chapter 3.5.1, "Setting up the LAN connection to the host PC", on page 17.
- Page 26 ● Connect the GPS antenna to the GPS ANT connector of the instrument for time synchronization to a GPS signal (3 V, max. 25 mA for active antenna). To ensure time synchronization of the R&S TSME6, it is required to have a GPS antenna connected.
- Page 27 32) of the R&S TSME6. 1. Mount the R&S TSME6 device fixed to the frame of a car. 2. Power on the R&S TSME6 device. 3. Activate "Dead Reckoning" in the used software (for details, refer to R&S ROMES, R&S NESTOR or R&S ViCom documentation).
-
Page 28: Connecting R&S Tsme6 With R&S Tsma6/6B-Bp
To shut down the device When you press the On/Off key on the rear panel of the R&S TSME6 to switch it off, the instrument changes to standby mode. In standby mode, the program exe- cution on the instrument is stopped immediately, but the instrument is still under power connection. - Page 29 Preparing for use R&S TSME6 Switching on or off R&S TSME6 Do not switch off the instrument while a connection to the application soft- ware is being established, otherwise the application might not be able to close properly. As a result, the software could crash and must be shut down from the Windows Task Manager.
-
Page 30: Instrument Tour
Front panel view Instrument tour Front panel view The front panel of the R&S TSME6 does not provide any connectors or control elements for operation. Behind the right side of the rear panel (with the ventilation openings), 4 status LEDs are located. These LEDs display the following states: ●... -
Page 31: Rear Panel View
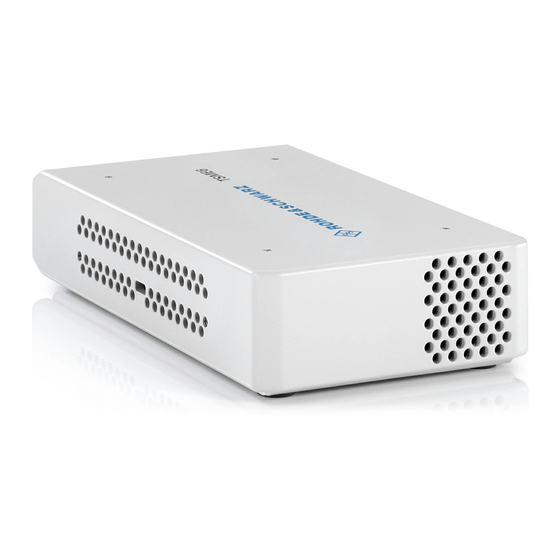
Rear panel view Figure 4-1: R&S TSME6 - front panel Rear panel view This figure shows the rear panel view of the R&S TSME6. The individual ele- ments are described in more detail in the subsequent sections. Getting Started 4900.0027.02 ─ 06... - Page 32 ® Instrument tour R&S TSME6 Rear panel view Figure 4-2: R&S TSME6 - rear panel "Power ON/OFF" on page 32 "GPS antenna connector" on page 32 "AUX connector" on page 33 "LAN connector with LEDs" on page 33 "DC IN connector"...
- Page 33 The LAN connector provides a high-speed Gigabit Ethernet interface with an RJ 45 connector using IPv4. It is required to connect the R&S TSME6 to a host PC. The LEDs on the LAN connector indicate the status of the connection to the host PC.
- Page 34 FGPA configuration in progress (2 Hz) green FPGA configuration finished, preparing for start (up to 5 seconds during startup) green R&S TSME6 ready, not connected green green connected green, blinking green measuring rapidly green, blinking green...
-
Page 35: Transporting
® Transporting R&S TSME6 Transporting Packing Use the original packaging material. It consists of antistatic wrap for electrostatic protection and packing material designed for the product. If you do not have the original packaging, use similar materials that provide the same level of protection. -
Page 36: Maintenance, Storage And Disposal
® Maintenance, storage and disposal R&S TSME6 Disposal Maintenance, storage and disposal The product does not require regular maintenance. It only requires occasional cleaning. It is however advisable to check the nominal data from time to time. Cleaning Do not use any liquids for cleaning. Cleaning agents, solvents (thinners, acetone), acids and bases can damage the front panel labeling, plastic parts and display. - Page 37 ® Maintenance, storage and disposal R&S TSME6 Disposal fulfills its obligation to take back and dispose of electrical and electronic waste. Contact your local service representative to dispose of the product. Disposing batteries A product that contains a battery cannot be disposed of in the normal household waste after it has come to the end of its service life.
- Page 38 ® Contacting customer support R&S TSME6 Contacting customer support Technical support – where and when you need it For quick, expert help with any Rohde & Schwarz product, contact our customer support center. A team of highly qualified engineers provides support and works with you to find a solution to your query on any aspect of the operation, program- ming or applications of Rohde &...
- Page 39 ® Index R&S TSME6 Index Application cards ........10 Safety instructions ......... 5, 9 Application notes ........10 Standby mode ......... 28 Brochures ..........10 Tutorials ............. 9 Casing User manual ..........9 Labels ........... 8 Connectors LAN ............. 33 White papers ...........
Need help?
Do you have a question about the TSME6 and is the answer not in the manual?
Questions and answers