
Related Manuals for Irritrol Rain Dial Plus 6


Summary of Contents for Irritrol Rain Dial Plus 6
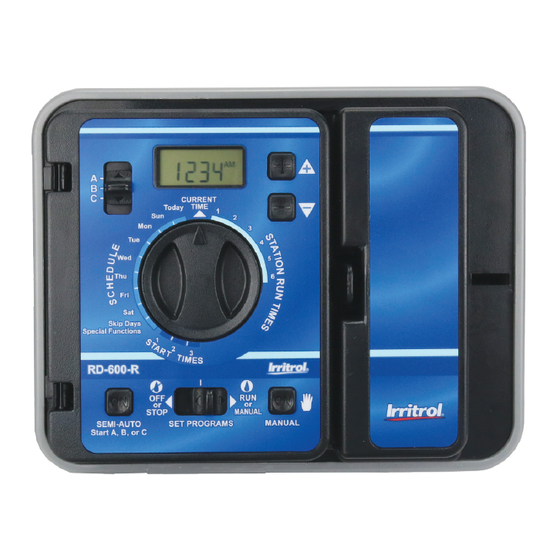
- Page 1 Irrigation System Controller User’s Guide Rain Dial Plus 6, 9 and 12 Station Indoor and Outdoor Models Español - Página 25 Français - Page 49...
-
Page 2: Table Of Contents
Table of Contents Contents & Specifications Remote Control Compatibility Getting the Most Out of Your Rain Dial Plus 4–5 Installations 6–9 “Anywhere Programming” Memory Protection Rain Sensor Operation What the Buttons and Switches Do 11–12 How the Dial Works Getting Started Automatic Operation, Step By Step 14–15 Special Features: Clear Program, Select Language... -
Page 3: Contents & Specifications
Contents & Specifications Congratulations. You have purchased the easiest-to-use landscape control system available today. Please read through this guide before you begin installing or programming your Rain Dial Plus controller. Your Rain Dial Plus package includes: Outdoor models Indoor models •... -
Page 4: Getting The Most Out Of Your Rain Dial Plus
Getting the Most Out of Your Rain Dial Plus • The Basic Cycle: Once a program is given a start time, it causes all valves with run times entered to operate in sequence beginning with the lowest numbered valve. When all valves having run times are finished, the cycle is over. •... - Page 5 Getting the Most Out of Your Rain Dial Plus Here is a Sample Watering Plan Program Start Time Valve # Location Run Time Schedule (#1) 5:00 a.m. 1 Front Lawn 15 min. Back yard 15 min. Side Yard 10 min. (#1) 3:00 p.m.
-
Page 6: Installations
Installations Installing the Battery Figure 1 CAUTION: To avoid hazards from improper battery usage, always replace the battery with the same or equivalent alkaline battery type. Properly dispose of used batteries as recommended by the battery manufacturer. Open the controller door. Carefully swing the control module open by pulling it from the right edge. - Page 7 Installations continued... Connecting an Earth Ground CAUTION: The built-in circuit Figure 3 Rain Sensor protection in all Rain Dial Plus Switch controllers must have an earth 2-Amp Fuse ground path to help protect the controller from power surges. This is especially important in lightning- prone areas.
- Page 8 Installations continued... Connecting a Master Valve or Pump Start Relay To use a master valve which operates throughout the watering cycle, connect one solenoid lead to “MV” terminal and the remaining lead to the “VC” terminal. Refer to Figure 3 on page 7. Note: The master valve must be equipped with a 24 V a.c., 0.2 A, 5VA solenoid.
- Page 9 Installations continued... Note: Electrical conduit and adapters are not supplied with the controller but are generally required. Check local building codes and install conduit accordingly. WARNING: All electrical components must meet applicable national and local electrical codes including installation by qualified personnel. On outdoor models, these codes may require an external junction box mounted on the transformer 1/2"...
-
Page 10: Anywhere Programming
“Anywhere Programming” The Rain Dial Plus control module is designed to be easily removed for complete programming in a more convenient setting, or for servicing. The battery keeps the current time and allows changes to settings until the module is connected to AC power. To remove the module, pull forward Figure 5 on the right edge of the module as if... -
Page 11: What The Buttons And Switches Do
What the Buttons and Switches Do Program Selector Display Switch + and – Buttons Dial Function Switch Manual Next Start Button Button Program Selector Switch • Schedule up to three, totally independent PROGRAMS to allow custom watering of your landscaping. Note: Regardless of Program Selector position, all three programs (A, B and C) always run in Automatic operation. - Page 12 What the Buttons and Switches Do continued... Semi-Auto/Manual Button • Manually starts an automatic program (semi-auto) or an individual valve. Next Button • Advances to the next option for setting time/date and special features. Dial • Sets changes or checks program information. +/- (Plus/Minus) Buttons •...
-
Page 13: How The Dial Works
How the Dial Works Schedule • Determines the days watering occurs by selecting: • Specific days of the week (e.g. watering every MON and THU), • Skip Days intervals, e.g., watering every 4 days, or • ODD-numbered or EVN-(even) numbered days of the month. Start Times •... -
Page 14: Getting Started
Getting Started Set the Time • Turn the Dial to Time • Press the +/- Buttons to set the current time (note AM or PM). Set the Date • Turn the Dial to Date. • Press the +/- Buttons to change the year shown on the display. •... - Page 15 Automatic Operation, Step by Step continued... Press the Next Button to select the current DAY (1–15) of the Skip Days schedule. This determines when the watering interval will begin. At the day change (midnight), the DAY number automatically increases by one. When the SKIP and DAY numbers are equal, watering will occur at the first scheduled start time.
-
Page 16: Special Features: Clear Program, Select Language
Special Features CLEAR A PROGRAM Note: The Clear Program process restores the default program. All scheduled watering days, start times and valve run times are eliminated. Water Budget becomes 100%. 1. Set the Function Switch to Set Program 2 Turn the Dial to Spl Func. When the display shows “CLR”, the controller is ready to clear the program. -
Page 17: Review Your Program
Review Your Program 1.Set the Function Switch to Off 2.Set the Program Selector to the program you wish to review, A, B, or C. 3.Turn the Dial to the setting you wish to check. This features reviews settings but cannot change them. 4.Return the Dial to the Time position when your review is complete. -
Page 18: Stop Watering
Stop Watering 1. Set the Function Switch to OFF. After 3 seconds, all watering stops . • Suspends but does not erase programs. • The display flashes “OFF”. Note: Watering remains off in this Function Switch position. Set the Function Switch to RUN to resume all automatic schedules. - Page 19 What the Display Means continued... Daily Schedule Each day of the week dial position displays either “ON” or “OFF”. If “SKIP DAYS” has been selected, the word “SKIP” followed by three dashes is displayed for each of the 7 watering day settings. If an odd or even schedule is in effect, “ODD”...
- Page 20 What the Display Means continued... Information Displayed When Operating With the Function Switch set to RUN, each Dial setting shows: No Program Running – Automatic Mode The current time with a flashing colon (:) is displayed. If the entire display is flashing, the controller has just been plugged in or there has been a power outage and no battery power was available during the outage.
-
Page 21: Documenting Your Watering Schedules
What the Display Means continued... Water Budget Adjustments – The run time you set is multiplied by the Water Budget value. If this exceeds 9.9 hours, the display shows one, two, or three bars before the program letter to advise that more time, up to 11.8 hours, is scheduled but cannot be displayed. -
Page 22: Troubleshooting The System
Troubleshooting the System PROBLEM POSSIBLE CAUSE CORRECTION Some valves don’t Solenoid defective Test & replace as required. operate Loose wire connection. Secure wire connections. Check for continuity. No valves operate Function Switch Off Set switch to Run Solenoid defective. Test & replace as required. Loose wire connection. -
Page 23: Replacing The Fuse
Troubleshooting the System continued... PROBLEM POSSIBLE CAUSE CORRECTION Waters on wrong days Weekly or “SKIP DAYS” See pages 14 & 15. schedule incorrectly set. “Current Time” is Power outage occurred Replace battery and wrong and flashing with no battery or weak reset “Current Time.”... -
Page 24: Electromagnetic Compatibility
004-000-00345-4. International: This is a CISPR 22 Class B product. Technical Assistance U.S A. Australia Irritrol Systems Irritrol Systems PTY Ltd. P.O. Box 489 53 Howards Road Riverside, CA 92502 Beverley, SA 5009 Australia Phone: (800) 634-8873 or (909) 785-3623...
Need help?
Do you have a question about the Rain Dial Plus 6 and is the answer not in the manual?
Questions and answers