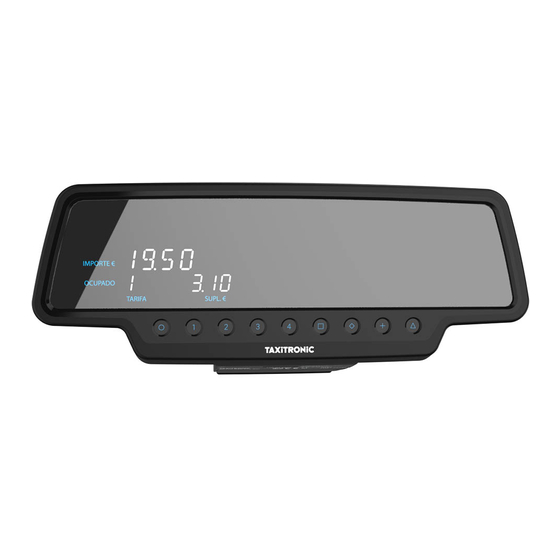
Flexitron TAXITRONIC TX80 SKYGLASS Installation Manual
Hide thumbs
Also See for TAXITRONIC TX80 SKYGLASS:
- User manual (22 pages) ,
- Installation manual (14 pages) ,
- User manual (21 pages)
Summary of Contents for Flexitron TAXITRONIC TX80 SKYGLASS
- Page 1 INSTALLATION MANUAL TX80 SKYGLASS INTERFACOM, S.A.U. 02/03/2022 INSTALLATION MANUAL TAXITRONIC TX80 SKYGLASS TAXITRONIC TX80 URBA Inst TX80_EN.doc 08/03/2017...
-
Page 2: Table Of Contents
INSTALLATION MANUAL TX80 SKYGLASS INTERFACOM, S.A.U. GENERAL INDEX INTRODUCTION ........................3 SAM INSTALLATION ......................3 MOUNTING ........................... 3 3.2. MOUNTING AND LOCATION OF TX80 ................3 3.2. MOUNTING AND LOCATION OF SKYGLASS ..............4 3.2. MOUNTING AND LOCATION OF URBA ................4 SEALING .......................... -
Page 3: Introduction
INTERFACOM, S.A.U. 1. INTRODUCTION This document describes the installation and parameterization of the taximeter TAXITRONIC TX80 SKYGLASS and URBA. 2. SAM INSTALLATION To introduce SAM card the device must be opened, then introduce SAM card in the Skyglass groove as there is shown on the plane. -
Page 4: Mounting And Location Of Skyglass
INSTALLATION MANUAL TX80 SKYGLASS INTERFACOM, S.A.U. For this reason, it is necessary to take care of the orientation, with the stickers looking to the outside. Standard positions are inside the glovebox or under the vehicle board. Some vehicle brands have standardized the TX80 position. It is necessary that the identification sticker and the seals are easy to inspect. - Page 5 INSTALLATION MANUAL TX80 SKYGLASS INTERFACOM, S.A.U. ELECTRICAL INSTALLATION To access the TX80 connectors it is necessary to open the Connector cover: Take out the screw that seals the cover Connect each cable into its connector Pass each cable through its retention Break the holes in the top cover in order the cables can pass Clos the device Screw the cover...
- Page 6 INSTALLATION MANUAL TX80 SKYGLASS INTERFACOM, S.A.U. • (4) Serial Port (IR80) Contact number Function + 12 V + 5 V RS232 levels +- 12V TTTL levels 0 - 5 V Ground • (5) CAN Accessories Contact number Color Function + 12V + 5V Yellow CAN H...
- Page 7 INSTALLATION MANUAL TX80 SKYGLASS INTERFACOM, S.A.U. TX80 CONNECTORS IPL80 CONNECTION IPL80 must be connected to CAN accessories (5) connector. The rooflight cables must be connected to IPL80 as the rooflight installation diagram shows. Inst TX80_EN.doc...
- Page 8 INSTALLATION MANUAL TX80 SKYGLASS INTERFACOM, S.A.U. COMPLETE INSTALLATION Inst TX80_EN.doc...
- Page 9 INSTALLATION MANUAL TX80 SKYGLASS INTERFACOM, S.A.U. PARALLEL ROOFLIGHT INSTALLATION Inst TX80_EN.doc...
- Page 10 INSTALLATION MANUAL TX80 SKYGLASS INTERFACOM, S.A.U. INSTALLATION IN A VEHICLE WITH CIA447 PROTOCOL Inst TX80_EN.doc...
- Page 11 INSTALLATION MANUAL TX80 SKYGLASS INTERFACOM, S.A.U. COMPLETE INSTALLATION Inst TX80_EN.doc...
- Page 12 INSTALLATION MANUAL TX80 SKYGLASS INTERFACOM, S.A.U. PARALLEL ROOFLIGHT INSTALLATION Inst TX80_EN.doc...
-
Page 13: Sealing
INSTALLATION MANUAL TX80 SKYGLASS INTERFACOM, S.A.U. RECOMMENDATIONS FOR THE ELECTRICAL INSTALLATION Disconnect the positive terminal on the battery until the whole electrical installation is completed. Any manipulation of the taximeter or of the external lights must be done while the taximeter is disconnected from the power supply Always take the positive and negative directly from the battery to avoid false contacts and to obtain a more filtered power supply. -
Page 14: Skyglass Sealing
INSTALLATION MANUAL TX80 SKYGLASS INTERFACOM, S.A.U. 5.2. SKYGLASS SEALING Seal Nº1: Seals the taximeter box, preventing access to the electronic board. Seal Nº2: seals the cover of the tariff charger connector. The taximeter kit is normally ready for sealing with a sticker seal. In some regions it is necessary to have a cable seal. -
Page 15: Technical Characteristics
INSTALLATION MANUAL TX80 SKYGLASS INTERFACOM, S.A.U. 6. TECHNICAL CHARACTERISTICS The general technical characteristics of TX80 SKYGLASS are as follows: Power supply voltage Nominal 12 V 30 V 10 V Maximum consumption without external lights 1500 mA Maximum consumption taximeter off 6 mA 2.5 A Maximum consumption inside battery... -
Page 16: Impulse Generator
INSTALLATION MANUAL TX80 SKYGLASS INTERFACOM, S.A.U. 7. IMPULSE GENERATOR 7.1. INTRODUCTION For the vehicles with mechanical speedometer, you have to use a pulse generator that is managed by the taximeter. The pulse generator is inserted in the cable of the speedometer and converts the mechanical movement of this cable in an electrical signal, which is amplified and filtered by the taximeter. - Page 17 INSTALLATION MANUAL TX80 SKYGLASS INTERFACOM, S.A.U. Finally, all pieces are assembled by screwing together the two fixing rings considering that the separating space indicated by (8) must be sufficient. Inst TX80_EN.doc...
-
Page 18: Cable Connection, Cover Closing And Pulse Generator Support
INSTALLATION MANUAL TX80 SKYGLASS INTERFACOM, S.A.U. 7.2.2. CABLE CONNECTION, COVER CLOSING AND PULSE GENERATOR SUPPORT To connect the pulse generator cable, it is necessary to open the pulse generator cover (item 1) after taking the closing screw out and moving the cover in the right direction indicated by the arrow. -
Page 19: Sealing (Drawing 11)
INSTALLATION MANUAL TX80 SKYGLASS INTERFACOM, S.A.U. 7.3. SEALING (Drawing 11) The pulse generator installation can also be sealed, as shown in the image. 7.4. TECHNICAL CHARACTERISTICS The main technical characteristics of the pulse generator are: Sensor type: Hall effect cell Number of pulses / revolution: 4 with double impulses train Feeding voltage:... -
Page 20: Error Messages
INSTALLATION MANUAL TX80 SKYGLASS INTERFACOM, S.A.U. 9. ERROR MESSAGES The possible error messages that may appear on the display are listed below. E-2 Roof lights failure: The roof lights are not correctly connected or some of its bulb lights doesn’t work. This error is shown if it is enabled in the tariff. E-5 The taximeter is out of the configured revision period: This message is shown when the taximeter is out of the configured revision period.


