D-Box G5 User Manual
Hide thumbs
Also See for G5:
- Quick start manual (2 pages) ,
- Quick start manual (5 pages) ,
- User manual (39 pages)
Table of Contents
Advertisement
Quick Links
Advertisement
Table of Contents
Troubleshooting

Related Manuals for D-Box G5


Summary of Contents for D-Box G5
- Page 1 231-914-0001-EN5 May 2022 231-914-0001-EN5...
-
Page 2: Table Of Contents
TABLE OF CONTENTS IMPORTANT SAFETY INSTRUCTIONS ......................4 G5 HAPTIC SYSTEM SPECIFICATION: ......................6 INTRODUCTION ............................. 8 INSTALLATION GUIDELINES ........................9 Minimum Spacing Between Actuators ................... 9 Haptic Actuator Alignment ......................9 Haptic Actuator Straightness ....................... 10 Level Surface ..........................10 Weight Distribution ........................ - Page 3 10.3 Update Software and Firmware ....................26 10.4 Troubleshooting with Haptic Bridge LEDs Status ..............27 10.5 Troubleshooting with D-BOX System Monitor ................. 29 10.6 Faults and Corrective Actions ....................33 10.7 Troubleshooting Software Issues (Game Center) ..............37 231-914-0001-EN5...
-
Page 4: Important Safety Instructions
D-BOX Technologies Inc. is in no way responsible for any damages of any kind arising from the use of this D- BOX Haptic System and the owners and/or users of this D-BOX Haptic System hereby agree not to hold D- BOX Technologies Inc. - Page 5 Thank you for purchasing a D-BOX Haptic System, the most immersive experience for the simulation and game markets. We strongly advise that you read these guidelines before assembling and using your Haptic System. Do not hesitate to contact us if you have questions.
-
Page 6: G5 Haptic System Specification
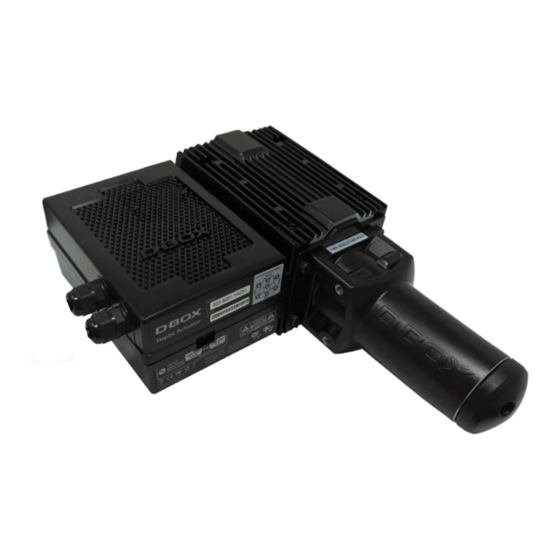
G5 HAPTIC SYSTEM SPECIFICATION: 231-914-0001-EN5... - Page 7 G5 HAPTIC BRIDGE G5 HAPTIC ACTUATOR 231-914-0001-EN5...
-
Page 8: Introduction
With voltage selection included in every individual actuator, you can seamlessly go between 110V and 230V with the flick of a switch... Making G5 a much more flexible solution! -
Page 9: Installation Guidelines
2. INSTALLATION GUIDELINES When integrating your D-BOX G5 Haptic System, please comply with the following guidelines. This will help you to keep your product healthy and optimize its service lifetime! If you must deviate from the guidelines, please contact us to make sure you are still using the system as prescribed. -
Page 10: Haptic Actuator Straightness
2.5 Weight Distribution Each actuator has a 250-lb maximal payload. When integrating the Haptic System on a platform, D-BOX recommends balancing the center of gravity (CG) of the platform to ensure each haptic actuator supports an equal load. -
Page 11: Voltage Selection
Set all haptic actuators to meet your region power voltage by using the switch selector located underneath the casing: NOTE: The Haptic Bridge has a universal power supply supplied by D-BOX 4. ACTUATOR ENDING INSTALLATION G5 haptic actuators come native with a non captive ending. -
Page 12: Captive Ending Installation
4.2 Captive Ending Installation The D-BOX captive ending is a 2 components assembly: Ball Joint Spacer Retainer Spacer Retainer: The spacer-retainer allows specific movements of the ball joint on both X and Y axes, thus eliminating any constraints during the movement of the platform. There are 2 models of spacer retainer. - Page 13 2 or 3 haptic actuators: Captive endings must be installed off-centre from the spacer retainers as follow: OUTWARD OUTWARD OUTWARD 4 haptic actuators: Captive endings must be installed in the middle of the spacer retainers as follow: INSTALLATION: Never operate the haptic actuator without the ending installed. This may lead to irreparable damages to the actuator: 231-914-0001-EN5...
- Page 14 STEP 1: Remove the existing non captive ending by removing the two (2) screws using a 4mm Allen Key: STEP 2: Attach the piston adaptor with the four (4) provided screws. Apply some blue thread locker on the screw threads then torque them to a value of 100 lbf·in (11 Nm) using a 4mm Allen Key: 231-914-0001-EN5...
- Page 15 STEP 3: Apply some blue thread locker on the ball joint threads then tighten with a torque of 130 lbf·in (15 Nm) using a 5/8’’ (16 mm) wrench: STEP 4: Install the ball joint assembly to the spacer retainer then attach it to the floor (or sub frame) with adequate hardware (anchors, bolts, etc.).
-
Page 16: Brackets Installation
5. BRACKETS INSTALLATION D-BOX offers two (2) types of brackets: ‘’L’’ and ‘’U’’ shaped. The screws to attach your haptic actuator to the bracket are included with your haptic actuator however, you need to provide the screws to mount the brackets to your platform. -
Page 17: Connect Your Haptic System
6. CONNECT YOUR HAPTIC SYSTEM This section shows the wiring diagrams for all configurations from one (1) to four (4) haptic actuators. Haptic actuators must be connected in a specific order to ensure a proper system operation. Make sure to choose the appropriate diagram corresponding to your setup. -
Page 18: 3-Actuator Configurations
6.3 3-Actuator Configurations 6.4 2-Actuator Configurations 231-914-0001-EN5... -
Page 19: 1-Actuator Configurations
Here is the link to access the D-BOX Connect website: https://connect.d-box.com/ Follow onscreen instructions. 8. SOFTWARE INSTALLATION There are two (2) D-BOX software packages to be installed on your computer: D-BOX Motion Core and System Configurator (section 8.2). Both are available at: https://www.d-box.com/en/software-downloads 8.1 D-BOX Motion Core D-BOX Motion Core: The D-BOX Motion Core Includes the system’s driver in addition to a complete... -
Page 20: D-Box Control Panel
8.1.1 D-BOX Control Panel The D-BOX Control Panel allows you to configure system parameters such as the global intensity level, Motion /Vibration Balance, and latency. There is also a test button to verify that your system is working properly. Default Mode: Park: Haptic actuators will go to its lower position when there are no haptic activities (minimum electrical consumption). -
Page 21: D-Box Game Center
8.1.2 D-BOX Game Center The D-BOX Game Center is an application to install the D-BOX compatible games haptic codes as well as manage and edit games profile. NOTE: A D-BOX Connect account is required to install and receive software & haptic code updates. -
Page 22: D-Box Adaptive Gaming Configurator
This application allows you to build, modify and activate your Adaptive Gaming profiles. You can also share your favorite profiles with other D-BOX users! 8.1.4 D-BOX HaptiSync App This application allows you to setup and control your D-BOX Coded Video experience using audio synchronization. A valid HaptiSync subscription is required (see section 7): 231-914-0001-EN5... -
Page 23: D-Box System Monitor
This application displays live health and operational data on all connected Haptic Systems. This is useful to troubleshoot your system: 8.1.6 D-BOX Stimuli Presenter The D-BOX Stimuli Presenter is a keyboard-controlled application to send basic signals to the haptic system, helpful for tests and demos: 231-914-0001-EN5... -
Page 24: D-Box System Configurator
You are now ready to live an immersive haptic experience! TROUBLESHOOTING This section contains step by step instruction to troubleshoot your G5 Haptic System. Do not hesitate to contact the D-BOX Technical Support team if you need help! 10.1 Initial Troubleshooting Steps STEP 1: Verify that all haptic actuators are set to your country’s voltage (See section 3). -
Page 25: Reinitiate Your Haptic System
System Monitor and check if there are some alarms. See section 10.6 for faults and corrective actions. STEP 7: Reset all the global settings in the D-BOX Control Panel. Use the circular arrows on the right side of the parameters to set them back to default:... -
Page 26: Update Software And Firmware
Editor. From the Motion Profile Editor tab, reset all the motion settings: 10.3 Update Software and Firmware STEP 9: Make sure you have the latest version of the D-BOX Motion Core installed on your PC. Right click on the D-BOX Motion Core Updater icon and select Check for updates: STEP 10: Make sure you have configured (if not done by your dealer) your G5 Haptic System using the latest version of the D-BOX System Configurator software (see section 8.2). -
Page 27: Troubleshooting With Haptic Bridge Leds Status
10.4 Troubleshooting with Haptic Bridge LEDs Status This section covers the status LED located on your Haptic Bridge: FRONT PANEL HAPTIC LINK USB LED HAPTIC LINK USB LED STATUS SOLUTION Haptic Bridge is Make sure the power supply is properly not powered. - Page 28 System fault or haptic power voltage (see section 3). actuator has not been set to the right voltage. Use the D-BOX System Monitor software to see the Actuator fault system fault (see section 10.5). Blinking amber & Make sure the actuator power and RJ45 cables are green properly connected.
-
Page 29: Troubleshooting With D-Box System Monitor
10.5 Troubleshooting with D-BOX System Monitor The D-BOX System Monitor software is the right tool to test and diagnose your Haptic System. The software is accessible from your Windows program menu under the D-BOX Utilities: Once the window appears, click on the Haptic Bridge device then a new window will open:... - Page 30 Overview Tab: The Overview tab displays a live overall 3D view of your D-BOX haptic platform and its current state. Haptic actuators in a pending or alarm state are displayed as yellow or red: The Identify Actuators button is used to...
- Page 31 Nodes description Motion Player: The D-BOX Motion Player connected to your computer. Platform Index: Position of the platform connected to your D-BOX motion player, starting at 0. ACM Index: Haptic Bridge and actuators of your platform. Alarm: Any alarm currently active (see section 10.6 for details).
- Page 32 Details Tab: The Details tab contains the complete technical details of the current D-BOX Haptic System and can be used to further evaluate the status of each individual component (Motion Player, Haptic Bridge, and actuators): 231-914-0001-EN5...
-
Page 33: Faults And Corrective Actions
10.6 Faults and Corrective Actions Here is a list of the faults you can find in the D-BOX Monitor System (Details tab) including the corrective actions: FAULTS CAUSES CORRECTIVE ACTIONS Make sure the power and network cables are securely plugged in. - Page 34 FAULTS CAUSES CORRECTIVE ACTIONS Do a visual inspection to make sure nothing is blocking the travel of the haptic actuator. This is a Hard fault. The Power off the haptic system, support your platform faulty actuator is to gain access to the actuator piston and pull it out Critical Actuator immediately deactivated of its body slowly until the entire piston is out of the...
- Page 35 (room temperature). sensor. If error persists, replace/repair the faulty actuator. When the position of the Verify that you are running a D-BOX certified haptic haptic actuator is over its code. Call D-BOX for validation if necessary. limits. Should never occur in normal operation Perform a test using the D-BOX Control Panel.
- Page 36 FAULTS CAUSES CORRECTIVE ACTIONS This fault is always Soft Actuator Fault accompanied with another Check solution for the main fault. fault (called ‘’main fault’’). This fault is always Temporary Actuator accompanied with another Check solution for the main fault. Fault fault (called ‘’main fault’’).
-
Page 37: Troubleshooting Software Issues (Game Center)
D-BOX Haptic Bridge device (on the left) then press the ‘’Test’’ button: STEP 3: If you are using a game (not your own simulation software), open D-BOX Game Center and make sure the game is well installed. If the game is not found (as shown below), the default path used by the... - Page 38 STEP 4: Reinstall the haptic code or update to the latest version. If the game is present in the Game Center, you can check the version of the motion code directly from there: If the game is not on the Game Center, you can check the version here: Go to C:\ProgramData\D- BOX\Gaming\LiveMotion\[GAME NAME]\dbxlive32-64.dll.
- Page 39 Haptic Code status ‘’disable’’ Configuration is incorrect. game then select automatically start with game. Uninstall all version of the game and D-BOX software. Reinstall game, start the game, play once Haptic Code not working / There was a problem during and exit.
Need help?
Do you have a question about the G5 and is the answer not in the manual?
Questions and answers