Table of Contents
Advertisement
Quick Links
Advertisement
Table of Contents

Subscribe to Our Youtube Channel
Related Manuals for Franklin Wireless RG1000


Summary of Contents for Franklin Wireless RG1000
- Page 1 5G Mobile Hotspot, RG1000 User Manual...
-
Page 2: Table Of Contents
Contents Getting Started ................................ 1 Overview .......................................... 2 System Requirements ................................2 Components ........................................ 3 Device Display........................................ 4 Battery Management .................................... 5 Using Your RG1000 .............................. 6 Accessing the Network .................................... 7 Using Your RG1000 for the First Time .............................. 7 System Requirements ................................7 Installing the SIM Card ................................7 Charging the Battery .................................. 7 Connecting to Your RG1000 .................................. 8 Wi-Fi Name (SSID) and Password ............................8 Connecting to the Internet . - Page 3 Body-Worn Operation ................................35 Safety Hazards ...................................... 3 6 Glossary ..................................38 Glossary.......................................... 3 9...
-
Page 4: Getting Started
Getting Started Overview Components Device Display Battery Management... -
Page 5: Overview
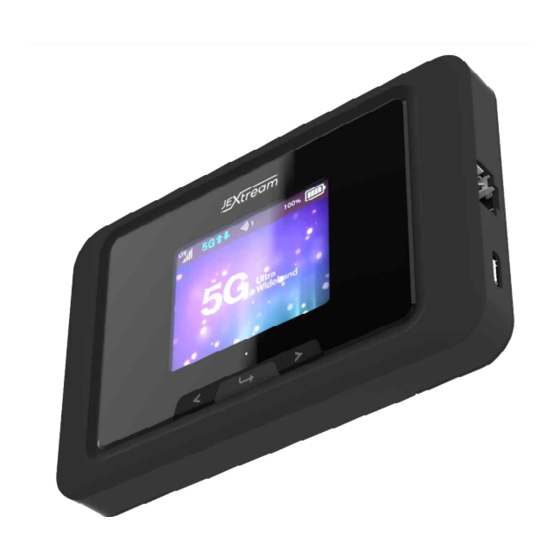
Thank you for choosing 5G Mobile Hotspot, RG1000! Having RG1000 at your fingertips will allow you to access the latest 5G and LTE networks for faster uploads and downloads. You can also connect up to 20 Wi-Fi capable devices to the Internet at once - laptops, tablets, eReaders, Smartphones and more. -
Page 6: Components
Components 1. Power button – Turn on/off RG1000. Button Operation Operations Actions Turn On Press and hold the button until “Welcome” message appears. Turn Off Press and hold the button until “Goodbye” message appears. Display When the display is off, the first quick press of the button Wake-Up wakes up the display. -
Page 7: Device Display
Device Display Status icon bar Icons Status Shows network signal strength. Shows network type the device is connected to. Appears when the device is on roaming network. Appears when data is being transferred between the mobile network and your mobile hotspot. Shows the number of connected devices. -
Page 8: Battery Management
You can change device settings on Wi-Fi, display, network. Device Information displays Battery Management Your RG1000 is equipped with a replaceable and rechargeable battery. It works from its charged battery alone, or when the device is plugged into a power source. Note: Please do not attempt to open or disassemble your hotspot and the battery pack. -
Page 9: Using Your Rg1000
Using Your RG1000 Accessing the Network Using Your RG1000 for the First Time Connecting to Your RG1000 Using Your RG1000 After Setup is Complete... -
Page 10: Accessing The Network
Do not bend or scratch your SIM card. Avoid exposing your SIM card to static electricity, water, or dirt. Whenever you insert or remove the SIM card, ensure your RG1000 is powered off and is not connected to any power source. Never use tools, knives, keys, or any type of object to force the door open or to remove the SIM card. -
Page 11: Connecting To Your Rg1000
RG1000. Then find your RG1000’s Wi-Fi name. Click Connect and enter the Password when prompted. NOTE: The last four characters of your Wi-Fi Name is unique for your RG1000. You can change the Wi-Fi Name of your own. See “Settings”. -
Page 12: Using Your Rg1000 After Setup Is Complete
Using Your RG1000 after Setup is Complete Mobile Hotspot to share connections You can use your RG1000 as a wireless mobile hotspot to connect to a total of 20 Wi-Fi capable devices to the mobile broadband network. Updating Your RG1000 software New software is updated automatically in the following scenarios. -
Page 13: Rg1000 Settings
RG1000 Settings Managing Your Mobile Hotspot Web Admin Home Messages Settings About Support... -
Page 14: Managing Your Mobile Hotspot
Access the RG1000 Mobile Hotspot Web Admin page You can access your Mobile Hotspot device information using an internet browse. Access RG1000 Mobile Hotspot Web Admin page via internet browsers. Connect your Wi-Fi capable device to the RG1000. Open a web browser on your connected device and open the Web Admin home page Click Login and enter the password. -
Page 15: Web Admin Home
Web Admin Home The Web Admin page allows you to quickly access all menu options for your RG1000. · Messages Settings · About · Support · Check status of network connection and data usage on the Home page. Disconnect: Click Disconnect to disconnect the Internet. -
Page 16: Messages
Messages Messages page displays SMS messages sent to you by Wireless Carrier. You can see the message contents by pressing the Messages menu on your Web Admin home page. To delete a selected message, click the trash bin icon to the right of the message date and timeline. - Page 17 Multi SSID: Select ON if you like to set up a separate guest Wi-Fi network. Your RG1000 will broadcast two Wi-Fi Names. Guest Wi-Fi: If ON is selected for Multi SSID, Guest Wi-Fi menu will appear. You can change Guest Wi-Fi settings.
- Page 18 You can choose Wi-Fi Band depends on your preference. NOTE: if you connect WLAN printer to your RG1000, Privacy Separator should be OFF to send file from your PC to the printer SSID Stealth: If ON is selected, the Wi-Fi name will not be broadcasted. You need to manually enter the Wi-Fi name and connect.
- Page 19 Inactive time: if there is no Wi-Fi connection for inactive time settings, the device goes to sleep mode to save battery power. NOTE: Default Inactive Time is 10 minutes. If the RG1000 is inactive for more than 10 minutes, it is required to press the power button to connect to Wi-Fi.
- Page 20 Press Block on the device your want to block connection. 2. The device blocked will be listed on the Blocked Devices. The blocked devices will not be allowed to connect to your RG1000. 3. To unlock the device, press Unblock.
-
Page 21: Mobile Network
- Connection Mode: Select network type to connect to. - Connection Type: Select connection type between your host devices and RG1000. Wi-Fi + USB Connect / Wi-Fi Only / USB Only - Time of Day Access: You can set the time span per day to allow data connection. - Page 22 To add a new APN, follow the steps below: 1. Click Add to access the following page. 1. Enter the related parameters as described in the following table. Parameters Description Name Type the profile name. Username Username is used to obtain authentication from the ISP when the connection is established.
- Page 23 Enter the SIM PIN and press Save Changes to save your settings. The SIM Status will be changed to Enabled. Once the SIM PIN Lock is enabled, you need to enter SIM PIN to connect to the mobile broadband network each time you power on your RG1000. NOTE: If you enter the wrong SIM PIN three times, your SIM will be disabled permanently until you enter the PUK code from your service provider.
- Page 24 Advanced Advanced Mobile Network Settings should only be used as directed by your provider’s Customer Service personnel. Certain advanced options will reset your device's connections and programming and will require reactivation. - Factory Reset: Click Factory Reset to reset the modem to the factory default value. - Factory Reset Button: Select Disable to prevent the device from performing the factory rest by pressing the factory reset button underneath the battery cover.
-
Page 25: Device
Device Preferences - Device Display Timeout: Select a timeout time from the drop-down list. Your RG1000 display turns off after this timeout period if there is no menu button action to save battery power. - LED Enable: If ON is selected, the Power Indicator light under the display will blink when the device is on. - Page 26 To change the password: - Current Password: Enter the current password. - New Password: Enter the new password. - Confirm New Password: Enter the new password again. Click Save Changes to save your settings. Software Update You can check current software version or check if there is a new update is available from this page.
-
Page 27: Advanced Router
Backup and Restore To back up your device settings to your computer, follow the steps below: a. Click Back Up Now. b. Click Save on the pop-up window. c. Choose a location on your computer to save the backup file. d. - Page 28 · IP address – The IP address for your Mobile Hotspot Web Admin · Subnet mask – The Subnet mask network setting for your mobile hotspot. The default value 255.255.255.0 is standard for small (class “C”) networks. If you change your LAN IP Address, ensure that you use the correct Subnet mask for the IP address range containing the LAN IP address.
- Page 29 To manually set a Domain Name Server: 1 Click the ON button to enable Manual DNS. 2 Enter the IP address of the first DNS in the DNS 1 IP address field. 3 Enter the IP address of the second DNS in the DNS 2 IP address field. 4 Click Save Changes button.
- Page 30 Firewall IPv4 From the Web UI, click Settings > Advanced Router > Firewall IPv4. You may set up firewall rules to protect your network from virus and malicious activity on the Internet. Firewall Switch – To set up Port Blacklist and Port Forwarding, turn Firewall Switch ON. ·...
- Page 31 2. Press Add to create a line to set up a rule. 3. Enter the name of the rule you want to set up. 4. Enter WAN port number of allowed inbound forward packet. 5. Enter LAN IP address your connected device that is assigned by your mobile hotspot. 6.
-
Page 32: About
About View your device's connection information, firmware information, WWAN information, Wi-Fi details and device information. From the Web UI main screen, click the About tab to view the available information. -
Page 33: Support
Support Obtain support information from the Web UI Support Tab. From the Web UI main screen, click the Support tab to view the available options. -
Page 34: Troubleshooting
Troubleshooting Overview First Steps Common Problems and Solutions... -
Page 35: Overview
This may occur under Battery depletion or overheating from excessive usage for a long time. To restore power, manually press and hold the Power button to turn on your RG1000. If the battery is depleted, charge the battery with the AC charger provided. -
Page 37: Regulatory Information
Regulatory Information Regulatory Statements Safety Hazards... -
Page 38: Regulatory Statements
Regulatory Statements FCC Equipment Authorization ID: XHG-RG1000 This device complies with Part 15 of the FCC Rules. Operation is subject to the following two conditions: (1) this device may not cause harmful interference, and (2) this device must accept any interference received, including interference that may cause undesired operation. - Page 39 Franklin Wireless. Product Certifications and Declaration of Conformity Product certifications and Declarations of conformity documentation may be consulted at Franklin Wireless, 9707 Waples Street, Suite 150, San Diego CA 92121, U.S.A, https://www.fra nklinwireless.com Safety Hazards...
- Page 40 Hearing Devices When some wireless devices are used with certain hearing devices (including hearing aids and cochlear implants) users may detect a noise which may interfere with the effectiveness of the hearing device. Use of Your Device while Operating a Vehicle Please consult the manufacturer of any electronic equipment that has been installed in your vehicle as RF signals may affect electronic systems in motor vehicles.
- Page 41 Glossary...
- Page 42 Glossary Term Definition Long-Term Evolution 802.11(b/g/n/ac) A set of WLAN communication standards in the 2.4GHz frequency band. Bits per second Broadband High capacity, high-speed transmission channel with a wider bandwidth than conventional modem lines. DHCP Dynamic Host Configuration Protocol DHCP Server A server or service with a server that assigns IP addresses.
Need help?
Do you have a question about the RG1000 and is the answer not in the manual?
Questions and answers