Table of Contents
Advertisement
Quick Links
Installation instructions and Instructions for use
These instructions must be read
prior to installation
Folding arm awning AREIA 7040
Operating guidelines
Installation instructions and Instructions for use
Preliminary remarks HELLA
Folding arm awning AREIA 7040
With this HELLA product you have opted for a high-quality product with a most up-to-date
technology that can nevertheless be easily installed and operated. In these instructions we
describe the basic installation, commissioning and use.
For authorized specialist staff
For the consumer (user)
The following symbols will assist you with the installation or use and require a safety-
conscious conduct:
Attention!
This symbol indicates instructions that, if disregarded, can put the user in
danger.
Attention!
This symbol indicates instructions that, if disregarded, can potentially
result in damage to the product.
This symbol indicates instructions for use or helpful information.
This symbol requires you to act.
Attention!
This symbol indicates a risk of injury or danger to life due to an electric
shock.
This symbol indicates parts of the product, for which you will find
important information in these installation instructions.
Subject to technical modifications - Date of Issue April/2022
and use!
Installation instructions and Instructions for use
Table of Contents
Preliminary remarks HELLA Folding arm awning AREIA 7040 ............................................3
General notes.......................................................................................................................4
CE marking...........................................................................................................................5
Safety instructions ................................................................................................................6
Designated use ..................................................................................................................10
Servicing, maintenance and repair .....................................................................................11
Operating guidelines...........................................................................................................14
Before installation ...............................................................................................................17
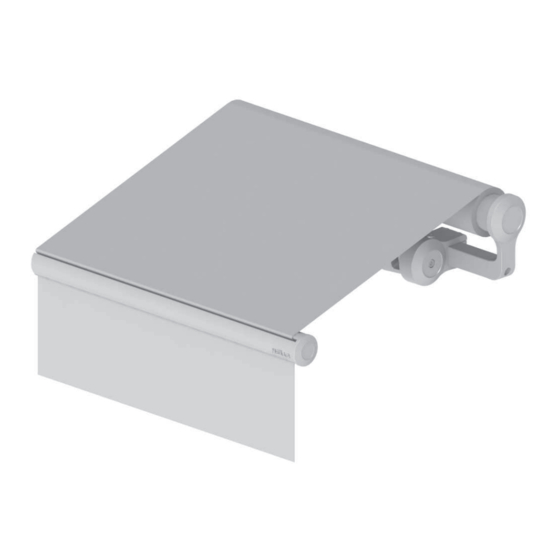
Overview folding arm awning AREIA 7040.........................................................................18
Overview tensioning bracket types .....................................................................................19
Installation of wall / ceiling brackets....................................................................................21
Rafter bracket installation ...................................................................................................24
Installation on concrete.......................................................................................................25
Installation on brickwork .....................................................................................................28
Installation on wood............................................................................................................30
Installation on concrete ceiling face, installation set 7 ........................................................32
Further installation situations, installation set 7 ..................................................................35
Installation of the awning ....................................................................................................37
Adjusting the awning ..........................................................................................................40
Installation linked units .......................................................................................................47
Overview Linking Elements ................................................................................................48
Electric commissioning and overview table power .............................................................53
Activation guidelines for electric drives...............................................................................55
Wiring diagram for motors with switch operation ................................................................56
Wiring diagram for motors with Somfy io ............................................................................57
Wiring diagram for motors with elero radio .........................................................................58
Wiring diagram for motors with ONYX.NODE ....................................................................59
Wiring diagram for motors with ONYX.CONNECTOR........................................................60
Overview LED lighting with remote control .........................................................................62
Replacing a folding arm with integrated LED lighting .........................................................63
Technical data ....................................................................................................................66
Configuration ......................................................................................................................67
Operation............................................................................................................................68
Operating guidelines...........................................................................................................69
Ideal use of the radio signal................................................................................................69
Fault removal......................................................................................................................70
Disposal..............................................................................................................................70
Commissioning/functional check ........................................................................................77
Removal and Disposal........................................................................................................78
Handing over report (for the fitter) ......................................................................................79
Handing over report (for the user) ......................................................................................80
Installation instructions and Instructions for use
General notes
Questions
In case of questions concerning the installation or the use of your product, please
consult your authorized specialist shop.
Spare parts/repairs
Spare parts are available at your HELLA specialist shop. Only spare parts that are
approved by HELLA are allowed to be used.
Warranty/guarantee
Precondition for warranty and guarantee is a correct and regular maintenance of the sun
protection device (at least once a year).
Warranty claims are subject to statutory limitation periods. Service parts are excluded
from the warranty; the same applies for changes in colour and changes in
characteristics caused by UV radiation.
Liability
In case of non-observance of the directions and information given in these instructions
and in case of improper operation or unintended use, the manufacturer shall not accept
any warranty claims concerning any damage to the product. In these cases, the liability
for consequential damage to any parts or persons is ruled out as well.
Legal notes
The graphs and texts of these instructions were carefully prepared. We cannot be held
liable for any errors and their potential consequences! Subject to technical modifications
to the product and to these instructions! These instructions include copyrighted
information. All rights reserved! The listed product or brand names are trademarks of the
respective owners.
3
4
Subject to technical modifications - Date of Issue April/2022
Advertisement
Table of Contents

Related Manuals for Hella AREIA 7040


Summary of Contents for Hella AREIA 7040
-
Page 1: Table Of Contents
Questions In case of questions concerning the installation or the use of your product, please With this HELLA product you have opted for a high-quality product with a most up-to-date consult your authorized specialist shop. technology that can nevertheless be easily installed and operated. In these instructions we describe the basic installation, commissioning and use. -
Page 2: Ce Marking
CE marking Safety instructions The HELLA folding arm awning AREIA 7040 is in compliance with the declaration of These installation instructions refer to prefabricated elements, that (1) for performance according to the Construction Products Regulation; if the unit is operated with... -
Page 3: Designated Use
Installation instructions and Instructions for use Installation instructions and Instructions for use Safety instructions Designated use Winter operation: Sun protection Snow or ice can destroy the unit. Thermal protection The unit may only be operated, if no ice or snow is lying on the cover. Sight screen During this time automatic control devices must be switched to manual operation. -
Page 4: Operating Guidelines
All inspection and maintenance works must be carried out by a together with the crank rod specialised company from HELLA or a HELLA partner. Regularly check into the eyelet. the electrical wires of motor driven units for damage. Check the mechanical parts of your unit for visible damage. -
Page 5: Before Installation
Installation instructions and Instructions for use Installation instructions and Instructions for use Before installation Overview folding arm awning AREIA 7040 Check the product immediately for possible shipping damage and for compliance with the delivery receipt. If parts are missing or damaged, please consult your supplier immediately. -
Page 6: Installation Of Wall / Ceiling Brackets
Installation instructions and Instructions for use Installation instructions and Instructions for use Installation of wall / ceiling brackets Installation of wall / ceiling brackets You specified the number, form and type of brackets on purchasing the awning in accordance with the size, the mounting base, the screw pull-out forces, the mounting material and the wind resistance classes. -
Page 7: Installation On Concrete
Installation instructions and Instructions for use Installation instructions and Instructions for use Installation on concrete Installation on concrete up to 60 mm ETICS Installation of the anchor bolts as per Installation of the anchor rod as per approval ETA-05/0069: approval ETA-12/0258: - Drilled hole preparation ø12 mm - Drilled hole preparation ø14 mm - Observe the anchoring depth and... -
Page 8: Installation On Brickwork
Installation instructions and Instructions for use Installation instructions and Instructions for use Installation on brickwork 60-170 mm ETICS Installation on wood Installation of the anchor rod as per Installation of the attachment: approval ETA-10/0383: - Drilled hole preparation ø9 mm Depending on the type of stone, the - Secure bracket with wood screw injection anchor sleeve must be used! -
Page 9: Installation On Concrete Ceiling Face, Installation Set 7
Installation instructions and Instructions for use Installation instructions and Instructions for use Installation on concrete ceiling face, installation set Installation on concrete ceiling face, installation set Installation of the anchor rod as per Affix the bitumen band on the back approval ETA-12/0258: of the wall bracket type I: - Drilled hole preparation... -
Page 10: Installation Of The Awning
Installation instructions and Instructions for use Installation instructions and Instructions for use Installation of the awning Installation of the awning The articulated arms are under high mechanical stress. The cover The mounting clamp is fixed together with the bracket. prevents a discharge of this potential energy. With linked awnings the articulated arms are ex works protected with an arm fixing device. - Page 11 Installation instructions and Instructions for use Installation instructions and Instructions for use Adjusting the awning Adjusting the awning Inclination adjustment with tilting arm bearing Arm adjustment Ex works your awning is optimally adjusted. To ensure a correct closing of the awning, the folding arms (1) should be in a parallel position to the front rail (2).
-
Page 12: Installation Linked Units
Installation instructions and Instructions for use Installation instructions and Instructions for use Adjusting the awning Adjusting the awning Adjusting the end positions Adjusting the end positions Changing gear end points with Varioplus roller blind with motor drive and remote control awnings with crank handle The roller blind can be raised or lowered by activating a hand-held radio transmitter. - Page 13 Installation instructions and Instructions for use Installation instructions and Instructions for use Overview Linking Elements Overview Linking Elements Ex works the connection The coupling end caps are profile for the front rail and pre-mounted on the rain the coupling of the roller tube shelter profile.
-
Page 14: Electric Commissioning And Overview Table Power
The drives are "splash-proof"; if they are operated in wet spaces, the VDE- the manufacturer or the HELLA installation instructions. guidelines, inter alia VDE 0100/Parts 701, 702, the guidelines of the local It is essential that switches for the awning drive be electrically and electric supply companies and of the TÜV must be observed and fulfilled. -
Page 15: Wiring Diagram For Motors With Somfy Io
Drive system Varioplus Legend For more details concerning the electrical connections, powers, operating instructions and programming, please refer to the enclosed documents of Radio drive Varioplus the manufacturer or the HELLA installation instructions. Junction box L1 N PE Mains No PE available! -
Page 16: Overview Led Lighting With Remote Control
Installation instructions and Instructions for use Installation instructions and Instructions for use Wiring diagram for motors with Overview LED lighting with remote control ONYX.CONNECTOR Hirschmann Hirschmann Hirschmann Hirschmann STAK 3 STAS 3 STAK 3 STAS 3 ONYX.CONNECTOR 1,5mm² 1,5mm² Hirschmann Hirschmann Hirschmann Hirschmann... -
Page 17: Technical Data
The current brightness is reset after the switching on. ONYX.CENTER. Before configuring the ONYX.LED, download HELLA’s free app ONYX from the App Store/Google Play to your smart phone. Groups with different shading and light control devices can be configured freely at the hand-held radio transmitter ONYX.CLICK. -
Page 18: Operating Guidelines
(24 V DC) is situated after the secondary circuit of the supply unit. However, in the event of personal adjustments, the manufacturer HELLA shall assume no liability or warranty. During works on the LED circuit, all LED lighting must be switched off and the entire power supply to the awning should be disconnected. - Page 19 Installation instructions and Instructions for use Installation instructions and Instructions for use Replacing a folding arm with integrated LED Replacing a folding arm with integrated LED lighting lighting Exchange procedure Basic structure of the LED lighting with control module for Somfy io/ONYX 1.
-
Page 20: Commissioning/Functional Check
Dear Customer, Dear Customer, We are glad that you have opted for a HELLA brand product. Our units are fabricated with We are glad that you have opted for a HELLA brand product. Our units are fabricated with greatest care and many years of experience. - Page 21 For questions, wishes and ideas: HELLA Infoline +43/(0)4846/6555-0 HELLA Sonnen- und Wetterschutztechnik GmbH A-9913 Abfaltersbach, No. 125 Phone: +43/(0)4846/6555-0 Fax: +43/(0)4846/6555-134 e-mail: office@hella.info Internet: http://www.hella.info...
Need help?
Do you have a question about the AREIA 7040 and is the answer not in the manual?
Questions and answers