
Subscribe to Our Youtube Channel
Related Manuals for Fife MAXCESS SE-42R


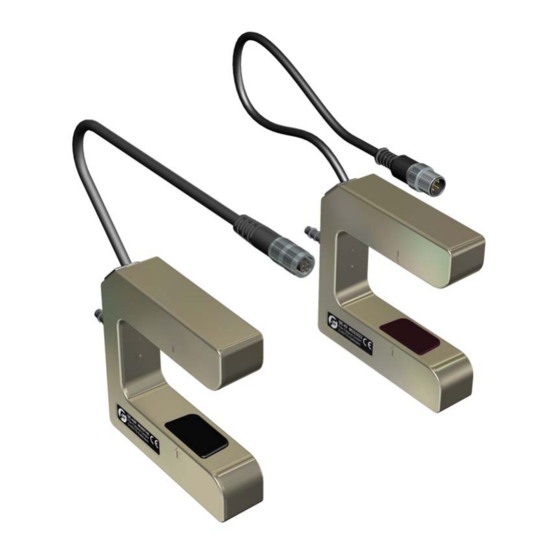
Summary of Contents for Fife MAXCESS SE-42R
- Page 1 FIFE GUIDING SOLUTIONS FIFE SE-42R/SE-42 Infrared Light Sensor Operating Instructions MI 1024 1 C...
-
Page 2: Table Of Contents
CONTENTS INTRODUCTION About these operating instructions ........1-1 Proper usage . -
Page 3: Introduction
INTRODUCTION 1 - 1 1 INTRODUCTION About these operating instructions These Operating Instructions describe the installation, operation and maintenance of the SE-42 sensor and provide important instructions for proper use. These Operating Instructions are directed to both the system construction master as well as the operator who uses the SE-42 sensor in production. -
Page 4: Air Supply( Optional)
1 - 2 INTRODUCTION Note: The housing and protectors of the SE-42 sensor are made of synthetic materials (see page ). Please note the chemical resistance of the synthetic materials in use. Air supply( optional) The SE-42 sensor is also available with air supply. Depending on the type of dirt contamination, this makes it possible to keep the field of view, transmitters and receivers free of large pieces of dirt with a continuous or pulsing flow of air. -
Page 5: Safety Instructions
SAFETY INSTRUCTIONS 2 - 1 2 SAFETY INSTRUCTIONS Important information To ensure safe and problem-free operation of the SE-42 sensor it must be – properly shipped and stored, – properly mounted and placed in operation, – properly used and carefully maintained. Proper operation and careful maintenance will ensure a long service life for the sensor. -
Page 6: Symbols
2 - 2 SAFETY INSTRUCTIONS Symbols Warning/caution - dangerous area Reference to general hazards that may result in bodily injuries or damage to the device. Warning/caution - danger due to crushing Refers to danger of injury caused by crushing Warning/caution - danger due to cutting Refers to danger of injury caused by cutting Additional symbols –... -
Page 7: Maintenance
∙ The parameters specified in Section must be observed. ∙ Only accessory and replacement parts that have been approved by Fife-Tidland GmbH may be used. ∙ No changes must be made to the sensor. ∙ Electrical lines must not be subjected to any mechanical loads Operation ∙... -
Page 8: Installation
3 - 1 INSTALLATION 3 INSTALLATION Transport and storage – The sensor must be secured against slipping during transport. – The sensor must be stored in a cool, dry place. – The sensor must not be stored in the vicinity of powerful magnetic fields. -
Page 9: Dimensions
INSTALLATION 3 - 2 Dimensions SE-42 sensor with Gap width W=49mm – Air supply (optional) – Connection cable (Cable length for SE-42R: 80mm) M8 – M8 threading for sensor bracket type M or MO M5 – M5 threading for sensor bracket type MB Figure 3.1: SE-42 with GW = 49mm SE-42 sensor with Gap width W=100mm... -
Page 10: Mechanical Fastening
3 - 3 INSTALLATION Mechanical fastening Drill holes are available on the housing for fastening the SE-42 figure 3.1 figure 3.2 sensor in place ( ). A large variety of assembly options are possible in connection with the various sensor mountings. Sensor mounts of types M and MO are available for various square bars for assembling the SE-42 sensor with M8 drill holes. - Page 11 INSTALLATION 3 - 4 Sensor with assembly suspension type MB Sensor mounts of type MB are available for assembling the SE-42 sensor on the M5 drill holes. CAUTION: Using long bolts introduces the risk of a short-circuit and destroying the electronics that are located inside the housing. Please note when assembling sensor SE-42 that only the original M5*7 bolts or similar ones should be used.
-
Page 12: Electrical Connection
3 - 5 INSTALLATION Electrical connection CAUTION: The sensor could be damaged. Electrical connections should always be made or disconnected on the sensor while there is no electrical power in the system When attaching the connector with the jack on the sensor, pay close attention to the guide and groove! The connector and jack must not be connected with incorrect orientation or by force, as this will destroy the sensor. -
Page 13: Operation
OPERATION 4 - 1 4 OPERATION WARNING: Danger of injury by crushing Do not place your hands on or near moving parts (rollers, material web, etc.) during operation. WARNING: Danger of injury due to cutting on the edge of the material web Do not place your hands on the edge of the (moving) material web during operation. -
Page 14: Settings
4 - 2 OPERATION Settings All settings required for operating the SE-42 sensor are performed with the web guide controller. Information on this topic is available in the Operating Instructions for the web guide controller. Before the SE-42 is used for working with transparent material, the sensor must always be calibrated to the contrast with the web guide controller. -
Page 15: Maintenance
MAINTENANCE 5 - 1 5 MAINTENANCE WARNING: Danger of injury by crushing. Maintenance work must only be performed on the sensor when the power is turned off and the machine is stopped and protected against being turned on again. Maintenance The protectors should be cleaned of ambient dust and dirt at regular intervals using a neutral synthetic cleaning agent and a soft cloth. -
Page 16: Technical Data
6 - 1 TECHNICAL DATA 6 TECHNICAL DATA General information Dimensions Gap widths: 49mm (standard value) 100 mm Throat length: 51,5mm Weight: 130g Protection class IP54 Ambient conditions Ambient temperature: 0°C - 60°C Relative humidity: up to 85% Operating altitude max. 5000m above sea level Materials used Housing: ABS (acrylonitrile/butadiene/styrene) Protectors: PMMA (polymethylmethacrylate) -
Page 17: Electrical Connection
TECHNICAL DATA 6 - 2 Electrical connection Power supply 10V ... 15V at 40mA Output signal 0 - 10mA Pin assignment 1 – Power supply 4 - Output signal 2 - Not assigned X - key 3 - P-GND Housing = Shield Figure 6.1: M12 conncector, SE-42 1 –... -
Page 18: Service
This will allow us to help you more quickly in the event that service is required. Addresses To request service, or if you need replacement parts, please contact one of the following addresses. Fife-Tidland GmbH Max-Planck-Straße 8 Siemensstraße 13-15 65779 Kelkheim 48683 Ahaus...
Need help?
Do you have a question about the MAXCESS SE-42R and is the answer not in the manual?
Questions and answers