
Related Manuals for RIDGID WL1200LS1


Summary of Contents for RIDGID WL1200LS1
- Page 1 WARNING: To reduce the risk of SAVE THIS MANUAL FOR injury, the user must read and understand the operator’s manual FUTURE REFERENCE before using this product. Part No. SP6489 Printed in China...
-
Page 2: Table Of Contents
Basic Lathe Operations ... 24 Changing Speeds ... 24 Spindle Turning ... 25 Faceplate Turning ... 27 Indexing ... 29 How To Use Your RIDGID Wood Lathe ... 30 Woodworking Chisels and How to Use Them ... 30 The Six Commonly Used Chisel Types ... -
Page 3: Safety Symbols
Safety Instructions For Wood Turning Lathe (continued) Safety Symbols indicates an imminently DANGER: hazardous situation which, if not avoided, will result in death or serious injury. indicates a potentially WARNING: hazardous situation which, if not avoided, could result in death or seri- ous injury. -
Page 4: When Installing Or Moving The Lathe
Safety Instructions For Wood Turning Lathe (continued) When Installing Or Moving the Lathe Reduce the Risk of Dangerous Environment. • Use the lathe in a dry, indoor place protected from rain. • Keep work area well lighted. To reduce the risk of injury from unexpected lathe movement. -
Page 5: Plan Ahead To Protect Your Eyes, Hands, Face And Ears
- Running the lathe too fast, so that it vibrates, could cause the work- piece to be thrown from the lathe... or the turning tool to be jerked from your hands. Always revolve the workpiece by hand before turning on the motor. If... -
Page 6: Inspect Your Workpiece
• Before actually turning with the lathe, let it run for a while. If it makes an unfamiliar noise or vibrates a lot, stop immediately. Turn the lathe off. -
Page 7: Motor Specifications And Electrical Requirements
Motor Specifications and Electrical Requirements Power Supply and Motor Specifications This Lathe is designed to use a 1725 RPM motor only. Do not use any motor that runs faster than 1725 RPM. WARNING: To reduce the risk of electrical hazards, fire hazards or damage to the tool, use proper circuit protection. -
Page 8: Motor Safety Protection
Check the spindle to make sure it turns freely. If the spindle will not turn make sure the index pin is desengaged. (See “Getting to Know Your Wood Lathe” - Index Pin.) If the spindle is free, try to start the motor again. If the motor still does not start, refer to the "Motor Trou-... -
Page 9: Wire Sizes
(A.W.G) 1710. Hammer Adjustable Wrench 1. Unpack all the parts of your wood lathe and lay them out in your work area so they can be recognized easily. Check all parts with the parts table and be careful not to lose any parts during assembly. -
Page 10: List Of Loose Parts
V Loose Parts Package (Containing the following items): Bolt, Carriage M6 x 1.0-45 ... 9 Bolt, Carriage M6 x 1.0-65 ... 3 Bolt, Carriage M6 x 1.0-16 ... 4 Lockwasher, Ext. 5mm ... 4 Item Description Lockwasher, 6mm ... 17 Nut, Hex M6 x 1.0... -
Page 11: Assembly
Assembly Assembling Steel Legset 1. Find the following legset pieces: 4 Legs 2 Side Stiffeners 2 End Stiffeners 2. From the loose parts package find the following items: 24 Carriage Bolts M8 x 1.25-16 24 Lockwashers M8 External Type 24 Hex Nuts,M8 x 1.25 24 Washer M8 x 16 x 1.6 8 Hex Nuts, 3/8-16 4 Leveling feet... -
Page 12: Holes Used For Mounting Boards And Wood Lathe To Leg Set
Assembly (continued) Holes Used for Mounting Boards and Wood Lathe to Leg Set A - Board/Side Support B - Board/Side Support C - Plate Support/Board/End Support D - Board/End Support E - Headstock/Plate Support/Board Mounting Left Side Table Top 1. Find the following:... -
Page 13: Mounting Right Side Table Top
Mounting Right Side Table Top 1. Find the following: 1 Particle Board Table Top 2. From the loose parts package find the following: 4 M6 x 1.0-45 Carriage Bolts 4 M6 x 1.0 Hex Head Nuts 4 6.5 x 19 x 1.6 Flat Washers 4 6mm Lockwashers 3. -
Page 14: Mounting Headstock
Assembly (continued) Mounting Headstock 1. Find the following: 1 Belt Guard Assembly 1 Headstock Assembly 1 Plate Bracket 2. From the loose parts package find the following: 2 M6 x 1.0-65 Carriage Bolts 1 M6 x 1.0-45 Carriage Bolt 1 M6 x 1.0-12 Hex Head Screw 4 M6 x 1.0 Hex Nuts 4 6.5 x 19 x 1.6 Flat Washers 4 6mm Lockwashers... -
Page 15: Mounting The Motor
7. Locate Hole F on the left table board. Attach the bracket plate to the table top through Hole F. Use an M6 x 1.0- 45 carriage bolt, washer, lockwasher and nut. Finger tighten. 8. Locate the three holes Labeled G on the lower edge of the belt guard plate. - Page 16 Assembly (continued) 3. Locate the four holes Labeled H on the plate support. 4. Place the motor over these holes with the motor shaft extending through the belt guard plate. Secure in place with carriage bolts, washers, lockwashers and nuts. 5.
-
Page 17: Headstock, Tailstock, And Tool Rest Assembly
Headstock, Tailstock, and Tool Rest Assembly 1. Find the following: 1 Tube 1 Large Tool Rest 1 Tailstock 2 Lever Assembly 1 Hex Head Screw M10 x 1.5-30 1 Tool Rest Holder/Clamp Support Assembly 2 Brass Shoe Locks 2. Place the tube assembly on your work- bench as shown. - Page 18 Assembly (continued) 5. Set large tool rest in tool rest holder and install lever assembly as shown. 6. Slide tailstock assembly onto the tube and install tailstock ram spindle lock lever. Be sure that the stud nut engages the keyed way of the spindle. 7.
-
Page 19: Mounting Rear Foot
Mounting Rear Foot 1. Locate the following: 1 M8 x 1.25-45 Pan Head Screw 1 M8 x 1.25 Square Nut 1 M6 x 1.0-65 Carriage Bolt 1 6.5 x 19 x 1.6 Flat Washer 1 6mm Lockwasher 1 M6 x 1.0 Hex Nut 2. -
Page 20: Spur And Cup Center Installation
Assembly (continued) Spur and Cup Center Installation 1. From the loose parts package find the following: 1 3/4-16 Hex Nut 1 Spur Center 1 Live Center 2. Screw nut onto head stock spindle until finger tight. 3. To insert point into spur center, place center between jaws of a vise. -
Page 21: Check Spindle Rotation
NOTE: Make sure the spur center is removed from the spindle. 1. Plug the lathe power cord into a prop- erly grounded outlet (See page 7) 2. Stand clear of the lathe spindle and turn the switch On. -
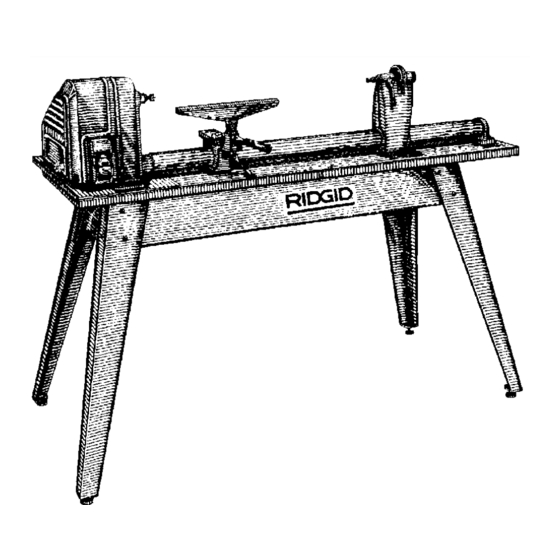
Page 22: Getting To Know Your Wood Lathe
Getting To Know Your Wood Lathe Spindle “Flats” Index Pin Belt Guard Speed Chart Belt Guard Knob Headstock On-Off Switch 1. Belt Guard Knob... Locks the hinged part of the guard during operation. 2. Index Pin... Engages with the spindle... -
Page 23: On-Off Switch
Use By Children And Others. 1. Insert key into switch. NOTE: Key is made of yellow plastic. 2. To turn lathe On... Insert finger under switch lever and pull End of switch out. 3. To turn lathe Off... Push lever in. -
Page 24: Basic Lathe Operations
The belt will climb up into the third step of the spindle pulley. To make the lathe go faster, the belt must be shifted outward. 1. Rotate the spindle pulley Clockwise with your right hand. Pull on the belt while rotating the pulley until it climbs down into the next smaller step. -
Page 25: Spindle Turning
WARNING: For your own safety, turn switch "OFF" and remove switch key before mounting work- piece in lathe. If you have never done any amount of wood turning, we suggest that you prac- tice using the various wood turning tools. - Page 26 "ON". Always be sure the workpiece is properly mounted and the lathe is set at the proper speed (RPM). 1/8" Tool Rest 1/8"...
-
Page 27: Faceplate Turning
5. To install faceplate on wood lathe remove the 3/4"-16 hex nut from the lathe spindle before mounting face- plate to the lathe spindle. This is nec- essary in order to provide full thread engagement of faceplate to spindle. Put a small amount of grease on the spindle, this will make removal of the faceplate easier. - Page 28 7. Always rotate the workpiece by hand before turning on the motor to make sure that it does not strike the tool rest, or any other part of the lathe. 8. Before turning on the motor, check the belt. Make sure it is positioned to run the lathe at the slowest speed.
-
Page 29: Indexing
Indexing The spindle pulley contains 36 equally spaced holes. The index pin engages with these holes to keep the spindle from turn- ing while you put a mark on the work- piece. For example: To locate the position of six spokes in a wheel: 1. -
Page 30: How To Use Your Ridgid Wood Lathe
How To Use Your RIDGID Wood Lathe Woodworking Chisels and How to Use Them Gouge Skew The Six Commonly Used Chisel Types Selection Of Chisels Better chisels have handles approxi- mately 10-in. long, to provide plenty of grip and leverage. Sharp tools are essen- tial for clean, easy work... - Page 31 When You Can Cut, and When You Must Scrape There are two different approaches to the work when turning. One approach is toward a circumference of the workpiece (for example, turning down the outer sur- face of a cylinder or the inner wall of a hol- low round box).
- Page 32 How To Use Your RIDGID Wood Lathe (continued) If the rest is placed too low, so that the chisel is held with the bevel out from the work (sketch 2), the cutting edge will con- tinue to dig deeper into the work. It will dig in until the "bite"...
-
Page 33: Using The Gouge
Using The Gouge Three gouges, the 1/4-, 1/2- and 3/4-in. sizes, are ample for general homeshop turning; but other sizes from 1/8- to 2-in. can be purchased. The chief use of the gouge is for rough circumference cutting of raw stock down to a cylinder of working size. -
Page 34: Using The Parting Tool
How To Use Your RIDGID Wood Lathe (continued) Using The Parting Tool The parting tool has just one primary pur- pose: to cut straight into the workpiece as deep as desired, or all the way through to make a cut-off. It is therefore a very nar- row tool - 1/8-in. -
Page 35: Hand Positions
Hand Positions WARNING: Keep firm hold and control of the turning tool at all times. Avoid awkward hand posi- tions where a sudden slip could cause a hand to move into the work- piece. In handling all of the chisels the handle hand takes a natural position, being nearer or farther from the end depending upon the amount of leverage required. -
Page 36: Making Standard Cuts
How to Use Your RIDGID Wood Lathe (continued) Making Standard Cuts The Roughing-off Cut Reducing a square or odd-shaped work- piece down to a cylinder of approximate size for finish turning is called “Roughing- off”. Faceplate turning and large diameter... - Page 37 Smoothing A Cylinder The final 1/8-in. can be removed in two ways. Either use the 1 -in. skew, working from center toward both ends and taking lighter and lighter cuts until finished. Cutting A Shoulder A shoulder can be the side of a square portion left in the workpiece, the side of a turned section, or the end of the work- piece.
- Page 38 How to Use Your RIDGID Wood Lathe (continued) Cutting Vees Vee grooves can be cut with either the toe or heel of the skew. When the toe is used, the cutting action is exactly the same as in trimming a shoulder - except that the skew is tilted to cut at the required bevel.
- Page 39 Cutting Coves (Concaves) This is the most difficult single cut to mas- ter - but one of the most important in good wood turning. First, use pencil marks to indicate the edges. Then, rough it out - to within about 1/8-in. of the desired finish surface - by scraping with the gouge or round nose chisel.
-
Page 40: How To Handle Spindle Turnings
How to Use Your RIDGID Wood Lathe (continued) Making Long Taper Cuts Long taper cuts are made like long con- vex cuts, with the skew or gouge. How- ever, the angle between the cutting edge and handle is kept constant during the entire cut. -
Page 41: Duplicate Turnings
After mak- ing the sizing cuts, hang the pattern behind the lathe where it will serve as a guide for completion of the workpiece. Using a Template and a Diameter... -
Page 42: Long Spindles
How to Use Your RIDGID Wood Lathe (continued) Long Spindles A long turning can be worked in short sec- tions, with joints arranged to be at shoul- ders where they will not be noticed. Long thin work that is likely to whip while turning should be supported at one or two places by a backstick. -
Page 43: How To Make Fancy Faceplate Turnings
Deep Recesses The first step is to remove as much wood as possible by boring into the center with the largest wood bit available. This can be accomplished as illustrated. Be careful to measure in advance the depth to which drill can be allowed to go. - Page 44 How To Use Your RIDGID Wood Lathe (continued) Turning Cylinders Stock for cylinders should be mounted on the screw center or a small faceplate. The tailstock can be brought up to support the work while the circumference is being turned and finished. Afterwards, the tail-...
- Page 45 Turning A Ring One method of turning a ring requires a spindle chuck. The work stock is first mounted to a backing block held by the large faceplate, and is turned to shape on the outer side. The inside diameter of the ring is also shaped, all the way through to the backing block.
-
Page 46: Sanding, Buffing And Polishing
How to Use Your RIDGID Wood Lathe (continued) Sanding, Buffing And Polishing Using The Lathe To Sand Turnings Turnings can be sanded with the lathe running. A large sheet of sandpaper is useful for smoothing cylinders. All other sanding operations are done with a nar- row strip of abrasive paper. -
Page 47: Wiring Diagram
2. If disassembly of the motor is neces- sary, it should be returned to your near- est RIDGID Service Center retail store in order to prevent voiding the guaran- tee. NOTE: The speed of this motor cannot be regulated or changed. -
Page 48: Troubleshooting
Remedy using lathe again. cooled. Center. Any attempt to repair this motor may create a HAZARD unless repair is done by a qualified service technician. to Know Your Wood Lathe”) sec- tion. Section. tion. See “Assembly” section. -
Page 49: Motor
2. Have motor repaired or replaced. or open. 1. Take shallower cuts. Remedy service technician. Repair service is available at an Authorized RIDGID Service Center. motors on same circuit when using the lathe. length of wiring. See “motor Speci- fications and Electrical Require- ments” section. - Page 50 Troubleshooting (continued) Motor (continued) Trouble Starting switch in 1. Burned switch con- motor will not oper- ate. 2. Shorted capacitor 3. Loose or broken con- Motor stalls 1. Starting switch not (resulting in blown fuses or tripped circuit 2. Voltage too low to breakers).
-
Page 51: Repair Parts
NOTE: Any attempt to repair this motor may create a hazard unless repair is done by qualified service technician. Repair service is available at an Authorized Service Center. Always order by Part Number -- Not by Key Number Part No. 828929 830177 RIDGID 12" Wood Lathe Model No. WL1200LS1 Figure 1 Description Motor Cord, Motor... - Page 52 Repair Parts RIDGID 12" Wood Turning Lathe Model WL1200LS1 Figure 2...
- Page 53 Repair Parts RIDGID 12" Wood-Turning Lathe Model No. WL1200LS1 Always order by Part Number -- Not by Key Number Part No. 826550 Headstock 826564 Plunger 813249-54 Pin, Roll 2.5-12 826563 Spring 826562 Housing, Plunger 826584 Center, Point 826582 Center, Spur...
- Page 54 Repair Parts RIDGID 12" Wood-Turning Lathe Model No. WL1200LS1 Figure 2...
- Page 55 Repair Parts RIDGID 12" Wood-Turning Lathe Always order by Part Number -- Not by Key Number Part No. 820377-1 826579 826619 826890 826581 826580 817449-1 818826-6 820238-7 821103 821063-2 818826-7 820236-7 803835-1 805483 * Standard hardware item - may be purchased locally.
- Page 56 WHAT IS COVERED UNDER THE LIMITED THREE YEAR WARRANTY This warranty covers all defects in workmanship or materials in this RIDGID tool for the three year period from the date of purchase. This warranty is specific to this tool. Warranties for other RIDGID products may vary.
Need help?
Do you have a question about the WL1200LS1 and is the answer not in the manual?
Questions and answers