Advertisement
Quick Links
Advertisement

Subscribe to Our Youtube Channel
Related Manuals for mopio Haylee


Summary of Contents for mopio Haylee
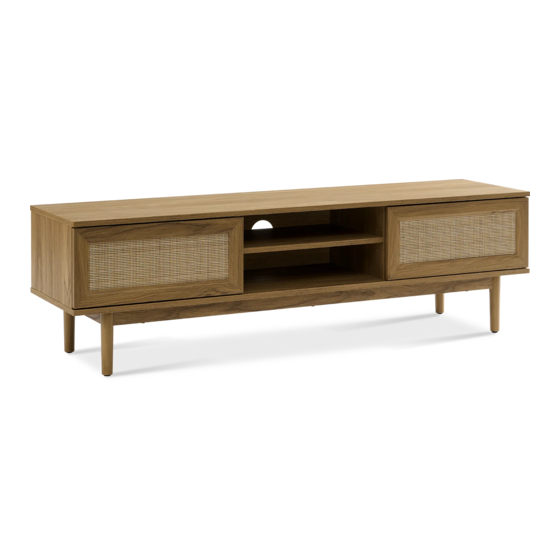
- Page 1 TV STAND, 59” A S S E M B LY I N S T R U C T I O N S...
- Page 2 Join and enjoy your 1-Year Warranty We’ve got more for you. Be part of and enjoy: • Privileged Customer Care • 10% O Your Next Purchase (no min spend) • 1-Year Free Warranty • Early Access To Upcoming Launches For any enquiries or issues regarding your purchase, you can contact us directly.
- Page 3 Before you start... Ensure you have received all cartons and Make sure you have cleared enough space familiarize yourself with the workload. Make in your home for the assembly. We sure there are enough helping hands to recommend protecting your floor with a assist you, and that you have allocated the mat or cardboard to avoid scratches during time required to assemble your new product.
- Page 4 Parts TV STAND, 59" | 04...
- Page 5 Hardware Cambolt Screw Shelf Pin Ø 6 x 35 mm M 4.5 x 12.5 mm Ø 5 x 15 mm Camlock Corner Wedge Brace Ø 15 mm Sliding Screw Screw M 6.4 x 53 mm Bottom M 3.5 x 15.5 mm Dowel Bu er Ø...
- Page 6 Step 1 Ensure your floor is properly protected, then take out board No. 1, No.3, No. 4, No. 9, No. 10. Screw cambolt A to board No. 1 (don't over screw). Plug in dowel D into side holes of board No.3, No. 4, No. 9, No.
- Page 7 Step 3 Slide in board no 12 into the groove. If it doesn't match, please refer to Step no 2. Place board No.2. on top. Insert screw G into holes indicated and screw in with Allen Key F. Do not fully tighten until all screws are engaged and screwed in properly.
- Page 8 Step 5 Prepare leg frame No. 6 and connect with 2 pieces of leg frame No.7 according to the position illustrated. ± 2 mm Do not fully tighten the screw (leave about 2mm), you will tighten it on Step 9. Please refer to the illustration carefully for the bracket placement orientation.
- Page 9 Step 7 Plug in dowel D into the holes on the leg frame. Please refer to the illustration carefully for the dowel hole positions . Step 8 You may require extra pair of hands to complete this step. Position leg frame upside down and install it to the table body board No.2.
- Page 10 Step 9 Detail 1 Prepare leg No.5 (4pcs). Detail 2 Remove the screws protector. Slot in leg No.5 (4pcs) by aligning the screws position and inserting fully. Insert washer M and nuts L into each screws, and tighten with wrench N. Tighten all the screws on the leg frame as indicated in detail 2.
- Page 11 Step 11 Plug in shelf pin Q into the desired hole positions and place the shelves gently on top of the shelf pin. Step 12 Please check the illustration and identify the correct position of pin sliding. Prepare Door No.8 (2pcs). Install sliding roller C with screw E.
- Page 12 Step 13 Reverse the table body and let it stand upwards to install the sliding door. You may need extra pair of hands to reverse the table body. Insert the door panel's top sliding pin to the groove underneath the top table board. While holding its position, insert the bottom sliding roller to the groove on the bottom board.
- Page 13 Step 14 Slide in back board stopper R onto the back panel groove as indicated on the drawing. Check carefully the product assembly before tightening it, ensure that the body installation is square (perpendicular 90 degree). Tighten with screw S using screw driver.
- Page 14 Finished! Congratulations! We’re almost there! Please perform following checks to ensure assembly is properly done. • Ensure all legs frame are fully tightened, please refer to Step 9. • If the door's gap is misaligned, please refer to Step 11. Step 13 •...
-
Page 15: Care Instructions
Care Instructions Your furniture, if treated with respect and love, will last you a long time. Each piece requires light maintenance to maximize its longevity. Few quick tips before using this product: Recommended weight limit for the table top is 45lbs and 10lbs for each storage compartment. -
Page 16: Frequently Asked Questions
Frequently Asked Questions 1. What should I do if my product received is incomplete? products are flat packed and come in separate boxes. Once your order has dispatched and been sent with Fedex, you will receive an email with tracking information. Please note that Fedex may deliver your boxes in separate deliveries. -
Page 17: Warranty & Return
Warranty & Return 1 YEAR LIMITED WARRANTY STATEMENT FOR MANUFACTURING DEFECTS Please read this limited warranty carefully. To maintain your warranty, you will need to comply with the conditions stated here. This warranty is for manufacturing defects only and does not cover damages as a result of misuse. - Page 18 The Return Returns are to be made within 30 days of the date you received the product. To initiate return request, please message us or contact our customer service team with your reason of returning so we can facilitate the request and issue return authorization to you. Please note the policy is subject to the conditions below: Only undamaged items in original packaging will be accepted under the Returns Policy.
Need help?
Do you have a question about the Haylee and is the answer not in the manual?
Questions and answers