Advertisement
Quick Links
Advertisement

Related Manuals for mopio ENSLEY


Summary of Contents for mopio ENSLEY
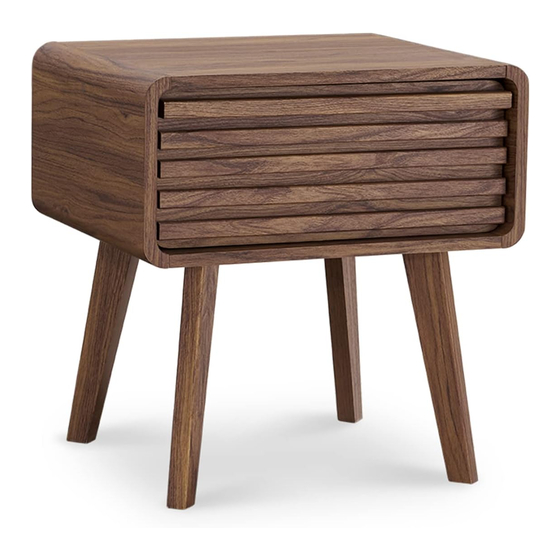
- Page 1 ENSLEY SIDE TABLE A S S E M B LY I N S T R U C T I O N S...
-
Page 2: Warranty Registration
Warranty Registration Mopio o ers one-year warranty for this product from date of purchase. To register your Mopio product for warranty coverage, please fill in the form on our website at www.mopio.com/warranty/register or scan the QR code: REGISTERED CUSTOMERS ALSO RECEIVE: •... - Page 3 Don’t skip ahead! DO NOT over tighten screws or use a drill. If you need further assistance with It will damage the product. assembling your Mopio product, please contact us at help@mopio.com. ENSLEY SIDE TABLE | 03...
- Page 4 Parts Watch installation demo video at: https://bit.ly/36WUTt2 ENSLEY SIDE TABLE | 04...
- Page 5 Please kindly note you will need the original package if you want to return the product later. If parts are missing or damaged, we will gladly ship your 45 mins replacements parts free of charge. Please contact us at help@mopio.com. ENSLEY SIDE TABLE | 05...
- Page 6 Plug in dowel E into side holes of board No. 11. *Don’t screw too deep Plug in dowel D into 4 pieces of leg No.5 respectively. Missing parts? Or feeling stuck? Watch demo video at: ENSLEY SIDE TABLE | 06 Contact us at help@mopio.com. https://bit.ly/36WUTt2...
- Page 7 The roller of the rail must be positioned on the right position. Then use screw K to tighten it. *Don’t screw too deep Missing parts? Or feeling stuck? Watch demo video at: ENSLEY SIDE TABLE | 07 Contact us at help@mopio.com. https://bit.ly/36WUTt2...
- Page 8 No. 1 and 2, then slowly tighten the camlocks. Please ensure all the boards are in place before fully tighten all camlocks. Missing parts? Or feeling stuck? Watch demo video at: ENSLEY SIDE TABLE | 08 Contact us at help@mopio.com. https://bit.ly/36WUTt2...
- Page 9 Allen key provided. Peel the floor protector sticker L and attach to the end of the legs. Missing parts? Or feeling stuck? Watch demo video at: ENSLEY SIDE TABLE | 09 Contact us at help@mopio.com. https://bit.ly/36WUTt2...
- Page 10 Slot in the drawer bottom panel No.10 and ensure it engages the groove completely. Install the drawer back panel board No.9 with screw J and tighten it. Missing parts? Or feeling stuck? Watch demo video at: ENSLEY SIDE TABLE | 10 Contact us at help@mopio.com. https://bit.ly/36WUTt2...
- Page 11 Slide in the drawer carefully as illustrated. Please ensure both rails are properly engaged to the groove before pushing the drawer in. Missing parts? Or feeling stuck? Watch demo video at: ENSLEY SIDE TABLE | 11 Contact us at help@mopio.com. https://bit.ly/36WUTt2...
- Page 12 Ensure all legs are fully tightened and not shaky. • Ensure floor protectors L are attached to the leg ends. Move your Mopio product carefully, with 2 people lifting it to the preferred location. Clean the product with a dry cloth. You are all set!
-
Page 13: Care Instructions
We recommend using placemats or coasters underneath glasses, cups, bowls or plates to prevent scratches to the table surface. Follow the care instructions and look after your furniture, in return, your furniture will look after you. We hope to see you soon! ENSLEY SIDE TABLE | 13... -
Page 14: Frequently Asked Questions
4. Who do I contact for repair queries? You may write to us at help@mopio.com specifying your queries and we will be able to assist you further. 5. What warranty do you o er for your products? You’ll just need to submit your warranty registration upon receiving product at... -
Page 15: Warranty & Return
MOPIO’S 30-DAY RETURN POLICY We believe you will be thrilled with your purchase from Mopio. That’s because we go out of our way to ensure that products are designed and built to be just what you need. We understand, however, that sometimes a product may not be what you expected it to be. - Page 16 Mopio product going through strict quality control process. We want to make sure your Mopio product reaches you safe and sound, however we are happy to do an exchange in case you receive a defective or damaged product due to any unforeseen hiccups throughout the journey.
Need help?
Do you have a question about the ENSLEY and is the answer not in the manual?
Questions and answers