Table of Contents
Advertisement
Quick Links
Advertisement
Table of Contents

Related Manuals for Ogawa SPIN PRO 81.6


Summary of Contents for Ogawa SPIN PRO 81.6
- Page 1 USER MANUAL...
-
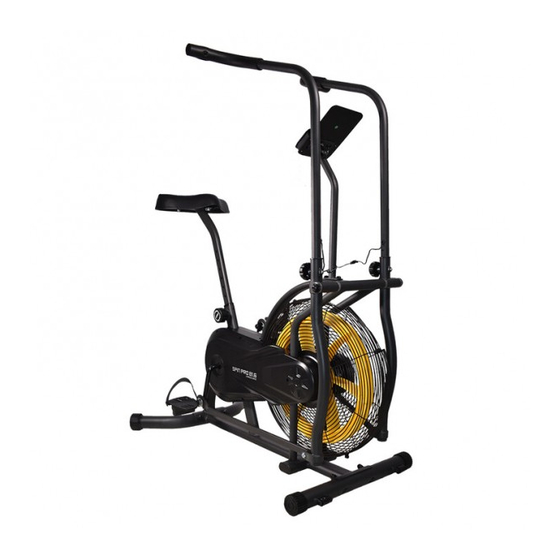
Page 2: Product Specification
Product Specification Product name Spin Pro B1.6 Model AC 3211 Packing dimension (cm) 100Lx25Wx66.5H Product dimension (cm) 111Lx61Wx136H Net weight 27kg Gross weight 27.7kg Max load 110kg Colour Black Material Steel+Plastic... -
Page 3: Warranty Claim
Warranty Claim 1. Warranty is not transferable. 2. This warranty is effective only if the product is purchased from Ogawa or its authorized dealers. 3. Proof of purchase (original receipt) is required for all warranty repairs. 4. All implied warranties, including but not limited to these implied warranties of fitness and merchantability, are limited to one (1) year from the date of purchase. -
Page 4: Important Safety Instructions
IMPORTANT SAFETY INSTRUCTIONS Basic precautions should always be followed, including the following important safety instructions when using this equipment. Read all instructions before using this equipment. Read all instructions and follow it carefully before using this equipment. Make sure the equipment is properly assembled and tightened before use. -
Page 5: Parts List
PARTS LIST Description Qty No. Description Main Frame 1 32 Handrail Arm Adjustable Knob M8 Computer Post 1 33 Hexagon Bolt M8×48 Left Handrail Arm 1 34 Plug Ø 32 Right Handrail Arm 1 35 Spacer Bushing Ø18xØ14xØ8x10 Left Handrail 1 36 Flange Nut M10×P1.0 Right Handrail... - Page 6 Description Description Seat Height Adjustable Knob M16 1 78 Crank Cover Ø 60 Seat Post Plastic Bushing 1 79 Cross Pan Head Tapping Screw 50×25×1.5 ST4.2×20 End Cap for Main Frame 2 80 Cross Countersunk Head Tapping Screw ST4.2×20 End Cap for Front Stabilizer Ø 50 2 81 Rotation Rod Hexagonal Bolt M6×45...
-
Page 7: Hardware Bag
HARDWARE BAG Spanner Spanner with Phillips Screwdriver S13- S17-S19 S13-S14-S15 1PC Allen Wrench S6 2PCS (69) Bolt M10x56 4PCS (70) Curve Washer Ø 10×Ø 20×2.0 4PCS (71) Cap Nut M10 4PCS (63) Seat Height Adjustment Knob M16 (32) Handrail Arm Adjustment Knob M8 2PCS... -
Page 8: Exploded Drawing
EXPLODED DRAWING 60 61 70 71 57 58 17 18... - Page 9 ASSEMBLY INSTRUCTIONS Tool: Spanner S13-S17-S19 70 71 Step 1:Front and Rear Stabilizers Installation Attach the Rear Stabilizer (10) onto the Main Frame (1) with two M10 Cap Nuts (71), two Ø 10×Ø 20×2.0 Curve Washers (70) and two M10×56 Bolts (69). Tighten with the Spanner provided.
- Page 10 62 87 Tool: Allen Wrench S6 Spanner S13-S17-S19 Spanner with Phillips Screwdriver S13-S14-S15...
- Page 11 Step 2: Left and Right Foot Pedals, Left and Right Foot Bar, Left and Right Handrail Arm Installation Remove two M10×20 Hexagon Bolts (27), two Ø 19.5×Ø11.5×2.5 Spring Washers (28), two Ø 10×Ø25×2.0 Flat Washer (90), two Ø28×Ø 16×δ5 Washers (29), and two Ø 26×Ø 16×δ0.3 Wave Washers (31) from the Rotation Rod (81).
- Page 12 Tool: Spanner with Phillips Screwdriver S13-S14-S15 Step 3: Seat Post, Seat Cushion Installation Remove three Ø8×Ø16×1.5 Flat Washers (17) and three M8 Nylon Nuts (18) from under the Seat Cushion (16). Attach the Seat Post (15) to the Seat Cushion (16) using three Ø8×Ø16× 1.5 Flat Washers (17) and three M8 Nylon Nuts (18).
- Page 13 Tool: Allen Wrench S6 Spanner with Phillips Screwdriver S13-S14-S15 Step 4: Computer Post Installation Connect the Sensor Wire (75) with Extension Sensor Wire (20). Remove two Ø8×Ø16×1.5 Flat Washers (17) and two M8×30 Hexagon Bolts (23) from the Main Frame (1). Attach the Computer Post (2) onto the Main Frame (1) with two Ø8×Ø16×1.5 Flat Washers (17) and two M8×30 Hexagon Bolts (23).
-
Page 14: Maintenance
MAINTENANCE Cleaning The bike can be cleaned with a soft clean damp cloth. Do not use abrasives or solvents on plastic parts. Please wipe your perspiration off the bike after each use. Be careful not get excessive moisture on the computer display panel as this might cause an electrical hazard or electronics to fail. -
Page 15: Warm Up And Cool Down Routine
WARM UP AND COOL DOWN ROUTINE The WARM-UP is an important part of any workout. The purpose of warming up is to prepare your body for exercise and to minimize injuries. Warm up for two to five minutes before aerobic exercising. It should begin every session to prepare your body for more strenuous exercise by heating up and stretching your muscles, increasing your circulation and pulse rate, and delivering more oxygen to your muscles. - Page 16 QUADRICEPS STRETCH With one hand against a wall for balance, reach behind you and pull your right foot up. Bring your heel as close to your buttocks as possible. Hold for 15 counts and repeat with left foot. INNER THIGH STRETCH Sit with the soles of your feet together and your knees pointing outward.
- Page 17 CONTACT US MALAYSIA Healthy World Lifestyle Sdn Bhd No.22 Jalan Anggerik Mokara 31/47 Kota Kemuning, 40460 Shah Alam Selangor Darul Ehsan, Malaysia. Tel: +603-5121 4286 Fax: +603-5121 4386...
Need help?
Do you have a question about the SPIN PRO 81.6 and is the answer not in the manual?
Questions and answers