Advertisement
Quick Links
Advertisement

Related Manuals for Kogan KA3AGIMBALA


Summary of Contents for Kogan KA3AGIMBALA
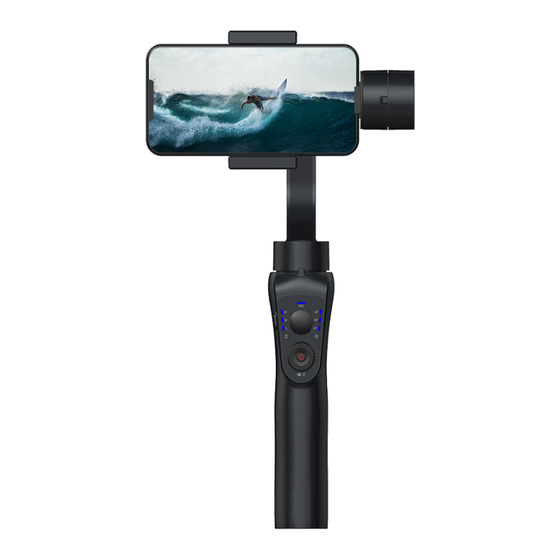
- Page 1 3-AXIS HANDHELD GIMBAL STABILISER KA3AGIMBALA...
-
Page 2: Table Of Contents
Safety & Warnings Components Overview Before First Use Operation Cleaning & Care Specifications Notes... -
Page 3: Safety & Warnings
SAFETY & WARNINGS Ensure to read all instructions and warnings in this user guide prior to first use. Retain this user guide for future reference. WARNING: • Failure to follow the instructions outlined in this user guide can result in damage to the gimbal or personal property and cause serious injury. -
Page 4: Components
COMPONENTS A Gimbal B Micro USB to USB cable C User guide D Lanyard... -
Page 5: Overview
OVERVIEW Front view Holder adjustment Smartphone holder Bluetooth indicator Pan motor Pan and tilt mode indicator > 66% battery indicator Pan following mode indicator > 33% battery indicator Lock mode indicator < 33% battery indicator Power/mode button Joystick Zoom control dial... - Page 6 Side and back view Holder adjustment USB charging port Roll motor Micro USB charging port Balance screw Shutter Adjustable arm ¼” thread screw Tilt motor...
-
Page 7: Before First Use
BEFORE FIRST USE Charging The gimbal must be charged before use. Connect the USB cable into the Micro USB charging port on the gimbal. Plug the other end of the cable into a power bank (not included) or adapter (not included) and charge the gimbal. A full charge will take between 3–4 hours. - Page 8 Adjusting the balance If the smartphone does not stay level when mounted: 1. Loosen the balance screw. 2. Make small adjustments by sliding the adjustable arm until the phone balances. 3. Tighten the balance screw after the phone is well balanced and level. Note: Proper adjustment of balance ensures a more efficient battery consumption rate during operation.
- Page 9 2. Turn the gimbal on by pressing and holding the power/mode button for 3–4 seconds until the mode indicator begins flashing and the other battery indicators illuminate. The Bluetooth indicator will then begin flashing. Notes: • Hold the gimbal’s handle still when it is powering on to ensure it powers successfully.
-
Page 10: Operation
OPERATION Powering on/off To power on, hold the power/mode button for 3–4 seconds until the mode indicators begin flashing and the other battery indicators illuminate. To power off, hold the power/mode button for 3–4 seconds until the mode indicators dim. App interface No. - Page 11 Allows options for the camera to use face/object Face/object tracking tracking when recording video. Mode status Displays the currently set mode on the gimbal. Gimbal battery indicator Displays the battery level of the gimbal. 10 Phone battery indicator Displays the battery level of your phone. Flash toggle Tap to turn the camera flash on/off.
- Page 12 Locking mode: In this mode, all three axes are locked. The camera stays still and stable. It will not follow the movement of the handle. Switching modes By default, the gimbal is set to the pan and tilt following mode. There are two ways to switch modes: Pressing the power/mode button on the gimbal, or tapping the mode selection icon in the ‘Gimbal Pro’...
- Page 13 Changing orientation The orientation (going from landscape to portrait) can be changed either automatically using the gimbal, or manually. Automatically: Ensure the gimbal is turned on. Keep the phone facing yourself and rotate the gimbal handle more than 70° either clockwise or anti-clockwise.
- Page 14 Battery level When on a full charge, all three battery indicators will be illuminated. The indicators will drop to two and one to indicate the battery remaining on the gimbal. The battery level can also be seen in the app interface of the ‘Gimbal Pro’ app. Mobile charging The USB port at the bottom of the gimbal handle can be used to charge your smartphone whilst using the gimbal.
-
Page 15: Cleaning & Care
CLEANING & CARE Ensure the gimbal is turned off before cleaning. Clean the gimbal by wiping it with a dry cloth. Storage and care • Fully charge and discharge the battery at least once every 3 months to keep the gimbal active. -
Page 16: Specifications
SPECIFICATIONS Power Min. Standard Max. Input voltage 3.4V 3.7V 4.2V* Operating current 150mAh 1500mAh 3000mAh* Note: *During operation, the input voltage and operating current will be at standard levels. When charging, these levels can vary between the minimum and maximum values in the table above. -
Page 17: Notes
NOTES... - Page 20 Need more information? We hope that this user guide has given you the assistance needed for a simple set-up. For the most up-to-date guide for your product, as well as any additional assistance you may require, head online to help.kogan.com...
Need help?
Do you have a question about the KA3AGIMBALA and is the answer not in the manual?
Questions and answers