
Related Manuals for Wifx L1


Summary of Contents for Wifx L1
- Page 1 Wifx L1 User manual revision 1.0 IP65 WAN® UTDOOR GATEWAY WITH EMBEDDED CONCENTRATOR CHIP User manual Versions: Date Revision Note Initial public release 09/05/2022...
-
Page 2: Table Of Contents
Wifx L1 User manual revision 1.0 UMMARY 1 Summary ................................. 2 2 Product specifications ............................. 4 3 Regulations ................................6 3.1 Version 863-870MHz band ..........................6 3.1.1 Europe / CE..............................6 3.2 Version 902-915MHz band ..........................7 3.2.1 USA – FCC Statement ..........................7 3.2.2 Canada –... - Page 3 User manual revision 1.0 8 Electrical ................................24 8.1 Power consumption ............................24 9 Mechanical ................................25 9.1 Wifx L1 ................................25 9.2 Antenna 5dBi (8XX & 9XX versions) ........................ 25 10 Setup guide ................................26 10.1 General recommendations ..........................26 10.2 Standard mounting using a pole........................
-
Page 4: Product Specifications
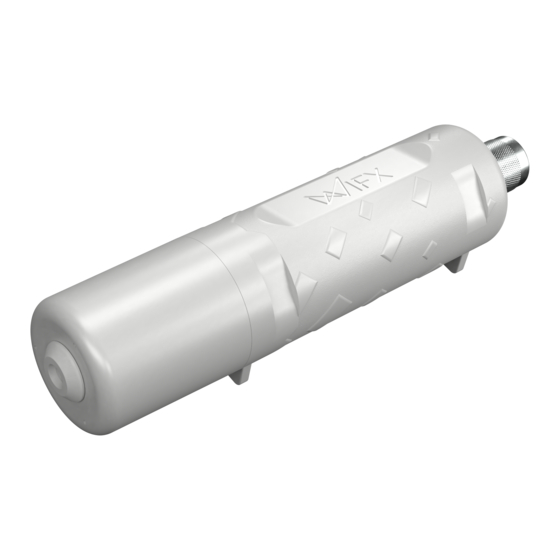
User manual revision 1.0 RODUCT SPECIFICATIONS Version Wifx L1 Physical specifications Dimensions 9.1 Wifx L1 Weight < 240 grams Connectors 1 RJ45 Ethernet 100Mbps port Max 100m. length, use shielded cable (S/UTP or U/FTP minimum) 1 USB-C service connector (service access only) 1 N type RF antenna connector 1 microSD SD Memory Card Specification v2.0 slot... - Page 5 Wifx L1 User manual revision 1.0 Version 8XX (863-870 MHz) 9XX (902-928 MHz) RF specification LoRa modulation 863-873MHz 902-928MHz (Chirp spread Following Table 3: Certification spectrum compliance version 863-870Mhz for modulation) Europe FSK Modulation 863-873MHz Not applicable Following Table 3: Certification...
-
Page 6: Regulations
EN 62368-1:2014/A11:2017 TABLE 3: CERTIFICATION COMPLIANCE VERSION 863-870MHZ FOR EUROPE For use in Europe, the Wifx L1 must comply with the ERC 70-3 requirements regarding duty cycle and maximum EIRP. These parameters are summarized in the following table: Duty cycle and maximum EIRP... -
Page 7: Version 902-915Mhz Band
User manual revision 1.0 902-915MH ERSION Z BAND The Wifx L1 9XX (902-928MHz) version complies with both FCC and IC regulation: Certification compliance CFR 47 FCC Part 15 FCC 47 CFR Part 15: 2014 - Part 15- Radio frequency devices RSS 247 RSS-Gen –... -
Page 8: Canada - Ised Statement
Wifx L1 User manual revision 1.0 3.2.2 C – ISED S ANADA TATEMENT This device complies with Industry Canada license‐exempt RSS standard(s). Operation is subject to the following two conditions: 1. This device may not cause interference, and 2. This device must accept any interference, including interference that may cause undesired operation of the device. -
Page 9: General Information
PEN SOURCE LICENSES All the licenses of the open source softwares used or available in the package repository of the LORIX OS are available at https://download.wifx.net/lorix-os/<LORIX OS release version>/licenses/, for example for the version 1.3.4, the licenses are available at https://download.wifx.net/lorix-os/1.3.4/licenses/. -
Page 10: Procedures
Wifx L1 User manual revision 1.0 To press the button, use a thin tool such as a paper clip. Upon release, the status LED will briefly flash and then stop to signal the reset action. 4.3.1 P ROCEDURES Short-press Press briefly, for less than 1 second. The blue LED will briefly blink upon release Long-press Press and hold for several seconds. -
Page 11: Ethernet/Poe
The green LED shows the actual SPEED of the Ethernet connection: 10Base-T 100Base-TX OWER THROUGH PASSIVE The Wifx L1 gateway is mainly powered through passive PoE using the Ethernet connector. The power is injected through a PoE injector as shown below: and V Table 6) represent both power lines of the gateway. -
Page 12: Service Access
Wifx L1 User manual revision 1.0 ERVICE ACCESS The embedded Linux can be accessed and configured either through the service USB Type-C connector or through SSH or web interface with a working Ethernet connection. Default user and password The default user is admin and the password is lorix4u. This is useful and easy to remember during the initial configuration time but we strongly advise changing the password as soon as possible as explained in 7.2.1... -
Page 13: Usb
Wifx L1 User manual revision 1.0 The gateway has a USB Type-C connector which provides a virtual COM port as soon as the service LED (white) turns on. Accessing the gateway this way allows you to debug and configure the system. This is also the only way to reach the service terminal when the network is not accessible or not yet configured. -
Page 14: Network
The gateway MAC address show on the sticker is FC:C2:3D:AA:BB:CC This hostname is therefore l1-aabbcc You can reach the gateway at l1-aabbcc.local To contact the gateway through mDNS, your network must support this feature (with IGMP snooping disabled) and you must be on the same subnetwork than the gateway to contact. - Page 15 Wifx L1 User manual revision 1.0 6.3.3.1 S ECURITY WARNING If you access the gateway with SSL support (HTTPs), you will get a security warning. The form can differ from one web browser to another but the concept stays the same. You receive this error because the SSL certificate of the gateway is self-signed as we don’t know the address at the certificate creation time.
-
Page 16: Basic Setup
Wifx L1 User manual revision 1.0 ASIC SETUP This chapter is made to help you to easily configure your gateway during the initial configuration process. It follows chronological configuration when possible so you should read it like a step by step configuration procedure and pass some steps when they are not required for your setup. -
Page 17: 7.1.2 Dhcp
Wifx L1 User manual revision 1.0 You can display its various parameters using the nmcli utils as follow: $ nmcli connection show backhaul connection.id: backhaul connection.uuid: 390e5c2b-7312-415e-80e6-7b94a5c24fc3 connection.stable-id: connection.type: 802-3-ethernet connection.interface-name: eth0 connection.autoconnect: connection.autoconnect-priority: connection.autoconnect-retries: 0 (forever) connection.multi-connect: 0 (default) connection.auth-retries:... -
Page 18: Static
Wifx L1 User manual revision 1.0 Additional configuration Additional DHCP configuration is often not required but if you need to modify parameters or add route for example, you can either use the web interface (Network → Ethernet → Settings) or consult nmcli’s documentation if you prefer the terminal access (USB or SSH). -
Page 19: Network Verification And Troubleshooting
Wifx L1 User manual revision 1.0 7.1.4 N ETWORK VERIFICATION AND TROUBLESHOOTING You should have a working network configuration at this time and the following chapter will help you to verify it. The first things to do is to test again the network connectivity as described in chapter 7.1.1.2... -
Page 20: System Update
Wifx L1 User manual revision 1.0 To change it, click on the user (Top right corner of the web interface) → Settings: Enter the current password and the new one twice and click on Save button. You then get a notification which confirms the password has been changed. - Page 21 Wifx L1 User manual revision 1.0 Downloaded image screen: The image is ready to be flash into the gateway. Click on install then wait for the update to be complete: During the reboot, you will be disconnected. Interface reconnection The connection should be enabled again automatically after 3-4 minutes. If it’s not the case, you can try to refresh the page and removing the cache using the command CTRL+F5.
-
Page 22: Lora/Lorawan Configuration
Wifx L1 User manual revision 1.0 CONFIGURATION 7.4.1 L (RF) Prior to any usage of LoRaWAN forwarder, you need to configure the region and the antenna. To do so, go into LoRa → Settings and define the region and antenna. -
Page 23: Lorawan
Wifx L1 User manual revision 1.0 7.4.2 L Once the RF base is correctly configured, you can select your favourite forwarder under LoRa → Forwarder: Clicking on the right blue button opens a modal window which displays the various forwarders and describes briefly the pros and cons of each solution. -
Page 24: Electrical
Wifx L1 User manual revision 1.0 LECTRICAL OWER CONSUMPTION All measures are done at 20°C, without USB Type-C cable connected. Task (@ 20°C ambient) Voltage [V] Current [mA] Power [mW] Input voltage: 10VDC Linux only running 10,0 RF part disabled... -
Page 25: Mechanical
Wifx L1 User manual revision 1.0 ECHANICAL Dimensions in mm (inch) 5dBi (8XX & 9XX NTENNA VERSIONS Dimensions in mm (inch) -
Page 26: Setup Guide
UV-resistant or use compatible accessories with eventually metal zip tie. Guide the loops around the Wifx L1 through the edge markings, and attach it around the pole where it will be mounted. It is strongly recommended to not connect a loose Ethernet cable to the Ethernet port while attaching the gateway to a pole, to avoid adding weight to the port. - Page 27 Wifx L1 User manual revision 1.0 Once the Ethernet cable passed through the cap hole, open the silicon grommet and put it around the cable as showed on the picture. Be careful with the orientation of the grommet Press the grommet with your finger from inside the cap (left picture) until take it final position (right picture).
- Page 28 Wifx L1 User manual revision 1.0 Screw the cap on the body to guarantee as good as possible water and dust protection. Once fixed, be sure the cable is well placed and verify that the grommet is correctly positioned. Use only appropriate antenna provided as accessory for the Wifx L1.
- Page 29 Wifx L1 User manual revision 1.0 Never turn or use directly the antenna body to screw it on the gateway, it could damage or break the antenna. Once the cable and the antenna correctly connected and the gateway correctly closed, you can install it on a pole using the 2 provided cable tie.
-
Page 30: Mounting On Wall (Indoor)
10.3 M OUNTING ON WALL INDOOR Using the accessory WHR-L01-W01, you can mount the Wifx L1 on a wall in indoor condition. The following instructions describe how to proceed. The WHR-L01-W01 is intended to be fixed on the Wifx L1 before any installation on the wall. - Page 31 Wifx L1 User manual revision 1.0 Once this first screw in place, it's time to mark the place of the second hole in the wall With the Wifx L1 fixed on the support...
-
Page 32: Final Control
Wifx L1 User manual revision 1.0 Once the second hole completed, you can place the plastic wall plug and screw the second screw as showed. 10.3.1 F INAL CONTROL As this installation is meant to be kept indoors, there is no special aspect to be taken care of. However, it is important... -
Page 33: Mounting On Wall (Outdoor)
A common method is to create a loop of cable under the Wifx L1 and secure it properly to the mast to ensure that any water stagnation remains below the cable grommet and that there is no mechanical stress on it.
Need help?
Do you have a question about the L1 and is the answer not in the manual?
Questions and answers