Table of Contents
Advertisement
Quick Links
Advertisement
Table of Contents

Subscribe to Our Youtube Channel
Related Manuals for Mobilogix ATD600S


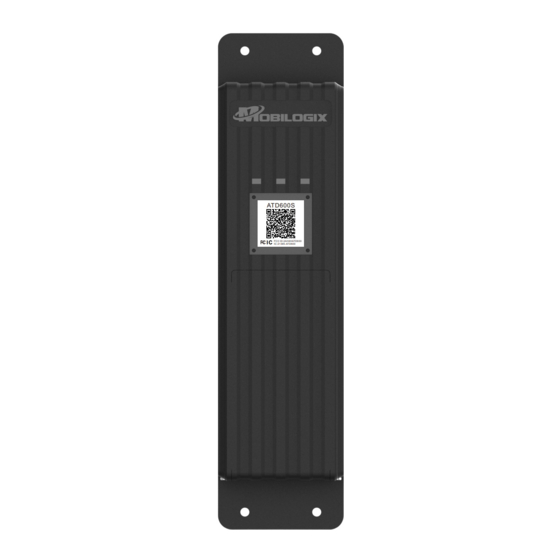
Summary of Contents for Mobilogix ATD600S
- Page 1 ATD600S User Guide August 10, 2021 Version 0.1.1...
-
Page 2: Table Of Contents
目录 Preface ................................4 Purpose ...............................4 Glossary ...............................4 Reference ..............................4 Installation ................................4 Before installation ............................4 2.1.1 Unpackaging and accessory checking ....................4 2.1.2 Active device ............................6 2.1.3 Config device ............................6 Installation ..............................6 Function ................................8 Brief introduction of beacon scanning ......................8 3.1.1 When to scan beacons .........................8 3.1.2 Beacon scanning ..........................8 Brief introduction of sampling location data ....................8... - Page 3 LKL, Historical data ............................11 LKL ................................11 Historical data ............................11 4.2.1 When to save historical data and report history data ..............11 How to do a BLE FOTA ............................. 12 Connect with BLE............................12 FOTA ................................. 18 Wireless UART ..............................23 What is wireless UART? ..........................
-
Page 4: Preface
1 Preface 1.1 Purpose For better support sales team, R&D team make this document to let team know how to install and use ATD600 device. 1.2 Glossary UAM: Un-authorized Movement LKL: Last Known Location NCL: Network Connection Lost MQTT: Message Queue Telemetry Transport QoS: Quality of Service 1.3 Reference For the information of reference manual or document of this document please see Table 1.1. - Page 5 Figure 2.1 label on the box(will update) ⚫ Accessory Here is the component list: 1. ATD600 2. package 3. screw, 2 pcs Figure 2.2 Device and cables...
-
Page 6: Active Device
Notice: 1: default APN is: mobilogix1.telefonica.com 2: default URL is: mbxiotfusion.mobilogix.com:1883 3: default cellRAT is 3, which support both GSM and eMTC RATs. Here is the RAT selection •... - Page 7 Step 2 Step 3 Figure 2.8 Example location...
-
Page 8: Function
3 Function 3.1 Brief introduction of beacon scanning 3.1.1 When to scan beacons There are two ways to scan beacons. 1. periodically sample (default 4h, GNSS sample frequency) 2. double press button 3.1.2 Beacon scanning When the sampling period is reached, device begins to scan beacons for 10s (default, Duration of sleep beacon scan), then stop scanning until next calling. -
Page 9: Data Report
{"ts":1615269209136,"values":{"ET":"LD","SN":"A600S20500029H","IMEI":"864475040056136","IMSI":"460044 339301547","IPW":3979,"SS":0,"CS":"LTE Cat NB1","OP":"CHINA MOBILE","LAC":"","CI":"","GFT":0,"LAT":22.576006,"LONG":114.054672,"Heading":240,"Altitude":157.000000," HDOP":1.230000,"NoS":5,"GFS":1}} 3.3 Data report 3.3.1 When to report data After setting the sampleCount(default 4, report sample data after sample a certain number of times) and sample frequent(default 4(h), GNSS sample frequency), every (sampleCount)*( sample frequent) hours will try to report data to cloud. -
Page 10: Geofence In And/Or Out Alarm
CMCC","LAC":"25F0","CI":"DDF","GFT":0,"LAT":0.000000,"LONG":0.000000,"Heading":0,"Altitude":0.000000,"H DOP":0.000000,"NoS":0,"GFS":0}} 3.4.3 Geofence in and/or out alarm This alarm can be divided into “Geofence In” and “Geofence Out” alarm, after setting center point (geofenceAlarm Point) and radius of geofence cycle and enable it, device will report the alarm after get location data from GPS. -
Page 11: Device Under "Set Up" Mode
quick press one time Red LED blink once, to tell device is alive and in normal mode. sampling and report data to cloud, like on demand feature after send quick press two times report data to cloud blink the red LED based on ACK or NACK (blink 3x for ACK, blink 4x for NACK). -
Page 12: How To Do A Ble Fota
2. When network OK, and the real-time data is already sent to the server, device will send the history data to server and delete data in memory. Notice: 1. “isHistory” is used in the message to mark it is historical data, for example: {"ts":1577836861040,"values":{"isHistory":1,"ET":"IBL","SN":"A600S20500002H","IMEI":"865284046405886","I MSI":"460046260108483","IPW":3563,"SS":0,"CS":"GSM","OP":"CHINA MOBILE CMCC","LAC":"25F0","CI":"DDF","GFT":0,"LAT":0.000000,"LONG":0.000000,"Heading":0,"Altitude":0.000000,"H... - Page 13 3. then you can search your device, for easier, you can set filer (input ATD600), like this:...
- Page 14 4. select the right device according to the mac address and connect with it.
- Page 15 5. after connection, it shows like this:...
- Page 16 6. create bond, the passkey is xxxxxx.
- Page 17 7. after bonding, you can see like this.
-
Page 18: Fota
5.2 FOTA 4. press the menu show as above, and select “OTA DFU”... - Page 19 5. then use default setting, make a “PARTIAL OTA”...
- Page 20 6. select your image file from your phone, press” Application” to add image, like following picture.
- Page 21 7. press OTA to start a FOTA after you load the right Image file.
- Page 22 8. after done, just press “END”, like this:...
-
Page 23: Wireless Uart
6 Wireless UART Notice: Wireless UART is only valid before first entering sleep. 6.1 What is wireless UART? As we know, we can get the device`s running log or configure parameters by a serial port connection. Now, we add an EV board as a wireless bridge between PC and MT4200 to achieve the same functionality. It is convenient for us to read the device`s log after the assembly is complete. - Page 24 We use EFR32BG13 radio board. 2. Radio board need to be program (The firmware is scanner-rtos v001.s37) at first run. 3. Open a terminal and open the EV board`s COM. The baud rate is 115200.
-
Page 25: How To Connect A Device
6.3 How to connect a device? 1. First, EV board will print device list. The format is 0,SN,mac address... - Page 26 2. Connect to your device by sending 1,SN,mac address 3. Send AT command to read or write parameter.
- Page 27 (work in normal mbxEnter mode) mbxExit enable running log (work in normal mode) mbxSN? read SN mbxHW? read hardware version mbxSW? read firmware version mbxMac? read MAC address mbxSURL? read server(MQTT) URL mbxSURL="mbxiotfusion.mobilogix.com"1883 write server(MQTT) URL...
- Page 28 MQTT token mbxMqttToken="efccc44eaf36200e44b3" write MQTT token mbxFURL? read FOTA URL mbxFURL="http://mbxfota.mobilogix.com",80 write FOTA URL mbxAPN? read APN mbxAPN="mobilogix1.telefonica.com" write APN mbxAPNNP? read APN name and password mbxAPNNP="mobilogix""88889999"...
-
Page 29: Use Ble To Config Device
mbxAT=1,AT+CCID read ICCID form modem mbxEnScanBcn? read beacon scanning state mbxEnScanBcn= enable/disable beacon scanning mbxScanBcn? read beacon scanning time (unit:s) write beacon scanning time (unit:s) mbxScanBcn=600,10 (here 600 is fixed and 10 is the scanning time) sampleConfig? get sample configuration sampleConfig= frequece, report frequency set sample frequece/report frequency Read network setting... - Page 30 3. then please click review every item by click “Read” and “Write”, and also please review following configuration table: Here is the command table: user Default Read Write Comment description Firmware 1.0.0 TRUE Fault Version PDP value TRUE TRUE rang is 1~16 apn psword TRUE TRUE...
- Page 31 TRUE TRUE Value UAMAlarm TRUE TRUE shake number fota Url TRUE TRUE Max length is 51 bytes http://mbxfota.mobilogix.com fota Port TRUE TRUE Max length is 4 bytes device Apn mobilogix1.telefonica.com TRUE TRUE Max length is 56 bytes server Port 1883...
- Page 32 8. FCC Statement This equipment has been tested and found to comply with the limits for a Class B digital device, pursuant to part 15 of the FCC Rules. These limits are designed to provide reasonable protection against harmful interference in a residential installation.
- Page 33 9. Canada Statement This device contains licence-exempt transmitter(s)/receiver(s) that comply with Innovation, Science and Economic Development Canada’s licence-exempt RSS(s). Operation is subject to the following two conditions: (1) This device may not cause interference. (2) This device must accept any interference, including interference that may cause undesired operation of the device.
Need help?
Do you have a question about the ATD600S and is the answer not in the manual?
Questions and answers