
Related Manuals for LV switch SIP-H680 Series


Summary of Contents for LV switch SIP-H680 Series
- Page 1 Ezdirect distributore Lvswitch – Via Nerino Garbuio – 54038 – Montignoso – www.ezdirect.it...
-
Page 2: Table Of Contents
SIP-H680 Series IP Phone User Manual Catalog Statement..............................4 CE mark.............................4 Part 15 of FCC Regulations.......................4 WEEE Mark............................4 3.2 Phone Installtion........................16 Writing purpose............................5 1.Outline..............................6 1.1 Hardware composition.........................6 1.2 Display icon description.......................8 1.3 Configuration interface description....................10 1.3.1 Phone LCD Configuration....................10 1.3.2 Web interface configuration...................10 1.3.3 Mobile phone scan code configuration................11... - Page 3 SIP-H680 Series IP Phone User Manual 4.5.1 Headset..........................61 4.6 System customization........................62 4.6.1 Account management....................62 4.7 Dial Plan............................63 4.7.1 Dial plan syntax........................63 4.7.2 Dial plan Funciton......................64 5.Basic functions............................73 5.1 Make a call..........................73 5.2 Answer a call..........................74 5.3 End a call...........................75 5.4 Redial............................75 5.5 DND............................76...
-
Page 4: Statement
SIP-H680 Series IP Phone User Manual 6.6.3 Web page configuration description................121 6.7 Trusted Certificates........................122 Copyright Copyright © 2020 LVswitch (Guangdong) Information Technology Co., Ltd. Copyright, all rights reserved. Without the express written permission of LVswitch (Guangdong) Information Technology Co., Ltd., no unit or individual may copy, copy or translate part or all of this manual without authorization. -
Page 5: Weee Mark
SIP-H680 Series IP Phone User Manual The device will not cause harmful interference. This device must accept any interference received, including interference that may cause unintended operation. WEEE Mark Since electronic products contain certain hazardous substances, in order to properly dispose of these electronic and electrical wastes and at the same time... -
Page 6: Writing Purpose
SIP-H680 Series IP Phone User Manual Writing purpose Thank you for using SIP-H680W/SIP-H680L IP phone. H680 is a simple office handheld phone with rich functions. In addition, it also has high-definition sound quality, unique appearance design, multi-language interchange; supports WIFI module/4G LTE module; compatible with service platforms of many manufacturers, such as IPPBX, Cloud PBX, IMS core network, softswitch, etc. -
Page 7: Outline
SIP-H680 Series IP Phone User Manual 1.Outline This chapter mainly provides a brief overview of the T790 IP phone. The main contents are as follows: Ø 1.1 Hardware composition Ø 1.2 Display icon description Ø 1. 3 Configuration interface description Ø... -
Page 9: Display Icon Description
SIP-H680 Series IP Phone User Manual (For example, 2 soft key functions are displayed on the main interface:History ,Menu). These two soft keys will change with the operation of the phone keys. In the function description below, the soft keys refer to these two keys, and the soft key functions correspond to the text at the bottom of the display screen. -
Page 10: Configuration Interface Description
1.3 Configuration interface description The H680 phone supports the following ways to configure the phone: Phone LCD configuration Web interface configuratio QR code configuration... - Page 11 SIP-H680 Series IP Phone User Manual Quickly configure the phone, through the phone LCD screen and the phone keyboard panel, you can configure and use the phone functions. After checking the IP address of the phone, you can also enter the IP address of the phone in the browser to view all the functions of the phone, and configure it through the browser.
-
Page 12: Mobile Phone Scan Code Configuration
SIP-H680 Series IP Phone User Manual introduction, please see the function configuration chapter. 1.3.3 Mobile phone scan code configuration Get the phone’s QR code through the phone’s QR code function. Before scanning, the smart phone needs to be connected to the WIFI of the same network as the phone before you can use the smart phone to scan the QR code to access the phone’s management page. - Page 13 SIP-H680 Series IP Phone User Manual • Advanced network setting • • CDP • • SNMP × • STUN Features • • Call forward • • Call transfer • • Auto Answer • • Anonymous Rejection • • • • Anonymous Call •...
- Page 14 SIP-H680 Series IP Phone User Manual cumentation The technical support manual provided by H680 is as follows: Name Description Obtain Language Includes easy With IP phone H680 quick Lvswitch company installation and Chinese/English user manual website download phone customization H680 User...
-
Page 15: Notes For Safe Use
SIP-H680 Series IP Phone User Manual 2. Notes for safe use Please read the safety instructions carefully before installing and using the phone to ensure safe and convenient use of the phone! Please use the power adapter specified by the product (supplied with the package).If you need to use the... -
Page 16: Getting Started With The Phone
SIP-H680 Series IP Phone User Manual 3. Getting started with the phone This chapter introduces the basic operation of the H680 IP phone, including the following contents: Ø Packing list Ø 3.2 Phone installation Ø 3.3 Phone initialization Ø 3.4 Phone standby interface Ø... -
Page 17: Phone Initialization
SIP-H680 Series IP Phone User Manual 3.3 Phone initialization After the phone is correctly installed and powered on, the phone will start up and display the following display: Phone initialization The LCD screen displays “Welcome Initializing Please wait ...”• Connect to network (the phone's initial network is automatically obtained by DHCP) After the phone is successfully turned on, the phone will automatically obtain the assigned IP address, subnet mask, default gateway, DNS server and other network configuration. -
Page 18: Check Phone Status
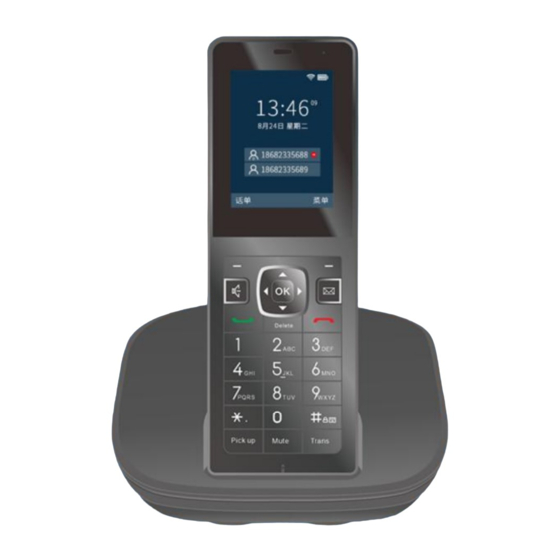
SIP-H680 Series IP Phone User Manual The phone standby interface can display the phone’s time, date, phone status (Do Not Disturb, Auto Answer), account registration status, extension number, label, battery level and WIFI icon, and two soft keys at the bottom of the LCD screen (History , Menu) label. -
Page 19: Set Up Phone Network
SIP-H680 Series IP Phone User Manual - Computer browser interface to view 1. Open the browser. 2. Enter the IP address of the phone (IPv4 /IPv6),192.168.17.39. 3. Enter the phone login page, enter the account and password to log in, the initial account and password is (admin/admin). - Page 20 SIP-H680 Series IP Phone User Manual 1.Press Menu->WIFI->Wireless network•Select the SSID to connect•press Option->Configuration. to select the desired mode in the IP mode(IPv4•IPv6•IPv4 &IPv6). 3. If it is IPv4&IPv6 mode, you can configure the mode priority. •Press to enter selecting mode priority•...
- Page 21 SIP-H680 Series IP Phone User Manual If you want to set up a DHCP network, fill in other corresponding SSID information and click Submit. H680 phone can set static IP address - Set a static IP through the phone interface 1.Press Menu->WIFI->Wireless network •Select the SSID to connect•press Option->...
- Page 22 - Set static IP via web interface 1.Log in to the phone page through the IP address. 2.Click Network•N•->WIFI->SSID1•fill in the corresponding ssid information and enable. 3.Check the static IP address according to the selected WAN interface mode IPv4 needs to fill in the IP address, subnet mask, default gateway, preferred DNS and alternative DNS.
-
Page 23: Phone Input Method And Input Method
an account The H680 phone supports two configuration methods: Manual configuration Software batch configuration The H680 IP phone supports dual account registration. The account switch is performed through the account button of the phone. The phone is generally configured by the system administrator. The account has been configured when the phone is obtained. - Page 24 - Input method introduction Ž...
-
Page 26: Phone Customization
SIP-H680 Series IP Phone User Manual 4. Phone customization You can customize the phone according to your own usage habits, such as: language, time & date, ringtones, contacts, Dir, etc. This chapter will give a detailed introduction to the customized phone. The main contents are as f ollows: Ø... - Page 27 - Set the language through the phone interface 1. Enter the phone IP address to enter into the web interface. 2. At the top right of the web interface, select the language from the drop-down box.
-
Page 28: Time&Date
4.1.2 Time&Date H680 can be set to display the time on the LCD screen when the phone is in standby, configure your SNTP server to automatically obtain the time and date, or manually set the time and date. - Obtain the time and date automatically through the phone interface 1. - Page 29 SIP-H680 Series IP Phone User Manual - Obtain time automatically via web browser 1. Log in to the phone page by IP address. 2. Press settings (E) -> date and time (t). 3. Manual setting is disabled by default. 4. Primary server and secondary server fill in the SNTP server address.
- Page 30 SIP-H680 Series IP Phone User Manual - - Daylight Saving Time setting 1. Log in to the phone page by IP address. 2. Press settings (E) -> date and time (t). 4. There are two types of manually setting the daylight saving time method by date or by week. Fill in the start time and end time.
- Page 31 SIP-H680 Series IP Phone User Manual u Set daylight saving mode in week modeŽ - Set time and date display format via web browser 1.Log in to the phone page through the IP address. 2.Press Settings (E) -> Date and Time (t).
-
Page 32: Call Out Button
SIP-H680 Series IP Phone User Manual The following table shows the date displayed in each date format: Date format Display MM DD WWW Wed,Aug 12 YY MM DD 12-Aug-20 YYYY MM DD 2020-Aug-12 YYYY/MM/DD 12/Aug/2020 YY/MM/DD 12/Aug/20 YYYY MM DD 12 Aug.2020... - Page 33 SIP-H680 Series IP Phone User Manual Enabling the keypad lock on the phone can prevent the phone from being used by unauthorized persons or accidental operations caused by accidental touches. When the keyboard is locked, only emergency call numbers can be dialed. If you need to dial other numbers, you need to unlock it.
- Page 34 SIP-H680 Series IP Phone User Manual b.Set other time (for example, after 10 seconds), the phone will be automatically locked at the set time after standby. 7. Press Save soft key to save the change. When the phone is locked , the LCD screen prompts “The keyboard is locked.”. And soft key showing will change to Emerg(emergency call) and Unlock(Use for unlock keyboard).As shown below:...
- Page 35 SIP-H680 Series IP Phone User Manual - Unlock the keypad lock on the phone interface 1. Press the Unlock soft key or any locked key, such as menu key, function key, and all keys. 2. Enter unlock password in the Unlock PIN field.(Default:admin) 3.Press ok softkey.
-
Page 36: Voice Setting
SIP-H680 Series IP Phone User Manual 4.2 Voice setting There are several sound settings in H680, including the following points: Volume setting Ringtone setting Button voice setting Signal tone setting 4.2.1 Volume setting The H680 phone can set the ring volume and the volume during the call. The volume setting range is 1-15, and the volume becomes larger as the value increases. -
Page 37: Ringtone Settings
4.2.2 Ringtone settings You can set different ringtones for your phone to distinguish incoming calls. In addition to unified ringtones, contacts can also set different ringtones to distinguish incoming calls from different contacts. The system provides a total of 10 default ringtones to choose from. - Set the incoming call ringtone on the phone interface 1.Press Menu->Settings->Basic settings->Sounds->Ringtone. -
Page 38: Button Sound
SIP-H680 Series IP Phone User Manual 2.Press Directory•B•->Local contact•x•• 3.Add a contact or click a contact in the list to edit it. 4.Select a ringtone for the contact from the ringtone selection box. 5.If you want to add a contact, click the Add button, if you want to modify a contact, click the Edit button. -
Page 39: Signal Tone
SIP-H680 Series IP Phone User Manual 4.2.4 Signal tone The audible signal sent by the switch to the user indicates that the phone is in a certain state. The signal tones follow a unified standard in each device. You can customize the signal tones according to national standards, or you can customize the signal tones. -
Page 40: Contact Management
SIP-H680 Series IP Phone User Manual is busy or the called party is busy Indicates that this connection ž10±3dBm0 Congestion 450±25 has encountered machine line congestion Indicates that the phone is in ž10±3dBm0 Call waiting 450±25 call waiting Indicates that the phone is in ž10±3dBm0... - Page 41 SIP-H680 Series IP Phone User Manual 4.3.1.1 Add group - Add a group via phone 1. Press the soft key Dir -> AddGrp. 2. Fill in the group name. 3. Press the Save soft key to save the group. - Add group via web browser 1.
- Page 42 SIP-H680 Series IP Phone User Manual - Edit group via phone interface•Default group can’t be edited• 1. Press Menu ->Directory -> Local directory. to select the edited group. 3.Press softkey Option->Detail,enter the edit interface. 4.Enter the new group name in the group name edit box (only English can be input on the phone interface•.
- Page 43 SIP-H680 Series IP Phone User Manual 4.3.1.3 Delete group - Delete the group through the phone (the default group cannot be deleted) 1. Menu ->Directory -> Local directory. to select the group needs to be deleted. 3.Press option softkey. to select delete option.
- Page 44 SIP-H680 Series IP Phone User Manual 2.Click Directory•B•->Address list•x•• 3.Select the group in the group module. 4.Click the delete button in the group setting module. 4.3.1.4 Add contact There are three ways of adding contact: Manually add Batch import Add from call record - Add contacts via phone user interface 1.Press the history soft key in the standby state.
- Page 45 - Add a contact through the local contact of the phone interface 1.Press Menu->Directory->Local Directory on the standby interface. to select the group. 3.After entering the group, press the Option-Add key to enter the add interface. to fill in the contact information (Name, mobile number, office number, other number, ring, account, group, etc.
- Page 46 SIP-H680 Series IP Phone User Manual 4. Click the Add button of the local contact module to add. - Import contacts in bulk via web browser 1. Log in to the phone page by IP address. 2. Click Directories(B)->Address list(x).
- Page 47 SIP-H680 Series IP Phone User Manual 4.3.1.5 Edit contact - Edit contacts via phone interface 1.In the standby mode, press the contact soft key (or Menu->Directory->Local Directory)->All Contacts. 2.Press to select the person name needed to be edit. 3.Press Option->Detail• ,enter into the edit page of the contact.
- Page 48 SIP-H680 Series IP Phone User Manual 4.3.1.6 Delete contact - Delete contact via phone user interface 1. Press Menu -> Direcorty -> Local Directory ->All Contacts in standby mode . to select the name of the contact you want to delete.
- Page 49 SIP-H680 Series IP Phone User Manual 4. Click the Delete/Delete all button under the list to delete the contact. 4.3.1.7 Call contact - Call a local contact through the phone interface 1. Press Menu -> Directory -> Local Directory) - >All Contacts.
-
Page 50: Blacklist
4.3.2 Blacklist H680 can save up to 30 blacklisted contacts, and the phone numbers with blacklisted will be automatically rejected by the phone. 4.3.2.1 Add to blacklist - Add a blacklist through the phone CDR interface 1. Press the History soft key in standby mode. to select the number added to the blacklist. - Page 51 - Add blacklist via web browser 1. Log in to the phone page by IP address. 2. Click Directories(B)->Address list(x). 3. Fill in the name and phone number to be added to the blacklist in the local contact module, and select the group as a Blacklist (BlackList).
- Page 52 SIP-H680 Series IP Phone User Manual - Delete the blacklist through a web browser 1. Log in to the phone page by IP address. 2. Click Directories(B)->Address list(x). 3. Select the blacklist from the drop-down box of the contact list below (BlackList) .
-
Page 53: Ldap Configuration
SIP-H680 Series IP Phone User Manual 4.3.3 LDAP configuration 4.3.3.1 Function Description LDAP (Light Directory Access Protocol, Lightweight Directory Access Protocol) is an application layer protocol running on an IP network that provides a series of functions for accessing and maintaining distributed directory information services. - Page 54 SIP-H680 Series IP Phone User Manual The following example is for reference only. You can modify the LDAP attribute value according to your specific needs. 1. Open the web interface and login . 2. Click Directories(B)->LDAP(I). 3. Configure LDAP parameters as following: 4.3.3.3 LDAP setting explaination:...
- Page 55 SIP-H680 Series IP Phone User Manual the prefix of the filter condition. LDAP Encrypted tra Set the connection method between the LDAP nsmission mode LDAP server and the IP phone: •LDAP •LDAP TLS Start ŽLDAPS LDAP server Fill in the IPPBX address 192.168.17.30...
- Page 56 SIP-H680 Series IP Phone User Manual LDAP Lookup For Set whether to perform LDAP search on Enable Incoming Call incoming call numbers. LDAP Lookup for Call Set whether to search for numbers in the Enable LDAP phone book when making a call.
-
Page 57: Cdr (Call History) Management
SIP-H680 Series IP Phone User Manual 4.4 CDR (call history) management The call history of H680 includes dialed numbers, missed calls, and received calls. Each record supports up to 300 records.You can view, delete, add contacts, and add blacklists to the dialog list. For contact operations, please refer to the chapter on contact management. - Page 58 SIP-H680 Series IP Phone User Manual - Make a call from the CDRS 1. Press the History soft key when the phone is in standby. to select the number going to call. 3.Press option->detail to send out .
-
Page 59: Accessories Customization
SIP-H680 Series IP Phone User Manual 4.5 Accessories customization H680 can be used with a variety of accessories, the main accessories are as follows: Headset 4.5.1 Headset H680 can use a headset. You only need to connect the headset to activate the headset mode. For the headset installation, please refer to the phone installation chapter. -
Page 60: System Customization
SIP-H680 Series IP Phone User Manual 4.6 System customization 4.6.1 Account management H680 can register SIP accounts, up to 2 accounts, and make calls through the registered SIP accounts. Dual accounts can make multiple calls at the same time, and switch the account to use by pressing the account key. -
Page 61: Dial Plan
SIP-H680 Series IP Phone User Manual -Register an account through the web interface 1. Log in to the phone page by IP address . 2. Click Account(A)->Register(r). 3. Submit after filling in (required items: display name, user name, registered account, password, server address, port,transport protocol). -
Page 62: Dial Plan Funciton
SIP-H680 Series IP Phone User Manual Enter“78x” Represents a placeholder match“781”“782”“783”“784”…“789”etc Enter“[7-9]” Indicates the interval range match“7”or“8”or“9” Represents the interval range, there is only one [] Enter“12[7-9]45” in the string, used with the- match“12745”“12845”“12945” symbol Represents a combination Enter“([1-2][7-8])” of multiple ranges, there match“17”“27”“18”“28”... - Page 63 SIP-H680 Series IP Phone User Manual After adding the above rules, when you dial the number "1", press the Send soft key or # to make the call, the phone will automatically be replaced with "10086" for dialing. - Modify the replacement rule through the web interface: 1.Log in to the phone interface through the IP address.
- Page 64 SIP-H680 Series IP Phone User Manual 4.7.2.2 Dial now rule You can customize the immediate outgoing rules, up to 100. Any number that meets the rules entered by pressing the hands-free or off-hook key will be dialed out at the set instant outgoing delay time without pressing the send button.
- Page 65 SIP-H680 Series IP Phone User Manual When entering any five-digit number such as 10086, the call will be made immediately after waiting for the delay time. - Modify the outgoing call rule through the web interface 1.Log in to the phone page through the IP address.
- Page 66 SIP-H680 Series IP Phone User Manual - Delete the outgoing call rule through the web interface 1.Log in to the phone page through the IP address. 2.Click Settings•E•->Dial plan•k•->Dial now. 3.In the rule list, click the rule to be deleted.
- Page 67 SIP-H680 Series IP Phone User Manual 4.7.2.3 Area code Calls between different regions need to add the area code, and the area code is different in different areas. If you need to dial the phone number of a certain area frequently, you need to manually add the area code prefix of that area.
- Page 68 SIP-H680 Series IP Phone User Manual 4.7.2.4 Block out You can set restrictions on outgoing numbers and restrict the phone from dialing certain numbers. H680W supports up to 10 restricted outgoing numbers. When the number you call matches the rule, the phone LCD will display the words "Forbidden Number".
- Page 69 SIP-H680 Series IP Phone User Manual - Modify the rules for restricting outgoing calls through the web interface 1.Log in to the phone page through the IP address. 2.Click settings•E•->Dial plan•k•->Block out. 3.In the list of restricted outgoing call rules, click on the rule to be modified.
- Page 70 SIP-H680 Series IP Phone User Manual...
-
Page 71: Basic Functions
SIP-H680 Series IP Phone User Manual 5.Basic functions This chapter mainly introduces the basic functions of the H680 phone. The contents are as follows: Ø Make a call Ø Answer a call Ø 5.3 End a call Ø 5.4 Redial Ø... -
Page 72: Answer A Call
- Use the headset to make a call You can use any of the following methods: - Use the speaker to make a call You can use any of the following methods• 5.2 Answer a call... -
Page 73: End A Call
SIP-H680 Series IP Phone User Manual H680 can use three tools to answer calls: Handset Headset Hands-free - Use the handset to answer the call Press the off-hook key when the phone is ringing. - Use hands-free to answer calls key. -
Page 74: Dnd
SIP-H680 Series IP Phone User Manual - Redial using the headset 1.Insert the headset to activate the headset mode and press the off-hook button. 2.Press the off-hook key again to make the last call in headset mode. 5.5 DND You can set the phone to the DND mode. After setting the DND mode, the phone will display an icon the upper right corner. - Page 75 SIP-H680 Series IP Phone User Manual - In phone mode, enable DND on the phone interface 1. Press Menu->Features->Do Not Disturb when the phone is in standby. 2. Press the switch soft key to switchž 3. Finally, press the Save soft key to save the operation.
-
Page 76: Call Forward
SIP-H680 Series IP Phone User Manual 1. When the phone is in standby, press Menu -> Features -> DND to enter the custom DND setting interface. 2. Press to select the account. 3. Press key to select enable. key to save the opeartion. -
Page 77: Auto Transfer
3. Enter the number to be transferred. button/send button• •/or send softkey to transfer the incoming call. 5.6.2 Auto transfer Automatic transfer is mainly divided into the following types: Unconditional transfer: all incoming calls on the phone will be transferred to the preset number. Busy transfer: When the phone is busy, the incoming call will be transferred to the preset number. - Page 78 SIP-H680 Series IP Phone User Manual - Set up call forwarding via web interface 1. Press Features•UŽ->Forward&DND•4Ž• 2.Select the mode in the call forwarding mode area: Custom: Custom mode can enable the call forwarding function for the specified account or all accounts; Phone mode: The call forwarding function will be applied to all accounts on the phone.
- Page 79 SIP-H680 Series IP Phone User Manual - Set up call forwarding through the phone interface 1.Press Menu->Features->Call forward. 2.Select the transfer method to be set according to your needs: ² Always forward 1ŽPress to select enter into Always forward. 2Ž...
- Page 80 SIP-H680 Series IP Phone User Manual ² Busy Forward 1Ž to select enter into Busy forward. to select enable/disable. 3ŽFill in the number for call transfer on busy. 4ŽEnter the on Feature code and off Feature code in the feature code area(Optional).
-
Page 81: Call Transfer
After the call forwarding function is enabled, the LCD screen of the phone will display an icon for enabling call forwarding when the phone is in standby. 5.7 Call transfer The call transfer can be divided into the following types: Blind transfer•There is no need to negotiate with the transferee, and directly transfer to the other party. -
Page 82: Blind Transfer
SIP-H680 Series IP Phone User Manual 5.7.1 Blind transfer Phone Phone Phone A and B are talking @B press Trans softkey • A AB call enters the hold state (press the resume soft key to resume the call between A and B) AB inputs the number C,press the BTRa softkey to transfer the call to party C. - Page 83 b) Select number by contact 1ŽB press the Dir soft key. 2ŽPress to select the group, press Enter soft key into the group. 3ŽPress to select the contact you want to transfer, and press the Send soft key. 4ŽPress Trans soft key to blind transfer. 5ŽThe call between phone B and phone A will be interrupted, and the call will be transferred to phone - Cancel the blind transfer operation process•...
-
Page 84: Inquiry Transfer
SIP-H680 Series IP Phone User Manual operation, press the resume soft key to resume the call between phone B and phone A. 5.7.2 Inquiry transfer... - Page 85 SIP-H680 Series IP Phone User Manual Phone Phone Phone A and B are talking. @B press the transfer soft key, AB call enters the hold state (you can press the resume soft key to resume the call). AB enters the number of C and press the send soft key...
-
Page 86: Call Waiting
SIP-H680 Series IP Phone User Manual c) Phone C can answer the call 1ŽAfter the negotiation between phone B and phone C is completed, phone C can answer the incoming call of phone A. 2ŽPhone B presses the Trans soft key. -
Page 87: Auto Redial
SIP-H680 Series IP Phone User Manual 5.9 Auto redial If you enable automatic redial, the phone will display an automatic redial prompt on the LCD interface after the call fails. You can also set the automatic redial time interval and the number of automatic redials. -
Page 88: Auto Answer
SIP-H680 Series IP Phone User Manual Use auto redial function: When the phone call fails, the phone LCD interface prompts as follows• 5.10 Auto Answer You can set up the auto answer function for the registered account of the phone. When the account with auto answer turned on receives an incoming call, the phone will automatically answer the call after the set auto answer waiting time. -
Page 89: Anonymous Call
SIP-H680 Series IP Phone User Manual appears on the standby display interface of the phone,Indicates that the phone is in automatic answering state.When the phone is in a call, it will no longer answer automatically. 5.11 Anonymous Call The phone can enable the anonymous rejection function. When there is an anonymous call, it will automatically reject the call. -
Page 90: Hotline
5.12 Hotline You can set frequently dialed numbers as hotlines. When using the hotline, when you press the off-hook key or press the handsfree key for dialing operations, after waiting for the hotline delay time, the phone will automatically dial the set hotline number. If the delay time is set to 0, the hotline number will be automatically dialed out immediately when dialing. -
Page 91: Qr Code
5.13 QR Code H680 supports scanning the QR code provided by the phone through a smart phone to enter the web interface, so as to configure the phone information on the phone. Before scanning the QR code, the phone must be connected to the local area network to which the phone belongs, and in the same network segment as the phone, such as connected to the WIFI of the router... -
Page 92: Conference
The interface of the mobile phone login phone belongs to the following figure. The specific usage method is the same as that of the computer web page. If you want to know the configuration method of each function, please check the function introduction of each chapter. If you have any questions about the use of the QR code, please contact your network administrator. - Page 93 SIP-H680 Series IP Phone User Manual party call to the current call. - Create a local three-way call on the phone 1. A and B are talking. 2. A presses the conference soft key to initiate a three-party call, the call between A and B enters the hold state, and A enters the dialing interface.
-
Page 94: Upgrade
SIP-H680 Series IP Phone User Manual 3. Manage soft key: Enter the manage page, you can perform the following operations for the other two parties: 1)Delete soft key: Delete selected conference members 2)Hold soft key: Hold selected conference member 3)Back soft key: Return to the previous screen 4) Mute soft key: So that the other two parties cannot hear your voice, and the other two parties can still talk . -
Page 95: Advanced Function
SIP-H680 Series IP Phone User Manual 6.Advanced function... -
Page 96: Multicast
SIP-H680 Series IP Phone User Manual This chapter mainly introduces the advanced functions of the H680 phone. The contents are as follows: 6.1 Multicast 6.2 Message 6.3 Configuration management 6.4 Auto Provision 6.5 SIP configuration 6.6 Action URL 6.7 Trusted Certificates 6.1 Multicast... - Page 97 3.Press Options softkey•and then press Edit softkey. 4.Enter the multicast IP address and port number in the address field (for example: 224.5.6.20:10008). 5.Enter the group name in the label field. 6. Enter the corresponding channel number in the Channel area. The valid channel numbers is from 0 to 30.
- Page 98 SIP-H680 Series IP Phone User Manual to select the correponding group. 3. Press option soft key then press Delete key. The phone LCD screen prompts "Delete group?". 4.Press OK soft key to delete the group. To delete all multicast groups, press the Delete All key.
-
Page 99: Accept Multicast Rtp Stream
SIP-H680 Series IP Phone User Manual ignore all multicasts, the range is 1-31. For example, if the priority is set to 1, the multicast with priority 2-31 is ignored. 2. Penetrate DND: If the phone is enabled to penetrate DND, priority is 3; when the phone is enabled in the DND mode, multicasts with a priority greater than or equal to three can be answered normally;... -
Page 100: Multicast Use
SIP-H680 Series IP Phone User Manual 7.Click confirm button to save the operation. 6.1.3 Multicast use Phone A has set up account 1 as multicast, account 2 as the multicast list, phone B, C, D, etc., set the listening address;... -
Page 101: Message
SIP-H680 Series IP Phone User Manual Precautions: 1. The multicast RTP stream is one-way, only from the sender to the receiver. When the phone is in a call, initiate a multicast RTP session and the current call is on hold;... - Page 102 SIP-H680 Series IP Phone User Manual - Send text messages 1. Press Menu ->Messages -> Text messages ->New Message 2. Write new message, press the # key to switch the input method. 3. (Optional) Press the Switch soft key and select the sender account in the sender area.
- Page 103 SIP-H680 Series IP Phone User Manual - Send text messages through the web interface 1. Log in to the phone page by IP address 2. Click Features(U) -> SMS(9). 3. Input Send number. 4. Type the Send Content. 5. Press Confirm button to send the message.
-
Page 104: Configuration Management
SIP-H680 Series IP Phone User Manual - Delete text messages: 1. Press Menu ->Messages -> Text messages ->Inbox(Sentbox, Outbox, Draftbox). 2. Select the information to be deleted, press the Option soft key. 3. Select Delete, and then press the OK soft key. The LCD interface displays "Delete the selected message?". -
Page 105: Auto Provision
SIP-H680 Series IP Phone User Manual The H680W phone has a configuration management function. You can export the phone configuration through the configuration management, or you can modify the exported configuration and re-import the phone. - BIN configuration 1. Log in the web interface via Ip address. - Page 106 SIP-H680 Series IP Phone User Manual Obtain CFG configuration file Get phone related information Layout update environment For boot files and configuration files, you can contact your dealer to obtain template files; - The checking way of the related information of phones: MAC: Press the OK button to view the phone in standby mode Phone model: In standby mode, press Ok ->More ->...
-
Page 107: Automatic Update Operation Steps
SIP-H680 Series IP Phone User Manual tone, QoS, sound Call forwarding, anonymous call, intercom, TR069, Features Programmable keys, DND, Hotline, voicemail, keypad configuration lock, Action URL, Auto update Upgrade phone and pager configuration Other configuration Example: If the phone needs to be upgraded to a specified version, and the language is set to Chinese, create a LanguageAndUp.cfg file, add the configuration and place it in the server root directory. - Page 108 SIP-H680 Series IP Phone User Manual Root directory file map: Setting steps: 1. Login Web interface. 2. Click Settings(E) ->Auto provision(3) 3. server URL Fill in the https address such as http(s)://192.168.17.xx, enable power on and start. Automatic configuration information update after restart.
- Page 109 SIP-H680 Series IP Phone User Manual 6.4.2.2 FTP/TFTP method update: To configure the server, run IPOP.exe directly to enable FTP/TFTP in the service, or you can use 3CDaemon, TFTPD32, etc. as the server; after running, put the configuration file directly in the environment root directory;...
-
Page 110: Sip Configuration
SIP-H680 Series IP Phone User Manual Setup steps: 1. Login Web interface. 2. Click Settings(E) ->Auto provision(3) 3. server URL fill in the ftp/tftp address, for example: ftp://192.168.17.xx/ Enable power-on startup; automatic configuration information update after restart. 6.5 SIP configuration 6.5.1 SIP Session Timer... -
Page 111: Local Sip Port And Tls Sip Port
SIP-H680 Series IP Phone User Manual SIP session timer T1: Timer T1 is an estimate of the round trip time (RTT) of the transaction between the SIP client and the SIP server. SIP session timer T2: Indicates the maximum retransmission time of any SIP request message. The retransmission multiplication of T1 will continue until the retransmission time reaches the value of T2. -
Page 112: Action Url
SIP-H680 Series IP Phone User Manual 3. Check Local SIP port and TLS SIP port. 4. Press Confirm button to save. 6.6 Action URL The Action URL function is mainly used for the phone to report its own behavior to the computer. An action on the phone generates a URL. - Page 113 SIP-H680 Series IP Phone User Manual $firmware(Base) Registered When SIP account registered. $mac $model $firmware $local unregister When SIP account unregister. Same as above Register failure When SIP account register failure. Same as above Put down the When the handset hangs up.
- Page 114 SIP-H680 Series IP Phone User Manual Enable call Enable call forwarding Same as above forwarding unconditionally. unconditionally Disable call Disable call forwarding Same as above forwarding unconditionally. unconditionally Enable call Enable call forwarding on busy. Same as above forwarding on...
- Page 115 SIP-H680 Series IP Phone User Manual Disable mute Disable mute. Same as above Unanswered calls When you get unanswered calls. Same as above IP change When the ip phone IP address Same as above changes. Idle into a call When the phone enters the call state $mac from the idle state.
-
Page 116: Variable Description
SIP-H680 Series IP Phone User Manual Cancel callout When you cancel dial out call. Same as above Remote busy The remote call is busy. Same as above Cancel remote When the remote call cancel. Same as above call Peripheral When peripheral information is... - Page 117 SIP-H680 Series IP Phone User Manual For example: http(s)://server address/help.xml?mac=$mac 4. Click Confirm button to save. 6.7 Trusted Certificates You can upload a specific CA certificate to your phone. - Configure trusted certificates via web interface 1. Login Web interface.
- Page 118 SIP-H680 Series IP Phone User Manual 5. Click OK to restart the phone. - Upload trusted certificate via web page 1. Login Web interface. 2. Click security(F)-> Trusted Certificates(@). 3. In the Load Trusted Certificate File area, click Browse to select the local certificate file•*.pem, *.crt, *.cer or *.derŽ.
Need help?
Do you have a question about the SIP-H680 Series and is the answer not in the manual?
Questions and answers