Advertisement
Catalogue
Chapter 1 Overview----------------------------------------------------------------Page 1
Chapter 2 Connection-------------------------------------------------------------Page 2
Chapter 3 remote control---------------------------------------------------------Page 3
Chapter 4 Initial configuration---------------------------------------------------Page 4-5
Chapter 5 Main menu--------------------------------------------------------------Page 6
Chapter 6 Local media play-------------------------------------------------------Page 7
Chapter 7 About App---------------------------------------------------------------Page 8-10
Chapter 8 setting--------------------------------------------------------------------Page 11-14
Chapter 9 DTV------------------------------------------------------------------------Page 15-23
Chapter 10 Update--------------------------------------------------------------------Page 24
Chapter 11 Factory data reset------------------------------------------------------Page 25
Chapter 12 Troubleshooting-------------------------------------------------------Page 26
Chapter 13 Specification------------------------------------------------------------Page 27
Advertisement

Related Manuals for AMLOGIC S912


Summary of Contents for AMLOGIC S912
-
Page 1: Table Of Contents
Catalogue Chapter 1 Overview----------------------------------------------------------------Page 1 Chapter 2 Connection-------------------------------------------------------------Page 2 Chapter 3 remote control---------------------------------------------------------Page 3 Chapter 4 Initial configuration---------------------------------------------------Page 4-5 Chapter 5 Main menu--------------------------------------------------------------Page 6 Chapter 6 Local media play-------------------------------------------------------Page 7 Chapter 7 About App---------------------------------------------------------------Page 8-10 Chapter 8 setting--------------------------------------------------------------------Page 11-14 Chapter 9 DTV------------------------------------------------------------------------Page 15-23 Chapter 10 Update--------------------------------------------------------------------Page 24 Chapter 11 Factory data reset------------------------------------------------------Page 25 Chapter 12 Troubleshooting-------------------------------------------------------Page 26... -
Page 2: Chapter 1 Overview
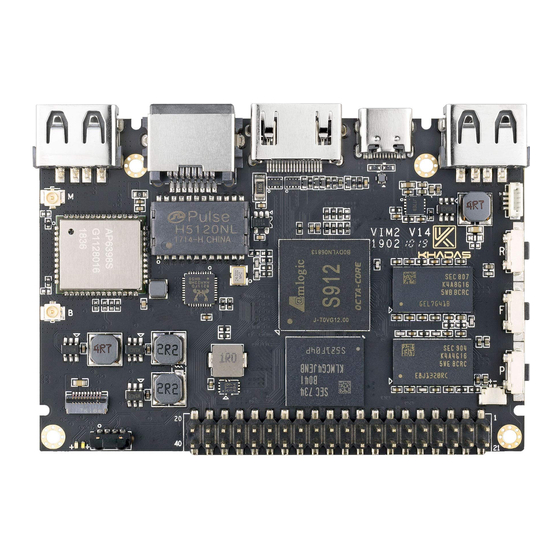
Chapter 1 Overview Appearance and interface Top Panel Rear Panel... - Page 3 Chapter 2: Initial configuration Step 1: At the “Welcome” page, click “Next” Step 2: Select your favorite language...
- Page 4 Step 3: Select output mode Step 4: Adjust the display position on the watch with your TV set Step 5: Set up the wired network if you are using a wired home network...
- Page 5 Step 6: Set up the Wi-Fi if you are using a wireless home network Step 7: Press ”Finish” to complete the initial configuration...
-
Page 6: Chapter 5 Main Menu
Chapter 5: Main Menu 5.1 Home Press Left/Right/Up/Down button on your remote to select items and Press “ok” button to enter 5.2 Application Press Left/Right/Up/Down Keys on your remote to select items and Press “ok” button to enter Press Empty to add your favorite app as a new shortcut, long press shortcut can delete your favorite app... - Page 7 5.3 Smart App Smart Press Left/Right/Up/Down Keys on your remote to select items and Press “ok” button to enter 5.4 Settings Press Left/Right/Up/Down Keys on your remote to select items and Press “ok” button to enter...
-
Page 8: Chapter 6 Local Media Play
Chapter 6: Local media play Press “Application” in main menu to select “file browser”, Press “ok” button to enter Select “Local Disk” or “USB” driver, press ”ok” button to enter... - Page 9 Click the video, there would pop up a option menu, Select your favorite video player to Start playing video Click the music, there would pop up a option menu, Select your favorite music player to Start playing music...
-
Page 10: Chapter 7 About App
Click the photos, there would pop up a option menu, Select your favorite photo player to Start playing photos Chapter 7: About app 7.1 About browser Press “Application” in main menu select browser... - Page 11 Use Brower to browse the web and visit your favorite websites. Open multiple webpages, use the Windows menu to switch. Create a bookmark in the Brower for quick visit 7.1.1 Open Webpage: Click the address bar to bring up the on screen virtual key-board. Type a URL and then click 7.1.2 Book mark a webpage webpage Click...
- Page 12 on the webpage to open a bookmark Click 7.1.3 open multipage at one time Open a new page: click...
- Page 13 Close a page: click 7.2 About App installer Click “AppInstaller” in Apps list...
- Page 14 Select the driver which APK allocated Click the APK you want to install...
- Page 15 7.3 About multi-screen communication 7.3.1 DLNA Notice: Please make sure your network is working before use this. Please make sure your mobile device support this function. Click “Media Center” in Apps list Turn on DLNA DMP” and “DLNA DMR” Turn on DLNA in your android mobile device Start playing the video,music,photo,in your android mobile device...
- Page 16 7.3.2 Airplay Click “Media center” in Apps list Turn on “Start AirPlay” Select video,photo in your iOS device,select share,click Airplay Select STB device Airplay name displayed in your iOS device and confirm 7.3.3 Micracast...
-
Page 17: Chapter 8 Setting
Chapter 8: Setting You can use setting to re-config your network, display, language… etc. - Page 18 8.1 Network setting 8.1.1 Wi-Fi setting Click ”Network settings”, select Wi-Fi, click Wi-Fi settings button to on or off to open Wi-Fi or close Wi-Fi. Open Wi-Fi, waiting till Wi-Fi scanning finished, select Wi-Fi network name from the list, input password, click “connect”...
- Page 19 8.1.2 Ethernet Setting Click ”Network settings”, select Ethernet, if Dynamic IP, when plug Ethernet cable, Ethernet settings will display “Connected” If select Static IP, click “static” in IP settings, revise address in IP address bar,Network gateway bar and DNS bar,click save.
- Page 20 8.1.3 Portable Wi-Fi hotspot This device can provide Wi-Fi hotspot for other network devices including PC,mobile,Pad… etc.They can get Free Wi-Fi sevice from this. Click Wi-Fi hotpot button to on, you can set network SSID name,Securtiy,Password as following,Password must be 8 digits at least. Click save.Then you can search SSID name in other network devices with inputting the same password to receive Wi-Fi signal.
- Page 21 8..2 Display settings 8.2.1 Auto output mode: Turn on “Auto output mode button” 8.2.2 Select output mode by hand: Turn off “Auto output mode”, Click HDMI output mode setting Select the mode in the pop-up list Presss ok to confirm and back...
- Page 22 8.2.3 Display position: Click display position,press “up” or ”down” key on the remote to adjust display position, Click “back” key to save and back...
- Page 23 8.3 Time settings 8.3.1 Set date and set time: keep “use network-provided time” on can keep TV display correct date and time as local date and time Close “Use network-provided time” can input new date and new time in “set date” and “set time”...
- Page 24 8.4 Language settings 8.4.1 OSD language settings: Click language setting,select the language as OSD language from language list,click “ok” to save and back 8.4.2 Input method settings: click input settings,click input method from the list,click “ok” to save and back,then you can use new input method.
- Page 25 8.5 System information 8.5.1 System information: Click system information to see model No., Android Version, Software Version, Hardware version, Apk version, IP address, Mac Address, Serial number 8.5.2 Memory information: click Memory information to see the memory space and internal storage space...
-
Page 26: Chapter 10 Update
8.6 More other settings Click Advanced settings for more other settings Chapter 10: Update Local update: Select setting in main menu, click ”system upgrade” Select “Local Update”, click ”ok” to enter, Click “select” button, select the new software, press ”ok” to back,... -
Page 27: Chapter 12 Troubleshooting
Click ”Update” button to start update Chapter 12: Troubleshootings Problem Possible cause What to do Power light not Mains lead unplugged Check mains lead Check fuse... - Page 28 Mains fuse blown Network doesn't Network cable not connected Connect/replace network cable or bad network cable work Wi-Fi not connected wifi Check Wi-Fi account/setting No picture or sound HDMI/AV is not selected on Reduce to another channel your TV sound distort Volume off Speaker not Adjust the voice volume...
- Page 29 Chapter 13: Specification AMLOGIC S912 QUAD-CORE 64-BIT CORTEX-A5 UP TO 1.5GHz PENTA-CORE MALIT820MP3 MEMORY 2G DDRIII 16G EMMC FLASH ANDROID 6.0 DECODER VIDEO DECODER FHD 1080P 60FPS H.265 10-BIT, H.264, VC-1, AUDIO DECODER MPEG1/2/4 PHOTO DECODER MP3,AAC,WMA,RM,FLAC,OGG VIDEO FORMATS JPG,JPEG,MJPEG,PNG...
- Page 30 FCC Warning Statement Changes or modifications not expressly approved by the party responsible for compliance could void the user’s authority to operate the equipment. This equipment has been tested and found to comply with the limits for a Class B digital device, pursuant to Part 15 of the FCC Rules.
Need help?
Do you have a question about the S912 and is the answer not in the manual?
Questions and answers