
Summary of Contents for Riello NetMan
- Page 1 N e t M a n S e n s o r I n t e r f a c e 1 W i r e 4 C h a n n e l A / D c o n v e r t e r –...
-
Page 3: Table Of Contents
INTRODUCTION ............................... 4 SAFETY................................4 TECHNICAL DATA ............................5 ................................5 NPUT ..............................5 ONNECTIONS ........................... 6 ABLE PECIFICATIONS INSTALLATION ..............................6 ........................6 AN PLUS JUMPER SETTINGS ..................7 ONNECTION OF THE SENSORS TO THE AN PLUS ... -
Page 4: Introduction
ENGLISH INTRODUCTION Thank you for choosing our product. The accessories described in this manual are of the highest quality, carefully designed and built in order to ensure excellent performance. This manual contains detailed instructions on how to install and use the product. It should be kept with care near the device, so that it can be consulted for information on how to use and make the most of your device. -
Page 5: Technical Data
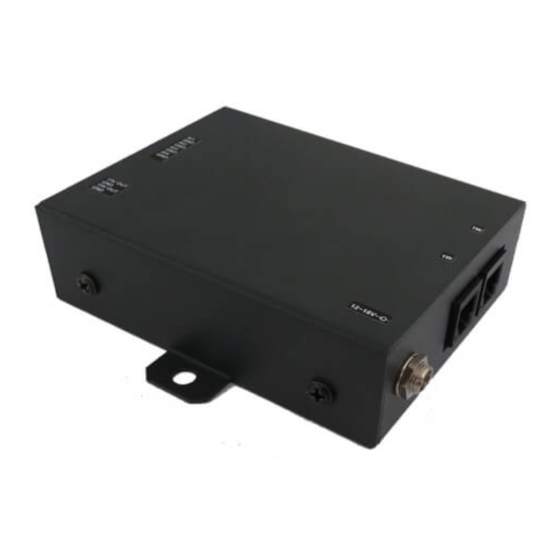
ENGLISH TECHNICAL DATA NPUT This device is a 4 channel A/D converter. Each channel has a standard input voltage range 0-10V. This device also provides a 15V unstabilized power supply capable to source 20mA (100mA max. if connected to an external power supply (12~18V )through Jack connector), allowing to supply a low power consumption transducer. -
Page 6: Cable Specifications
Picture 6 netman to sensor interface Picture 7 sensor to sensor cable INSTALLATION AN PLUS JUMPER SETTINGS In order to use the environmental sensors, please configure the JP6 and JP10 jumpers as shown below. See also the NetMan plus manual for configuring the other jumpers. -
Page 7: Connection Of The Sensors To The Net Man Plus
DB9 spacers and the tooth lock washers (supplied with the sensor) as shown on the following image to fix the NetMan to the UPS / Solar inverter with the supplied screws and tooth lock washers. By means of a multimeter, check the electrical... -
Page 8: Phisical Installation Of The Device
ENGLISH HISICAL INSTALLATION OF THE DEVICE This device can be installed on a DIN (see Picture 8, Picture 9 and Picture 10) rail or wall- mounted (Picture 11). 1. Bolt 2. Washers 3. Nut Picture 8 assemble bolt Picture 9 lift the wings by means of a flat screw driver Picture 10 hang the device on a DIN rail and screw the bolts to secure the case to the rail... -
Page 9: Software Setup
To establish the communication within the NetMan card and this product, please connect to the NetMan trough either serial port or telnet client and enable sensors (please refer to the NetMan user’s manual) and proceed as described in the following steps. -
Page 10: Irradiance Sensor Application
ENGLISH IRRADIANCE SENSOR APPLICATION With reference to Picture 4, in order to use an irradiance and temperature sensor, please connect the irradiance output to the “Analog Input 1” terminal; temperature to the “Analog Input 2” terminal; GND on any of the available GND connections. The supported input ranges for the sensor are (0 ~ 1200) W/m and (-20 ~ +80)°C Please tie to PE... - Page 13 ITALIANO INTRODUZIONE ............................. 14 SICUREZZA ..............................14 DATI TECNICI ..............................15 ..............................15 NGRESSO ..............................15 ONNESSIONI ............................16 PECIFICHE DEI CAVI INSTALLAZIONE ............................16 ..........................16 MPOSTAZIONE DEI JUMPER ................17 ONNESSIONE DEI SENSORI ALLA SCHEDA AN PLUS ...
-
Page 14: Introduzione
ITALIANO INTRODUZIONE Grazie per aver scelto il nostro prodotto. L’accessorio descritto nel presente manuale è di alta qualità, accuratamente progettato e costruito per garantire prestazioni eccellenti. Questo manuale contiene istruzioni dettagliate riguardo l’installazione e l’uso del prodotto. Dovrebbe essere conservato con cura vicino al dispositivo, così da poter essere consultato per informazioni riguardo l’uso del prodotto e per sfruttarlo al meglio. -
Page 15: Dati Tecnici
ITALIANO DATI TECNICI NGRESSO Questo dispositivo è un convertitore A/D a 4 canali. Ogni canale ha un intervallo standard di misura 0-10 V Questo dispositivo fornisce anche un’alimentazione non stabilizzata a 15V capace di fornire al massimo 20mA (100 mA se connesso ad un alimentatore esterno (12~18V ) tramite il connettore Jack), consentendo così... -
Page 16: Specifiche Dei Cavi
Figura 6 cavo dalla scheda netman al “sensor interface” Figura 7 cavo tra sensori INSTALLAZIONE MPOSTAZIONE DEI JUMPER Per usare I sensori ambientali, configurare i jumper JP6 e JP10 come mostrato di seguito. Consultare anche il manuale della scheda NetMan plus per l’impostazione degli altri jumper. -
Page 17: Connessione Dei Sensori Alla Scheda Net Man Plus
AN PLUS (solo per NetMan 102 plus): Per un corretto funzionamento della comunicazione tra i sensori e il NetMan 102 plus, è necessario garantire la continuità elettrica (connessione a terra) tra le torrette di fissaggio del connettore DB9 e la carpenteria dell’UPS / Inverter fotovoltaico. Pertanto prima di collegare i sensori è... -
Page 18: Installazione Fisica Del Dispositivo
ITALIANO NSTALLAZIONE FISICA DEL DISPOSITIVO Questo dispositivo può essere installato su barra DIN (Figura 8, Figura 9, Figura 10) o montato a muro (Figura 11). 1. Bullone 2. Rondelle 3. Dado Figura 8 assemblare dado, rondelle e bullone Figura 9 sollevare le alette con un cacciavite piatto Figura 10 agganciare il dispositivo alla barra DIN, quindi stringere i dadi... -
Page 19: Impostazioni Software
IMPOSTAZIONI SOFTWARE Per stabilire la comunicazione tra la scheda NetMan e questo prodotto, collegarsi alla scheda NetMan attraverso la sua porta seriale o telnet e abilitare I sensori (fare riferimento al manuale della scheda NetMan), quindi procedere come descritto di seguito. -
Page 20: Applicazione Sensore Di Irraggiamento
ITALIANO APPLICAZIONE SENSORE DI IRRAGGIAMENTO Con riferimento alla Figura 4, per usare un sensore di irraggiamento e temperature, collegare l’uscita irraggiamento all’ingresso 1; il sensore di temperatura all’ingresso 2; la massa a qualunque delle connessioni GND disponibili. Gli intervalli di misura suportati sono (0 ~ 1200) W/m2 e (-20 ~ +80)°C Collegare a terra lo schermo del cavo del sensore dalla parte di questo dispositivo o dalla parte del trasduttore, non da entrambe le parti. - Page 24 0MNU147NPB...