Table of Contents

Related Manuals for CHEFOOK VERTICALE EVO 350


Summary of Contents for CHEFOOK VERTICALE EVO 350
- Page 1 CAP. 9 - ECTRICAL DIAGRAM Professional slicers 9.1 - 115 V. - 230V. SINGLE-PHASE - 230V. THREE-PHASE - 400V. THREE-PHASE VERTICALE EVO 350-370-385 Fig. n°56 SERVICE CENTRE AUTHORISED DEALER Operating and maintenance manual...
-
Page 2: Preliminary Check
INTRODUCTION Periodically check the state of wear and tear of the cable and call the “SERVICE CENTER” for its replacement. This manual has been re-presented to provide the Client with all the information on the machine 7.5 - BLADE and its safety regulations, and also the use and maintenance instructions which permit using the machine in the best way and maintaining its efficiency throughout time. -
Page 3: Chap. 7 - Maintenance
6.2.5 - Cleaning the sharpener 6.2.5 - Cleaning the sharpener To clean the sharpener it is necessary to - SLIDE GUIDES LUBRICATION adhere to the following instructions: 1. lift (a) the cap up to the top; CHAP. 7 - MAINTENANCE page 22 2. - Page 4 CHAP. 1 - RECEIVING THE MACHINE extracted in the following way: 1. unhook the bladeguard (Fig. n°48); 2. take out the sharpening device (Fig. n° 50 rif.a); 1.1 - PACKAGE 3. unscrew the three or four screws (Fig. n° 50 ref.f), depending on the model, which The slicer is shipped in a package which consists of (Fig.
-
Page 5: Cleaning The Machine
CHAP. 6 - ROUTINE CLEANING 6.1 - GENERALITIES Do not expose the package to humidity Cleaning the machine must be carried out at least once a day or, if necessary, more fre- or rain (Fig. n°4). quently . All the parts of the slicer that come in direct or indirect contact with the food to be cut Fig. -
Page 6: Chap. 2 - Installation
the documents, make a precise report on the damage to the machine. Do not 5.3 - SHARPENING THE BLADE overturn the package!! When transporting it make sure that it is firmly held WARNING: Before starting to sharpen the blade, pay attention to RESIDUAL RISKS by the four corners (keeping it parallel to the floor). -
Page 7: Loading And Cutting The Product
5.2 - LOADING AND CUTTING THE PRODUCT 2.2 - POSITIONING WARNING: The goods to be cut are loaded on the hopper only with the graduated hand Position the pallet, with the slicer, on a grip at “0” and the motor stopped, being careful with the blade and the points. flat surface and take off (a) the cap from the slicer (Fig. -
Page 8: Electrical Connection
2.3 - ELECTRICAL CONNECTION CHAP. 5 - MACHINE USE LEGEND (A) = Product code and name (B) = Power supply Check that the data reported on the techni- 5.1 - OPERATIONAL CHECK (C) = Motor frequency cal-part number plate (Fig. n°18), in the (D) = Amperage (E) = Serial number delivery documents, correspond in the right... - Page 9 TAB. n°2 2.3.5 - Electrical connection modification Unless otherwise specified, the slicers are equipped with 400 V. three-phase connection. MODEL U.m. 350 BS3 370 BS3 385 BS3 To modify the connection carefully follow these instructions: - remove the plug from the electric network; Blade diameter - turn the slicer on the side opposite the trolley;...
-
Page 10: General Precautions
BS2/BS3 CHAP. 3 - INFORMATION ON THE MACHINE 3.1 - GENERAL PRECAUTIONS The general precautions, even though they appear obvious, are fundamental for the installation, use, maintenance and possible inconveniences with their respective solu- tions. The slicer is designed for cutting fresh, seasoned and cooked meats, cured meats and vegetables, non-frozen and Fig. -
Page 11: Description Of The Machine
4.3 - DESCRIPTION OF THE MACHINE Do not leave the slicer exposed to dama- Professional CE slicers have been designed and made by our company with the precise ging agents: sun, rain, sprays, humidity, purpose of cutting food products (like lunch meat, meats and vegetables) and they gua- ice (Fig. -
Page 12: Construction Features
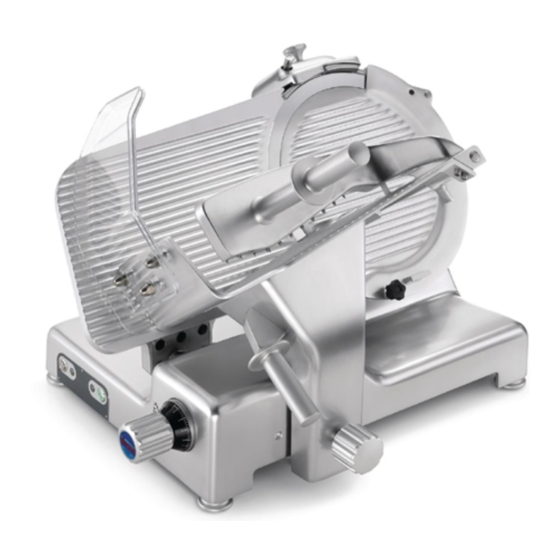
CHAP. 4 - GETTING TO KNOW THE SLICER 4.2 - SAFETY DEVICES INSTALLED ON THE MACHINE 4.2.1 - Mechanical safety As far as mechanical safety is concerned, the slicer described in this manual responds to: 4.1 - CONSTRUCTION FEATURES - CEE 2006/42 machine directives. The slicer is made of an anodized alluminum alloy (AlMg3).
Need help?
Do you have a question about the VERTICALE EVO 350 and is the answer not in the manual?
Questions and answers